Climbing is also one of the most challenging yet rewarding parts of cycling. It’s a tangible goal to reach up the road or trail ahead of you. Plus, the immediate reward of a fun descent often awaits at a climb’s conclusion. Some rides feature more climbing than others, but whether you ride road, gravel, or mountain bikes, you will probably go up hills at some point in your cycling life—and often several times in one ride.
The hills and mountains we ride also play an important role in cycling culture; it is where races are lost or a ride becomes legendary. From the fabled cols where racing’s top athletes compete for glory to the local ascents we face on our everyday rides, climbing is a universal element that transcends riding disciplines and geography.
You can improve your climbing speed through better fitness; methods include strength training and intervals. Working on your climbing technique can also make those inclines easier. However, sticking to a training plan or practicing skills can be hard work.
Our bike, gear, and setup choices can also improve our ability to float up climbs. While equipment isn’t a replacement for good old-fashioned fitness, the wrong gear—or setting it up incorrectly—can hold you back from reaching your climbing potential. Selecting the right equipment can at least make climbs easier to bear.
Install Lower Gearing
The gearing that came stock on your bike might not be best for your needs or the riding you do. Product managers at bicycle brands often pick a gear range that appeals to the broadest range of riders across many global regions (and there is a good chance it’s not based on your local roads or trails). But that doesn’t mean you can’t change the gearing to make climbing easier.
Many riders, including myself, often ride in big gears when we don’t need to. Lower gearing can allow you to climb more comfortably and with less strain on your body, especially on your back, shoulders, and knees. So, if you often find yourself grunting and grinding up every climb, I recommend exploring ways to install easier gears on your bike.
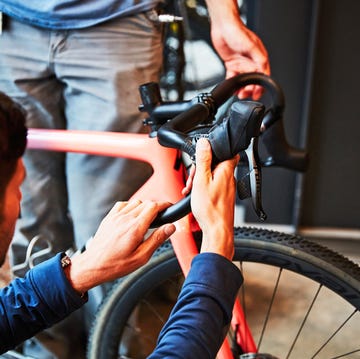
Sometimes this can be as easy as swapping chainrings or changing to a wide-range cassette. However, other times, installing lower gearing might require an entirely new drivetrain. The huge variety of bikes and potential combinations of drivetrain parts make it impossible to provide one single solution for every bike and rider. The best advice is to consult with your local bike shop. They can show you options that will work best for your riding needs, your bike’s compatibility, and your budget.
Get Lighter Wheels and Tires
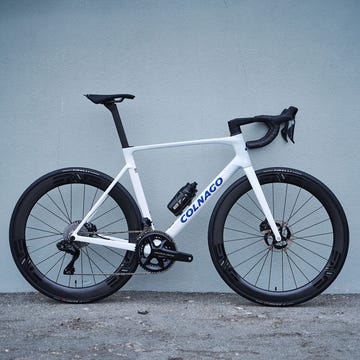
Trimming grams from bikes is an age-old strategy for better climbing. And when putting your bike on a weight-loss program, the best grams saved-to-dollar spent ratio is usually from changing your bike’s stock wheels and tires. Aside from top-level race bikes equipped with Dura-Ace or Red AXS drivetrains, most complete bikes come with lower-cost OEM wheelsets. And while these wheels and tires often ride fine, their heavier weight is noticeable when climbing.
For example, the wheelset on Trek Madone SL5 (a $3,500 105-equipped carbon road bike) weighs 1,893 grams. Aerodynamic race-weight wheels like those on the top-level Madone SLR 9 weigh approximately 1,400 grams, but cost over $2,800. Since swapping wheels can be costly, I often recommend that riders concerned about weight (while also conscious about price) start by changing their tires when the stock ones wear out. If you switch the SL5’s stock 350-gram tires for the SLR 9’s cotton casing Aeolus RSL rubber at 285-gram/each, you save 120 grams (4 ounces). They are pricey at $180 for the pair, but the cotton tires greatly improve ride feel.
Another example: Dan Chabanov tested the Specialized Allez Sport and found lighter wheels and tires dramatically improved the bike’s ride quality and climbing. He saved 320 grams (0.7 pounds) simply by switching out the stock 450-gram/each tires to $60/each Panaracer GravelKing Slicks and another 500 grams (1.1 pounds) by swapping to an $800 Alpinist SLX wheelset.
The Right Seat and Saddle Height
Your bike’s comfort and fit, particularly your saddle and saddle height, are key to improving climbing. If you do not feel comfortable seated on your bike, you will suffer even more when the road pitches upward.
If you find your saddle uncomfortable, check its positioning (height, tilt, and fore-aft location) before rushing to change it. However, head to a shop or a bike fitter for advice if you cannot find a comfortable position after a few changes. Getting fit advice from a professional will save you headaches, discomfort, and possible injury. There are several popular methods for finding your ideal saddle height—check out our “How to Find the Right Bike Seat Height for You” guide for some quick tips.
Remember, no saddle is perfect for every rider, and what might be best for me might not be right for you. Try to test ride different saddles (brands, shapes, widths) before purchasing one.
Tip: Switching seats is also a way to cut weight. Stock saddles and seatposts on new bikes are often much heavier than aftermarket versions. For example, an OEM Fizik Vento Argo R5 saddle weighs 237 grams, while the carbon-railed R1 variant shaves 46 grams.
Computer with a Climbing Function
Head units with a climbing function are excellent tech for help on hilly rides. Many bicycle computers now incorporate a graphical depiction of a hill or mountain’s elevation profile during a climb. (The function is dubbed ClimbPro by Garmin, Summit Climbing by Wahoo, Climber by Hammerhead, and Climb Details by Coros.) How each brand displays the information varies slightly, but all show you a climb’s length, gradient, and your current position. The feature displays automatically at the start of a hill on many computer models, however, some head units (or those without an update) sometimes require a pre-loaded route to activate the function.
This feature allows you to more effectively pace climbs by showing you what lies ahead. I find it extremely useful when I‘m riding in new areas or exploring off my typical routes. As someone who tends to pop early on climbs (especially in hot weather), the Karoo’s Climber function has saved me on more than a few occasions.
Stay Cool on Hot Days
Many riders suffer more on hot days than in chilly temps on climbs. This is partially from less air flow at slower riding speeds, causing a reduced evaporative cooling effect. Additionally, many road climbs are exposed or have limited tree cover, leading to riders overheating in the sun.
Wear lighter-weight summer clothes if your planned route has a lot of climbing. Several brands make jerseys with mesh or vented fabrics that wick sweat and help keep you cool (my favorites include the Velocio Ultralight Mesh and Pearl Izumi Pro Mesh). Lightweight bib shorts also breathe better, and their chamois doesn’t feel like a loaded diaper on hot rides. And to keep your head cool, choose a well-ventilated helmet versus an aero lid for long, toasty days in the saddle.
Since I tend to overheat, I also use a Core Body Temp sensor to monitor my body temperature and set an alarm on my computer to remind me to drink on hot days. Insulated bottles, like Bivo’s stainless models, are a way to keep your sports drink or water cool on rides.
Ride an E-Bike
More riders than ever are turning to electric bikes for daily commutes, trail riding, and fitness. E-bikes’ mid-drive or hub-mounted motors provide riders with varying amounts (depending on the motor size, tuning, and assistance level) of pedaling assistance on rides.
However, e-bikes aren’t cheating or a magic bullet; you still have to pedal and work for it on climbs with most e-bikes. But the extra wattage boost gets you to the summit faster or with more energy left in your body.
For example, on a particularly steep local climb, my unassisted PR is 13 minutes and 58 seconds and my best time going all out on an e-bike is 7:54. That is still 18 seconds slower than my speedy colleague Trevor Raab’s best time and 39 seconds off the segment’s overall leader, both completed on unassisted bikes.
Use an Indoor Trainer
One proven method to improve your climbing prowess is to do it more often. However, if you live in an elevation-challenged location, you might not have many hills easily accessible from your front door. So, to prepare for trips or rides in the mountains, use an indoor trainer and programs like Zwift or Rouvy. You can pair a Wahoo Kickr-series trainer with a Wahoo Kickr Climb for added realism on Zwift climbs. The Climb simulates inclines up to 20 percent in real-time.
As Deputy Editor, Tara Seplavy leads Bicycling’s product test team; after having previously led product development and sourcing for multiple bike brands, run World Championship winning mountain bike teams, wrenched at renowned bicycle shops in Brooklyn, raced everything from criteriums to downhill, and ridden bikes on six different continents (landing herself in hospital emergency rooms in four countries and counting). Based in Easton, Pennsylvania, Tara spends tons of time on the road and trail testing products. A familiar face at cyclocross races, crits, and bike parks in the Mid Atlantic and New England, on weekends she can often be found racing for the New York City-based CRCA/KruisCX team. When not riding a bike, or talking about them, Tara listens to a lot of ska, punk, and emo music, and consumes too much social media.


