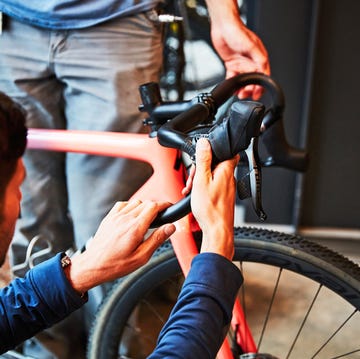
If your bike’s handlebar is too low it can cause discomfort in your back, neck, or shoulders. While lowering your stem can improve aerodynamics and increase riding speed. Adjusting your bike’s stem height is an easy job. It’s something you can do at home with some basic tools.
Follow our steps below to make the change.
What is a Bike Stem?
The stem is the bike part that connects your handlebar to your fork’s steerer tube. Bike stems come in many sizes, shapes, finishes, and designs. The four most common styles are:
Threadless Stem
These are the most common stems used on bikes manufactured in the last 25 years. Used on forks without threads (hence the name “threadless”), these stems clamp to the outside of the fork’s steerer tube. Threadless stems come in numerous lengths and bar clamp sizes. They usually have an internal measurement of 1-1/8” or 1-1/4” at the clamp where it attaches to the fork’s steerer tube. (1” and 1.5” stems are less common but were used on some bikes over the years.) As the name suggests, threadless stems attach to forks without threaded steerer tubes.
Quill Stem
Used on bikes with a threaded fork, a quill stem attaches inside the steerer tube. Sometimes referred to as “goose necks” or “necks”, these stems have a long bolt passing through the body connected to a wedge. When the bolt is tightened the wedge presses against the inside of the walls of the steerer tube, securing the stem to the bike. Quill stems typically measure 1” or 1-1/8” in diameter and are offered in many rises, lengths, and bar clamp dimensions.
Adjustable Stems
Adjustable stems are made in threadless or quill stem styles. These allow easy adjustment of the stem’s angle to raise or lower the bar height and reach distance. If your threadless stem cannot be raised, an adjustable stem can get the bar position higher.
Integrated Stem
Found on some high-end bikes, this stem is usually characterized by a one-piece handlebar and stem design. Often, integrated bar stems have internally routed cables (brake and shifter housing passing through the inside) and come in fixed lengths and widths. Many of these systems are proprietary to particular bikes or manufacturers. The many sizes and proprietary fit often make them more difficult to adjust and change.
Parts of a Threadless System
Above is a side view of the anatomy of the front end of a bicycle. The length of your steerer tube dictates how much you can raise or lower your bike’s stem. You can often raise or lower your stem if several spacers are above or below it. If not, you might need to purchase a stem with more rise or an adjustable stem.
Stem Clamp vs. Bar Clamp
It's essential to know the difference when purchasing a new stem. The stem clamp measurement is where the threadless stem attaches to the fork steerer. The bar clamp is where the stem attaches to the handlebar.
How To Adjust a Threadless Stem
Tools Needed
- Hex or Torx Wrenches
- Torque Wrench
Quill stems are easily adjusted by loosening the quill bolt, raising the stem (do not exceed the inscribed minimum insertion line), and re-tightening the bolt.
Below are the steps to adjust the position of a threadless stem. You can also use these steps to change out your stem; however, you may require more or less spacers if the replacement stem differs in height from your original stem.
Steps
- Visually inspect your stem for any deformations or issues with its structural integrity.
- Measure the space between the bike’s upper headset cup and the bottom of the stem.
- If you have spacers, count how many you have.
- If there are no spacers above your stem, it cannot be raised. If no spacers are below your stem, it cannot be lowered.
- You can often flip a threadless stem to slightly raise or lower the handlebar position.
- Using the correct size hex or Torx wrench, remove the stem’s top cap. Loosen the bolt until it unthreads from the star nut in the steerer tube and the top cap comes off.
- Then, loosen the bolts on the side of the stem until the stem moves freely.
- Remove the stem from the steerer tube. To raise your stem height, take spacers from above the stem and place them below the stem. (Or move spacers from below to above the stem to drop the height.)
- After adding (or removing) spacers, return your stem to the steerer.
- Place any remaining spacers, the top cap, and bolt onto the stem. Thread the bolt into the star nut in the steerer tube. Tighten the bolt to adjust the headset tension. The headset should not bind when turning and should not feel loose or knock when rocked fore and aft.
- With your top cap and bolt secured, use the torque wrench to tighten the side bolts to the correct value for your stem. (This info is often printed on the stem—if not, consult the manufacturer.) Do not exceed the manufacturer's recommendation.
- Use care when tightening the stem bolts if you do not have a torque wrench. Ensure the bolts are snug but do not overtighten, these bolts can break easily or you can damage your steerer tube.
- Use care when tightening the stem bolts if you do not have a torque wrench. Ensure the bolts are snug but do not overtighten, these bolts can break easily or you can damage your steerer tube.
- Double-check your work.
- Hold your front brake and place your other hand at the headset (where the fork meets the headtube). Gently rock the bike front and back to check for any play in the headset bearings.
- If there is play or knocking, loosen the side bolts and repeat steps 7 through 9.
- Shred and have Fun!


