Securing a Spring MVC Application with Spring Security
Last Updated :
19 Sep, 2024
Securing web applications is crucial in today's world, where security threats are prevalent. Spring Security is a powerful, customizable authentication and access-control framework that is part of the larger Spring ecosystem. It helps secure Spring MVC applications by managing authentication, authorization, and other security concerns.
This article will walk you through securing a Spring MVC application using Spring Security, with code examples and detailed explanations.
Enhancing Security in a Spring MVC Application with Spring Security
Spring Security is a robust framework that enhances the security of Java web applications, particularly Spring-based applications. It provides features such as authentication, authorization, and protection against common attacks like session fixation, clickjacking, and cross-site request forgery.
Spring Security is highly customizable, allowing you to define security rules for web requests, manage user roles, and handle login and logout processes.
Key Security Mechanisms
- Authentication: Verifying user credentials (e.g., username and password) to establish identity.
- Authorization: Controlling access to resources based on user roles (e.g., ADMIN or USER).
- Protection: Guarding against common web vulnerabilities.
Security Filter Chain
Spring Security operates by adding a filter chain to the application. These filters intercept HTTP requests and apply security rules based on configuration. The modern approach to defining security rules in Spring Security is through the SecurityFilterChain bean.
Role-Based Access Control (RBAC)
In a typical Spring Security setup, users can be assigned roles such as ROLE_USER or ROLE_ADMIN. Resources and endpoints can be protected by specifying which roles have access to them.
Implementation to Secure a Spring MVC Application with Spring Security
Follow these steps to secure a Spring MVC application using Spring Security:
Step 1: Create a New Spring Boot Project
- Open IntelliJ IDEA and create a new Spring Boot project.
- Configure the project with the following settings:
- Name:
spring-security-mvc - Language: Java
- Type: Maven
- Packaging: Jar
Click on the Next button.

Step 2: Add Dependencies
Add the following dependencies into the Spring Boot project.
- Spring Web
- Spring Security
- Lombok
- Spring DevTools
- Thymeleaf
Click on the Create button.

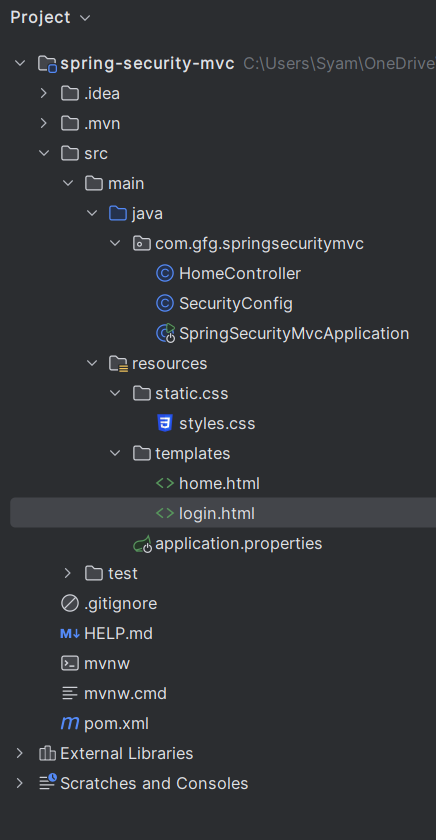
Project Structure
After the project creation done, the folder structure will look like the below image:
Step 3: Configure Application Properties
In src/main/resources/application.properties, add:
spring.application.name=spring-security-mvc
Step 4: Create the SecurityConfig Class
Create the SecurityConfig class to configure the security rules of the Spring Boot application
Java
package com.gfg.springsecuritymvc;

import org.springframework.context.annotation.Bean;
import org.springframework.context.annotation.Configuration;
import org.springframework.security.config.annotation.web.builders.HttpSecurity;
import org.springframework.security.core.userdetails.User;
import org.springframework.security.core.userdetails.UserDetailsService;
import org.springframework.security.crypto.bcrypt.BCryptPasswordEncoder;
import org.springframework.security.crypto.password.PasswordEncoder;
import org.springframework.security.provisioning.InMemoryUserDetailsManager;
import org.springframework.security.web.SecurityFilterChain;

/**
 * Security configuration class for setting up security rules.
 */
@Configuration
public class SecurityConfig {

    /**
     * Bean for password encoding using BCrypt.
     * @return PasswordEncoder
     */
    @Bean
    public PasswordEncoder passwordEncoder() {
        return new BCryptPasswordEncoder();
    }

    /**
     * Bean for in-memory user details service with predefined users and roles.
     * @return UserDetailsService
     */
    @Bean
    public UserDetailsService userDetailsService() {
        InMemoryUserDetailsManager manager = new InMemoryUserDetailsManager();
        manager.createUser(User.withUsername("user")
                .password(passwordEncoder().encode("password"))
                .roles("USER")
                .build());
        manager.createUser(User.withUsername("admin")
                .password(passwordEncoder().encode("admin"))
                .roles("ADMIN")
                .build());
        return manager;
    }

    /**
     * Bean for configuring HTTP security with authorization and authentication rules.
     * @param http HttpSecurity
     * @return SecurityFilterChain
     * @throws Exception
     */
    @Bean
    public SecurityFilterChain securityFilterChain(HttpSecurity http) throws Exception {
        http
                .authorizeHttpRequests(authorize -> authorize
                        .requestMatchers("/login", "/public/**").permitAll()  // Allow unauthenticated access to login and public pages
                        .requestMatchers("/admin/**").hasRole("ADMIN")       // Restrict access to /admin/** to ADMIN role only
                        .requestMatchers("/user/**").hasAnyRole("USER", "ADMIN")  // Allow access to /user/** for USER and ADMIN roles
                        .anyRequest().authenticated()                        // All other requests require authentication
                )
                .formLogin(form -> form
                        .loginPage("/login")                                // Custom login page
                        .defaultSuccessUrl("/home", true)                   // Redirect to home after successful login
                        .permitAll()                                        // Allow all to access login page
                )
                .logout(logout -> logout
                        .permitAll()                                        // Allow all to log out
                );

        return http.build();
    }
}
Step 5: Create the HomeController Class
Create the HomeController class to handle the /home and /login routes:
Java
package com.gfg.springsecuritymvc;

import org.springframework.stereotype.Controller;
import org.springframework.web.bind.annotation.GetMapping;

/**
 * Controller for handling home and login routes.
 */
@Controller
public class HomeController {

    /**
     * Handle GET requests to /home.
     * @return View name for home page
     */
    @GetMapping("/home")
    public String home() {
        return "home"; // Maps to home.html
    }

    /**
     * Handle GET requests to /login.
     * @return View name for login page
     */
    @GetMapping("/login")
    public String login() {
        return "login"; // Maps to login.html
    }
}
Explanation:
- @GetMapping("/home"): It maps the /home to the home page for the authentication users.
- @GetMapping("/login"): It maps the /login to the login page.
Step 6: Main Class
The main class remains unchanged:
Java
package com.gfg.springsecuritymvc;

import org.springframework.boot.SpringApplication;
import org.springframework.boot.autoconfigure.SpringBootApplication;

@SpringBootApplication
public class SpringSecurityMvcApplication {

    public static void main(String[] args) {
        SpringApplication.run(SpringSecurityMvcApplication.class, args);
    }

}
Step 7: Create the Login Page
Create src/main/resources/templates/login.html:
HTML
<!DOCTYPE html>
<html xmlns:th="http://www.thymeleaf.org">
<head>
    <title>Login Page</title>
    <!-- Bootstrap CSS -->
    <link href="https://stackpath.bootstrapcdn.com/bootstrap/4.5.2/css/bootstrap.min.css" rel="stylesheet">
    <!-- Custom CSS -->
    <link href="/css/styles.css" rel="stylesheet">
</head>
<body>
<div class="container mt-5">
    <div class="row justify-content-center">
        <div class="col-md-4">
            <div class="card">
                <div class="card-header text-center">
                    <h4>Login</h4>
                </div>
                <div class="card-body">
                    <form th:action="@{/login}" method="post">
                        <div class="form-group">
                            <label for="username">Username</label>
                            <input type="text" id="username" name="username" class="form-control" required/>
                        </div>
                        <div class="form-group">
                            <label for="password">Password</label>
                            <input type="password" id="password" name="password" class="form-control" required/>
                        </div>
                        <button type="submit" class="btn btn-primary">Login</button>
                    </form>
                </div>
            </div>
        </div>
    </div>
</div>
</body>
</html>
Step 8: Create the Home Page
Create src/main/resources/templates/home.html:
HTML
<!DOCTYPE html>
<html xmlns:th="http://www.thymeleaf.org">
<head>
    <title>Home Page</title>
    <!-- Bootstrap CSS -->
    <link href="https://stackpath.bootstrapcdn.com/bootstrap/4.5.2/css/bootstrap.min.css" rel="stylesheet">
    <!-- Custom CSS -->
    <link href="/css/styles.css" rel="stylesheet">
</head>
<body>
<nav class="navbar navbar-expand-lg navbar-custom">
    <a class="navbar-brand" href="#">My App</a>
    <div class="collapse navbar-collapse">
        <ul class="navbar-nav ml-auto">
            <li class="nav-item">
                <a class="nav-link" href="/logout">Logout</a>
            </li>
        </ul>
    </div>
</nav>

<div class="container mt-5">
    <div class="jumbotron text-center">
        <h1 class="display-4">Welcome to the Home Page!</h1>
        <p class="lead">You have successfully logged in.</p>
        <hr class="my-4">
        <a class="btn btn-custom btn-lg" href="/logout" role="button">Logout</a>
    </div>
</div>

</body>
</html>
Step 9: Add CSS Styles
To improve the appearance of your login and home pages, create a CSS file.
Create src/main/resources/static/css/styles.css:
CSS
/* Basic styles for login and home pages */
body {
    background-color: #f8f9fa;
    font-family: Arial, sans-serif;
}

.container {
    margin-top: 50px;
}

.card {
    border-radius: 10px;
    box-shadow: 0 0 10px rgba(0, 0, 0, 0.1);
}

.card-header {
    background-color: #007bff;
    color: #fff;
    font-size: 1.5rem;
}

.btn {
    border-radius: 5px;
}

.btn-secondary {
    background-color: #6c757d;
    border-color: #6c757d;
}

.btn-secondary:hover {
    background-color: #5a6268;
    border-color: #545b62;
}
body: Sets a light background color and font for the entire page..container: Adds margin at the top of the container..card: Styles the card component with rounded corners and shadow..card-header: Sets background color and text color for the header of the card..btn-secondary: Customizes the appearance of the secondary button.
pom.xml
XML
<?xml version="1.0" encoding="UTF-8"?>
<project xmlns="http://maven.apache.org/POM/4.0.0" xmlns:xsi="http://www.w3.org/2001/XMLSchema-instance"
         xsi:schemaLocation="http://maven.apache.org/POM/4.0.0 https://maven.apache.org/xsd/maven-4.0.0.xsd">
    <modelVersion>4.0.0</modelVersion>
    <parent>
        <groupId>org.springframework.boot</groupId>
        <artifactId>spring-boot-starter-parent</artifactId>
        <version>3.3.3</version>
        <relativePath/> <!-- lookup parent from repository -->
    </parent>
    <groupId>com.gfg</groupId>
    <artifactId>spring-security-mvc</artifactId>
    <version>0.0.1-SNAPSHOT</version>
    <name>spring-security-mvc</name>
    <description>spring-security-mvc</description>
    <url/>
    <licenses>
        <license/>
    </licenses>
    <developers>
        <developer/>
    </developers>
    <scm>
        <connection/>
        <developerConnection/>
        <tag/>
        <url/>
    </scm>
    <properties>
        <java.version>17</java.version>
    </properties>
    <dependencies>
        <dependency>
            <groupId>org.springframework.boot</groupId>
            <artifactId>spring-boot-starter-security</artifactId>
        </dependency>
        <dependency>
            <groupId>org.springframework.boot</groupId>
            <artifactId>spring-boot-starter-thymeleaf</artifactId>
        </dependency>
        <dependency>
            <groupId>org.springframework.boot</groupId>
            <artifactId>spring-boot-starter-web</artifactId>
        </dependency>
        <dependency>
            <groupId>org.thymeleaf.extras</groupId>
            <artifactId>thymeleaf-extras-springsecurity6</artifactId>
        </dependency>

        <dependency>
            <groupId>org.springframework.boot</groupId>
            <artifactId>spring-boot-devtools</artifactId>
            <scope>runtime</scope>
            <optional>true</optional>
        </dependency>
        <dependency>
            <groupId>org.projectlombok</groupId>
            <artifactId>lombok</artifactId>
            <optional>true</optional>
        </dependency>
        <dependency>
            <groupId>org.springframework.boot</groupId>
            <artifactId>spring-boot-starter-test</artifactId>
            <scope>test</scope>
        </dependency>
        <dependency>
            <groupId>org.springframework.security</groupId>
            <artifactId>spring-security-test</artifactId>
            <scope>test</scope>
        </dependency>
    </dependencies>

    <build>
        <plugins>
            <plugin>
                <groupId>org.springframework.boot</groupId>
                <artifactId>spring-boot-maven-plugin</artifactId>
                <configuration>
                    <excludes>
                        <exclude>
                            <groupId>org.projectlombok</groupId>
                            <artifactId>lombok</artifactId>
                        </exclude>
                    </excludes>
                </configuration>
            </plugin>
        </plugins>
    </build>

</project>
Step 10: Run the Application
Now run the application, and it will start at port 8080.

Step 11: Testing the Application
Login Page: This page allows the users to login with their credentials for the Spring boot application.
- username: admin
- password: admin
Click on the login button.

Home Page (After Login)
After successfully logging in, then the users are redirected to the home page.

In this example project, we walked through the setting up the simple Spring MVC application secured by the Spring Security. The configuration provides the form based authentication, user roles, and custom login and logout functionality.
Similar Reads
Security with Spring Security and Spring Webflux Spring WebFlux is a part of the Spring Framework that supports reactive programming, enabling non-blocking asynchronous request handling. When developing web applications with Spring WebFlux, securing the application is a crucial aspect to ensure unauthorized access is prevented. This article provid
3 min read
Securing REST APIs with Spring Security In Spring Boot applications, securing the REST APIs is a critical aspect of developing secure and robust applications. REST APIs are commonly used to expose functionalities to external systems, mobile applications, and web applications. Without proper security measures, these APIs can become targets
8 min read
Spring Security - Secure Your Web Application Spring Security is a powerful and highly customizable security framework that provides authentication, authorization, and other security features for Spring-based applications. It is a widely used open-source project that helps developers to secure their web applications by implementing security pol
7 min read
Spring Security Integration with Spring Boot Spring Security is a powerful and customizable authentication and access control framework for Java applications. It provides comprehensive security services for Java EE-based enterprise software applications. This article will integrate Spring Security with a Spring Boot application, covering confi
5 min read
Securing Spring Boot 3 Applications With SSL Bundles In a web environment, securing an application is a crucial necessity. SSL, a Secure Socket Layer, provides a secure channel between the client and server by encrypting the transmitted data. In this article, we will go through the steps to secure a Spring Boot 3 application using SSL Bundles.What is
5 min read
Securing Spring Boot API With API Key and Secret In Web applications, securing the APIs is critical. One of the common methods of securing the APIs is by using API keys and secrets. This ensures that only the authorized clients can access the API endpoints. This article can guide you through the process of securing the Spring Boot API using the AP
6 min read