


8.) ms-access_ppt-CA-course-itt-programme.pptx
- 2. Learning objectives Understand the basics of databases, including their advantages and the structure of Access databases. Create, navigate, and effectively use Access databases, both from scratch and using templates. Create, manage, and relate tables, as well as create and modify queries using SQL commands. Integrate Access with Outlook, Word, and Excel for data sharing and manipulation. Modify forms and reports, automate tasks with macros, and enhance functionality using modules.
- 3. Introduction Data: basic value or facts represented as text, numbers, or multimedia. (unprocessed or processed) Database: A database is an organized collection of data so that it can be easily accessed and managed.
- 4. DBMS database management system DBMS is a tool that allows users to access, modify, and manipulate that data in various ways. DBMS are used in a wide range of applications, including financial transactions, customer relationship management, supply chain management, and more. They are essential for businesses, organizations, and individuals to store, manage, and retrieve data efficiently and securely.
- 5. Here are the basic steps involved in the working of a DBMS: Data definition: The DBMS is used to define the structure of the database, including the data types, relationships, and constraints for the data being stored. Data storage: The DBMS stores the data in a structured format, such as tables with rows and columns, making it easy to retrieve and manipulate the data. Data manipulation: The DBMS provides a set of tools and commands that allow users to retrieve, update, and delete data as needed. It also provides security measures to ensure that only authorized users can access the data.
- 6. Here are the basic steps involved in the working of a DBMS: Data integrity: The DBMS ensures the integrity of the data by enforcing constraints and rules, such as ensuring that data is entered correctly and that relationships between data are maintained. Data recovery: The DBMS includes mechanisms to ensure the reliability and availability of the data, such as backups and recovery processes in case of system failures.
- 7. 1.1 Introduction of MS-ACCESS as database tool MS Access or Microsoft Access is a Database Management System (DBMS) by Microsoft. In Microsoft Access, Jet Database Engine is merged with the Graphical User Interface (GUI) and Software development tools. You can create customizable database applications using MS Access with many built-in functions like string, numeric, date, and information functions.
- 8. How to Start Microsoft Access •Option 1) From Windows, Start button. •Step 1) Click on the ‘Windows’ icon. You will find the list of installed programs. •Step 2) Find the Access icon. Check and click on Access Icon. •Step 3) Check the window. MS Access Application window will appear
- 9. Result: This will open the MS Access Windows application.
- 10. •Option 2) From Desktop, ‘New’ option. •Step 1) Right Click from the Desktop and Click ‘New’ •Step 2) Click on ‘Microsoft Access Database Option’
- 11. step 1. Click on file step 2. Select a template or blank database step 3. New file name step 4. create
- 12. 1.2 THE PARTS OF AN ACCESS DATABASE: Table • A Table is an object that stores data in Row & Column format to store data. • A Table is usually related to other tables in the database file. • Each column must have a Unique name • We can also define the Primary Key in a table. Query • Queries answer a question by selecting and sorting and filtering data based on search criteria. • Queries show a selection of data based on criteria (limitations) you provide. • Queries can pull from one or more related Tables and other Queries. • Types of Query can be SELECT, INSERT, UPDATE, DELETE, etc.
- 13. 1.2 THE PARTS OF AN ACCESS DATABASE: Form • A form is a database object that you can use to create a user interface for a database application. • Forms help you to display live data from the table. It mainly used to ease the process of data entry or editing. Report • A report is an object in desktop databases primarily used for formatting, calculating, printing, and summarizing selected data. • You can even customize the report’s look and feel.
- 14. 1.2 THE PARTS OF AN ACCESS DATABASE: Macros •Macros are mini-computer programming constructs. They allow you to set up commands and processes in your forms, like, searching, moving to another record, or running a formula. Modules •Modules are procedures(functions) that you can write using Visual Basic for Applications (VBA).
- 15. Summary A database is a structured collection of data that is organized and stored in a computer system. Tables are the fundamental building blocks of a database. Forms provide a user-friendly interface for entering, viewing, and editing data in tables. Reports are used to present data in a structured and printable format. Queries are used to retrieve and manipulate data from one or more tables. Macros are sequences of actions that automate tasks within your database. Modules are used for more advanced programming and customization within Access.
- 16. UNIT-3: MS-ACCESS CHAPTER-2 CREATE & MANAGE TABLES, CREATE &MODIFY QUERIES, SQL COMMANDS
- 17. LEARNING OBJECTIVES: Adding, importing, and how to create tables. an aging data. Understand table and field properties. Comprehend relational databases. Primary and foreign keys. Establishing table relationships. Crafting select queries. Using SQL for query definition. Sorting and summarizing data. Basic SQL understanding. Writing SELECT statements. Utilizing SQL clauses. Combining query results with UNION.
- 18. 2.1 How to create tables
- 19. Table in datasheet view
- 20. Create a table in the design view
- 21. Create table in design view
- 23. Record, field and field value A record: Contains specific data, like information about a particular employee or a product. A field: Contains data about one aspect of the table subject, such as first name or email address. A field value: Each record has a field value. For example, Contoso, Ltd.
- 25. k e y s Primary key: Primary keys serve as unique identifiers for each row in a database table. Foreign key: Foreign keys link data in one table to the data in another table.
- 26. Query Using a query makes it easier to view, add, delete, or change data in your Access database. Some other reasons for using queries: Find specific quickly data by filtering on specific criteria (conditions) Calculate or summarize data Automate data management tasks, such as reviewing the most current data on a recurring basis.
- 27. Query using query wizard Select Create > Query Wizard. Select Simple Query, and then OK. Select the table that contains the field, and add the Available Fields you want to Selected Fields, and select Next. Choose whether you want to open the query in the Datasheet view or modify the query in the Design view, and then select Finish.
- 28. Query using design view Select the source table Select query Select the basic query field Field: student id Table: student Sort: descending Show Criteria Run query
- 29. SQL COMMANDS Structured query language (SQL) commands are specific keywords or SQL statements that developers use to manipulate the data stored in a relational database.
- 30. SQL COMMANDS The SQL SELECT statement is used to select (retrieve) data from a database table. This SQL query selects the first name of all customers from the customer table
- 31. SQ L COM MANDS The WHERE clause allows us to fetch records from a database table that matches specified condition(s) This SQL query selects all customers from the customer table with the last name ‘ram’
- 32. SQL COMMANDS Sorting the results: ORDER BY The ORDER BY command is used to sort the result set in ascending or descending order.
- 33. SQL COMMANDS UNION The UNION command combines the result set of two or more SELECT statements only distinct value ( )
- 34. Summary You can create a table in Access in various ways: Add a Table: Use the Create tab to add a new table to an existing database. Datasheet View: Enter data directly in Datasheet View, and Access will create the table structure for you. New Database: Create a new blank database and a blank table is automatically included. Existing Database: Open an existing database, and click Table on the Create tab to add a new table. Adding Data to a Table: Name the columns (fields) to identify them easily. Fill in rows with relevant data. You can copy data from another source, but ensure data types match and rename fields if necessary.
- 35. Summary Use the External Data tab to import data from various sources, like Excel or text files. Follow the wizard to specify the source and mapping. Table properties affect table behavior, set in Design view. Field properties define attributes of specific fields, adjusted in Datasheet view or Design view Tables in a relational database are often connected. Relationships link data between tables, ensuring data integrity. Primary keys uniquely identify records in a table, while foreign keys link to primary keys in other tables Queries retrieve and analyze data from one or more tables based on specified criteria. You can create queries using the Query Wizard or Design view, selecting tables, fields, and criteria. Sort results using ORDER BY, aggregate data with GROUP BY and HAVING clauses, and combine results with UNION. SQL consists of SELECT, FROM, and WHERE clauses, which specify data sources, fields, and criteria. Use GROUP BY and HAVING for summarized data and UNION to combine query results.
- 36. UNIT-3: MS-ACCESS CHAPTER-3 INTEGRATING MS ACCESS WITH MS OUTLOOK, MS WORD, MS EXCEL
- 37. LEARNING OBJECTIVES: Export Data to Outlook. Link Access Tables. Send Email from Access. Calendar Integration.
- 38. 3.1. INTEGRATING MS ACCESS WITH MS OUTLOOK EXPORTING DATA TO OUTLOOK LINKING ACCESS TABLES SENDING EMAIL FROM ACCESS CALENDAR INTEGRATION
- 39. 3.2 INTEGRATING MS ACCESS WITH MS WORD MAIL MERGE EMBEDDING ACCESS DATA VBA (VISUAL BASIC FOR APPLICATIONS)
- 40. 3.3. INTEGRATING MS ACCESS WITH MS EXCEL IMPORT AND EXPORT DATA LINKING TABLES AUTOMATION WITH VBA EXCEL AS A REPORTING TOOL
- 41. UNIT-3: MS-ACCESS CHAPTER-4 MODIFY FORMS IN LAYOUT VIEW
- 42. LEARNING OBJECTIVES: Effectively add titles and logos to Access forms. Differentiate Layout and Design views. Utilize Title and Logo options. Adjust logos and understand form view limitations. Understand title/logo importance. Use Title and Logo tools. Add, resize logos. Recognize form view limits
- 43. 4.1. ADD A TITLE TO A FORM With this option you can add a title to a form in Layout view or Design view by using the Title option on the Design tab within the Form Design Tools or Form Layout Tools tab. Adding a title will add a Form Header if the form doesn’t have one already. If there is a title already, the Title option will select the text in the title and allow you to edit it.
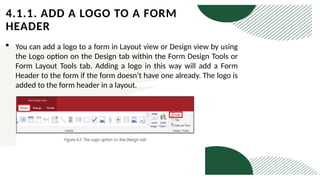
- 44. 4.1.1. ADD A LOGO TO A FORM HEADER You can add a logo to a form in Layout view or Design view by using the Logo option on the Design tab within the Form Design Tools or Form Layout Tools tab. Adding a logo in this way will add a Form Header to the form if the form doesn’t have one already. The logo is added to the form header in a layout.
- 45. To add a logo Open a form in Design view. In the Layout view of the form, go to the Design tab within the Form Layout Tools tab, and then in the Header/Footer group, select Logo. Alternatively, in the Design view of the form, go to the Design tab within the Form Design Tools tab, and then in the Header/Footer group, select Logo.
- 46. UNIT-3: MS-ACCESS CHAPTER-4 MODIFY FORMS IN LAYOUT VIEW
- 47. LEARNING OBJECTIVES: By the end of this training module, you will be proficient in using Microsoft Access’s Layout View to enhance reports. They will understand how to: Navigate Layout View: Learn the benefits of Layout View in Access, which closely resembles the printed report and is suitable for various modifications. Modify Reports: Learn to switch between Layout and Design Views, adjust column/field widths, change row/field heights, and add new fields for improved report readability
- 48. 5.2 UNDERSTAND LAYOUT VIEW •The easiest view to utilize for report modification is layout view, which can be used for almost all modifications you could wish to make to a report in Access. The report is actually running in Layout view, allowing you to see your data almost exactly as it will on paper. But in this view, you can also alter the report’s layout. It’s a very helpful view for altering column widths, adding grouping levels, or carrying out nearly any other action that impacts the layout and readability of the report because you can see the data while you are making the modifications.
- 49. 5.3 MODIFY REPORT ELEMENTS AND POSITIONING: When creating reports, you also need to consider the report’s design layout and common report modifications that you can perform in Layout view. You can use the following steps to modify some report design elements for an existing report. 1.On the Home tab, in the Views group, select View, and then select Design View. 2.You can also select the Report drop-down list in the Property Sheet pane and then choose the option you want to modify, as depicted in the following screenshot
- 50. 5.4 CHANGE COLUMN OR FIELD WIDTH IN LAYOUT VIEW Click an item in the column that you want to adjust. A border is drawn around the item to indicate that the field is selected. Drag the right or left edge of the border until the column is the width you want 5.5 CHANGE ROW OR FIELD HEIGHT IN LAYOUT VIEW: Click an item in the row that you want to adjust. A border is drawn around the item to indicate that the field is selected. Drag the top or bottom edge of the border until the row is the height you want. 5.6 ADD A FIELD IN LAYOUT VIEW: On the Design tab, in the Tools group, click Add Existing Fields. The list of available fields is displayed. If there are fields available in other tables, these will be displayed under Fields available in other tables. Drag a field from the Field List onto the report. As you move the field, a highlighted area will indicate where the field will be placed when you release the mouse button
- 51. TH A N K YOU