Advance Computer Architecture
1 like•422 views

This document describes several practical experiments conducted using the WinDLX and WinMIPS64 simulators. It begins with an introduction to the DLX processor and WinDLX simulator. It then outlines 6 practical experiments: 1) Using WinDLX to calculate factorials, 2) Writing a prime number program in WinDLX, 3) Writing a program to calculate z=(x^2+y^2)*(x+y) in WinDLX, 4) Studying the WinMIPS64 simulator, 5) Implementing register swapping in WinMIPS64 without a third variable, and 6) Writing a program to calculate x^n in WinMIPS64. For each experiment, the document provides the program


![Advanced Computer Architecture |
CSIT Dept’s SGBAU Amravati.
21
PRACTICAL NO: 8
AIM: Design a program to calculate execution cycle, number of stalls and code size occurred
in insertion sort algorithm.
TOOL USED: WinMIPS64 V1.57 version simulator.
THEORY:
.data
#int size = 16
size: .align 4
.word 16
#char * [] data
data: .align 2
.space 64
.text
main:
#char * [] data = { "names" }
addr_init:
la $t0, array
la $t1, data
li $t2, 0 #i = 0
init_loop:
beq $t2, 16, end_init #initialize addresses
sw $t0, ($t1) #data[i] = &array[i]
addi $t0, $t0, 16 #array = align 4 = 16
addi $t1, $t1, 4 #data = words = 4
addi $t2, $t2, 1 #i++
j init_loop
.data
init_string: .asciiz "Initial array is:n["
.text
end_init:
#printf("Initial array is:n");
la $t0, init_string
move $a0, $t0
li $v0, 4
Syscall
#print_array(data, size);
la $a0, data](https://image.slidesharecdn.com/5reportaca-190408171637/85/Advance-Computer-Architecture-21-320.jpg)
![Advanced Computer Architecture |
CSIT Dept’s SGBAU Amravati.
22
lw $a1, size
jal print_array
#insertSort(data, size);
la $a0, data
lw $a1, size
jal insert_sort
.data
sort_string: .asciiz "Insertion sort is finished!n["
.text
#printf("Insertion sort is finished!n");
la $t0, sort_string
move $a0, $t0
li $v0, 4
Syscall
#print_array(data, size);
la $a0, data
lw $a1, size
jal print_array
#exit(0);
li $v0, 10
Syscall
insert_sort:
addi $sp, $sp, -24
sw $ra, 0($sp)
sw $s0, 4($sp)
sw $s1, 8($sp)
sw $s2, 12($sp)
sw $s3, 16($sp)
sw $s4, 20($sp)
#char *a[], size_t length
move $s0, $a0
move $s1, $a1
li $s2, 1 #i
array_loop:
#for(i = 1; i < length;i++)
beq $s2, $s1, end_loop
#char *value = a[i];
la $t0 ($s0)
li $t1, 4](https://image.slidesharecdn.com/5reportaca-190408171637/85/Advance-Computer-Architecture-22-320.jpg)
![Advanced Computer Architecture |
CSIT Dept’s SGBAU Amravati.
23
mul $t2, $s2, $t1 # 4 * i
add $t3, $t0, $t2 # get address from data[i]
lw $s3, ($t3) #value = array[i]
addi $s4, $s2, -1 #j = i-1
comp_loop:
#for (j = i-1; j >= 0 && str_lt(value, a[j]); j--)
addi $t0, $s4, 1 # j + 1 > 0 == j >=0
beq $t0, $zero, end_comp
move $a0, $s3
#str_lt(value, a[j]) == true
la $t0, ($s0)
li $t1, 4
mul $t2, $s4, $t1 #4 * j
add $t3, $t0, $t2 # get address from data[j]
lw $a1, ($t3) #a[j] as argument
jal str_lt
move $t0, $v0
beq $t0, $zero, end_comp #str_lt == true
addi $t1, $s4, 1
beq $t1, $zero, end_comp #j >= 0
la $t0, ($s0)
li $t1, 4
mul $t2, $s4, $t1 #4 * j
add $t3, $t0, $t2 # get address from data[j]
lw $t4, ($t3) # $t4 = a[j] for later
move $t0, $s0
li $t1, 4
addi $t2, $s4, 1 #j + 1
mul $t3, $t2, $t1 # 4 * (j + 1)
add $t1, $t3, $t0 #get address from data
sw $t4, ($t1) #a[j+1] = a[j]; a[j] == $t4
addi $s4, $s4, -1 #j--
j comp_loop #end for(j)
end_comp:
move $t0, $s0
li $t1, 4
addi $t2, $s4, 1 #j + 1
mul $t4, $t2, $t1 # 4 * (j + 1)](https://image.slidesharecdn.com/5reportaca-190408171637/85/Advance-Computer-Architecture-23-320.jpg)
![Advanced Computer Architecture |
CSIT Dept’s SGBAU Amravati.
24
add $t1, $t4, $t0
sw $s3, ($t1) #a[j+1] = value;
addi $s2, $s2, 1 #i++
j array_loop #for(i)
end_loop:
lw $s4, 20($sp)
lw $s3, 16($sp)
lw $s2, 12($sp)
lw $s1, 8($sp)
lw $s0, 4($sp)
lw $ra, 0($sp)
addi $sp, $sp, 24
jr $ra
print_array:
addi $sp, $sp -4
sw $ra, 0($sp)
move $t0, $a0
move $t1, $a1 #int i=size
print_loop:
beq $t1, $zero, end_print #while i > 0
lw $a0, ($t0) #printf( a[i] )
li $v0, 4
syscall
addi $t0, $t0, 4
addi $t1, $t1, -1
.data
chars: .asciiz ", "
.text
beq $t1, 0, end_print
la $t3, chars
move $a0, $t3
li $v0, 4
syscall
j print_loop
.data
end_string: .asciiz "]n"
.text
end_print:](https://image.slidesharecdn.com/5reportaca-190408171637/85/Advance-Computer-Architecture-24-320.jpg)
![Advanced Computer Architecture |
CSIT Dept’s SGBAU Amravati.
25
la $t0, end_string
move $a0, $t0
li $v0, 4
syscall
lw $ra, 0($sp)
addi $sp, $sp, 4
jr $ra
str_lt:
addi $sp, $sp, -4
sw $ra, 0($sp)
move $t0, $a0 #char * x
move $t1, $a1 #char * y
word_loop:
lb $t2, ($t0) #load
lb $t3, ($t1)
and $t4, $t2, $t3
beq $t4, $zero, str_end #for (; *x!='0' && *y!='0'; x++, y++)
blt $t2, $t3, lt #if (x < y)
bgt $t2, $t3, gt #if (y < x)
addi $t0, $t0, 1 #x++
addi $t1, $t1, 1 #y++
j word_loop
str_end:
beq $t2, $zero, lt# if x == 0
j gt #else return false
lt: #return true
li $v0, 1
j end_lt
gt: #return false
li $v0, 0
j end_lt
end_lt:
lw $ra, 0($sp)
addi $sp, $sp 4
jr $ra
.data
#char * data [] = { "list", "of", "names" }
array:](https://image.slidesharecdn.com/5reportaca-190408171637/85/Advance-Computer-Architecture-25-320.jpg)


![Advanced Computer Architecture |
CSIT Dept’s SGBAU Amravati.
29
PRACTICAL NO: 9
AIM: Simulate Control Hazard Branch Taken example in WinMIPS64 Simulator.
TOOL USED: WinMIPS64 V1.57 simulator.
THEORY:
In the case of a TAKEN (T) branch, the two instructions sequentially following the branch
instruction need to be flushed out and start over at the branch target. Branch Prediction
scheme is used to guess outcome of branch's condition test (i.e. whether or not the branch
will be taken). All modern CPUs use branch prediction. Accurate predictions are important
for optimal performance. Most CPUs predict branches dynamically—statistics are kept at
runtime to determine the likelihood of a branch being taken. In MIPS processor, a branch can
be decided (i.e. evaluate its condition) a little earlier; in ID instead of EX stage. In this way,
only one instruction needs to be flushed out on a miss prediction
PROGRAM:
.data
.text
main:
loop: ld r1,0(r2) ;r2 is initialized to 8, Memory[8]=5
dsub r3,r3,r1 ;r3 = 15
bnez r3,loop
sd r4,0(r3) ;r4 = 6
finish:
HOW TO RUN THE PROGRAM :
• Use a text editor to create your program file_name.s.
• Click on the “file” button and open file_name.s.
• You can then run the program by simply pressing the “run to” button – all the
instruction will be executed, and the final content will be reflected in the Winmips64.
OUTPUT:
Execution](https://image.slidesharecdn.com/5reportaca-190408171637/85/Advance-Computer-Architecture-29-320.jpg)

![Advanced Computer Architecture |
CSIT Dept’s SGBAU Amravati.
31
PRACTICAL NO: 10
AIM: Simulate Control Hazard Non-Taken Branch Example in WinMIPS64 Simulator.
TOOL USED: WinMIPS64 V1.57 simulator.
THEORY:
Control hazards can cause a greater performance loss for DLX pipeline than data hazards.
When a branch is executed, it may or may not change the PC (program counter) to something
other than its current value plus 4. If a branch changes the PC to its target address, it is a
taken branch; if it falls through, it is not taken. If instruction i is a taken branch, then the PC
is normally not changed until the end of MEM stage, after the completion of the address
calculation and comparison .The simplest method of dealing with branches is to stall the
pipeline as soon as the branch is detected until we reach the MEM stage, which determines
the new PC.
PROGRAM:
.data
.text
main:
loop: ld r1,0(r2) ;r2 is initialized to 8, Memory[8]=5
dsub r5,r3,r2 ;r3 = 15
bnez r6,loop ;r6 = 0
sd r4,0(r3) ;r4 = 6
finish:
HOW TO RUN THE PROGRAM:
• Use a text editor to create your program file_name.s.
• Click on the “file” button and open file_name.s.
• You can then run the program by simply pressing the “run to” button – all the instruction
will be executed, and the final content will be reflected in the Winmips64.](https://image.slidesharecdn.com/5reportaca-190408171637/85/Advance-Computer-Architecture-31-320.jpg)


Advance Computer Architecture
- 1. Advanced Computer Architecture | CSIT Dept’s SGBAU Amravati. 1 PRACTICAL NO. 1 AIM: Study of WinDLX simulator. TOOL USED: WinDLX 1.0 version INTRODUCTION The DLX processor (pronounced "DeLuXe") is a pipelined processor used as an example in J. Hennessy's and D. Patterson's Computer Architecture - A quantitative approach. In this describes a session using WinDLX, a Windows-based simulator that shows how DLX's pipeline works. The example used in this Practical is very simple and is not meant to show all aspects of WinDLX. It should act only as a first introduction to the use of the application. When you have completed it, please refer to the help files; you can at every stage of a session get context-sensitive help by pressing F1. During this example, though, this will probably not be necessary. Though every step of the example will be discussed in detail, basic knowledge in the use of Windows must be required. It must be assumed that you know how to start Windows, scroll using scrollbars, execute a double click or bring a window uppermost on the screen. The exact appearance of your screen cannot be foretold. You will need Windows 3.0 or higher for this simulation. The icon looks like this: A COMPLETE EXAMPLE This chapter uses the assembler file fact.s in WinDLX assembler. The program calculates the factorial of a number you can enter on the keyboard. The file input.s will be required for this, too. Starting and configuring WinDLX WinDLX is started - like every Windows application - by double clicking on the WinDLX icon. A window (denoted main window in the future) with six icons appears. Double clicking on these icons will pop up child windows. Each of these windows will be explained and used later.
- 2. Advanced Computer Architecture | CSIT Dept’s SGBAU Amravati. 2 To make sure the simulation is reset, click on the File menu and click reset all. A window pops up and you will have to confirm your intention by clicking the OK button in the "Reset DLX" window. WinDLX is capable of working with several configurations. Let us choose the standard settings; click Configuration / Floating Point Stages (read that as: click Configuration to open the menu, then click on Floating Point Stages) and make sure that the following settings are given: By clicking Configuration / Memory Size the size of the simulated processor's memory can be set. This should be 0x8000. Again, OK goes back to the main window. Three more options in the Configuration menu can be chosen: Symbolic addresses, Absolute Cycle Count and Enable Forwarding should all be set, that is, a small hook should be shown beside it. If this is not the case, click on the option. A) 4 Loading test programs In order to be able to start the simulation, at least one program must be loaded into the main memory. To accomplish this, select File / Load Code or Data. A list of assembler programs in the directory appears in a window. As mentioned earlier, fact.s calculates the factorial of an integer number. input.s contains a subprogram which reads the standard input (the keyboard) and stores the integer in the general purpose register 1 of the DLX processor.
- 3. Advanced Computer Architecture | CSIT Dept’s SGBAU Amravati. 3 B) Simulating When looking now at the main window, you should see six icons, named (not necessarily in that order) "Register", "Code", "Pipeline", "Clock Cycle Diagram", "Statistics" and "Breakpoints". Clicking any of these icons will pop up a new window (a "child" window). The characteristics and the use of each of these windows will be introduced during the simulation C) Code window The next window we will look at is the Code window. When double clicking the icon, you will see a three column representation of the memory, showing from the left to the right an address (symbolic or in numbers), a hex number giving the machine code representation of the command and the assembler command. It is time to start the simulation now, so click Execution in the main window. In the appearing pull down menu, click Single Cycle. Pressing F7 has the same effect.
- 4. Advanced Computer Architecture | CSIT Dept’s SGBAU Amravati. 4 D) Clock Cycle Diagram window Another window will show further information. Iconize all child windows and open the Clock Cycle Diagram window. It contains a representation of the timing behaviourof the pipeline. E) Breakpoint window When examining the code by opening the code window (double click on icon code if it is not already opened) you will notice that the next instructions are all nearly the same; they are sw- operations that store words from a register into the memory. Repeatedly pressing F7 would be quite boring, so we will speed this up by using a breakpoint. If you bring the clock cycle diagram window to the foreground by clicking on it, you will note something new: The simulation is now in cycle 14, but the line trap 0x5 looks like
- 5. Advanced Computer Architecture | CSIT Dept’s SGBAU Amravati. 5 F) Register window To go further in the simulation, click on the code window to bring it uppermost on the screen and scroll down (using the arrow keys or the mouse on the vertical scrollbar) to the line with the address 0x00000194, with the instruction lw r2, SaveR2(r0). Set a breakpoint on this line (click on the line; press Ins as a shortcut or click on Code / Set Breakpoint / OK). Use the same procedure to set a breakpoint on line 0x000001a4 jar r31. Pressing F5 now to run the simulation further will bring a surprise. CONCLUSION: In this practical we have studied the WinDLX simulator successfully.
- 6. Advanced Computer Architecture | CSIT Dept’s SGBAU Amravati. 6 PRACTICAL NO: 2 AIM: Write a program to implement prime number in WinDLX simulator. TOOL USED: WinDLX 1.0 version simulator. THEORY: Prime number logic: a number is prime if it is divisible only by one and itself two is the only even and also the smallest prime number. First few prime numbers are 2, 3, 5, 7, 11, 13, 17....etc. Prime numbers have many applications in computer science and mathematics. PROGRAM: .data; *** size of table .global Count Count: .word 10 .global Table Table: .space Count*4 .text .global main main: ;*** Initialization addi r1,r0,0 ;Index in Table addi r2,r0,2 ;Current value ;*** Determine, if R2 can be divided by a value in table NextValue: addi r3,r0,0 ;Helpindex in Table Loop: seq r4,r1,r3 ;End of Table? bnez r4,IsPrim ;R2 is a prime number lw r5,Table(R3) divu r6,r2,r5 multu r7,r6,r5 subu r8,r2,r7
- 7. Advanced Computer Architecture | CSIT Dept’s SGBAU Amravati. 7 beqz r8,IsNoPrim addi r3,r3,4 j Loop IsPrim: ;*** Write value into Table and increment index sw Table(r1),r2 addi r1,r1,4 ;*** 'Count' reached? lw r9,Count srli r10,r1,2 sge r11,r10,r9 bnez r11,Finish IsNoPrim: ;*** Check next value addi r2,r2,1 ;increment R2j NextValue Finish: ;*** end trap 0 HOW TO RUN THE PROGRAM: • Use a text editor to create your program file_name.s. • Click on the “file” button and load code or data and select file_name.s then load file. • You can then run the program by simply pressing the “execute” button – click on multiple cycles all the instruction will be executed, and the final content will be reflected in the WinDLX.
- 8. Advanced Computer Architecture | CSIT Dept’s SGBAU Amravati. 8 OUTPUT: Fig: Output of prime number in WinDLX simulator. CONCLUSION: In this practical we have written a code to implement prime number using WinDLX simulator.
- 9. Advanced Computer Architecture | CSIT Dept’s SGBAU Amravati. 9 PRACTICAL NO: 3 AIM: Write a program for z=(x2 +y2 )*(x+y) in WinDLX Simulator. TOOL USED: WinDLX 1.0 Simulator. PROGRAM: .data .text main: add r1,r0,r5 add r2,r0,r5 mult r1,r1,r1 mult r2,r2,r2 add r3,r1,r2 mult r4,r1,r2 mult r3,r3,r4 trap 0 HOW TO RUN THE PROGRAM: • Use a text editor to create your program file_name.s. • Click on the “file” button and load code or data and select file_name.s then load file. • You can then run the program by simply pressing the “execute” button – click on multiple cycles all the instruction will be executed, and the final content will be reflected in the WinDLX.
- 10. Advanced Computer Architecture | CSIT Dept’s SGBAU Amravati. 10 OUTPUT: Fig: Output of z=(x2 +y2 )*(x+y) in WinDLX Simulator. CONCLUSION: In this practical we have written a code for z=(x2 +y2 )*(x+y) using WinDLX Simulator.
- 11. Advanced Computer Architecture | CSIT Dept’s SGBAU Amravati. 11 PRACTICAL NO: 4 AIM: Study of WinMIPS64simulator. TOOL USED: WinMIPS64 V1.57 version THEORY: MIPS (originally an acronym for Microprocessor without Interlocked Pipeline Stages) is a reduced instruction set computer (RISC) instruction set architecture (ISA) developed by MIPS Technologies (formerly MIPS Computer Systems, Inc.). The early MIPS architectures were 32-bit, with 64-bit versions added later .WinMIPS64 is an instruction set simulator, and is designed as a replacement for the popular Microsoft Windows utility WinDLX. A window (denoted the main window) appears with seven child windows and a status line at the bottom. The seven windows are Pipeline, Code, Data, Registers, Statistics, Cycles and Terminal. Fig: Homepage of WinMIPS64simulator.
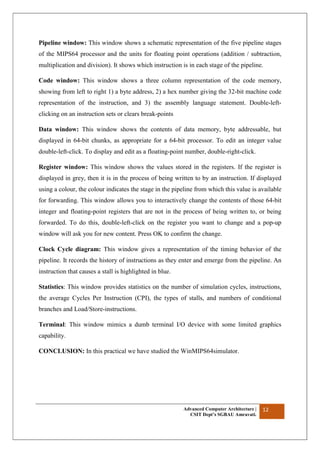
- 12. Advanced Computer Architecture | CSIT Dept’s SGBAU Amravati. 12 Pipeline window: This window shows a schematic representation of the five pipeline stages of the MIPS64 processor and the units for floating point operations (addition / subtraction, multiplication and division). It shows which instruction is in each stage of the pipeline. Code window: This window shows a three column representation of the code memory, showing from left to right 1) a byte address, 2) a hex number giving the 32-bit machine code representation of the instruction, and 3) the assembly language statement. Double-left- clicking on an instruction sets or clears break-points Data window: This window shows the contents of data memory, byte addressable, but displayed in 64-bit chunks, as appropriate for a 64-bit processor. To edit an integer value double-left-click. To display and edit as a floating-point number, double-right-click. Register window: This window shows the values stored in the registers. If the register is displayed in grey, then it is in the process of being written to by an instruction. If displayed using a colour, the colour indicates the stage in the pipeline from which this value is available for forwarding. This window allows you to interactively change the contents of those 64-bit integer and floating-point registers that are not in the process of being written to, or being forwarded. To do this, double-left-click on the register you want to change and a pop-up window will ask you for new content. Press OK to confirm the change. Clock Cycle diagram: This window gives a representation of the timing behavior of the pipeline. It records the history of instructions as they enter and emerge from the pipeline. An instruction that causes a stall is highlighted in blue. Statistics: This window provides statistics on the number of simulation cycles, instructions, the average Cycles Per Instruction (CPI), the types of stalls, and numbers of conditional branches and Load/Store-instructions. Terminal: This window mimics a dumb terminal I/O device with some limited graphics capability. CONCLUSION: In this practical we have studied the WinMIPS64simulator.
- 13. Advanced Computer Architecture | CSIT Dept’s SGBAU Amravati. 13 PRACTICAL NO: 5 AIM: To implement swapping program of two registers without using third variable in WinMIPS64 Simulator. TOOL USED: WinMIPS64 V1.57 version simulator. THEORY: In this program swapping of two register (R1 & R2) take place without using third variable. The idea is to get sum in one of the two given registers. The registers can then be swapped using the sum and subtraction from sum. PROGRAM: .data .text main: dadd r1,r1,r2 dsub r2,r1,r2 dsub r1,r1,r2 finish: HOW TO RUN THE PROGRAM: • Use a text editor to create your program file_name.s. • Click on the “file” button and open file_name.s. • You can then run the program by simply pressing the “run to” button – all the Instruction will be executed, and the final content will be reflected in the Winmips64.
- 14. Advanced Computer Architecture | CSIT Dept’s SGBAU Amravati. 14 OUTPUT: Execution 4cycle 0instruction Fig: Output of swapping program of two registers CONCLUSION: In this practical we have implemented swapping program of two registers without using third variable using WinMIPS64 Simulator.
- 15. Advanced Computer Architecture | CSIT Dept’s SGBAU Amravati. 15 PRACTICAL NO: 6 AIM: Write a program to raise xn where ‘x’ is double and ‘n’ is positive integer in WinMIPS64simulator. TOOL USED: WinMIPS64 simulator. THEORY: The MTC1 instruction (i.e. Move Word to Floating Point) in program moves an integer number into a floating-point register. The instruction CVT.L.D (i.e. Floating Point Convert to Long Fixed Point) converts the integer to Double Precision format. In the pipeline window observe in particular the execution of the MUL.D instruction. Next implement this simple algorithm to calculate w=xn . Try and minimize the number of clock cycles. w=1; forever { if (n%2!=0) w*=x; n/=2; if (n==0) break; x*=x; } PROGRAM: .data n: .word 8 x: .double 0.5 .text LD R1,n(R0) L.D F0,x(R0) DADDI R2, R0, 1 ; R2 = 1 MTC1 R2,F11 ; F11 = 1 CVT.L.D F2,F11 ; F2 = 1 loop: MUL.D F2, F2, F0 ; F2 = F2*F0 DADDI R1, R1, -1 ; decrement R1 by 1 BNEZ R1, loop ; if R1 != 0 continue ; result in F2 HALT
- 16. Advanced Computer Architecture | CSIT Dept’s SGBAU Amravati. 16 HOW TO RUN THE PROGRAM: • Use a text editor to create your program file_name.s. • Click on the “file” button and open file_name.s. • You can then run the program by simply pressing the “run to” button – all the instruction will be executed, and the final content will be reflected in the Winmips64. OUTPUT: Execution 4cycle 0instruction
- 17. Advanced Computer Architecture | CSIT Dept’s SGBAU Amravati. 17 Fig: Output of raise xn where ‘x’ is double and ‘n’ is positive integer CONCLUSION: In this practical we have simulated raise xn where x is double and n is positive integer using WinMIPS64 Simulator.
- 18. Advanced Computer Architecture | CSIT Dept’s SGBAU Amravati. 18 PRACTICAL NO: 7 AIM: To implement factorial program in WinMIPS64 Simulator. TOOL USED: WinMIPS64 V1.57 version simulator. THEORY: MIPS (Microprocessor without Interlocked Pipeline Stages) is a processor architecture of choice for embedded systems worldwide. MIPS architecture is a member of Reduced Instruction Set design (RISC) family – a design philosophy emphasizing that less is more. That is, every aspect (e.g. number of instruction formats, number of instructions, number of addressing modes, etc.) of Instruction Set Architecture (ISA) is kept to minimum to achieve simplicity in processor design. For instance, a marked feature of RISC processors is that only load and store instructions are allowed memory access for data. Any instruction requiring processing some data must first load it into processor’s register using a load instruction. Similarly, destination of all arithmetic and logical instructions are also processor registers. Thus, a store instruction must be executed to place the result back in main memory. For this reason, RISC is also known as register-register architecture. As detailed below, the design of MIPS processor is highly amenable to pipelining. • WinMIPS64 : A windows based simulation of the pipeline implementation of the MIPS64 processer architecture • Six windows showing different feature of execution. • The six windows are pipeline, code, data, register, statistics, and the clock cycle. PROGRAM Factorial example; Returns number! in r10; .data number: .word 10 Title: .asciiz "factorial program n= " CONTROL: .word32 0x10000 DATA: .word32 0x10008 .text
- 19. Advanced Computer Architecture | CSIT Dept’s SGBAU Amravati. 19 lwu r21,CONTROL(r0) lwu r22,DATA(r0) daddi r24,r0,4 ; ascii output daddi r1,r0,title sd r1,(r22) sd r24,(r21) daddi r24,r0,8 ; read input sd r24,(r21) ld r1,(r22) start: daddi r29,r0,0x80 ; position a stack in data memory, use r29 as stack pointer jal factorial daddi r24,r0,1 ; integer output sd r10,(r22) sd r24,(r21) halt ; parameter passed in r1, return value in r10; factorial: slti r10,r1,2 bnez r10,out ; set r10=1 and return if r1=1 sd r31,(r29) daddi r29,r29,8 ; push return address onto stack sd r1,(r29) daddi r29,r29,8 ; push r1 on stack daddi r1,r1,-1 ; r1 = r1-1 jal factorial ; recurse... dadd r4,r0,r10 daddi r29,r29,-8 ld r3,(r29) ; pop n off the stack dmulu r3,r3,r4 ; multiply r1 x factorial(r1-1) dadd r10,r0,r3 ; move product r3 to r10 daddi r29,r29,-8 ; pop return address ld r31,0(r29) out: jr r31
- 20. Advanced Computer Architecture | CSIT Dept’s SGBAU Amravati. 20 HOW TO RUN THE PROGRAM: • Use a text editor to create your program file_name.s. • Click on the “file” button and open file_name.s. • You can then run the program by simply pressing the “run to” button – all the instruction will be executed, and the final content will be reflected in the Winmips64. OUTPUT: Execution 5 cycles 1 instruction 5.000 cycle per instruction Fig: Output of factorial program CONCLUSION: In this practical we have implemented factorial program using WinMIPS64simulator.
- 21. Advanced Computer Architecture | CSIT Dept’s SGBAU Amravati. 21 PRACTICAL NO: 8 AIM: Design a program to calculate execution cycle, number of stalls and code size occurred in insertion sort algorithm. TOOL USED: WinMIPS64 V1.57 version simulator. THEORY: .data #int size = 16 size: .align 4 .word 16 #char * [] data data: .align 2 .space 64 .text main: #char * [] data = { "names" } addr_init: la $t0, array la $t1, data li $t2, 0 #i = 0 init_loop: beq $t2, 16, end_init #initialize addresses sw $t0, ($t1) #data[i] = &array[i] addi $t0, $t0, 16 #array = align 4 = 16 addi $t1, $t1, 4 #data = words = 4 addi $t2, $t2, 1 #i++ j init_loop .data init_string: .asciiz "Initial array is:n[" .text end_init: #printf("Initial array is:n"); la $t0, init_string move $a0, $t0 li $v0, 4 Syscall #print_array(data, size); la $a0, data
- 22. Advanced Computer Architecture | CSIT Dept’s SGBAU Amravati. 22 lw $a1, size jal print_array #insertSort(data, size); la $a0, data lw $a1, size jal insert_sort .data sort_string: .asciiz "Insertion sort is finished!n[" .text #printf("Insertion sort is finished!n"); la $t0, sort_string move $a0, $t0 li $v0, 4 Syscall #print_array(data, size); la $a0, data lw $a1, size jal print_array #exit(0); li $v0, 10 Syscall insert_sort: addi $sp, $sp, -24 sw $ra, 0($sp) sw $s0, 4($sp) sw $s1, 8($sp) sw $s2, 12($sp) sw $s3, 16($sp) sw $s4, 20($sp) #char *a[], size_t length move $s0, $a0 move $s1, $a1 li $s2, 1 #i array_loop: #for(i = 1; i < length;i++) beq $s2, $s1, end_loop #char *value = a[i]; la $t0 ($s0) li $t1, 4
- 23. Advanced Computer Architecture | CSIT Dept’s SGBAU Amravati. 23 mul $t2, $s2, $t1 # 4 * i add $t3, $t0, $t2 # get address from data[i] lw $s3, ($t3) #value = array[i] addi $s4, $s2, -1 #j = i-1 comp_loop: #for (j = i-1; j >= 0 && str_lt(value, a[j]); j--) addi $t0, $s4, 1 # j + 1 > 0 == j >=0 beq $t0, $zero, end_comp move $a0, $s3 #str_lt(value, a[j]) == true la $t0, ($s0) li $t1, 4 mul $t2, $s4, $t1 #4 * j add $t3, $t0, $t2 # get address from data[j] lw $a1, ($t3) #a[j] as argument jal str_lt move $t0, $v0 beq $t0, $zero, end_comp #str_lt == true addi $t1, $s4, 1 beq $t1, $zero, end_comp #j >= 0 la $t0, ($s0) li $t1, 4 mul $t2, $s4, $t1 #4 * j add $t3, $t0, $t2 # get address from data[j] lw $t4, ($t3) # $t4 = a[j] for later move $t0, $s0 li $t1, 4 addi $t2, $s4, 1 #j + 1 mul $t3, $t2, $t1 # 4 * (j + 1) add $t1, $t3, $t0 #get address from data sw $t4, ($t1) #a[j+1] = a[j]; a[j] == $t4 addi $s4, $s4, -1 #j-- j comp_loop #end for(j) end_comp: move $t0, $s0 li $t1, 4 addi $t2, $s4, 1 #j + 1 mul $t4, $t2, $t1 # 4 * (j + 1)
- 24. Advanced Computer Architecture | CSIT Dept’s SGBAU Amravati. 24 add $t1, $t4, $t0 sw $s3, ($t1) #a[j+1] = value; addi $s2, $s2, 1 #i++ j array_loop #for(i) end_loop: lw $s4, 20($sp) lw $s3, 16($sp) lw $s2, 12($sp) lw $s1, 8($sp) lw $s0, 4($sp) lw $ra, 0($sp) addi $sp, $sp, 24 jr $ra print_array: addi $sp, $sp -4 sw $ra, 0($sp) move $t0, $a0 move $t1, $a1 #int i=size print_loop: beq $t1, $zero, end_print #while i > 0 lw $a0, ($t0) #printf( a[i] ) li $v0, 4 syscall addi $t0, $t0, 4 addi $t1, $t1, -1 .data chars: .asciiz ", " .text beq $t1, 0, end_print la $t3, chars move $a0, $t3 li $v0, 4 syscall j print_loop .data end_string: .asciiz "]n" .text end_print:
- 25. Advanced Computer Architecture | CSIT Dept’s SGBAU Amravati. 25 la $t0, end_string move $a0, $t0 li $v0, 4 syscall lw $ra, 0($sp) addi $sp, $sp, 4 jr $ra str_lt: addi $sp, $sp, -4 sw $ra, 0($sp) move $t0, $a0 #char * x move $t1, $a1 #char * y word_loop: lb $t2, ($t0) #load lb $t3, ($t1) and $t4, $t2, $t3 beq $t4, $zero, str_end #for (; *x!='0' && *y!='0'; x++, y++) blt $t2, $t3, lt #if (x < y) bgt $t2, $t3, gt #if (y < x) addi $t0, $t0, 1 #x++ addi $t1, $t1, 1 #y++ j word_loop str_end: beq $t2, $zero, lt# if x == 0 j gt #else return false lt: #return true li $v0, 1 j end_lt gt: #return false li $v0, 0 j end_lt end_lt: lw $ra, 0($sp) addi $sp, $sp 4 jr $ra .data #char * data [] = { "list", "of", "names" } array:
- 26. Advanced Computer Architecture | CSIT Dept’s SGBAU Amravati. 26 .align 4 .asciiz "Joe" .align 4 .asciiz "Jenny" .align 4 .asciiz "Jill" .align 4 .asciiz "John" .align 4 .asciiz "Jeff" .align 4 .asciiz "Joyce" .align 4 .asciiz "Jerry" .align 4 .asciiz "Janice" .align 4 .asciiz "Jake" .align 4 .asciiz "Jonna" .align 4 .asciiz "Jack" .align 4 .asciiz "Jocelyn" .align 4 .asciiz "Jessie" .align 4 .asciiz "Jess" .align 4 .asciiz "Janet" .align 4 .asciiz "Jane" .align 4 OUTPUT: Output of insertion sort algorithm
- 27. Advanced Computer Architecture | CSIT Dept’s SGBAU Amravati. 27 Fig a): Cycle and Registers Fig b) : Statistic and Pipline
- 28. Advanced Computer Architecture | CSIT Dept’s SGBAU Amravati. 28 Fig c): Code in insertion sort algorithm CONCLUSION: In this practical a program to calculate execution cycle, number of stalls and code size occurred in insertion sort algorithm.
- 29. Advanced Computer Architecture | CSIT Dept’s SGBAU Amravati. 29 PRACTICAL NO: 9 AIM: Simulate Control Hazard Branch Taken example in WinMIPS64 Simulator. TOOL USED: WinMIPS64 V1.57 simulator. THEORY: In the case of a TAKEN (T) branch, the two instructions sequentially following the branch instruction need to be flushed out and start over at the branch target. Branch Prediction scheme is used to guess outcome of branch's condition test (i.e. whether or not the branch will be taken). All modern CPUs use branch prediction. Accurate predictions are important for optimal performance. Most CPUs predict branches dynamically—statistics are kept at runtime to determine the likelihood of a branch being taken. In MIPS processor, a branch can be decided (i.e. evaluate its condition) a little earlier; in ID instead of EX stage. In this way, only one instruction needs to be flushed out on a miss prediction PROGRAM: .data .text main: loop: ld r1,0(r2) ;r2 is initialized to 8, Memory[8]=5 dsub r3,r3,r1 ;r3 = 15 bnez r3,loop sd r4,0(r3) ;r4 = 6 finish: HOW TO RUN THE PROGRAM : • Use a text editor to create your program file_name.s. • Click on the “file” button and open file_name.s. • You can then run the program by simply pressing the “run to” button – all the instruction will be executed, and the final content will be reflected in the Winmips64. OUTPUT: Execution
- 30. Advanced Computer Architecture | CSIT Dept’s SGBAU Amravati. 30 4 cycles 0 instructions Fig: Output of Control Hazard Branch taken example CONCLUSION: In this practical we have simulated Control Hazard Branch Taken example using WinMIPS64 Simulator.
- 31. Advanced Computer Architecture | CSIT Dept’s SGBAU Amravati. 31 PRACTICAL NO: 10 AIM: Simulate Control Hazard Non-Taken Branch Example in WinMIPS64 Simulator. TOOL USED: WinMIPS64 V1.57 simulator. THEORY: Control hazards can cause a greater performance loss for DLX pipeline than data hazards. When a branch is executed, it may or may not change the PC (program counter) to something other than its current value plus 4. If a branch changes the PC to its target address, it is a taken branch; if it falls through, it is not taken. If instruction i is a taken branch, then the PC is normally not changed until the end of MEM stage, after the completion of the address calculation and comparison .The simplest method of dealing with branches is to stall the pipeline as soon as the branch is detected until we reach the MEM stage, which determines the new PC. PROGRAM: .data .text main: loop: ld r1,0(r2) ;r2 is initialized to 8, Memory[8]=5 dsub r5,r3,r2 ;r3 = 15 bnez r6,loop ;r6 = 0 sd r4,0(r3) ;r4 = 6 finish: HOW TO RUN THE PROGRAM: • Use a text editor to create your program file_name.s. • Click on the “file” button and open file_name.s. • You can then run the program by simply pressing the “run to” button – all the instruction will be executed, and the final content will be reflected in the Winmips64.
- 32. Advanced Computer Architecture | CSIT Dept’s SGBAU Amravati. 32 OUTPUT Execution 4cycle 0instruction Fig: Output of Control Hazard Branch non-Taken example CONCLUSION: In this practical we have simulated Control Hazard Non-Token Branch example using WinMIPS64 Simulator.
- 33. Advanced Computer Architecture | CSIT Dept’s SGBAU Amravati. 33 PRACTICAL NO: 11 AIM: Study of QtSpim simulator. TOOL USED: QtSpim version 9.1.4 Simulator. THEORY: The most up-to-date version of the SPIM simulator, called “QtSpim” is maintained by James Lazrus, formerly of the University of Wisconsin at Madison. It is “freeware,” and is maintained on a web site called “Source Forge.” There is a new SPIM version, as of August, 2015. We open QtSpim; a window will open as shown in Figure. The window is divided into different sections: 1. The Register tabs display the content of all registers. 2. Buttons across the top are used to load and run a simulation 3. The Text tab displays the MIPS instructions loaded into memory to be executed. (From left-to-right, the memory address of an instruction, the contents of the address in hex, the actual MIPS instructions – where register numbers are used, the MIPS assembly that you wrote, and any comments you made in your code are displayed.) 4. The Data tab displays memory addresses and their values in the data and stack segments of the memory. 5. The Information Console lists the actions performed by the simulator.
- 34. Advanced Computer Architecture | CSIT Dept’s SGBAU Amravati. 34 Fig: Homepage of QtSpim simulator To run the program in QtSpim: 1. Use a text editor to create your program yyyyyy.s 2. Click on the “load” button and open yyyyyy.s 3. You can then run the program by simply pressing the “run” (play) button – all instructions will be executed, and the final contents of memory and the register file will be reflected in the QtSpim window. Example Program Below is an example program to find the sum of an array. Copy this into a text editor and save it as a .s file and open it in QtSpim by loading the file. You can directly run it or do single stepping and observe the change in the Register file. At the end of the Program you should be able to see the result stored in S1 as “1e” (2+4+6+8+10 = 30 = 0x1e) and the console will print this result. The code is well commented which should help you start straight away. # first SPIM program
- 35. Advanced Computer Architecture | CSIT Dept’s SGBAU Amravati. 35 # ECE 484/584 # .data # Put Global Data here N: .word 5 # loop count X: .word 2,4,6,8,10 # array of numbers to be added' SUM: .word 0 # location of the final sum str: .asciiz "The sum of the array is = " .text # Put program here .globl main # globally define 'main' main: lw $s0, N # load loop counter into $s0 la $t0, X # load the address of X into $t0 and $s1, $s1, $zero # clear $s1 aka temp sum loop: lw $t1, 0($t0) # load the next value of x add $s1, $s1, $t1 # add it to the running sum addi $t0, $t0, 4 # increment to the next address addi $s0, $s0, -1 # decrement the loop counter bne $0, $s0, loop # loop back until complete sw $s1, SUM # store the final total CONCLUSION: In this practical we have studied the QtSpim simulator.
- 36. Advanced Computer Architecture | CSIT Dept’s SGBAU Amravati. 36 PRACTICAL NO: 12 AIM: Implementation of SPIM console and appreciate system calls provided by the QtSpim. TOOL USED: QtSpim version 9.1.4 Simulator. Program: Create the following program using notepad.
- 37. Advanced Computer Architecture | CSIT Dept’s SGBAU Amravati. 37 OUTPUT: Fig: Output of console and appreciate system calls CONCLUSION: In this practical we have studied the QtSpim simulator.
- 38. Advanced Computer Architecture | CSIT Dept’s SGBAU Amravati. 38 PRACTICAL NO: 13 AIM: Design a program to find the sum of an array in QtSpim Simulator and store the result into S1 register. TOOL USED: QtSpim version 9.1.4 Simulator. THEORY: Program: data # Put Global Data here N: .word 7 # loop count X: .word 2,4,6,8,10,12,4 # array of numbers to be added' SUM: .word 0 # location of the final sum str: .asciiz "The sum of the array is = " .text # Put program here .globl main # globally define 'main' main: lw $s0, N # load loop counter into $s0 la $t0, X # load the address of X into $t0 and $s1, $s1, $zero # clear $s1 aka temp sum loop: lw $t1, 0($t0) # load the next value of x add $s1, $s1, $t1 # add it to the running sum addi $t0, $t0, 4 # increment to the next address addi $s0, $s0, -1 # decrement the loop counter bne $0, $s0, loop # loop back until complete sw $s1, SUM # store the final total li $v0, 6 la $a0,str syscall li $v0,1 move $a0,$s1
- 39. Advanced Computer Architecture | CSIT Dept’s SGBAU Amravati. 39 syscall li $v0, 10 # syscall to exit cleanly from main syscall # this ends execution .end OUTPUT: Fig: Output of sum of array CONCLUSION: In this practical we have studied the sum of an array in QtSpim Simulator and store the result into S1 register.
- 40. Advanced Computer Architecture | CSIT Dept’s SGBAU Amravati. 40 PRACTICAL NO: 14 AIM: Design a program to compute the sum of squares with the help of QtSpim simulator. TOOL USED: QtSpim version 9.1.4 Simulator. THEORY: Program: # Program to compute the sum of squares (i^2) i=1..n # Usage of registers, plus prompt user to get n # Remember: # need to start with label main # $sp is the stack pointer # $ra save return address (i.e. where to return when we're done) # $zero always equal to zero main: subu $sp, $sp, 8 # make space for parameters on stack (2 words) # $sp = $sp - 8 # # sw $register offset ($base-address) # # store the resister offset bytes from the base-address sw $ra, 0($sp) # save register $ra on stack sw $a0, 4($sp) # save register $a0 on stack move $s0, $zero # $s0 : i move $s1, $zero # $s1 : sum # # Ask for a number li $v0, 4 # syscall 4 : print string la $a0, ask # ask: string label syscall li $v0, 5 # read integer syscall move $s2, $v0 # $s2 : n
- 41. Advanced Computer Architecture | CSIT Dept’s SGBAU Amravati. 41 loop: mul $t0, $s0, $s0 # Compute i^2 add $s1, $s1, $t0 # Accumulate sum addi $s0, $s0, 1 # Increase i ble $s0, $s2, loop # Loop control # if (i <= n) goto loop # # Prepare to print result li $v0, 4 # load syscall option: 4 = print string la $a0, str1 # load the string address into $a0 (argument) syscall # call syscall. li $v0, 1 move $a0, $s2 syscall li $v0, 4 la $a0, str2 syscall li $v0, 1 # same idea, syscall option 1 = print integer move $a0, $s1 syscall # call syscall. li $v0, 4 # once again. la $a0, newl # print text in newline as a string syscall # # All right. We're done. # # free space on stack, and jump back to the original $ra lw $ra, 0($sp) # Restore register $ra addu $sp, $sp, 8 # Pop stack jr $ra # return # Here data is stored .data ask:
- 42. Advanced Computer Architecture | CSIT Dept’s SGBAU Amravati. 42 .asciiz "nEnter number > " str1: .asciiz "nThe sum of i^2 from 1 .. " str2: .asciiz " = " newl: .asciiz "n" OUTPUT: Fig: Homepage of QtSpim simulator.
- 43. Advanced Computer Architecture | CSIT Dept’s SGBAU Amravati. 43 Fig: Output of compute the sum of squares CONCLUSION: In this practical we have studied the program to compute the sum of squares with the help of QtSpim simulator.
- 44. Advanced Computer Architecture | CSIT Dept’s SGBAU Amravati. 44 PRACTICAL NO: 15 AIM: Design a program to convert decimal numbers to hexadecimal number with the help of QtSpim simulator. TOOL USED: QtSpim version 9.1.4 Simulator. THEORY: Program: .data array1: .word 0:100 length: .word 100 max: .word 0 prompt1: .asciiz "Enter ten integer numbers.n" prompt2: .asciiz "The ten integers are:n" prompt3: .asciiz "The ten values in hex are:n" newline: .asciiz "n" tab: .asciiz "t" hexdigits: .asciiz "0123456789abcdef" hexword: .asciiz "00000000" hexdig: .asciiz "0" goodbye: .asciiz "Goodbyen" dit: .asciiz "." dash: .asciiz "," .globl main .text main: # prompt for input li $v0, 4 la $a0, prompt1
- 45. Advanced Computer Architecture | CSIT Dept’s SGBAU Amravati. 45 syscall # set up the loop variables li $t0, 10 la $t1, array1 # Read in the integers loop1: li $v0, 5 syscall sw $v0, ($t1) # decrement loop counter and continue addi $t0, $t0, -1 addi $t1, $t1, 4 bgtz $t0, loop1 # display the number read in li $v0, 4 la $a0, prompt2 syscall # set up the loop variables li $t0, 10 la $t1, array1 # print out the integers # (first a tab, then the int, then a newline) loop2: li $v0, 4 la $a0, tab syscall li $v0, 1 lw $a0, ($t1) syscall
- 46. Advanced Computer Architecture | CSIT Dept’s SGBAU Amravati. 46 li $v0, 4 la $a0, newline syscall # decrement loop counter and continue addi $t0, $t0, -1 addi $t1, $t1, 4 bgtz $t0, loop2 # print each number in hex li $v0, 4 la $a0, prompt3 syscall # set up the loop variables li $t0, 10 # loop3o counter la $t1, array1 # get the value and put it in $t2 loop3o: lw $t2, ($t1) # initialize values for the inner loop la $t6, hexdigits la $t7, hexword li $t3, 15 # the mask value sll $t3, $t3, 28 li $t4, 28 # loop3i counter and shift amount # mask off the correct 4 bits for a hex digit # and shift for bit positions 0-3 loop3i: and $t5, $t2, $t3 srl $t5, $t5, $t4 # get proper hex digit add $t5, $t5, $t6
- 47. Advanced Computer Architecture | CSIT Dept’s SGBAU Amravati. 47 lb $t8, ($t5) sb $t8, ($t7) # process loop values and branch srl $t3, $t3, 4 addi $t7, $t7, 1 addi $t4, $t4, -4 bgez $t4, loop3i # output the hex word li $v0, 4 la $a0, tab syscall li $v0, 4 la $a0, hexword syscall li $v0, 4 la $a0, newline syscall # process loop values and branch addi $t0, $t0, -1 addi $t1, $t1, 4 bgtz $t0, loop3o # end the program li $v0, 4 la $a0, goodbye syscall li $v0, 10 syscall
- 48. Advanced Computer Architecture | CSIT Dept’s SGBAU Amravati. 48 OUTPUT: Fig: Homepage of QtSpim simulator.
- 49. Advanced Computer Architecture | CSIT Dept’s SGBAU Amravati. 49 Fig:Ouput of convert decimal numbers to hexadecimal number CONCLUSION: In this practical we have studied the program to convert decimal numbers to hexadecimal number with the help of QtSpim simulator.
- 50. Advanced Computer Architecture | CSIT Dept’s SGBAU Amravati. 50 PRACTICAL NO: 16 AIM: Design a program to find a minimum, maximum and average number using QtSpim simulator and display the result. TOOL USED: QtSpim version 9.1.4 Simulator. THEORY: Program: .data promp_to_user: .asciiz "nEnter number:n" arr: .word 0, 0, 0, 0, 0, 0, 0, 0, 0, 0 # size: .word 10 # mx: .word 0 # mn: .word 0 #numturn: .word 1 prompt: .asciiz "nMax number is:" .text Main: add $t0, $zero, $zero # $t0 = temp sum add $t2, $zero, $zero # initailize loop counter $t2= i=0 add $t3, $zero, $zero la $s0, arr # address of arr stored in $s0 Loop: li $v0, 4 #sys call code to print out string la $a0, promp_to_user #address of the string to print syscall li $v0, 5 # read integer syscall sw $v0, arr # memory li $v0, 4 # print string la $a0, prompt # Max number is: syscall li $v0, 1 # print integer lw $a0, arr syscall #addi $s0, $s0, 4 addi $t2, $t2, 1 #i++ ble $t2, 9, Loop li $v0, 10 #sys code stop syscall
- 51. Advanced Computer Architecture | CSIT Dept’s SGBAU Amravati. 51 OUTPUT: Fig: Output of minimum, maximum and average number CONCLUSION: In this practical we have studied the program to find a minimum, maximum and average number using QtSpim simulator and display the result.
- 52. Advanced Computer Architecture | CSIT Dept’s SGBAU Amravati. 52 PRACTICAL NO: 17 AIM: Study of Architecture design simulator. 1. R.sim 2. A.sim TOOL USED: QtSpim version 9.1.4 Simulator. THEORY: Doing research or system design in computer architecture involves deciding among many interrelated tradeoffs. Computer architecture is increasingly driven by quantitative data. Usually, developers can devise analytical models to bound the design space in the very early development stages but the interactions between many design decisions in today increasingly complex systems make impossible to use these analytical models to accurately predict the performance of a _nished system. Hence, we need experimental models in order to guess the performance impact of a possible design decision before building a _nished system. Doing direct performance measurements requires a nished model; hence it is not possible to do it during the design phase. Also, building prototypes is too expensive for most research projects. As an alternative, system architects and researches use performance simulators to predict the effect of the ideas and techniques that they need to evaluate. Performance simulators are complex software systems which accurately model the behavior of a hardware system. Doing a simulation of a hardware model is several orders of magnitude slower than running the simulated system. Developers need fast and accurate simulators to be able to perform as many useful experiments as possible. There are two main types of performance simulators for processors: trace driven and execution driven. Trace driven simulators use traces obtained from the real execution of programs to drive a performance model while execution driven simulators simulate the actual execution of a program recording detailed performance statistics. The current trend in performance simulation is to use execution driven simulation because it allows much more precise results specially for current processors which exploit instruction level parallelism using out of order execution and speculation. There are several popular execution driven performance simulators and simulation frameworks like SimOS (Rosenblum et al. 1997), MASE (Larson et al. 2001), Winsconsin Wind Tunnel II
- 53. Advanced Computer Architecture | CSIT Dept’s SGBAU Amravati. 53 (Mukherjee et al. 2000), SimpleScalar (Austin et al. 2002), Simics (Magnusson et al. 2002), Asim (Emer et al. 2002) or RSIM (Hughes et al. 2002). RSIM (Hughes et al. 2002; Pai et al. 1997a) is a simulator primarily targeted to study shared-memory cache coherent (cc-NUMA) multiprocessor architectures built from processors that aggressively exploit instruction-level parallelism (ILP). RSIM key advantage is that it models a system comprised by several out- of-order processors which aggressively exploit instruction level parallelism (ILP). The model includes an aggressive memory system and a scalable interconnection network. Using detailed ILP models for the simulated processors provides a realistic approximation to modern and future multiprocessor systems. RSIM provides a great _exibility which allows using it to simulate a range of systems from monoprocessors to different cc-NUMA con_gurations. The accurate and exible model provided by RSIM implies a slower execution speed than other less detailed simulators. Furthermore, although RSIM is supposed to be portable it was not available on common and cheap architectures like Linux/x86, requiring instead Solaris/ SPARC, IRIX/MIPS or other big-endian machines. This has proved to be a serious problem to our research group due to the limited access to these kind of machines. In this work we show how we ported RSIM to Linux/x86 and how that allows us to obtain an increased performance for our simulations at a fraction of the original cost. In the next section we examine some other performance simulators available, specially those derived from RSIM. Later, we explain some key characteristics of RSIM and the approach we have followed to porting RSIM to Linux/i386. After that section, we evaluate the performance of the ported simulator with respect to the cost of the hardware used to run the simulations. PROBLEMS PORTING RSIM RSIM is an interpreter for Solaris/SPARC v9 application executables. Internally, RSIM is a discrete event-driven simulator based on the YACSIM (Yet Another C Simulator) library from the Rice Parallel Processing Testbed(RPPT) (Convington et al. 1991; Pai et al. 1997b). RSIM interprets application executables rather that uses traces, enabling more accurate modeling of the effects of contention and synchronization in multiprocessor simulations as well as speculation in multiprocessor and uniprocessor simulations. For speed, it converts the SPARC v9 instructions into an expanded, loosely encoded instruction set format and internally caches them. RSIM subsystems include the processor engine, the
- 54. Advanced Computer Architecture | CSIT Dept’s SGBAU Amravati. 54 memory module, the cache module, the directory module and the interconnection network. Each subsystem is mostly independent from each other and they interact through a small number of prede_ned interfaces. RSIM is written in a modular fashion using C++ and C for extensibility and portability. Initially, it was developed using Sun systems (Solaris 2.5) on SPARC. It has successfully ported to HP-UX 10 running on a Convex Exemplar and to IRIX running on MIPS. However, porting it to 64-bit or little-endian architectures requires significant additional effort. We have successfully ported RSIM to GNU/Linux running on x86 architectures. The main problems that we have had to solve were: Build issues due to differences in libraries and headers between Solaris and Linux. CONCLUSIONS The purpose of our port of RSIM is to allow us to use our research resources more efficiently. Prior to the port, the small number of available machines to develop and run our simulations created long waiting queues and serious organizational problems. Using a RSIM version which runs on cheap and readily available x86 hardware allows us to provide each researcher with its own workstation to comfortably develop and test his experiments and use an inexpensive cluster of Linux/x86 machines to execute the longest simulations. The x 86 versions not only execute each benchmark faster, but more importantly, it is easier to provide more resources to increase the throughput of the whole team.