ASP.NET Identity
0 likes•134 views

The document introduces ASP.NET Identity, which is Microsoft's new platform for managing users in ASP.NET applications. It has replaced the older ASP.NET Membership platform. The document discusses setting up an ASP.NET Identity implementation in an example project, including installing NuGet packages, defining a database context class, and creating a basic user management interface. It also provides an overview of how ASP.NET Identity uses OWIN/Katana to provide services to web applications in a more modular way compared to the previous ASP.NET Membership system.


![CHAPTER 13 ■ GETTING STARTED WITH IDENTITY
3
I created a view by right-clicking the Index action method and selecting Add View from the pop-up menu. I set
View Name to Index and set Template to Empty (without model). Unlike the examples in previous chapters, I want
to use a common layout for this chapter, so I checked the Use a Layout Page option. When I clicked the Add button,
Visual Studio created the Views/Shared/_Layout.cshtml and Views/Home/Index.cshtml files. Listing 13-2 shows the
contents of the _Layout.cshtml file.
Listing 13-2. The Contents of the _Layout.cshtml File
<!DOCTYPE html>
<html>
<head>
<meta name="viewport" content="width=device-width" />
<title>@ViewBag.Title</title>
<link href="~/Content/bootstrap.min.css" rel="stylesheet" />
<link href="~/Content/bootstrap-theme.min.css" rel="stylesheet" />
<style>
.container { padding-top: 10px; }
.validation-summary-errors { color: #f00; }
</style>
</head>
<body class="container">
<div class="container">
@RenderBody()
</div>
</body>
</html>
Listing 13-3 shows the contents of the Index.cshtml file.
Listing 13-3. The Contents of the Index.cshtml File
@{
ViewBag.Title = "Index";
}
<div class="panel panel-primary">
<div class="panel-heading">User Details</div>
<table class="table table-striped">
@foreach (string key in Model.Keys) {
<tr>
<th>@key</th>
<td>@Model[key]</td>
</tr>
}
</table>
</div>
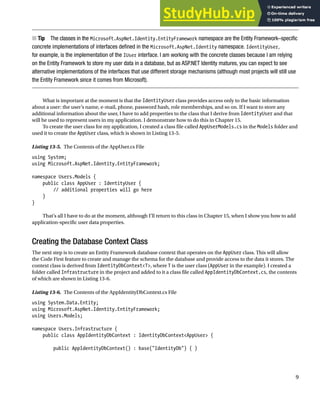
To test that the example application is working, select Start Debugging from the Visual Studio Debug menu and
navigate to the /Home/Index URL. You should see the result illustrated by Figure 13-1.](https://image.slidesharecdn.com/asp-230806165525-c099b641/85/ASP-NET-Identity-4-320.jpg)


![CHAPTER 13 ■ GETTING STARTED WITH IDENTITY
17
Listing 13-11. The Contents of the UserViewModels.cs File
using System.ComponentModel.DataAnnotations;
namespace Users.Models {
public class CreateModel {
[Required]
public string Name { get; set; }
[Required]
public string Email { get; set; }
[Required]
public string Password { get; set; }
}
}
The initial model I have defined is called CreateModel, and it defines the basic properties that I require to
create a user account: a username, an e-mail address, and a password. I have used the Required attribute from the
System.ComponentModel.DataAnnotations namespace to denote that values are required for all three properties
defined in the model.
I added a pair of Create action methods to the Admin controller, which are targeted by the link in the Index view
from the previous section and which uses the standard controller pattern to present a view to the user for a GET
request and process form data for a POST request. You can see the new action methods in Listing 13-12.
Listing 13-12. Defining the Create Action Methods in the AdminController.cs File
using System.Web;
using System.Web.Mvc;
using Microsoft.AspNet.Identity.Owin;
using Users.Infrastructure;
using Users.Models;
using Microsoft.AspNet.Identity;
using System.Threading.Tasks;
namespace Users.Controllers {
public class AdminController : Controller {
public ActionResult Index() {
return View(UserManager.Users);
}
public ActionResult Create() {
return View();
}
[HttpPost]
public async Task<ActionResult> Create(CreateModel model) {
if (ModelState.IsValid) {
AppUser user = new AppUser {UserName = model.Name, Email = model.Email};
IdentityResult result = await UserManager.CreateAsync(user,
model.Password);](https://image.slidesharecdn.com/asp-230806165525-c099b641/85/ASP-NET-Identity-18-320.jpg)


![CHAPTER 13 ■ GETTING STARTED WITH IDENTITY
30
Implementing the Delete Feature
The user manager class defines a DeleteAsync method that takes an instance of the user class and removes it from the
database. In Listing 13-21, you can see how I have used the DeleteAsync method to implement the delete feature of
the Admin controller.
Listing 13-21. Deleting Users in the AdminController.cs File
using System.Web;
using System.Web.Mvc;
using Microsoft.AspNet.Identity.Owin;
using Users.Infrastructure;
using Users.Models;
using Microsoft.AspNet.Identity;
using System.Threading.Tasks;
namespace Users.Controllers {
public class AdminController : Controller {
// ...other action methods omitted for brevity...
[HttpPost]
public async Task<ActionResult> Delete(string id) {
AppUser user = await UserManager.FindByIdAsync(id);
if (user != null) {
IdentityResult result = await UserManager.DeleteAsync(user);
if (result.Succeeded) {
return RedirectToAction("Index");
} else {
return View("Error", result.Errors);
}
} else {
return View("Error", new string[] { "User Not Found" });
}
}
private void AddErrorsFromResult(IdentityResult result) {
foreach (string error in result.Errors) {
ModelState.AddModelError("", error);
}
}
private AppUserManager UserManager {
get {
return HttpContext.GetOwinContext().GetUserManager<AppUserManager>();
}
}
}
}](https://image.slidesharecdn.com/asp-230806165525-c099b641/85/ASP-NET-Identity-31-320.jpg)
![CHAPTER 13 ■ GETTING STARTED WITH IDENTITY
32
using Microsoft.AspNet.Identity;
using System.Threading.Tasks;
namespace Users.Controllers {
public class AdminController : Controller {
// ...other action methods omitted for brevity...
public async Task<ActionResult> Edit(string id) {
AppUser user = await UserManager.FindByIdAsync(id);
if (user != null) {
return View(user);
} else {
return RedirectToAction("Index");
}
}
[HttpPost]
public async Task<ActionResult> Edit(string id, string email, string password) {
AppUser user = await UserManager.FindByIdAsync(id);
if (user != null) {
user.Email = email;
IdentityResult validEmail
= await UserManager.UserValidator.ValidateAsync(user);
if (!validEmail.Succeeded) {
AddErrorsFromResult(validEmail);
}
IdentityResult validPass = null;
if (password != string.Empty) {
validPass
= await UserManager.PasswordValidator.ValidateAsync(password);
if (validPass.Succeeded) {
user.PasswordHash =
UserManager.PasswordHasher.HashPassword(password);
} else {
AddErrorsFromResult(validPass);
}
}
if ((validEmail.Succeeded && validPass == null) || ( validEmail.Succeeded
&& password != string.Empty && validPass.Succeeded)) {
IdentityResult result = await UserManager.UpdateAsync(user);
if (result.Succeeded) {
return RedirectToAction("Index");
} else {
AddErrorsFromResult(result);
}
}](https://image.slidesharecdn.com/asp-230806165525-c099b641/85/ASP-NET-Identity-33-320.jpg)


![CHAPTER 14 ■ APPLYING ASP.NET IDENTITY
2
Tip
■ I use names and passwords stored in the ASP.NET Identity database in this chapter. In Chapter 15, I demonstrate
how ASP.NET Identity can be used to authenticate users with a service from Google (Identity also supports authentication
for Microsoft, Facebook, and Twitter accounts).
Table 14-2. Putting Authentication in Context
Question Answer
What is it? Authentication validates credentials provided by users. Once the user is
authenticated, requests that originate from the browser contain a cookie that
represents the user identity.
Why should I care? Authentication is how you check the identity of your users and is the first step
toward restricting access to sensitive parts of the application.
How is it used by the MVC
framework?
Authentication features are accessed through the Authorize attribute, which
is applied to controllers and action methods in order to restrict access to
authenticated users.
Understanding the Authentication/Authorization Process
The ASP.NET Identity system integrates into the ASP.NET platform, which means you use the standard MVC
framework techniques to control access to action methods, such as the Authorize attribute. In this section, I am going
to apply basic restrictions to the Index action method in the Home controller and then implement the features that
allow users to identify themselves so they can gain access to it. Listing 14-1 shows how I have applied the Authorize
attribute to the Home controller.
Listing 14-1. Securing the Home Controller
using System.Web.Mvc;
using System.Collections.Generic;
namespace Users.Controllers {
public class HomeController : Controller {
[Authorize]
public ActionResult Index() {
Dictionary<string, object> data
= new Dictionary<string, object>();
data.Add("Placeholder", "Placeholder");
return View(data);
}
}
}
Using the Authorize attribute in this way is the most general form of authorization and restricts access to the
Index action methods to requests that are made by users who have been authenticated by the application.
If you start the application and request a URL that targets the Index action on the Home controller (/Home/Index,
/Home, or just /), you will see the error shown by Figure 14-1.](https://image.slidesharecdn.com/asp-230806165525-c099b641/85/ASP-NET-Identity-38-320.jpg)


![CHAPTER 14 ■ APPLYING ASP.NET IDENTITY
5
Listing 14-2. Adding a New Model Class to the UserViewModels.cs File
using System.ComponentModel.DataAnnotations;
namespace Users.Models {
public class CreateModel {
[Required]
public string Name { get; set; }
[Required]
public string Email { get; set; }
[Required]
public string Password { get; set; }
}
public class LoginModel {
[Required]
public string Name { get; set; }
[Required]
public string Password { get; set; }
}
}
The new model has Name and Password properties, both of which are decorated with the Required attribute so
that I can use model validation to check that the user has provided values.
Tip
■ In a real project, I would use client-side validation to check that the user has provided name and password
values before submitting the form to the server, but I am going to keep things focused on Identity and the server-side
functionality in this chapter. See Pro ASP.NET MVC 5 for details of client-side form validation.
I added an Account controller to the project, as shown in Listing 14-3, with Login action methods to collect and
process the user’s credentials. I have not implemented the authentication logic in the listing because I am going to
define the view and then walk through the process of validating user credentials and signing users into the application.
Listing 14-3. The Contents of the AccountController.cs File
using System.Threading.Tasks;
using System.Web.Mvc;
using Users.Models;
namespace Users.Controllers {
[Authorize]
public class AccountController : Controller {
[AllowAnonymous]
public ActionResult Login(string returnUrl) {
if (ModelState.IsValid) {
}](https://image.slidesharecdn.com/asp-230806165525-c099b641/85/ASP-NET-Identity-41-320.jpg)
![CHAPTER 14 ■ APPLYING ASP.NET IDENTITY
6
ViewBag.returnUrl = returnUrl;
return View();
}
[HttpPost]
[AllowAnonymous]
[ValidateAntiForgeryToken]
public async Task<ActionResult> Login(LoginModel details, string returnUrl) {
return View(details);
}
}
}
Even though it doesn’t authenticate users yet, the Account controller contains some useful infrastructure that
I want to explain separately from the ASP.NET Identity code that I’ll add to the Login action method shortly.
First, notice that both versions of the Login action method take an argument called returnUrl. When a user
requests a restricted URL, they are redirected to the /Account/Login URL with a query string that specifies the URL
that the user should be sent back to once they have been authenticated. You can see this if you start the application
and request the /Home/Index URL. Your browser will be redirected, like this:
/Account/Login?ReturnUrl=%2FHome%2FIndex
The value of the ReturnUrl query string parameter allows me to redirect the user so that navigating between
open and secured parts of the application is a smooth and seamless process.
Next, notice the attributes that I have applied to the Account controller. Controllers that manage user accounts
contain functionality that should be available only to authenticated users, such as password reset, for example. To that
end, I have applied the Authorize attribute to the controller class and then used the AllowAnonymous attribute on the
individual action methods. This restricts action methods to authenticated users by default but allows unauthenticated
users to log in to the application.
Finally, I have applied the ValidateAntiForgeryToken attribute, which works in conjunction with the Html.
AntiForgeryToken helper method in the view and guards against cross-site request forgery. Cross-site forgery exploits
the trust that your user has for your application and it is especially important to use the helper and attribute for
authentication requests.
Tip
■ You can learn more about cross-site request forgery at http://en.wikipedia.org/wiki/Cross-site_request_forgery.
My last preparatory step is to create the view that will be rendered to gather credentials from the user. Listing 14-4
shows the contents of the Views/Account/Login.cshtml file, which I created by right-clicking the Index action method
and selecting Add View from the pop-up menu.
Listing 14-4. The Contents of the Login.cshtml File
@model Users.Models.LoginModel
@{ ViewBag.Title = "Login";}
<h2>Log In</h2>
@Html.ValidationSummary()](https://image.slidesharecdn.com/asp-230806165525-c099b641/85/ASP-NET-Identity-42-320.jpg)

![CHAPTER 14 ■ APPLYING ASP.NET IDENTITY
8
Listing 14-5. Adding Authentication to the AccountController.cs File
using System.Threading.Tasks;
using System.Web.Mvc;
using Users.Models;
using Microsoft.Owin.Security;
using System.Security.Claims;
using Microsoft.AspNet.Identity;
using Microsoft.AspNet.Identity.Owin;
using Users.Infrastructure;
using System.Web;
namespace Users.Controllers {
[Authorize]
public class AccountController : Controller {
[AllowAnonymous]
public ActionResult Login(string returnUrl) {
ViewBag.returnUrl = returnUrl;
return View();
}
[HttpPost]
[AllowAnonymous]
[ValidateAntiForgeryToken]
public async Task<ActionResult> Login(LoginModel details, string returnUrl) {
if (ModelState.IsValid) {
AppUser user = await UserManager.FindAsync(details.Name,
details.Password);
if (user == null) {
ModelState.AddModelError("", "Invalid name or password.");
} else {
ClaimsIdentity ident = await UserManager.CreateIdentityAsync(user,
DefaultAuthenticationTypes.ApplicationCookie);
AuthManager.SignOut();
AuthManager.SignIn(new AuthenticationProperties {
IsPersistent = false}, ident);
return Redirect(returnUrl);
}
}
ViewBag.returnUrl = returnUrl;
return View(details);
}
private IAuthenticationManager AuthManager {
get {
return HttpContext.GetOwinContext().Authentication;
}
}](https://image.slidesharecdn.com/asp-230806165525-c099b641/85/ASP-NET-Identity-44-320.jpg)


![CHAPTER 14 ■ APPLYING ASP.NET IDENTITY
15
[HttpPost]
public async Task<ActionResult> Create([Required]string name) {
if (ModelState.IsValid) {
IdentityResult result
= await RoleManager.CreateAsync(new AppRole(name));
if (result.Succeeded) {
return RedirectToAction("Index");
} else {
AddErrorsFromResult(result);
}
}
return View(name);
}
[HttpPost]
public async Task<ActionResult> Delete(string id) {
AppRole role = await RoleManager.FindByIdAsync(id);
if (role != null) {
IdentityResult result = await RoleManager.DeleteAsync(role);
if (result.Succeeded) {
return RedirectToAction("Index");
} else {
return View("Error", result.Errors);
}
} else {
return View("Error", new string[] { "Role Not Found" });
}
}
private void AddErrorsFromResult(IdentityResult result) {
foreach (string error in result.Errors) {
ModelState.AddModelError("", error);
}
}
private AppUserManager UserManager {
get {
return HttpContext.GetOwinContext().GetUserManager<AppUserManager>();
}
}
private AppRoleManager RoleManager {
get {
return HttpContext.GetOwinContext().GetUserManager<AppRoleManager>();
}
}
}
}](https://image.slidesharecdn.com/asp-230806165525-c099b641/85/ASP-NET-Identity-51-320.jpg)


![CHAPTER 14 ■ APPLYING ASP.NET IDENTITY
18
Testing Creating and Deleting Roles
To test the new controller, start the application and navigate to the /RoleAdmin/Index URL. To create a new role, click
the Create button, enter a name in the input element, and click the second Create button. The new view will be saved
to the database and displayed when the browser is redirected to the Index action, as shown in Figure 14-4. You can
remove the role from the application by clicking the Delete button.
Figure 14-4. Creating a new role
Managing Role Memberships
To authorize users, it isn’t enough to just create and delete roles; I also have to be able to manage role memberships,
assigning and removing users from the roles that the application defines. This isn’t a complicated process,
but it invokes taking the role data from the AppRoleManager class and then calling the methods defined by the
AppUserMangager class that associate users with roles.
I started by defining view models that will let me represent the membership of a role and receive a new set of
membership instructions from the user. Listing 14-13 shows the additions I made to the UserViewModels.cs file.
Listing 14-13. Adding View Models to the UserViewModels.cs File
using System.ComponentModel.DataAnnotations;
using System.Collections.Generic;
namespace Users.Models {
public class CreateModel {
[Required]
public string Name { get; set; }
[Required]
public string Email { get; set; }
[Required]
public string Password { get; set; }
}](https://image.slidesharecdn.com/asp-230806165525-c099b641/85/ASP-NET-Identity-54-320.jpg)
![CHAPTER 14 ■ APPLYING ASP.NET IDENTITY
19
public class LoginModel {
[Required]
public string Name { get; set; }
[Required]
public string Password { get; set; }
}
public class RoleEditModel {
public AppRole Role { get; set; }
public IEnumerable<AppUser> Members { get; set; }
public IEnumerable<AppUser> NonMembers { get; set; }
}
public class RoleModificationModel {
[Required]
public string RoleName { get; set; }
public string[] IdsToAdd { get; set; }
public string[] IdsToDelete { get; set; }
}
}
The RoleEditModel class will let me pass details of a role and details of the users in the system, categorized by
membership. I use AppUser objects in the view model so that I can extract the name and ID for each user in the view
that will allow memberships to be edited. The RoleModificationModel class is the one that I will receive from the
model binding system when the user submits their changes. It contains arrays of user IDs rather than AppUser objects,
which is what I need to change role memberships.
Having defined the view models, I can add the action methods to the controller that will allow role memberships
to be defined. Listing 14-14 shows the changes I made to the RoleAdmin controller.
Listing 14-14. Adding Action Methods in the RoleAdminController.cs File
using System.ComponentModel.DataAnnotations;
using System.Linq;
using System.Threading.Tasks;
using System.Web;
using System.Web.Mvc;
using Microsoft.AspNet.Identity;
using Microsoft.AspNet.Identity.Owin;
using Users.Infrastructure;
using Users.Models;
using System.Collections.Generic;
namespace Users.Controllers {
public class RoleAdminController : Controller {
// ...other action methods omitted for brevity...
public async Task<ActionResult> Edit(string id) {
AppRole role = await RoleManager.FindByIdAsync(id);
string[] memberIDs = role.Users.Select(x => x.UserId).ToArray();
IEnumerable<AppUser> members
= UserManager.Users.Where(x => memberIDs.Any(y => y == x.Id));](https://image.slidesharecdn.com/asp-230806165525-c099b641/85/ASP-NET-Identity-55-320.jpg)
![CHAPTER 14 ■ APPLYING ASP.NET IDENTITY
20
IEnumerable<AppUser> nonMembers = UserManager.Users.Except(members);
return View(new RoleEditModel {
Role = role,
Members = members,
NonMembers = nonMembers
});
}
[HttpPost]
public async Task<ActionResult> Edit(RoleModificationModel model) {
IdentityResult result;
if (ModelState.IsValid) {
foreach (string userId in model.IdsToAdd ?? new string[] { }) {
result = await UserManager.AddToRoleAsync(userId, model.RoleName);
if (!result.Succeeded) {
return View("Error", result.Errors);
}
}
foreach (string userId in model.IdsToDelete ?? new string[] { }) {
result = await UserManager.RemoveFromRoleAsync(userId,
model.RoleName);
if (!result.Succeeded) {
return View("Error", result.Errors);
}
}
return RedirectToAction("Index");
}
return View("Error", new string[] { "Role Not Found" });
}
private void AddErrorsFromResult(IdentityResult result) {
foreach (string error in result.Errors) {
ModelState.AddModelError("", error);
}
}
private AppUserManager UserManager {
get {
return HttpContext.GetOwinContext().GetUserManager<AppUserManager>();
}
}
private AppRoleManager RoleManager {
get {
return HttpContext.GetOwinContext().GetUserManager<AppRoleManager>();
}
}
}
}](https://image.slidesharecdn.com/asp-230806165525-c099b641/85/ASP-NET-Identity-56-320.jpg)


![CHAPTER 14 ■ APPLYING ASP.NET IDENTITY
24
Using Roles for Authorization
Now that I have the ability to manage roles, I can use them as the basis for authorization through the Authorize
attribute. To make it easier to test role-based authorization, I have added a Logout method to the Account controller,
as shown in Listing 14-16, which will make it easier to log out and log in again as a different user to see the effect of
role membership.
Listing 14-16. Adding a Logout Method to the AccountController.cs File
using System.Threading.Tasks;
using System.Web.Mvc;
using Users.Models;
using Microsoft.Owin.Security;
using System.Security.Claims;
using Microsoft.AspNet.Identity;
using Microsoft.AspNet.Identity.Owin;
using Users.Infrastructure;
using System.Web;
namespace Users.Controllers {
[Authorize]
public class AccountController : Controller {
[AllowAnonymous]
public ActionResult Login(string returnUrl) {
ViewBag.returnUrl = returnUrl;
return View();
}
[HttpPost]
[AllowAnonymous]
[ValidateAntiForgeryToken]
Figure 14-6. The effect of adding users to a role](https://image.slidesharecdn.com/asp-230806165525-c099b641/85/ASP-NET-Identity-60-320.jpg)
![CHAPTER 14 ■ APPLYING ASP.NET IDENTITY
25
public async Task<ActionResult> Login(LoginModel details, string returnUrl) {
// ...statements omitted for brevity...
}
[Authorize]
public ActionResult Logout() {
AuthManager.SignOut();
return RedirectToAction("Index", "Home");
}
private IAuthenticationManager AuthManager {
get {
return HttpContext.GetOwinContext().Authentication;
}
}
private AppUserManager UserManager {
get {
return HttpContext.GetOwinContext().GetUserManager<AppUserManager>();
}
}
}
}
I have updated the Home controller to add a new action method and pass some information about the
authenticated user to the view, as shown in Listing 14-17.
Listing 14-17. Adding an Action Method and Account Information to the HomeController.cs File
using System.Web.Mvc;
using System.Collections.Generic;
using System.Web;
using System.Security.Principal;
namespace Users.Controllers {
public class HomeController : Controller {
[Authorize]
public ActionResult Index() {
return View(GetData("Index"));
}
[Authorize(Roles="Users")]
public ActionResult OtherAction() {
return View("Index", GetData("OtherAction"));
}
private Dictionary<string, object> GetData(string actionName) {
Dictionary<string, object> dict
= new Dictionary<string, object>();](https://image.slidesharecdn.com/asp-230806165525-c099b641/85/ASP-NET-Identity-61-320.jpg)
![CHAPTER 14 ■ APPLYING ASP.NET IDENTITY
26
dict.Add("Action", actionName);
dict.Add("User", HttpContext.User.Identity.Name);
dict.Add("Authenticated", HttpContext.User.Identity.IsAuthenticated);
dict.Add("Auth Type", HttpContext.User.Identity.AuthenticationType);
dict.Add("In Users Role", HttpContext.User.IsInRole("Users"));
return dict;
}
}
}
I have left the Authorize attribute unchanged for the Index action method, but I have set the Roles property
when applying the attribute to the OtherAction method, specifying that only members of the Users role should be
able to access it. I also defined a GetData method, which adds some basic information about the user identity, using
the properties available through the HttpContext object. The final change I made was to the Index.cshtml file in the
Views/Home folder, which is used by both actions in the Home controller, to add a link that targets the Logout method in
the Account controller, as shown in Listing 14-18.
Listing 14-18. Adding a Sign-Out Link to the Index.cshtml File in the Views/Home Folder
@{ ViewBag.Title = "Index"; }
<div class="panel panel-primary">
<div class="panel-heading">User Details</div>
<table class="table table-striped">
@foreach (string key in Model.Keys) {
<tr>
<th>@key</th>
<td>@Model[key]</td>
</tr>
}
</table>
</div>
@Html.ActionLink("Sign Out", "Logout", "Account", null, new {@class = "btn btn-primary"})
Tip
■ The Authorize attribute can also be used to authorize access based on a list of individual usernames. This is an
appealing feature for small projects, but it means you have to change the code in your controllers each time the set of
users you are authorizing changes, and that usually means having to go through the test-and-deploy cycle again. Using
roles for authorization isolates the application from changes in individual user accounts and allows you to control access
to the application through the memberships stored by ASP.NET Identity.
To test the authentication, start the application and navigate to the /Home/Index URL. Your browser will be
redirected so that you can enter user credentials. It doesn’t matter which of the user details from Table 14-10 you
choose to authenticate with because the Authorize attribute applied to the Index action allows access to any
authenticated user.](https://image.slidesharecdn.com/asp-230806165525-c099b641/85/ASP-NET-Identity-62-320.jpg)
![CHAPTER 14 ■ APPLYING ASP.NET IDENTITY
27
However, if you now request the /Home/OtherAction URL, the user details you chose from Table 14-10 will make a
difference because only Alice and Joe are members of the Users role, which is required to access the OtherAction method.
If you log in as Bob, then your browser will be redirected so that you can be prompted for credentials once again.
Redirecting an already authenticated user for more credentials is rarely a useful thing to do, so I have modified
the Login action method in the Account controller to check to see whether the user is authenticated and, if so, redirect
them to the shared Error view. Listing 14-19 shows the changes.
Listing 14-19. Detecting Already Authenticated Users in the AccountController.cs File
using System.Threading.Tasks;
using System.Web.Mvc;
using Users.Models;
using Microsoft.Owin.Security;
using System.Security.Claims;
using Microsoft.AspNet.Identity;
using Microsoft.AspNet.Identity.Owin;
using Users.Infrastructure;
using System.Web;
namespace Users.Controllers {
[Authorize]
public class AccountController : Controller {
[AllowAnonymous]
public ActionResult Login(string returnUrl) {
if (HttpContext.User.Identity.IsAuthenticated) {
return View("Error", new string[] { "Access Denied" });
}
ViewBag.returnUrl = returnUrl;
return View();
}
[HttpPost]
[AllowAnonymous]
[ValidateAntiForgeryToken]
public async Task<ActionResult> Login(LoginModel details, string returnUrl) {
// ...code omitted for brevity...
}
[Authorize]
public ActionResult Logout() {
AuthManager.SignOut();
return RedirectToAction("Index", "Home");
}
private IAuthenticationManager AuthManager {
get {
return HttpContext.GetOwinContext().Authentication;
}
}](https://image.slidesharecdn.com/asp-230806165525-c099b641/85/ASP-NET-Identity-63-320.jpg)


![CHAPTER 14 ■ APPLYING ASP.NET IDENTITY
30
if (!userMgr.IsInRole(user.Id, roleName)) {
userMgr.AddToRole(user.Id, roleName);
}
}
}
}
Tip
■ For this example, I used the synchronous extension methods to locate and manage the role and user.
As I explained in Chapter 13, I prefer the asynchronous methods by default, but the synchronous methods can be useful
when you need to perform a sequence of related operations.
I have to create instances of AppUserManager and AppRoleManager directly because the PerformInitialSetup
method is called before the OWIN configuration is complete. I use the RoleManager and AppManager objects to create
a role called Administrators and a user called Admin and add the user to the role.
Tip
■ Read Chapter 15 before you add database seeding to your project. I describe database migrations, which allow
you to take control of schema changes in the database and which put the seeding logic in a different place.
With this change, I can use the Authorize attribute to protect the Admin and RoleAdmin controllers. Listing 14-21
shows the change I made to the Admin controller.
Listing 14-21. Restricting Access in the AdminController.cs File
using System.Web;
using System.Web.Mvc;
using Microsoft.AspNet.Identity.Owin;
using Users.Infrastructure;
using Users.Models;
using Microsoft.AspNet.Identity;
using System.Threading.Tasks;
namespace Users.Controllers {
[Authorize(Roles = "Administrators")]
public class AdminController : Controller {
// ...statements omitted for brevity...
}
}
Listing 14-22 shows the corresponding change I made to the RoleAdmin controller.
Listing 14-22. Restricting Access in the RoleAdminController.cs File
using System.ComponentModel.DataAnnotations;
using System.Linq;
using System.Threading.Tasks;
using System.Web;](https://image.slidesharecdn.com/asp-230806165525-c099b641/85/ASP-NET-Identity-66-320.jpg)
![CHAPTER 14 ■ APPLYING ASP.NET IDENTITY
31
using System.Web.Mvc;
using Microsoft.AspNet.Identity;
using Microsoft.AspNet.Identity.Owin;
using Users.Infrastructure;
using Users.Models;
using System.Collections.Generic;
namespace Users.Controllers {
[Authorize(Roles = "Administrators")]
public class RoleAdminController : Controller {
// ...statements omitted for brevity...
}
}
The database is seeded only when the schema is created, which means I need to reset the database to
complete the process. This isn’t something you would do in a real application, of course, but I wanted to wait until I
demonstrated how authentication and authorization worked before creating the administrator account.
To delete the database, open the Visual Studio SQL Server Object Explorer window and locate and right-click the
IdentityDb item. Select Delete from the pop-up menu and check both of the options in the Delete Database dialog
window. Click the OK button to delete the database.
Now create an empty database to which the schema will be added by right-clicking the Databases item, selecting
Add New Database, and entering IdentityDb in the Database Name field. Click OK to create the empty database.
Tip
■ There are step-by-step instructions with screenshots in Chapter 13 for creating the database.
Now start the application and request the /Admin/Index or /RoleAdmin/Index URL. There will be a delay while
the schema is created and the database is seeded, and then you will be prompted to enter your credentials. Use Admin
as the name and MySecret as the password, and you will be granted access to the controllers.
Caution
■ Deleting the database removes the user accounts you created using the details in Table 14-10, which is
why you would not perform this task on a live database containing user details.
Summary
In this chapter, I showed you how to use ASP.NET Identity to authenticate and authorize users. I explained how the
ASP.NET life-cycle events provide a foundation for authenticating requests, how to collect and validate credentials
users, and how to restrict access to action methods based on the roles that a user is a member of. In the next chapter,
I demonstrate some of the advanced features that ASP.NET Identity provides.](https://image.slidesharecdn.com/asp-230806165525-c099b641/85/ASP-NET-Identity-67-320.jpg)


![CHAPTER 15 ■ ADVANCED ASP.NET IDENTITY
4
Defining Custom Properties
Listing 15-1 shows how I added a simple property to the AppUser class to represent the city in which the user lives.
Listing 15-1. Adding a Property in the AppUser.cs File
using System;
using Microsoft.AspNet.Identity.EntityFramework;
namespace Users.Models {
public enum Cities {
LONDON, PARIS, CHICAGO
}
public class AppUser : IdentityUser {
public Cities City { get; set; }
}
}
I have defined an enumeration called Cities that defines values for some large cities and added a property
called City to the AppUser class. To allow the user to view and edit their City property, I added actions to the Home
controller, as shown in Listing 15-2.
Listing 15-2. Adding Support for Custom User Properties in the HomeController.cs File
using System.Web.Mvc;
using System.Collections.Generic;
using System.Web;
using System.Security.Principal;
using System.Threading.Tasks;
using Users.Infrastructure;
using Microsoft.AspNet.Identity;
using Microsoft.AspNet.Identity.Owin;
using Users.Models;
namespace Users.Controllers {
public class HomeController : Controller {
[Authorize]
public ActionResult Index() {
return View(GetData("Index"));
}
[Authorize(Roles = "Users")]
public ActionResult OtherAction() {
return View("Index", GetData("OtherAction"));
}](https://image.slidesharecdn.com/asp-230806165525-c099b641/85/ASP-NET-Identity-71-320.jpg)
![CHAPTER 15 ■ ADVANCED ASP.NET IDENTITY
5
private Dictionary<string, object> GetData(string actionName) {
Dictionary<string, object> dict
= new Dictionary<string, object>();
dict.Add("Action", actionName);
dict.Add("User", HttpContext.User.Identity.Name);
dict.Add("Authenticated", HttpContext.User.Identity.IsAuthenticated);
dict.Add("Auth Type", HttpContext.User.Identity.AuthenticationType);
dict.Add("In Users Role", HttpContext.User.IsInRole("Users"));
return dict;
}
[Authorize]
public ActionResult UserProps() {
return View(CurrentUser);
}
[Authorize]
[HttpPost]
public async Task<ActionResult> UserProps(Cities city) {
AppUser user = CurrentUser;
user.City = city;
await UserManager.UpdateAsync(user);
return View(user);
}
private AppUser CurrentUser {
get {
return UserManager.FindByName(HttpContext.User.Identity.Name);
}
}
private AppUserManager UserManager {
get {
return HttpContext.GetOwinContext().GetUserManager<AppUserManager>();
}
}
}
}
I added a CurrentUser property that uses the AppUserManager class to retrieve an AppUser instance to
represent the current user. I pass the AppUser object as the view model object in the GET version of the UserProps
action method, and the POST method uses it to update the value of the new City property. Listing 15-3 shows the
UserProps.cshtml view, which displays the City property value and contains a form to change it.
Listing 15-3. The Contents of the UserProps.cshtml File in the Views/Home Folder
@using Users.Models
@model AppUser
@{ ViewBag.Title = "UserProps";}](https://image.slidesharecdn.com/asp-230806165525-c099b641/85/ASP-NET-Identity-72-320.jpg)


![CHAPTER 15 ■ ADVANCED ASP.NET IDENTITY
14
Listing 15-11 shows the corresponding change I made to the Home controller to update the Country property
when the City value changes.
Listing 15-11. Setting Custom Properties in the HomeController.cs File
using System.Web.Mvc;
using System.Collections.Generic;
using System.Web;
using System.Security.Principal;
using System.Threading.Tasks;
using Users.Infrastructure;
using Microsoft.AspNet.Identity;
using Microsoft.AspNet.Identity.Owin;
using Users.Models;
namespace Users.Controllers {
public class HomeController : Controller {
// ...other action methods omitted for brevity...
[Authorize]
public ActionResult UserProps() {
return View(CurrentUser);
}
[Authorize]
[HttpPost]
public async Task<ActionResult> UserProps(Cities city) {
AppUser user = CurrentUser;
user.City = city;
user.SetCountryFromCity(city);
await UserManager.UpdateAsync(user);
return View(user);
}
// ...properties omitted for brevity...
}
}
Performing the Migration
All that remains is to create and apply a new migration. Enter the following command into the Package Manager
Console:
Add-Migration CountryProperty](https://image.slidesharecdn.com/asp-230806165525-c099b641/85/ASP-NET-Identity-81-320.jpg)

![CHAPTER 15 ■ ADVANCED ASP.NET IDENTITY
16
This alternative approach uses claims, and in this section I’ll describe how ASP.NET Identity supports claims-
based authorization. Table 15-4 puts claims in context.
Table 15-4. Putting Claims in Context
Question Answer
What is it? Claims are pieces of information about users that you can use to make
authorization decisions. Claims can be obtained from external systems
as well as from the local Identity database.
Why should I care? Claims can be used to flexibly authorize access to action methods.
Unlike conventional roles, claims allow access to be driven by the
information that describes the user.
How is it used by the MVC framework? This feature isn’t used directly by the MVC framework, but it is
integrated into the standard authorization features, such as the
Authorize attribute.
Tip
■ You don’t have to use claims in your applications, and as Chapter 14 showed, ASP.NET Identity is perfectly happy
providing an application with the authentication and authorization services without any need to understand claims at all.
Understanding Claims
A claim is a piece of information about the user, along with some information about where the information came from.
The easiest way to unpack claims is through some practical demonstrations, without which any discussion becomes
too abstract to be truly useful. To get started, I added a Claims controller to the example project, the definition of which
you can see in Listing 15-12.
Listing 15-12. The Contents of the ClaimsController.cs File
using System.Security.Claims;
using System.Web;
using System.Web.Mvc;
namespace Users.Controllers {
public class ClaimsController : Controller {
[Authorize]
public ActionResult Index() {
ClaimsIdentity ident = HttpContext.User.Identity as ClaimsIdentity;
if (ident == null) {
return View("Error", new string[] { "No claims available" });
} else {
return View(ident.Claims);
}
}
}
}](https://image.slidesharecdn.com/asp-230806165525-c099b641/85/ASP-NET-Identity-83-320.jpg)


![CHAPTER 15 ■ ADVANCED ASP.NET IDENTITY
19
public static MvcHtmlString ClaimType(this HtmlHelper html, string claimType) {
FieldInfo[] fields = typeof(ClaimTypes).GetFields();
foreach (FieldInfo field in fields) {
if (field.GetValue(null).ToString() == claimType) {
return new MvcHtmlString(field.Name);
}
}
return new MvcHtmlString(string.Format("{0}",
claimType.Split('/', '.').Last()));
}
}
}
Note
■ The helper method isn’t at all efficient because it reflects on the fields of the ClaimType class for each claim
that is displayed, but it is sufficient for my purposes in this chapter. You won’t often need to display the claim type in
real applications.
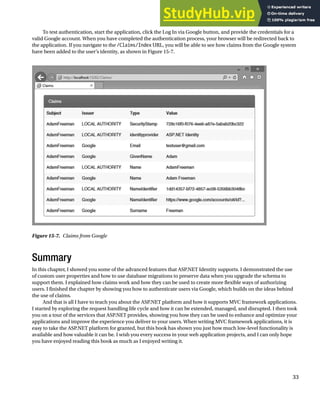
To see why I have created a controller that uses claims without really explaining what they are, start the application,
authenticate as the user Alice (with the password MySecret), and request the /Claims/Index URL. Figure 15-5 shows the
content that is generated.
Figure 15-5. The output from the Index action of the Claims controller
It can be hard to make out the detail in the figure, so I have reproduced the content in Table 15-7.](https://image.slidesharecdn.com/asp-230806165525-c099b641/85/ASP-NET-Identity-86-320.jpg)

![CHAPTER 15 ■ ADVANCED ASP.NET IDENTITY
21
} else {
claims.Add(CreateClaim(ClaimTypes.PostalCode, "NY 10036"));
claims.Add(CreateClaim(ClaimTypes.StateOrProvince, "NY"));
}
return claims;
}
private static Claim CreateClaim(string type, string value) {
return new Claim(type, value, ClaimValueTypes.String, "RemoteClaims");
}
}
}
The GetClaims method takes a ClaimsIdentity argument and uses the Name property to create claims about the
user’s ZIP code and state. This class allows me to simulate a system such as a central HR database, which would be
the authoritative source of location information about staff, for example.
Claims are associated with the user’s identity during the authentication process, and Listing 15-16 shows the
changes I made to the Login action method of the Account controller to call the LocationClaimsProvider class.
Listing 15-16. Associating Claims with a User in the AccountController.cs File
...
[HttpPost]
[AllowAnonymous]
[ValidateAntiForgeryToken]
public async Task<ActionResult> Login(LoginModel details, string returnUrl) {
if (ModelState.IsValid) {
AppUser user = await UserManager.FindAsync(details.Name,
details.Password);
if (user == null) {
ModelState.AddModelError("", "Invalid name or password.");
} else {
ClaimsIdentity ident = await UserManager.CreateIdentityAsync(user,
DefaultAuthenticationTypes.ApplicationCookie);
ident.AddClaims(LocationClaimsProvider.GetClaims(ident));
AuthManager.SignOut();
AuthManager.SignIn(new AuthenticationProperties {
IsPersistent = false
}, ident);
return Redirect(returnUrl);
}
}
ViewBag.returnUrl = returnUrl;
return View(details);
}
...
You can see the effect of the location claims by starting the application, authenticating as a user, and requesting
the /Claim/Index URL. Figure 15-6 shows the claims for Alice. You may have to sign out and sign back in again to
see the change.](https://image.slidesharecdn.com/asp-230806165525-c099b641/85/ASP-NET-Identity-88-320.jpg)

![CHAPTER 15 ■ ADVANCED ASP.NET IDENTITY
23
Listing 15-17. The Contents of the ClaimsRoles.cs File
using System.Collections.Generic;
using System.Security.Claims;
namespace Users.Infrastructure {
public class ClaimsRoles {
public static IEnumerable<Claim> CreateRolesFromClaims(ClaimsIdentity user) {
List<Claim> claims = new List<Claim>();
if (user.HasClaim(x => x.Type == ClaimTypes.StateOrProvince
&& x.Issuer == "RemoteClaims" && x.Value == "DC")
&& user.HasClaim(x => x.Type == ClaimTypes.Role
&& x.Value == "Employees")) {
claims.Add(new Claim(ClaimTypes.Role, "DCStaff"));
}
return claims;
}
}
}
The gnarly looking CreateRolesFromClaims method uses lambda expressions to determine whether the user has
a StateOrProvince claim from the RemoteClaims issuer with a value of DC and a Role claim with a value of Employees.
If the user has both claims, then a Role claim is returned for the DCStaff role. Listing 15-18 shows how I call the
CreateRolesFromClaims method from the Login action in the Account controller.
Listing 15-18. Generating Roles Based on Claims in the AccountController.cs File
...
[HttpPost]
[AllowAnonymous]
[ValidateAntiForgeryToken]
public async Task<ActionResult> Login(LoginModel details, string returnUrl) {
if (ModelState.IsValid) {
AppUser user = await UserManager.FindAsync(details.Name,
details.Password);
if (user == null) {
ModelState.AddModelError("", "Invalid name or password.");
} else {
ClaimsIdentity ident = await UserManager.CreateIdentityAsync(user,
DefaultAuthenticationTypes.ApplicationCookie);
ident.AddClaims(LocationClaimsProvider.GetClaims(ident));
ident.AddClaims(ClaimsRoles.CreateRolesFromClaims(ident));
AuthManager.SignOut();
AuthManager.SignIn(new AuthenticationProperties {
IsPersistent = false
}, ident);
return Redirect(returnUrl);
}
}
ViewBag.returnUrl = returnUrl;
return View(details);
}
...](https://image.slidesharecdn.com/asp-230806165525-c099b641/85/ASP-NET-Identity-90-320.jpg)
![CHAPTER 15 ■ ADVANCED ASP.NET IDENTITY
24
I can then restrict access to an action method based on membership of the DCStaff role. Listing 15-19 shows a
new action method I added to the Claims controller to which I have applied the Authorize attribute.
Listing 15-19. Adding a New Action Method to the ClaimsController.cs File
using System.Security.Claims;
using System.Web;
using System.Web.Mvc;
namespace Users.Controllers {
public class ClaimsController : Controller {
[Authorize]
public ActionResult Index() {
ClaimsIdentity ident = HttpContext.User.Identity as ClaimsIdentity;
if (ident == null) {
return View("Error", new string[] { "No claims available" });
} else {
return View(ident.Claims);
}
}
[Authorize(Roles="DCStaff")]
public string OtherAction() {
return "This is the protected action";
}
}
}
Users will be able to access OtherAction only if their claims grant them membership to the DCStaff role.
Membership of this role is generated dynamically, so a change to the user’s employment status or location information
will change their authorization level.
Authorizing Access Using Claims
The previous example is an effective demonstration of how claims can be used to keep authorizations fresh and
accurate, but it is a little indirect because I generate roles based on claims data and then enforce my authorization
policy based on the membership of that role. A more direct and flexible approach is to enforce authorization directly
by creating a custom authorization filter attribute. Listing 15-20 shows the contents of the ClaimsAccessAttribute.cs
file, which I added to the Infrastructure folder and used to create such a filter.
Listing 15-20. The Contents of the ClaimsAccessAttribute.cs File
using System.Security.Claims;
using System.Web;
using System.Web.Mvc;
namespace Users.Infrastructure {
public class ClaimsAccessAttribute : AuthorizeAttribute {](https://image.slidesharecdn.com/asp-230806165525-c099b641/85/ASP-NET-Identity-91-320.jpg)
![CHAPTER 15 ■ ADVANCED ASP.NET IDENTITY
25
public string Issuer { get; set; }
public string ClaimType { get; set; }
public string Value { get; set; }
protected override bool AuthorizeCore(HttpContextBase context) {
return context.User.Identity.IsAuthenticated
&& context.User.Identity is ClaimsIdentity
&& ((ClaimsIdentity)context.User.Identity).HasClaim(x =>
x.Issuer == Issuer && x.Type == ClaimType && x.Value == Value
);
}
}
}
The attribute I have defined is derived from the AuthorizeAttribute class, which makes it easy to create custom
authorization policies in MVC framework applications by overriding the AuthorizeCore method. My implementation
grants access if the user is authenticated, the IIdentity implementation is an instance of ClaimsIdentity, and the
user has a claim with the issuer, type, and value matching the class properties. Listing 15-21 shows how I applied the
attribute to the Claims controller to authorize access to the OtherAction method based on one of the location claims
created by the LocationClaimsProvider class.
Listing 15-21. Performing Authorization on Claims in the ClaimsController.cs File
using System.Security.Claims;
using System.Web;
using System.Web.Mvc;
using Users.Infrastructure;
namespace Users.Controllers {
public class ClaimsController : Controller {
[Authorize]
public ActionResult Index() {
ClaimsIdentity ident = HttpContext.User.Identity as ClaimsIdentity;
if (ident == null) {
return View("Error", new string[] { "No claims available" });
} else {
return View(ident.Claims);
}
}
[ClaimsAccess(Issuer="RemoteClaims", ClaimType=ClaimTypes.PostalCode,
Value="DC 20500")]
public string OtherAction() {
return "This is the protected action";
}
}
}
My authorization filter ensures that only users whose location claims specify a ZIP code of DC 20500 can invoke
the OtherAction method.](https://image.slidesharecdn.com/asp-230806165525-c099b641/85/ASP-NET-Identity-92-320.jpg)


![CHAPTER 15 ■ ADVANCED ASP.NET IDENTITY
28
Listing 15-23. Adding a Google Login Button to the Login.cshtml File
@model Users.Models.LoginModel
@{ ViewBag.Title = "Login";}
<h2>Log In</h2>
@Html.ValidationSummary()
@using (Html.BeginForm()) {
@Html.AntiForgeryToken();
<input type="hidden" name="returnUrl" value="@ViewBag.returnUrl" />
<div class="form-group">
<label>Name</label>
@Html.TextBoxFor(x => x.Name, new { @class = "form-control" })
</div>
<div class="form-group">
<label>Password</label>
@Html.PasswordFor(x => x.Password, new { @class = "form-control" })
</div>
<button class="btn btn-primary" type="submit">Log In</button>
}
@using (Html.BeginForm("GoogleLogin", "Account")) {
<input type="hidden" name="returnUrl" value="@ViewBag.returnUrl" />
<button class="btn btn-primary" type="submit">Log In via Google</button>
}
The new button submits a form that targets the GoogleLogin action on the Account controller. You can see this
method—and the other changes I made the controller—in Listing 15-24.
Listing 15-24. Adding Support for Google Authentication to the AccountController.cs File
using System.Threading.Tasks;
using System.Web.Mvc;
using Users.Models;
using Microsoft.Owin.Security;
using System.Security.Claims;
using Microsoft.AspNet.Identity;
using Microsoft.AspNet.Identity.Owin;
using Users.Infrastructure;
using System.Web;
namespace Users.Controllers {
[Authorize]
public class AccountController : Controller {
[AllowAnonymous]
public ActionResult Login(string returnUrl) {
if (HttpContext.User.Identity.IsAuthenticated) {
return View("Error", new string[] { "Access Denied" });
}](https://image.slidesharecdn.com/asp-230806165525-c099b641/85/ASP-NET-Identity-95-320.jpg)
![CHAPTER 15 ■ ADVANCED ASP.NET IDENTITY
29
ViewBag.returnUrl = returnUrl;
return View();
}
[HttpPost]
[AllowAnonymous]
[ValidateAntiForgeryToken]
public async Task<ActionResult> Login(LoginModel details, string returnUrl) {
if (ModelState.IsValid) {
AppUser user = await UserManager.FindAsync(details.Name,
details.Password);
if (user == null) {
ModelState.AddModelError("", "Invalid name or password.");
} else {
ClaimsIdentity ident = await UserManager.CreateIdentityAsync(user,
DefaultAuthenticationTypes.ApplicationCookie);
ident.AddClaims(LocationClaimsProvider.GetClaims(ident));
ident.AddClaims(ClaimsRoles.CreateRolesFromClaims(ident));
AuthManager.SignOut();
AuthManager.SignIn(new AuthenticationProperties {
IsPersistent = false
}, ident);
return Redirect(returnUrl);
}
}
ViewBag.returnUrl = returnUrl;
return View(details);
}
[HttpPost]
[AllowAnonymous]
public ActionResult GoogleLogin(string returnUrl) {
var properties = new AuthenticationProperties {
RedirectUri = Url.Action("GoogleLoginCallback",
new { returnUrl = returnUrl})
};
HttpContext.GetOwinContext().Authentication.Challenge(properties, "Google");
return new HttpUnauthorizedResult();
}
[AllowAnonymous]
public async Task<ActionResult> GoogleLoginCallback(string returnUrl) {
ExternalLoginInfo loginInfo = await AuthManager.GetExternalLoginInfoAsync();
AppUser user = await UserManager.FindAsync(loginInfo.Login);
if (user == null) {
user = new AppUser {
Email = loginInfo.Email,
UserName = loginInfo.DefaultUserName,
City = Cities.LONDON, Country = Countries.UK
};](https://image.slidesharecdn.com/asp-230806165525-c099b641/85/ASP-NET-Identity-96-320.jpg)
![CHAPTER 15 ■ ADVANCED ASP.NET IDENTITY
30
IdentityResult result = await UserManager.CreateAsync(user);
if (!result.Succeeded) {
return View("Error", result.Errors);
} else {
result = await UserManager.AddLoginAsync(user.Id, loginInfo.Login);
if (!result.Succeeded) {
return View("Error", result.Errors);
}
}
}
ClaimsIdentity ident = await UserManager.CreateIdentityAsync(user,
DefaultAuthenticationTypes.ApplicationCookie);
ident.AddClaims(loginInfo.ExternalIdentity.Claims);
AuthManager.SignIn(new AuthenticationProperties {
IsPersistent = false }, ident);
return Redirect(returnUrl ?? "/");
}
[Authorize]
public ActionResult Logout() {
AuthManager.SignOut();
return RedirectToAction("Index", "Home");
}
private IAuthenticationManager AuthManager {
get {
return HttpContext.GetOwinContext().Authentication;
}
}
private AppUserManager UserManager {
get {
return HttpContext.GetOwinContext().GetUserManager<AppUserManager>();
}
}
}
}
The GoogleLogin method creates an instance of the AuthenticationProperties class and sets the RedirectUri
property to a URL that targets the GoogleLoginCallback action in the same controller. The next part is a magic phrase
that causes ASP.NET Identity to respond to an unauthorized error by redirecting the user to the Google authentication
page, rather than the one defined by the application:
...
HttpContext.GetOwinContext().Authentication.Challenge(properties, "Google");
return new HttpUnauthorizedResult();
...](https://image.slidesharecdn.com/asp-230806165525-c099b641/85/ASP-NET-Identity-97-320.jpg)


ASP.NET Identity
- 1. 1 ASP.NET Identity In Pro ASP.NET MVC 5, I describe the basic MVC framework authentication and authorization features and explain that Apress has agreed to distribute the relevant chapters from my Pro ASP.NET MVC 5 Platform book when it is published. The three chapters that follow introduce version 2.0 of ASP.NET Identity, which is the new Microsoft platform for managing users. I explain how to create a basic Identity installation, how to authenticate and authorize users, and how you can apply claims-based authorization in your applications. I also demonstrate how you can delegate authentication to third parties. I use Google in these chapters, but the same technique can also be used to authenticate users with accounts managed by Microsoft, Twitter, and Facebook. These chapters are taken as-is from Pro ASP.NET MVC 5 Platform. You don’t need a copy of the Platform book to follow the examples in these chapters, but you will see references to chapters that are not included here. You can download the source code for the example project from www.apress.com/9781430265412. I hope you find these chapters helpful, and I wish you every success in your ASP.NET projects. Adam Freeman, London April 2014
- 2. 1 CHAPTER 13 Getting Started with Identity Identity is a new API from Microsoft to manage users in ASP.NET applications. The mainstay for user management in recent years has been ASP.NET Membership, which has suffered from design choices that were reasonable when it was introduced in 2005 but that have aged badly. The biggest limitation is that the schema used to store the data worked only with SQL Server and was difficult to extend without re-implementing a lot of provider classes. The schema itself was overly complex, which made it harder to implement changes than it should have been. Microsoft made a couple of attempts to improve Membership prior to releasing Identity. The first was known as simple membership, which reduced the complexity of the schema and made it easier to customize user data but still needed a relational storage model. The second attempt was the ASP.NET universal providers, which I used in Chapter 10 when I set up SQL Server storage for session data. The advantage of the universal providers is that they use the Entity Framework Code First feature to automatically create the database schema, which made it possible to create databases where access to schema management tools wasn’t possible, such as the Azure cloud service. But even with the improvements, the fundamental issues of depending on relational data and difficult customizations remained. To address both problems and to provide a more modern user management platform, Microsoft has replaced Membership with Identity. As you’ll learn in this chapter and Chapters 14 and 15, ASP.NET Identity is flexible and extensible, but it is immature, and features that you might take for granted in a more mature system can require a surprising amount of work. Microsoft has over-compensated for the inflexibility of Membership and made Identity so open and so adaptable that it can be used in just about any way—just as long as you have the time and energy to implement what you require. In this chapter, I demonstrate the process of setting up ASP.NET Identity and creating a simple user administration tool that manages individual user accounts that are stored in a database. ASP.NET Identity supports other kinds of user accounts, such as those stored using Active Directory, but I don’t describe them since they are not used that often outside corporations (where Active Directive implementations tend to be so convoluted that it would be difficult for me to provide useful general examples). In Chapter 14, I show you how to perform authentication and authorization using those user accounts, and in Chapter 15, I show you how to move beyond the basics and apply some advanced techniques. Table 13-1 summarizes this chapter.
- 3. CHAPTER 13 ■ GETTING STARTED WITH IDENTITY 2 Preparing the Example Project I created a project called Users for this chapter, following the same steps I have used throughout this book. I selected the Empty template and checked the option to add the folders and references required for an MVC application. I will be using Bootstrap to style the views in this chapter, so enter the following command into the Visual Studio Package Manager Console and press Enter to download and install the NuGet package: Install-Package -version 3.0.3 bootstrap I created a Home controller to act as the focal point for the examples in this chapter. The definition of the controller is shown in Listing 13-1. I’ll be using this controller to describe details of user accounts and data, and the Index action method passes a dictionary of values to the default view via the View method. Listing 13-1. The Contents of the HomeController.cs File using System.Web.Mvc; using System.Collections.Generic; namespace Users.Controllers { public class HomeController : Controller { public ActionResult Index() { Dictionary<string, object> data = new Dictionary<string, object>(); data.Add("Placeholder", "Placeholder"); return View(data); } } } Table 13-1. Chapter Summary Problem Solution Listing Install ASP.NET Identity. Add the NuGet packages and define a connection string and an OWIN start class in the Web.config file. 1–4 Prepare to use ASP.NET Identity. Create classes that represent the user, the user manager, the database context, and the OWIN start class. 5–8 Enumerate user accounts. Use the Users property defined by the user manager class. 9, 10 Create user accounts. Use the CreateAsync method defined by the user manager class. 11–13 Enforce a password policy. Set the PasswordValidator property defined by the user manager class, either using the built-in PasswordValidator class or using a custom derivation. 14–16 Validate new user accounts. Set the UserValidator property defined by the user manager class, either using the built-in UserValidator class or using a custom derivation. 17–19 Delete user accounts. Use the DeleteAsync method defined by the user manager class. 20–22 Modify user accounts. Use the UpdateAsync method defined by the user manager class. 23–24
- 4. CHAPTER 13 ■ GETTING STARTED WITH IDENTITY 3 I created a view by right-clicking the Index action method and selecting Add View from the pop-up menu. I set View Name to Index and set Template to Empty (without model). Unlike the examples in previous chapters, I want to use a common layout for this chapter, so I checked the Use a Layout Page option. When I clicked the Add button, Visual Studio created the Views/Shared/_Layout.cshtml and Views/Home/Index.cshtml files. Listing 13-2 shows the contents of the _Layout.cshtml file. Listing 13-2. The Contents of the _Layout.cshtml File <!DOCTYPE html> <html> <head> <meta name="viewport" content="width=device-width" /> <title>@ViewBag.Title</title> <link href="~/Content/bootstrap.min.css" rel="stylesheet" /> <link href="~/Content/bootstrap-theme.min.css" rel="stylesheet" /> <style> .container { padding-top: 10px; } .validation-summary-errors { color: #f00; } </style> </head> <body class="container"> <div class="container"> @RenderBody() </div> </body> </html> Listing 13-3 shows the contents of the Index.cshtml file. Listing 13-3. The Contents of the Index.cshtml File @{ ViewBag.Title = "Index"; } <div class="panel panel-primary"> <div class="panel-heading">User Details</div> <table class="table table-striped"> @foreach (string key in Model.Keys) { <tr> <th>@key</th> <td>@Model[key]</td> </tr> } </table> </div> To test that the example application is working, select Start Debugging from the Visual Studio Debug menu and navigate to the /Home/Index URL. You should see the result illustrated by Figure 13-1.
- 5. CHAPTER 13 ■ GETTING STARTED WITH IDENTITY 4 Setting Up ASP.NET Identity For most ASP.NET developers, Identity will be the first exposure to the Open Web Interface for .NET (OWIN). OWIN is an abstraction layer that isolates a web application from the environment that hosts it. The idea is that the abstraction will allow for greater innovation in the ASP.NET technology stack, more flexibility in the environments that can host ASP.NET applications, and a lighter-weight server infrastructure. OWIN is an open standard (which you can read at http://owin.org/spec/owin-1.0.0.html). Microsoft has created Project Katana, its implementation of the OWIN standard and a set of components that provide the functionality that web applications require. The attraction to Microsoft is that OWIN/Katana isolates the ASP.NET technology stack from the rest of the .NET Framework, which allows a greater rate of change. OWIN developers select the services that they require for their application, rather than consuming an entire platform as happens now with ASP.NET. Individual services—known as middleware in the OWIN terminology—can be developed at different rates, and developers will be able to choose between providers for different services, rather than being tied to a Microsoft implementation. There is a lot to like about the direction that OWIN and Katana are heading in, but it is in the early days, and it will be some time before it becomes a complete platform for ASP.NET applications. As I write this, it is possible to build Web API and SignalR applications without needing the System.Web namespace or IIS to process requests, but that’s about all. The MVC framework requires the standard ASP.NET platform and will continue to do so for some time to come. The ASP.NET platform and IIS are not going away. Microsoft has been clear that it sees one of the most attractive aspects of OWIN as allowing developers more flexibility in which middleware components are hosted by IIS, and Project Katana already has support for the System.Web namespaces. OWIN and Katana are not the end of ASP.NET—rather, they represent an evolution where Microsoft allows developers more flexibility in how ASP.NET applications are assembled and executed. Tip ■ Identity is the first major ASP.NET component to be delivered as OWIN middleware, but it won’t be the last. Microsoft has made sure that the latest versions of Web API and SignalR don’t depend on the System.Web namespaces, and that means that any component intended for use across the ASP.NET family of technologies has to be delivered via OWIN. I get into more detail about OWIN in my Expert ASP.NET Web API 2 for MVC Developers book, which will be published by Apress in 2014. OWIN and Katana won’t have a major impact on MVC framework developers for some time, but changes are already taking effect—and one of these is that ASP.NET Identity is implemented as an OWIN middleware component. This isn’t ideal because it means that MVC framework applications have to mix OWIN and traditional ASP.NET Figure 13-1. Testing the example application
- 6. CHAPTER 13 ■ GETTING STARTED WITH IDENTITY 5 platform techniques to use Identity, but it isn’t too burdensome once you understand the basics and know how to get OWIN set up, which I demonstrate in the sections that follow. Creating the ASP.NET Identity Database ASP.NET Identity isn’t tied to a SQL Server schema in the same way that Membership was, but relational storage is still the default—and simplest—option, and it is the one that I will be using in this chapter. Although the NoSQL movement has gained momentum in recent years, relational databases are still the mainstream storage choice and are well-understood in most development teams. ASP.NET Identity uses the Entity Framework Code First feature to automatically create its schema, but I still need to create the database into which that schema—and the user data—will be placed, just as I did in Chapter 10 when I created the database for session state data (the universal provider that I used to manage the database uses the same Code First feature). Tip ■ You don’t need to understand how Entity Framework or the Code First feature works to use ASP.NET Identity. As in Chapter 10, I will be using the localdb feature to create my database. As a reminder, localdb is included in Visual Studio and is a cut-down version of SQL Server that allows developers to easily create and work with databases. Select SQL Server Object Explorer from the Visual Studio View menu and right-click the SQL Server object in the window that appears. Select Add SQL Server from the pop-up menu, as shown in Figure 13-2. Figure 13-2. Creating a new database connection Visual Studio will display the Connect to Server dialog. Set the server name to (localdb)v11.0, select the Windows Authentication option, and click the Connect button. A connection to the database will be established and shown in the SQL Server Object Explorer window. Expand the new item, right-click Databases, and select Add New Database from the pop-up window, as shown in Figure 13-3.
- 7. CHAPTER 13 ■ GETTING STARTED WITH IDENTITY 6 Set the Database Name option to IdentityDb, leave the Database Location value unchanged, and click the OK button to create the database. The new database will be shown in the Databases section of the SQL connection in the SQL Server Object Explorer. Adding the Identity Packages Identity is published as a set of NuGet packages, which makes it easy to install them into any project. Enter the following commands into the Package Manager Console: Install-Package Microsoft.AspNet.Identity.EntityFramework –Version 2.0.0 Install-Package Microsoft.AspNet.Identity.OWIN -Version 2.0.0 Install-Package Microsoft.Owin.Host.SystemWeb -Version 2.1.0 Visual Studio can create projects that are configured with a generic user account management configuration, using the Identity API. You can add the templates and code to a project by selecting the MVC template when creating the project and setting the Authentication option to Individual User Accounts. I don’t use the templates because I find them too general and too verbose and because I like to have direct control over the contents and configuration of my projects. I recommend you do the same, not least because you will gain a better understanding of how important features work, but it can be interesting to look at the templates to see how common tasks are performed. Updating the Web.config File Two changes are required to the Web.config file to prepare a project for ASP.NET Identity. The first is a connection string that describes the database I created in the previous section. The second change is to define an application setting that names the class that initializes OWIN middleware and that is used to configure Identity. Listing 13-4 shows the changes I made to the Web.config file. (I explained how connection strings and application settings work in Chapter 9.) Listing 13-4. Preparing the Web.config File for ASP.NET Identity <?xml version="1.0" encoding="utf-8"?> <configuration> Figure 13-3. Adding a new database
- 8. CHAPTER 13 ■ GETTING STARTED WITH IDENTITY 7 <configSections> <section name="entityFramework" type="System.Data.Entity.Internal.ConfigFile.EntityFrameworkSection, EntityFramework, Version=6.0.0.0, Culture=neutral, PublicKeyToken=b77a5c561934e089" requirePermission="false" /> </configSections> <connectionStrings> <add name="IdentityDb" providerName="System.Data.SqlClient" connectionString="Data Source=(localdb)v11.0;Initial Catalog=IdentityDb;Integrated Security=True;Connect Timeout=15;Encrypt=False;TrustServerCertificate=False; MultipleActiveResultSets=True"/> </connectionStrings> <appSettings> <add key="webpages:Version" value="3.0.0.0" /> <add key="webpages:Enabled" value="false" /> <add key="ClientValidationEnabled" value="true" /> <add key="UnobtrusiveJavaScriptEnabled" value="true" /> <add key="owin:AppStartup" value="Users.IdentityConfig" /> </appSettings> <system.web> <compilation debug="true" targetFramework="4.5.1" /> <httpRuntime targetFramework="4.5.1" /> </system.web> <entityFramework> <defaultConnectionFactory type="System.Data.Entity.Infrastructure.LocalDbConnectionFactory, EntityFramework"> <parameters> <parameter value="v11.0" /> </parameters> </defaultConnectionFactory> <providers> <provider invariantName="System.Data.SqlClient" type="System.Data.Entity.SqlServer.SqlProviderServices, EntityFramework.SqlServer" /> </providers> </entityFramework> </configuration> Caution ■ Make sure you put the connectionString value on a single line. I had to break it over several lines to make the listing fit on the page, but ASP.NET expects a single, unbroken string. If in doubt, download the source code that accompanies this book, which is freely available from www.apress.com. OWIN defines its own application startup model, which is separate from the global application class that I described in Chapter 3. The application setting, called owin:AppStartup, specifies a class that OWIN will instantiate when the application starts in order to receive its configuration.
- 9. CHAPTER 13 ■ GETTING STARTED WITH IDENTITY 8 Tip ■ Notice that I have set the MultipleActiveResultSets property to true in the connection string. This allows the results from multiple queries to be read simultaneously, which I rely on in Chapter 14 when I show you how to authorize access to action methods based on role membership. Creating the Entity Framework Classes If you have used Membership in projects, you may be surprised by just how much initial preparation is required for ASP.NET Identity. The extensibility that Membership lacked is readily available in ASP.NET Identity, but it comes with a price of having to create a set of implementation classes that the Entity Framework uses to manage the database. In the sections that follow, I’ll show you how to create the classes needed to get Entity Framework to act as the storage system for ASP.NET Identity. Creating the User Class The first class to define is the one that represents a user, which I will refer to as the user class. The user class is derived from IdentityUser, which is defined in the Microsoft.AspNet.Identity.EntityFramework namespace. IdentityUser provides the basic user representation, which can be extended by adding properties to the derived class, which I describe in Chapter 15. Table 13-2 shows the built-in properties that IdentityUser defines, which are the ones I will be using in this chapter. Table 13-2. The Properties Defined by the IdentityUser Class Name Description Claims Returns the collection of claims for the user, which I describe in Chapter 15 Email Returns the user’s e-mail address Id Returns the unique ID for the user Logins Returns a collection of logins for the user, which I use in Chapter 15 PasswordHash Returns a hashed form of the user password, which I use in the “Implementing the Edit Feature” section Roles Returns the collection of roles that the user belongs to, which I describe in Chapter 14 PhoneNumber Returns the user’s phone number SecurityStamp Returns a value that is changed when the user identity is altered, such as by a password change UserName Returns the username
- 10. CHAPTER 13 ■ GETTING STARTED WITH IDENTITY 9 Tip ■ The classes in the Microsoft.AspNet.Identity.EntityFramework namespace are the Entity Framework–specific concrete implementations of interfaces defined in the Microsoft.AspNet.Identity namespace. IdentityUser, for example, is the implementation of the IUser interface. I am working with the concrete classes because I am relying on the Entity Framework to store my user data in a database, but as ASP.NET Identity matures, you can expect to see alternative implementations of the interfaces that use different storage mechanisms (although most projects will still use the Entity Framework since it comes from Microsoft). What is important at the moment is that the IdentityUser class provides access only to the basic information about a user: the user’s name, e-mail, phone, password hash, role memberships, and so on. If I want to store any additional information about the user, I have to add properties to the class that I derive from IdentityUser and that will be used to represent users in my application. I demonstrate how to do this in Chapter 15. To create the user class for my application, I created a class file called AppUserModels.cs in the Models folder and used it to create the AppUser class, which is shown in Listing 13-5. Listing 13-5. The Contents of the AppUser.cs File using System; using Microsoft.AspNet.Identity.EntityFramework; namespace Users.Models { public class AppUser : IdentityUser { // additional properties will go here } } That’s all I have to do at the moment, although I’ll return to this class in Chapter 15, when I show you how to add application-specific user data properties. Creating the Database Context Class The next step is to create an Entity Framework database context that operates on the AppUser class. This will allow the Code First feature to create and manage the schema for the database and provide access to the data it stores. The context class is derived from IdentityDbContext<T>, where T is the user class (AppUser in the example). I created a folder called Infrastructure in the project and added to it a class file called AppIdentityDbContext.cs, the contents of which are shown in Listing 13-6. Listing 13-6. The Contents of the AppIdentityDbContext.cs File using System.Data.Entity; using Microsoft.AspNet.Identity.EntityFramework; using Users.Models; namespace Users.Infrastructure { public class AppIdentityDbContext : IdentityDbContext<AppUser> { public AppIdentityDbContext() : base("IdentityDb") { }
- 11. CHAPTER 13 ■ GETTING STARTED WITH IDENTITY 10 static AppIdentityDbContext() { Database.SetInitializer<AppIdentityDbContext>(new IdentityDbInit()); } public static AppIdentityDbContext Create() { return new AppIdentityDbContext(); } } public class IdentityDbInit : DropCreateDatabaseIfModelChanges<AppIdentityDbContext> { protected override void Seed(AppIdentityDbContext context) { PerformInitialSetup(context); base.Seed(context); } public void PerformInitialSetup(AppIdentityDbContext context) { // initial configuration will go here } } } The constructor for the AppIdentityDbContext class calls its base with the name of the connection string that will be used to connect to the database, which is IdentityDb in this example. This is how I associate the connection string I defined in Listing 13-4 with ASP.NET Identity. The AppIdentityDbContext class also defines a static constructor, which uses the Database.SetInitializer method to specify a class that will seed the database when the schema is first created through the Entity Framework Code First feature. My seed class is called IdentityDbInit, and I have provided just enough of a class to create a placeholder so that I can return to seeding the database later by adding statements to the PerformInitialSetup method. I show you how to seed the database in Chapter 14. Finally, the AppIdentityDbContext class defines a Create method. This is how instances of the class will be created when needed by the OWIN, using the class I describe in the “Creating the Start Class” section. Note ■ Don’t worry if the role of these classes doesn’t make sense. If you are unfamiliar with the Entity Framework, then I suggest you treat it as something of a black box. Once the basic building blocks are in place—and you can copy the ones into your chapter to get things working—then you will rarely need to edit them. Creating the User Manager Class One of the most important Identity classes is the user manager, which manages instances of the user class. The user manager class must be derived from UserManager<T>, where T is the user class. The UserManager<T> class isn’t specific to the Entity Framework and provides more general features for creating and operating on user data. Table 13-3 shows the basic methods and properties defined by the UserManager<T> class for managing users. There are others, but rather than list them all here, I’ll describe them in context when I describe the different ways in which user data can be managed.
- 12. CHAPTER 13 ■ GETTING STARTED WITH IDENTITY 11 Tip ■ Notice that the names of all of these methods end with Async. This is because ASP.NET Identity is implemented almost entirely using C# asynchronous programming features, which means that operations will be performed concurrently and not block other activities. You will see how this works once I start demonstrating how to create and manage user data. There are also synchronous extension methods for each Async method. I stick to the asynchronous methods for most examples, but the synchronous equivalents are useful if you need to perform multiple related operations in sequence. I have included an example of this in the “Seeding the Database” section of Chapter 14. The synchronous methods are also useful when you want to call Identity methods from within property getters or setters, which I do in Chapter 15. I added a class file called AppUserManager.cs to the Infrastructure folder and used it to define the user manager class, which I have called AppUserManager, as shown in Listing 13-7. Listing 13-7. The Contents of the AppUserManager.cs File using Microsoft.AspNet.Identity; using Microsoft.AspNet.Identity.EntityFramework; using Microsoft.AspNet.Identity.Owin; using Microsoft.Owin; using Users.Models; namespace Users.Infrastructure { public class AppUserManager : UserManager<AppUser> { Table 13-3. The Basic Methods and Properties Defined by the UserManager<T> Class Name Description ChangePasswordAsync(id, old, new) Changes the password for the specified user. CreateAsync(user) Creates a new user without a password. See Chapter 15 for an example. CreateAsync(user, pass) Creates a new user with the specified password. See the “Creating Users” section. DeleteAsync(user) Deletes the specified user. See the “Implementing the Delete Feature” section. FindAsync(user, pass) Finds the object that represents the user and authenticates their password. See Chapter 14 for details of authentication. FindByIdAsync(id) Finds the user object associated with the specified ID. See the “Implementing the Delete Feature” section. FindByNameAsync(name) Finds the user object associated with the specified name. I use this method in the “Seeding the Database” section of Chapter 14. UpdateAsync(user) Pushes changes to a user object back into the database. See the “Implementing the Edit Feature” section. Users Returns an enumeration of the users. See the “Enumerating User Accounts” section.
- 13. CHAPTER 13 ■ GETTING STARTED WITH IDENTITY 12 public AppUserManager(IUserStore<AppUser> store) : base(store) { } public static AppUserManager Create( IdentityFactoryOptions<AppUserManager> options, IOwinContext context) { AppIdentityDbContext db = context.Get<AppIdentityDbContext>(); AppUserManager manager = new AppUserManager(new UserStore<AppUser>(db)); return manager; } } } The static Create method will be called when Identity needs an instance of the AppUserManager, which will happen when I perform operations on user data—something that I will demonstrate once I have finished performing the setup. To create an instance of the AppUserManager class, I need an instance of UserStore<AppUser>. The UserStore<T> class is the Entity Framework implementation of the IUserStore<T> interface, which provides the storage-specific implementation of the methods defined by the UserManager class. To create the UserStore<AppUser>, I need an instance of the AppIdentityDbContext class, which I get through OWIN as follows: ... AppIdentityDbContext db = context.Get<AppIdentityDbContext>(); ... The IOwinContext implementation passed as an argument to the Create method defines a generically typed Get method that returns instances of objects that have been registered in the OWIN start class, which I describe in the following section. Creating the Start Class The final piece I need to get ASP.NET Identity up and running is a start class. In Listing 13-4, I defined an application setting that specified a configuration class for OWIN, like this: ... <add key="owin:AppStartup" value="Users.IdentityConfig" /> ... OWIN emerged independently of ASP.NET and has its own conventions. One of them is that there is a class that is instantiated to load and configure middleware and perform any other configuration work that is required. By default, this class is called Start, and it is defined in the global namespace. This class contains a method called Configuration, which is called by the OWIN infrastructure and passed an implementation of the Owin.IAppBuilder interface, which supports setting up the middleware that an application requires. The Start class is usually defined as a partial class, with its other class files dedicated to each kind of middleware that is being used. I freely ignore this convention, given that the only OWIN middleware that I use in MVC framework applications is Identity. I prefer to use the application setting in the Web.config file to define a single class in the top-level namespace of the application. To this end, I added a class file called IdentityConfig.cs to the App_Start folder and used it to define the class shown in Listing 13-8, which is the class that I specified in the Web.config folder.
- 14. CHAPTER 13 ■ GETTING STARTED WITH IDENTITY 13 Listing 13-8. The Contents of the IdentityConfig.cs File using Microsoft.AspNet.Identity; using Microsoft.Owin; using Microsoft.Owin.Security.Cookies; using Owin; using Users.Infrastructure; namespace Users { public class IdentityConfig { public void Configuration(IAppBuilder app) { app.CreatePerOwinContext<AppIdentityDbContext>(AppIdentityDbContext.Create); app.CreatePerOwinContext<AppUserManager>(AppUserManager.Create); app.UseCookieAuthentication(new CookieAuthenticationOptions { AuthenticationType = DefaultAuthenticationTypes.ApplicationCookie, LoginPath = new PathString("/Account/Login"), }); } } } The IAppBuilder interface is supplemented by a number of extension methods defined in classes in the Owin namespace. The CreatePerOwinContext method creates a new instance of the AppUserManager and AppIdentityDbContext classes for each request. This ensures that each request has clean access to the ASP.NET Identity data and that I don’t have to worry about synchronization or poorly cached database data. The UseCookieAuthentication method tells ASP.NET Identity how to use a cookie to identity authenticated users, where the options are specified through the CookieAuthenticationOptions class. The important part here is the LoginPath property, which specifies a URL that clients should be redirected to when they request content without authentication. I have specified /Account/Login, and I will create the controller that handles these redirections in Chapter 14. Using ASP.NET Identity Now that the basic setup is out of the way, I can start to use ASP.NET Identity to add support for managing users to the example application. In the sections that follow, I will demonstrate how the Identity API can be used to create administration tools that allow for centralized management of users. Table 13-4 puts ASP.NET Identity into context. Table 13-4. Putting Content Caching by Attribute in Context Question Answer What is it? ASP.NET Identity is the API used to manage user data and perform authentication and authorization. Why should I care? Most applications require users to create accounts and provide credentials to access content and features. ASP.NET Identity provides the facilities for performing these operations. How is it used by the MVC framework? ASP.NET Identity isn’t used directly by the MVC framework but integrates through the standard MVC authorization features.
- 15. CHAPTER 13 ■ GETTING STARTED WITH IDENTITY 14 Enumerating User Accounts Centralized user administration tools are useful in just about all applications, even those that allow users to create and manage their own accounts. There will always be some customers who require bulk account creation, for example, and support issues that require inspection and adjustment of user data. From the perspective of this chapter, administration tools are useful because they consolidate a lot of basic user management functions into a small number of classes, making them useful examples to demonstrate the fundamental features of ASP.NET Identity. I started by adding a controller called Admin to the project, which is shown in Listing 13-9, and which I will use to define my user administration functionality. Listing 13-9. The Contents of the AdminController.cs File using System.Web; using System.Web.Mvc; using Microsoft.AspNet.Identity.Owin; using Users.Infrastructure; namespace Users.Controllers { public class AdminController : Controller { public ActionResult Index() { return View(UserManager.Users); } private AppUserManager UserManager { get { return HttpContext.GetOwinContext().GetUserManager<AppUserManager>(); } } } } The Index action method enumerates the users managed by the Identity system; of course, there aren’t any users at the moment, but there will be soon. The important part of this listing is the way that I obtain an instance of the AppUserManager class, through which I manage user information. I will be using the AppUserManager class repeatedly as I implement the different administration functions, and I defined the UserManager property in the Admin controller to simplify my code. The Microsoft.Owin.Host.SystemWeb assembly adds extension methods for the HttpContext class, one of which is GetOwinContext. This provides a per-request context object into the OWIN API through an IOwinContext object. The IOwinContext isn’t that interesting in an MVC framework application, but there is another extension method called GetUserManager<T> that is used to get instances of the user manager class. Tip ■ As you may have gathered, there are lots of extension methods in ASP.NET Identity; overall, the API is something of a muddle as it tries to mix OWIN, abstract Identity functionality, and the concrete Entity Framework storage implementation.
- 16. CHAPTER 13 ■ GETTING STARTED WITH IDENTITY 15 I called the GetUserManager with a generic type parameter to specify the AppUserManager class that I created earlier in the chapter, like this: ... return HttpContext.GetOwinContext().GetUserManager<AppUserManager>(); ... Once I have an instance of the AppUserManager class, I can start to query the data store. The AppUserManager.Users property returns an enumeration of user objects—instances of the AppUser class in my application—which can be queried and manipulated using LINQ. In the Index action method, I pass the value of the Users property to the View method so that I can list details of the users in the view. Listing 13-10 shows the contents of the Views/Admin/Index.cshtml file that I created by right-clicking the Index action method and selecting Add View from the pop-up menu. Listing 13-10. The Contents of the Index.cshtml File in the /Views/Admin Folder @using Users.Models @model IEnumerable<AppUser> @{ ViewBag.Title = "Index"; } <div class="panel panel-primary"> <div class="panel-heading"> User Accounts </div> <table class="table table-striped"> <tr><th>ID</th><th>Name</th><th>Email</th></tr> @if (Model.Count() == 0) { <tr><td colspan="3" class="text-center">No User Accounts</td></tr> } else { foreach (AppUser user in Model) { <tr> <td>@user.Id</td> <td>@user.UserName</td> <td>@user.Email</td> </tr> } } </table> </div> @Html.ActionLink("Create", "Create", null, new { @class = "btn btn-primary" }) This view contains a table that has rows for each user, with columns for the unique ID, username, and e-mail address. If there are no users in the database, then a message is displayed, as shown in Figure 13-4.
- 17. CHAPTER 13 ■ GETTING STARTED WITH IDENTITY 16 I included a Create link in the view (which I styled as a button using Bootstrap) that targets the Create action on the Admin controller. I’ll implement this action shortly to support adding users. RESETTING THE DATABASE When you start the application and navigate to the /Admin/Index URL, it will take a few moments before the contents rendered from the view are displayed. This is because the Entity Framework has connected to the database and determined that there is no schema defined. The Code First feature uses the classes I defined earlier in the chapter (and some which are contained in the Identity assemblies) to create the schema so that it is ready to be queried and to store data. You can see the effect by opening the Visual Studio SQL Server Object Explorer window and expanding entry for the IdentityDB database schema, which will include tables with names such as AspNetUsers and AspNetRoles. To delete the database, right-click the IdentityDb item and select Delete from the pop-up menu. Check both of the options in the Delete Database dialog and click the OK button to delete the database. Right-click the Databases item, select Add New Database (as shown in Figure 13-3), and enter IdentityDb in the Database Name field. Click OK to create the empty database. The next time you start the application and navigate to the Admin/Index URL, the Entity Framework will detect that there is no schema and re-create it. Creating Users I am going to use MVC framework model validation for the input my application receives, and the easiest way to do this is to create simple view models for each of the operations that my controller supports. I added a class file called UserViewModels.cs to the Models folder and used it to define the class shown in Listing 13-11. I’ll add further classes to this file as I define models for additional features. Figure 13-4. Display the (empty) list of users
- 18. CHAPTER 13 ■ GETTING STARTED WITH IDENTITY 17 Listing 13-11. The Contents of the UserViewModels.cs File using System.ComponentModel.DataAnnotations; namespace Users.Models { public class CreateModel { [Required] public string Name { get; set; } [Required] public string Email { get; set; } [Required] public string Password { get; set; } } } The initial model I have defined is called CreateModel, and it defines the basic properties that I require to create a user account: a username, an e-mail address, and a password. I have used the Required attribute from the System.ComponentModel.DataAnnotations namespace to denote that values are required for all three properties defined in the model. I added a pair of Create action methods to the Admin controller, which are targeted by the link in the Index view from the previous section and which uses the standard controller pattern to present a view to the user for a GET request and process form data for a POST request. You can see the new action methods in Listing 13-12. Listing 13-12. Defining the Create Action Methods in the AdminController.cs File using System.Web; using System.Web.Mvc; using Microsoft.AspNet.Identity.Owin; using Users.Infrastructure; using Users.Models; using Microsoft.AspNet.Identity; using System.Threading.Tasks; namespace Users.Controllers { public class AdminController : Controller { public ActionResult Index() { return View(UserManager.Users); } public ActionResult Create() { return View(); } [HttpPost] public async Task<ActionResult> Create(CreateModel model) { if (ModelState.IsValid) { AppUser user = new AppUser {UserName = model.Name, Email = model.Email}; IdentityResult result = await UserManager.CreateAsync(user, model.Password);
- 19. CHAPTER 13 ■ GETTING STARTED WITH IDENTITY 18 if (result.Succeeded) { return RedirectToAction("Index"); } else { AddErrorsFromResult(result); } } return View(model); } private void AddErrorsFromResult(IdentityResult result) { foreach (string error in result.Errors) { ModelState.AddModelError("", error); } } private AppUserManager UserManager { get { return HttpContext.GetOwinContext().GetUserManager<AppUserManager>(); } } } } The important part of this listing is the Create method that takes a CreateModel argument and that will be invoked when the administrator submits their form data. I use the ModelState.IsValid property to check that the data I am receiving contains the values I require, and if it does, I create a new instance of the AppUser class and pass it to the UserManager.CreateAsync method, like this: ... AppUser user = new AppUser {UserName = model.Name, Email = model.Email}; IdentityResult result = await UserManager.CreateAsync(user, model.Password); ... The result from the CreateAsync method is an implementation of the IdentityResult interface, which describes the outcome of the operation through the properties listed in Table 13-5. Table 13-5. The Properties Defined by the IdentityResult Interface Name Description Errors Returns a string enumeration that lists the errors encountered while attempting the operation Succeeded Returns true if the operation succeeded
- 20. CHAPTER 13 ■ GETTING STARTED WITH IDENTITY 19 USING THE ASP .NET IDENTITY ASYNCHRONOUS METHODS You will notice that all of the operations for manipulating user data, such as the UserManager.CreateAsync method I used in Listing 13-12, are available as asynchronous methods. Such methods are easily consumed with the async and await keywords. Using asynchronous Identity methods allows your action methods to be executed asynchronously, which can improve the overall throughput of your application. However, you can also use synchronous extension methods provided by the Identity API. All of the commonly used asynchronous methods have a synchronous wrapper so that the functionality of the UserManager.CreateAsync method can be called through the synchronous UserManager.Create method. I use the asynchronous methods for preference, and I recommend you follow the same approach in your projects. The synchronous methods can be useful for creating simpler code when you need to perform multiple dependent operations, so I used them in the “Seeding the Database” section of Chapter 14 as a demonstration. I inspect the Succeeded property in the Create action method to determine whether I have been able to create a new user record in the database. If the Succeeded property is true, then I redirect the browser to the Index action so that list of users is displayed: ... if (result.Succeeded) { return RedirectToAction("Index"); } else { AddErrorsFromResult(result); } ... If the Succeeded property is false, then I call the AddErrorsFromResult method, which enumerates the messages from the Errors property and adds them to the set of model state errors, taking advantage of the MVC framework model validation feature. I defined the AddErrorsFromResult method because I will have to process errors from other operations as I build the functionality of my administration controller. The last step is to create the view that will allow the administrator to create new accounts. Listing 13-13 shows the contents of the Views/Admin/Create.cshtml file. Listing 13-13. The Contents of the Create.cshtml File @model Users.Models.CreateModel @{ ViewBag.Title = "Create User";} <h2>Create User</h2> @Html.ValidationSummary(false) @using (Html.BeginForm()) { <div class="form-group"> <label>Name</label> @Html.TextBoxFor(x => x.Name, new { @class = "form-control"}) </div> <div class="form-group"> <label>Email</label> @Html.TextBoxFor(x => x.Email, new { @class = "form-control" }) </div>
- 21. CHAPTER 13 ■ GETTING STARTED WITH IDENTITY 20 <div class="form-group"> <label>Password</label> @Html.PasswordFor(x => x.Password, new { @class = "form-control" }) </div> <button type="submit" class="btn btn-primary">Create</button> @Html.ActionLink("Cancel", "Index", null, new { @class = "btn btn-default"}) } There is nothing special about this view—it is a simple form that gathers values that the MVC framework will bind to the properties of the model class that is passed to the Create action method. Testing the Create Functionality To test the ability to create a new user account, start the application, navigate to the /Admin/Index URL, and click the Create button. Fill in the form with the values shown in Table 13-6. Figure 13-5. The effect of adding a new user account Table 13-6. The Values for Creating an Example User Name Value Name Joe Email [email protected] Password secret Tip ■ Although not widely known by developers, there are domains that are reserved for testing, including example.com. You can see a complete list at https://tools.ietf.org/html/rfc2606. Once you have entered the values, click the Create button. ASP.NET Identity will create the user account, which will be displayed when your browser is redirected to the Index action method, as shown in Figure 13-5. You will see a different ID value because IDs are randomly generated for each user account.
- 22. CHAPTER 13 ■ GETTING STARTED WITH IDENTITY 21 Click the Create button again and enter the same details into the form, using the values in Table 13-6. This time when you submit the form, you will see an error reported through the model validation summary, as shown in Figure 13-6. Figure 13-6. An error trying to create a new user Table 13-7. The Properties Defined by the PasswordValidator Class Name Description RequiredLength Specifies the minimum length of a valid passwords. RequireNonLetterOrDigit When set to true, valid passwords must contain a character that is neither a letter nor a digit. RequireDigit When set to true, valid passwords must contain a digit. RequireLowercase When set to true, valid passwords must contain a lowercase character. RequireUppercase When set to true, valid passwords must contain a uppercase character. Validating Passwords One of the most common requirements, especially for corporate applications, is to enforce a password policy. ASP.NET Identity provides the PasswordValidator class, which can be used to configure a password policy using the properties described in Table 13-7.
- 23. CHAPTER 13 ■ GETTING STARTED WITH IDENTITY 22 A password policy is defined by creating an instance of the PasswordValidator class, setting the property values, and using the object as the value for the PasswordValidator property in the Create method that OWIN uses to instantiate the AppUserManager class, as shown in Listing 13-14. Listing 13-14. Setting a Password Policy in the AppUserManager.cs File using Microsoft.AspNet.Identity; using Microsoft.AspNet.Identity.EntityFramework; using Microsoft.AspNet.Identity.Owin; using Microsoft.Owin; using Users.Models; namespace Users.Infrastructure { public class AppUserManager : UserManager<AppUser> { public AppUserManager(IUserStore<AppUser> store) : base(store) { } public static AppUserManager Create(IdentityFactoryOptions<AppUserManager> options, IOwinContext context) { AppIdentityDbContext db = context.Get<AppIdentityDbContext>(); AppUserManager manager = new AppUserManager( new UserStore<AppUser>(db)); manager.PasswordValidator = new PasswordValidator { RequiredLength = 6, RequireNonLetterOrDigit = false, RequireDigit = false, RequireLowercase = true, RequireUppercase = true }; return manager; } } } I used the PasswordValidator class to specify a policy that requires at least six characters and a mix of uppercase and lowercase characters. You can see how the policy is applied by starting the application, navigating to the /Admin/ Index URL, clicking the Create button, and trying to create an account that has the password secret. The password doesn’t meet the new password policy, and an error is added to the model state, as shown in Figure 13-7.
- 24. CHAPTER 13 ■ GETTING STARTED WITH IDENTITY 23 Implementing a Custom Password Validator The built-in password validation is sufficient for most applications, but you may need to implement a custom policy, especially if you are implementing a corporate line-of-business application where complex password policies are common. Extending the built-in functionality is done by deriving a new class from PasswordValidatator and overriding the ValidateAsync method. As a demonstration, I added a class file called CustomPasswordValidator.cs in the Infrastructure folder and used it to define the class shown in Listing 13-15. Listing 13-15. The Contents of the CustomPasswordValidator.cs File using System.Linq; using System.Threading.Tasks; using Microsoft.AspNet.Identity; namespace Users.Infrastructure { public class CustomPasswordValidator : PasswordValidator { public override async Task<IdentityResult> ValidateAsync(string pass) { IdentityResult result = await base.ValidateAsync(pass); if (pass.Contains("12345")) { var errors = result.Errors.ToList(); Figure 13-7. Reporting an error when validating a password
- 25. CHAPTER 13 ■ GETTING STARTED WITH IDENTITY 24 errors.Add("Passwords cannot contain numeric sequences"); result = new IdentityResult(errors); } return result; } } } I have overridden the ValidateAsync method and call the base implementation so I can benefit from the built-in validation checks. The ValidateAsync method is passed the candidate password, and I perform my own check to ensure that the password does not contain the sequence 12345. The properties of the IdentityResult class are read-only, which means that if I want to report a validation error, I have to create a new instance, concatenate my error with any errors from the base implementation, and pass the combined list as the constructor argument. I used LINQ to concatenate the base errors with my custom one. Listing 13-16 shows the application of my custom password validator in the AppUserManager class. Listing 13-16. Applying a Custom Password Validator in the AppUserManager.cs File using Microsoft.AspNet.Identity; using Microsoft.AspNet.Identity.EntityFramework; using Microsoft.AspNet.Identity.Owin; using Microsoft.Owin; using Users.Models; namespace Users.Infrastructure { public class AppUserManager : UserManager<AppUser> { public AppUserManager(IUserStore<AppUser> store) : base(store) { } public static AppUserManager Create(IdentityFactoryOptions<AppUserManager> options, IOwinContext context) { AppIdentityDbContext db = context.Get<AppIdentityDbContext>(); AppUserManager manager = new AppUserManager( new UserStore<AppUser>(db)); manager.PasswordValidator = new CustomPasswordValidator { RequiredLength = 6, RequireNonLetterOrDigit = false, RequireDigit = false, RequireLowercase = true, RequireUppercase = true }; return manager; } } }
- 26. CHAPTER 13 ■ GETTING STARTED WITH IDENTITY 25 To test the custom password validation, try to create a new user account with the password secret12345. This will break two of the validation rules—one from the built-in validator and one from my custom implementation. Error messages for both problems are added to the model state and displayed when the Create button is clicked, as shown in Figure 13-8. Figure 13-8. The effect of a custom password validation policy Table 13-8. The Properties Defined by the UserValidator Class Name Description AllowOnlyAlphanumericUserNames When true, usernames can contain only alphanumeric characters. RequireUniqueEmail When true, e-mail addresses must be unique. Validating User Details More general validation can be performed by creating an instance of the UserValidator class and using the properties it defines to restrict other user property values. Table 13-8 describes the UserValidator properties. Performing validation on user details is done by creating an instance of the UserValidator class and assigning it to the UserValidator property of the user manager class within the Create method that OWIN uses to create instances. Listing 13-17 shows an example of using the built-in validator class.
- 27. CHAPTER 13 ■ GETTING STARTED WITH IDENTITY 26 Listing 13-17. Using the Built-in user Validator Class in the AppUserManager.cs File using Microsoft.AspNet.Identity; using Microsoft.AspNet.Identity.EntityFramework; using Microsoft.AspNet.Identity.Owin; using Microsoft.Owin; using Users.Models; namespace Users.Infrastructure { public class AppUserManager : UserManager<AppUser> { public AppUserManager(IUserStore<AppUser> store) : base(store) { } public static AppUserManager Create(IdentityFactoryOptions<AppUserManager> options, IOwinContext context) { AppIdentityDbContext db = context.Get<AppIdentityDbContext>(); AppUserManager manager = new AppUserManager( new UserStore<AppUser>(db)); manager.PasswordValidator = new CustomPasswordValidator { RequiredLength = 6, RequireNonLetterOrDigit = false, RequireDigit = false, RequireLowercase = true, RequireUppercase = true }; manager.UserValidator = new UserValidator<AppUser>(manager) { AllowOnlyAlphanumericUserNames = true, RequireUniqueEmail = true }; return manager; } } } The UserValidator class takes a generic type parameter that specifies the type of the user class, which is AppUser in this case. Its constructor argument is the user manager class, which is an instance of the user manager class (which is AppUserManager for my application). The built-in validation support is rather basic, but you can create a custom validation policy by creating a class that is derived from UserValidator. As a demonstration, I added a class file called CustomUserValidator.cs to the Infrastructure folder and used it to create the class shown in Listing 13-18. Listing 13-18. The Contents of the CustomUserValidator.cs File using System.Linq; using System.Threading.Tasks; using Microsoft.AspNet.Identity; using Users.Models;
- 28. CHAPTER 13 ■ GETTING STARTED WITH IDENTITY 27 namespace Users.Infrastructure { public class CustomUserValidator : UserValidator<AppUser> { public CustomUserValidator(AppUserManager mgr) : base(mgr) { } public override async Task<IdentityResult> ValidateAsync(AppUser user) { IdentityResult result = await base.ValidateAsync(user); if (!user.Email.ToLower().EndsWith("@example.com")) { var errors = result.Errors.ToList(); errors.Add("Only example.com email addresses are allowed"); result = new IdentityResult(errors); } return result; } } } The constructor of the derived class must take an instance of the user manager class and call the base implementation so that the built-in validation checks can be performed. Custom validation is implemented by overriding the ValidateAsync method, which takes an instance of the user class and returns an IdentityResult object. My custom policy restricts users to e-mail addresses in the example.com domain and performs the same LINQ manipulation I used for password validation to concatenate my error message with those produced by the base class. Listing 13-19 shows how I applied my custom validation class in the Create method of the AppUserManager class, replacing the default implementation. Listing 13-19. Using a Custom User Validation Class in the AppUserManager.cs File using Microsoft.AspNet.Identity; using Microsoft.AspNet.Identity.EntityFramework; using Microsoft.AspNet.Identity.Owin; using Microsoft.Owin; using Users.Models; namespace Users.Infrastructure { public class AppUserManager : UserManager<AppUser> { public AppUserManager(IUserStore<AppUser> store) : base(store) { } public static AppUserManager Create(IdentityFactoryOptions<AppUserManager> options, IOwinContext context) { AppIdentityDbContext db = context.Get<AppIdentityDbContext>(); AppUserManager manager = new AppUserManager( new UserStore<AppUser>(db));
- 29. CHAPTER 13 ■ GETTING STARTED WITH IDENTITY 28 manager.PasswordValidator = new CustomPasswordValidator { RequiredLength = 6, RequireNonLetterOrDigit = false, RequireDigit = false, RequireLowercase = true, RequireUppercase = true }; manager.UserValidator = new CustomUserValidator(manager) { AllowOnlyAlphanumericUserNames = true, RequireUniqueEmail = true }; return manager; } } } You can see the result if you try to create an account with an e-mail address such as [email protected], as shown in Figure 13-9. Figure 13-9. An error message shown by a custom user validation policy
- 30. CHAPTER 13 ■ GETTING STARTED WITH IDENTITY 29 Completing the Administration Features I only have to implement the features for editing and deleting users to complete my administration tool. In Listing 13-20, you can see the changes I made to the Views/Admin/Index.cshtml file to target Edit and Delete actions in the Admin controller. Listing 13-20. Adding Edit and Delete Buttons to the Index.cshtml File @using Users.Models @model IEnumerable<AppUser> @{ ViewBag.Title = "Index"; } <div class="panel panel-primary"> <div class="panel-heading"> User Accounts </div> <table class="table table-striped"> <tr><th>ID</th><th>Name</th><th>Email</th><th></th></tr> @if (Model.Count() == 0) { <tr><td colspan="4" class="text-center">No User Accounts</td></tr> } else { foreach (AppUser user in Model) { <tr> <td>@user.Id</td> <td>@user.UserName</td> <td>@user.Email</td> <td> @using (Html.BeginForm("Delete", "Admin", new { id = user.Id })) { @Html.ActionLink("Edit", "Edit", new { id = user.Id }, new { @class = "btn btn-primary btn-xs" }) <button class="btn btn-danger btn-xs" type="submit"> Delete </button> } </td> </tr> } } </table> </div> @Html.ActionLink("Create", "Create", null, new { @class = "btn btn-primary" }) Tip ■ You will notice that I have put the Html.ActionLink call that targets the Edit action method inside the scope of the Html.Begin helper. I did this solely so that the Bootstrap styles will style both elements as buttons displayed on a single line.
- 31. CHAPTER 13 ■ GETTING STARTED WITH IDENTITY 30 Implementing the Delete Feature The user manager class defines a DeleteAsync method that takes an instance of the user class and removes it from the database. In Listing 13-21, you can see how I have used the DeleteAsync method to implement the delete feature of the Admin controller. Listing 13-21. Deleting Users in the AdminController.cs File using System.Web; using System.Web.Mvc; using Microsoft.AspNet.Identity.Owin; using Users.Infrastructure; using Users.Models; using Microsoft.AspNet.Identity; using System.Threading.Tasks; namespace Users.Controllers { public class AdminController : Controller { // ...other action methods omitted for brevity... [HttpPost] public async Task<ActionResult> Delete(string id) { AppUser user = await UserManager.FindByIdAsync(id); if (user != null) { IdentityResult result = await UserManager.DeleteAsync(user); if (result.Succeeded) { return RedirectToAction("Index"); } else { return View("Error", result.Errors); } } else { return View("Error", new string[] { "User Not Found" }); } } private void AddErrorsFromResult(IdentityResult result) { foreach (string error in result.Errors) { ModelState.AddModelError("", error); } } private AppUserManager UserManager { get { return HttpContext.GetOwinContext().GetUserManager<AppUserManager>(); } } } }
- 32. CHAPTER 13 ■ GETTING STARTED WITH IDENTITY 31 My action method receives the unique ID for the user as an argument, and I use the FindByIdAsync method to locate the corresponding user object so that I can pass it to DeleteAsync method. The result of the DeleteAsync method is an IdentityResult, which I process in the same way I did in earlier examples to ensure that any errors are displayed to the user. You can test the delete functionality by creating a new user and then clicking the Delete button that appears alongside it in the Index view. There is no view associated with the Delete action, so to display any errors I created a view file called Error.cshtml in the Views/Shared folder, the contents of which are shown in Listing 13-22. Listing 13-22. The Contents of the Error.cshtml File @model IEnumerable<string> @{ ViewBag.Title = "Error";} <div class="alert alert-danger"> @switch (Model.Count()) { case 0: @: Something went wrong. Please try again break; case 1: @Model.First(); break; default: @: The following errors were encountered: <ul> @foreach (string error in Model) { <li>@error</li> } </ul> break; } </div> @Html.ActionLink("OK", "Index", null, new { @class = "btn btn-default" }) Tip ■ I put this view in the Views/Shared folder so that it can be used by other controllers, including the one I create to manage roles and role membership in Chapter 14. Implementing the Edit Feature To complete the administration tool, I need to add support for editing the e-mail address and password for a user account. These are the only properties defined by users at the moment, but I’ll show you how to extend the schema with custom properties in Chapter 15. Listing 13-23 shows the Edit action methods that I added to the Admin controller. Listing 13-23. Adding the Edit Actions in the AdminController.cs File using System.Web; using System.Web.Mvc; using Microsoft.AspNet.Identity.Owin; using Users.Infrastructure; using Users.Models;
- 33. CHAPTER 13 ■ GETTING STARTED WITH IDENTITY 32 using Microsoft.AspNet.Identity; using System.Threading.Tasks; namespace Users.Controllers { public class AdminController : Controller { // ...other action methods omitted for brevity... public async Task<ActionResult> Edit(string id) { AppUser user = await UserManager.FindByIdAsync(id); if (user != null) { return View(user); } else { return RedirectToAction("Index"); } } [HttpPost] public async Task<ActionResult> Edit(string id, string email, string password) { AppUser user = await UserManager.FindByIdAsync(id); if (user != null) { user.Email = email; IdentityResult validEmail = await UserManager.UserValidator.ValidateAsync(user); if (!validEmail.Succeeded) { AddErrorsFromResult(validEmail); } IdentityResult validPass = null; if (password != string.Empty) { validPass = await UserManager.PasswordValidator.ValidateAsync(password); if (validPass.Succeeded) { user.PasswordHash = UserManager.PasswordHasher.HashPassword(password); } else { AddErrorsFromResult(validPass); } } if ((validEmail.Succeeded && validPass == null) || ( validEmail.Succeeded && password != string.Empty && validPass.Succeeded)) { IdentityResult result = await UserManager.UpdateAsync(user); if (result.Succeeded) { return RedirectToAction("Index"); } else { AddErrorsFromResult(result); } }
- 34. CHAPTER 13 ■ GETTING STARTED WITH IDENTITY 33 } else { ModelState.AddModelError("", "User Not Found"); } return View(user); } private void AddErrorsFromResult(IdentityResult result) { foreach (string error in result.Errors) { ModelState.AddModelError("", error); } } private AppUserManager UserManager { get { return HttpContext.GetOwinContext().GetUserManager<AppUserManager>(); } } } } The Edit action targeted by GET requests uses the ID string embedded in the Index view to call the FindByIdAsync method in order to get an AppUser object that represents the user. The more complex implementation receives the POST request, with arguments for the user ID, the new e-mail address, and the password. I have to perform several tasks to complete the editing operation. The first task is to validate the values I have received. I am working with a simple user object at the moment—although I’ll show you how to customize the data stored for users in Chapter 15—but even so, I need to validate the user data to ensure that I don’t violate the custom policies defined in the “Validating User Details” and “Validating Passwords” sections. I start by validating the e-mail address, which I do like this: ... user.Email = email; IdentityResult validEmail = await UserManager.UserValidator.ValidateAsync(user); if (!validEmail.Succeeded) { AddErrorsFromResult(validEmail); } ... Tip ■ Notice that I have to change the value of the Email property before I perform the validation because the ValidateAsync method only accepts instances of the user class. The next step is to change the password, if one has been supplied. ASP.NET Identity stores hashes of passwords, rather than the passwords themselves—this is intended to prevent passwords from being stolen. My next step is to take the validated password and generate the hash code that will be stored in the database so that the user can be authenticated (which I demonstrate in Chapter 14).
- 35. CHAPTER 13 ■ GETTING STARTED WITH IDENTITY 34 Passwords are converted to hashes through an implementation of the IPasswordHasher interface, which is obtained through the AppUserManager.PasswordHasher property. The IPasswordHasher interface defines the HashPassword method, which takes a string argument and returns its hashed value, like this: ... if (password != string.Empty) { validPass = await UserManager.PasswordValidator.ValidateAsync(password); if (validPass.Succeeded) { user.PasswordHash = UserManager.PasswordHasher.HashPassword(password); } else { AddErrorsFromResult(validPass); } } ... Changes to the user class are not stored in the database until the UpdateAsync method is called, like this: ... if ((validEmail.Succeeded && validPass == null) || ( validEmail.Succeeded && password != string.Empty && validPass.Succeeded)) { IdentityResult result = await UserManager.UpdateAsync(user); if (result.Succeeded) { return RedirectToAction("Index"); } else { AddErrorsFromResult(result); } } ... Creating the View The final component is the view that will render the current values for a user and allow new values to be submitted to the controller. Listing 13-24 shows the contents of the Views/Admin/Edit.cshtml file. Listing 13-24. The Contents of the Edit.cshtml File @model Users.Models.AppUser @{ ViewBag.Title = "Edit"; } @Html.ValidationSummary(false) <h2>Edit User</h2> <div class="form-group"> <label>Name</label> <p class="form-control-static">@Model.Id</p> </div> @using (Html.BeginForm()) { @Html.HiddenFor(x => x.Id) <div class="form-group"> <label>Email</label> @Html.TextBoxFor(x => x.Email, new { @class = "form-control" }) </div>
- 36. CHAPTER 13 ■ GETTING STARTED WITH IDENTITY 35 <div class="form-group"> <label>Password</label> <input name="password" type="password" class="form-control" /> </div> <button type="submit" class="btn btn-primary">Save</button> @Html.ActionLink("Cancel", "Index", null, new { @class = "btn btn-default" }) } There is nothing special about the view. It displays the user ID, which cannot be changed, as static text and provides a form for editing the e-mail address and password, as shown in Figure 13-10. Validation problems are displayed in the validation summary section of the view, and successfully editing a user account will return to the list of accounts in the system. Figure 13-10. Editing a user account Summary In this chapter, I showed you how to create the configuration and classes required to use ASP.NET Identity and demonstrated how they can be applied to create a user administration tool. In the next chapter, I show you how to perform authentication and authorization with ASP.NET Identity.
- 37. 1 CHAPTER 14 Applying ASP.NET Identity In this chapter, I show you how to apply ASP.NET Identity to authenticate and authorize the user accounts created in the previous chapter. I explain how the ASP.NET platform provides a foundation for authenticating requests and how ASP.NET Identity fits into that foundation to authenticate users and enforce authorization through roles. Table 14-1 summarizes this chapter. Table 14-1. Chapter Summary Problem Solution Listing Prepare an application for user authentication. Apply the Authorize attribute to restrict access to action methods and define a controller to which users will be redirected to provide credentials. 1–4 Authenticate a user. Check the name and password using the FindAsync method defined by the user manager class and create an implementation of the IIdentity interface using the CreateIdentityMethod. Set an authentication cookie for subsequent requests by calling the SignIn method defined by the authentication manager class. 5 Prepare an application for role-based authorization. Create a role manager class and register it for instantiation in the OWIN startup class. 6–8 Create and delete roles. Use the CreateAsync and DeleteAsync methods defined by the role manager class. 9–12 Manage role membership. Use the AddToRoleAsync and RemoveFromRoleAsync methods defined by the user manager class. 13–15 Use roles for authorization. Set the Roles property of the Authorize attribute. 16–19 Seed the database with initial content. Use the database context initialization class. 20, 21 Preparing the Example Project In this chapter, I am going to continue working on the Users project I created in Chapter 13. No changes to the application components are required. Authenticating Users The most fundamental activity for ASP.NET Identity is to authenticate users, and in this section, I explain and demonstrate how this is done. Table 14-2 puts authentication into context.
- 38. CHAPTER 14 ■ APPLYING ASP.NET IDENTITY 2 Tip ■ I use names and passwords stored in the ASP.NET Identity database in this chapter. In Chapter 15, I demonstrate how ASP.NET Identity can be used to authenticate users with a service from Google (Identity also supports authentication for Microsoft, Facebook, and Twitter accounts). Table 14-2. Putting Authentication in Context Question Answer What is it? Authentication validates credentials provided by users. Once the user is authenticated, requests that originate from the browser contain a cookie that represents the user identity. Why should I care? Authentication is how you check the identity of your users and is the first step toward restricting access to sensitive parts of the application. How is it used by the MVC framework? Authentication features are accessed through the Authorize attribute, which is applied to controllers and action methods in order to restrict access to authenticated users. Understanding the Authentication/Authorization Process The ASP.NET Identity system integrates into the ASP.NET platform, which means you use the standard MVC framework techniques to control access to action methods, such as the Authorize attribute. In this section, I am going to apply basic restrictions to the Index action method in the Home controller and then implement the features that allow users to identify themselves so they can gain access to it. Listing 14-1 shows how I have applied the Authorize attribute to the Home controller. Listing 14-1. Securing the Home Controller using System.Web.Mvc; using System.Collections.Generic; namespace Users.Controllers { public class HomeController : Controller { [Authorize] public ActionResult Index() { Dictionary<string, object> data = new Dictionary<string, object>(); data.Add("Placeholder", "Placeholder"); return View(data); } } } Using the Authorize attribute in this way is the most general form of authorization and restricts access to the Index action methods to requests that are made by users who have been authenticated by the application. If you start the application and request a URL that targets the Index action on the Home controller (/Home/Index, /Home, or just /), you will see the error shown by Figure 14-1.
- 39. CHAPTER 14 ■ APPLYING ASP.NET IDENTITY 3 The ASP.NET platform provides some useful information about the user through the HttpContext object, which is used by the Authorize attribute to check the status of the current request and see whether the user has been authenticated. The HttpContext.User property returns an implementation of the IPrincipal interface, which is defined in the System.Security.Principal namespace. The IPrincipal interface defines the property and method shown in Table 14-3. Figure 14-1. Requesting a protected URL Table 14-3. The Members Defined by the IPrincipal Interface Name Description Identity Returns an implementation of the IIdentity interface that describes the user associated with the request. IsInRole(role) Returns true if the user is a member of the specified role. See the “Authorizing Users with Roles” section for details of managing authorizations with roles. The implementation of IIdentity interface returned by the IPrincipal.Identity property provides some basic, but useful, information about the current user through the properties I have described in Table 14-4. Table 14-4. The Properties Defined by the IIdentity Interface Name Description AuthenticationType Returns a string that describes the mechanism used to authenticate the user IsAuthenticated Returns true if the user has been authenticated Name Returns the name of the current user
- 40. CHAPTER 14 ■ APPLYING ASP.NET IDENTITY 4 Tip ■ In Chapter 15 I describe the implementation class that ASP.NET Identity uses for the IIdentity interface, which is called ClaimsIdentity. ASP.NET Identity contains a module that handles the AuthenticateRequest life-cycle event, which I described in Chapter 3, and uses the cookies sent by the browser to establish whether the user has been authenticated. I’ll show you how these cookies are created shortly. If the user is authenticated, the ASP.NET framework module sets the value of the IIdentity.IsAuthenticated property to true and otherwise sets it to false. (I have yet to implement the feature that will allow users to authenticate, which means that the value of the IsAuthenticated property is always false in the example application.) The Authorize module checks the value of the IsAuthenticated property and, finding that the user isn’t authenticated, sets the result status code to 401 and terminates the request. At this point, the ASP.NET Identity module intercepts the request and redirects the user to the /Account/Login URL. This is the URL that I defined in the IdentityConfig class, which I specified in Chapter 13 as the OWIN startup class, like this: using Microsoft.AspNet.Identity; using Microsoft.Owin; using Microsoft.Owin.Security.Cookies; using Owin; using Users.Infrastructure; namespace Users { public class IdentityConfig { public void Configuration(IAppBuilder app) { app.CreatePerOwinContext<AppUserManager>(AppUserManager.Create); app.UseCookieAuthentication(new CookieAuthenticationOptions { AuthenticationType = DefaultAuthenticationTypes.ApplicationCookie, LoginPath = new PathString("/Account/Login"), }); } } } The browser requests the /Account/Login URL, but since it doesn’t correspond to any controller or action in the example project, the server returns a 404 – Not Found response, leading to the error message shown in Figure 14-1. Preparing to Implement Authentication Even though the request ends in an error message, the request in the previous section illustrates how the ASP.NET Identity system fits into the standard ASP.NET request life cycle. The next step is to implement a controller that will receive requests for the /Account/Login URL and authenticate the user. I started by adding a new model class to the UserViewModels.cs file, as shown in Listing 14-2.
- 41. CHAPTER 14 ■ APPLYING ASP.NET IDENTITY 5 Listing 14-2. Adding a New Model Class to the UserViewModels.cs File using System.ComponentModel.DataAnnotations; namespace Users.Models { public class CreateModel { [Required] public string Name { get; set; } [Required] public string Email { get; set; } [Required] public string Password { get; set; } } public class LoginModel { [Required] public string Name { get; set; } [Required] public string Password { get; set; } } } The new model has Name and Password properties, both of which are decorated with the Required attribute so that I can use model validation to check that the user has provided values. Tip ■ In a real project, I would use client-side validation to check that the user has provided name and password values before submitting the form to the server, but I am going to keep things focused on Identity and the server-side functionality in this chapter. See Pro ASP.NET MVC 5 for details of client-side form validation. I added an Account controller to the project, as shown in Listing 14-3, with Login action methods to collect and process the user’s credentials. I have not implemented the authentication logic in the listing because I am going to define the view and then walk through the process of validating user credentials and signing users into the application. Listing 14-3. The Contents of the AccountController.cs File using System.Threading.Tasks; using System.Web.Mvc; using Users.Models; namespace Users.Controllers { [Authorize] public class AccountController : Controller { [AllowAnonymous] public ActionResult Login(string returnUrl) { if (ModelState.IsValid) { }
- 42. CHAPTER 14 ■ APPLYING ASP.NET IDENTITY 6 ViewBag.returnUrl = returnUrl; return View(); } [HttpPost] [AllowAnonymous] [ValidateAntiForgeryToken] public async Task<ActionResult> Login(LoginModel details, string returnUrl) { return View(details); } } } Even though it doesn’t authenticate users yet, the Account controller contains some useful infrastructure that I want to explain separately from the ASP.NET Identity code that I’ll add to the Login action method shortly. First, notice that both versions of the Login action method take an argument called returnUrl. When a user requests a restricted URL, they are redirected to the /Account/Login URL with a query string that specifies the URL that the user should be sent back to once they have been authenticated. You can see this if you start the application and request the /Home/Index URL. Your browser will be redirected, like this: /Account/Login?ReturnUrl=%2FHome%2FIndex The value of the ReturnUrl query string parameter allows me to redirect the user so that navigating between open and secured parts of the application is a smooth and seamless process. Next, notice the attributes that I have applied to the Account controller. Controllers that manage user accounts contain functionality that should be available only to authenticated users, such as password reset, for example. To that end, I have applied the Authorize attribute to the controller class and then used the AllowAnonymous attribute on the individual action methods. This restricts action methods to authenticated users by default but allows unauthenticated users to log in to the application. Finally, I have applied the ValidateAntiForgeryToken attribute, which works in conjunction with the Html. AntiForgeryToken helper method in the view and guards against cross-site request forgery. Cross-site forgery exploits the trust that your user has for your application and it is especially important to use the helper and attribute for authentication requests. Tip ■ You can learn more about cross-site request forgery at http://en.wikipedia.org/wiki/Cross-site_request_forgery. My last preparatory step is to create the view that will be rendered to gather credentials from the user. Listing 14-4 shows the contents of the Views/Account/Login.cshtml file, which I created by right-clicking the Index action method and selecting Add View from the pop-up menu. Listing 14-4. The Contents of the Login.cshtml File @model Users.Models.LoginModel @{ ViewBag.Title = "Login";} <h2>Log In</h2> @Html.ValidationSummary()
- 43. CHAPTER 14 ■ APPLYING ASP.NET IDENTITY 7 @using (Html.BeginForm()) { @Html.AntiForgeryToken(); <input type="hidden" name="returnUrl" value="@ViewBag.returnUrl" /> <div class="form-group"> <label>Name</label> @Html.TextBoxFor(x => x.Name, new { @class = "form-control" }) </div> <div class="form-group"> <label>Password</label> @Html.PasswordFor(x => x.Password, new { @class = "form-control" }) </div> <button class="btn btn-primary" type="submit">Log In</button> } The only notable aspects of this view are using the Html.AntiForgeryToken helper and creating a hidden input element to preserve the returnUrl argument. In all other respects, this is a standard Razor view, but it completes the preparations for authentication and demonstrates the way that unauthenticated requests are intercepted and redirected. To test the new controller, start the application and request the /Home/Index URL. You will be redirected to the /Account/Login URL, as shown in Figure 14-2. Figure 14-2. Prompting the user for authentication credentials Adding User Authentication Requests for protected URLs are being correctly redirected to the Account controller, but the credentials provided by the user are not yet used for authentication. In Listing 14-5, you can see how I have completed the implementation of the Login action.
- 44. CHAPTER 14 ■ APPLYING ASP.NET IDENTITY 8 Listing 14-5. Adding Authentication to the AccountController.cs File using System.Threading.Tasks; using System.Web.Mvc; using Users.Models; using Microsoft.Owin.Security; using System.Security.Claims; using Microsoft.AspNet.Identity; using Microsoft.AspNet.Identity.Owin; using Users.Infrastructure; using System.Web; namespace Users.Controllers { [Authorize] public class AccountController : Controller { [AllowAnonymous] public ActionResult Login(string returnUrl) { ViewBag.returnUrl = returnUrl; return View(); } [HttpPost] [AllowAnonymous] [ValidateAntiForgeryToken] public async Task<ActionResult> Login(LoginModel details, string returnUrl) { if (ModelState.IsValid) { AppUser user = await UserManager.FindAsync(details.Name, details.Password); if (user == null) { ModelState.AddModelError("", "Invalid name or password."); } else { ClaimsIdentity ident = await UserManager.CreateIdentityAsync(user, DefaultAuthenticationTypes.ApplicationCookie); AuthManager.SignOut(); AuthManager.SignIn(new AuthenticationProperties { IsPersistent = false}, ident); return Redirect(returnUrl); } } ViewBag.returnUrl = returnUrl; return View(details); } private IAuthenticationManager AuthManager { get { return HttpContext.GetOwinContext().Authentication; } }
- 45. CHAPTER 14 ■ APPLYING ASP.NET IDENTITY 9 private AppUserManager UserManager { get { return HttpContext.GetOwinContext().GetUserManager<AppUserManager>(); } } } } The simplest part is checking the credentials, which I do through the FindAsync method of the AppUserManager class, which you will remember as the user manager class from Chapter 13: ... AppUser user = await UserManager.FindAsync(details.Name, details.Password); ... I will be using the AppUserManager class repeatedly in the Account controller, so I defined a property called UserManager that returns the instance of the class using the GetOwinContext extension method for the HttpContext class, just as I did for the Admin controller in Chapter 13. The FindAsync method takes the account name and password supplied by the user and returns an instance of the user class (AppUser in the example application) if the user account exists and if the password is correct. If there is no such account or the password doesn’t match the one stored in the database, then the FindAsync method returns null, in which case I add an error to the model state that tells the user that something went wrong. If the FindAsync method does return an AppUser object, then I need to create the cookie that the browser will send in subsequent requests to show they are authenticated. Here are the relevant statements: ... ClaimsIdentity ident = await UserManager.CreateIdentityAsync(user, DefaultAuthenticationTypes.ApplicationCookie); AuthManager.SignOut(); AuthManager.SignIn(new AuthenticationProperties {IsPersistent = false}, ident); return Redirect(returnUrl); ... The first step is to create a ClaimsIdentity object that identifies the user. The ClaimsIdentity class is the ASP.NET Identity implementation of the IIdentity interface that I described in Table 14-4 and that you can see used in the “Using Roles for Authorization” section later in this chapter. Tip ■ Don’t worry about why the class is called ClaimsIdentity at the moment. I explain what claims are and how they can be used in Chapter 15. Instances of ClaimsIdentity are created by calling the user manager CreateIdentityAsync method, passing in a user object and a value from the DefaultAuthenticationTypes enumeration. The ApplicationCookie value is used when working with individual user accounts. The next step is to invalidate any existing authentication cookies and create the new one. I defined the AuthManager property in the controller because I’ll need access to the object it provides repeatedly as I build the functionality in this chapter. The property returns an implementation of the IAuthenticationManager interface that is responsible for performing common authentication options. I have described the most useful methods provided by the IAuthenticationManager interface in Table 14-5.
- 46. CHAPTER 14 ■ APPLYING ASP.NET IDENTITY 10 The arguments to the SignIn method are an AuthenticationProperties object that configures the authentication process and the ClaimsIdentity object. I set the IsPersistent property defined by the AuthenticationProperties object to true to make the authentication cookie persistent at the browser, meaning that the user doesn’t have to authenticate again when starting a new session. (There are other properties defined by the AuthenticationProperties class, but the IsPersistent property is the only one that is widely used at the moment.) The final step is to redirect the user to the URL they requested before the authentication process started, which I do by calling the Redirect method. CONSIDERING TWO-FACTOR AUTHENTICATION I have performed single-factor authentication in this chapter, which is where the user is able to authenticate using a single piece of information known to them in advance: the password. ASP.NET Identity also supports two-factor authentication, where the user needs something extra, usually something that is given to the user at the moment they want to authenticate. The most common examples are a value from a SecureID token or an authentication code that is sent as an e-mail or text message (strictly speaking, the two factors can be anything, including fingerprints, iris scans, and voice recognition, although these are options that are rarely required for most web applications). Security is increased because an attacker needs to know the user’s password and have access to whatever provides the second factor, such an e-mail account or cell phone. I don’t show two-factor authentication in the book for two reasons. The first is that it requires a lot of preparatory work, such as setting up the infrastructure that distributes the second-factor e-mails and texts and implementing the validation logic, all of which is beyond the scope of this book. The second reason is that two-factor authentication forces the user to remember to jump through an additional hoop to authenticate, such as remembering their phone or keeping a security token nearby, something that isn’t always appropriate for web applications. I carried a SecureID token of one sort or another for more than a decade in various jobs, and I lost count of the number of times that I couldn’t log in to an employer’s system because I left the token at home. If you are interested in two-factor security, then I recommend relying on a third-party provider such as Google for authentication, which allows the user to choose whether they want the additional security (and inconvenience) that two-factor authentication provides. I demonstrate third-party authentication in Chapter 15. Table 14-5. The Most Useful Methods Defined by the IAuthenticationManager Interface Name Description SignIn(options, identity) Signs the user in, which generally means creating the cookie that identifies authenticated requests SignOut() Signs the user out, which generally means invalidating the cookie that identifies authenticated requests
- 47. CHAPTER 14 ■ APPLYING ASP.NET IDENTITY 11 Testing Authentication To test user authentication, start the application and request the /Home/Index URL. When redirected to the /Account/ Login URL, enter the details of one of the users I listed at the start of the chapter (for instance, the name joe and the password MySecret). Click the Log In button, and your browser will be redirected back to the /Home/Index URL, but this time it will submit the authentication cookie that grants it access to the action method, as shown in Figure 14-3. Figure 14-3. Authenticating a user Tip ■ You can use the browser F12 tools to see the cookies that are used to identify authenticated requests. Table 14-6. Putting Authorization in Context Question Answer What is it? Authorization is the process of granting access to controllers and action methods to certain users, generally based on role membership. Why should I care? Without roles, you can differentiate only between users who are authenticated and those who are not. Most applications will have different types of users, such as customers and administrators. How is it used by the MVC framework? Roles are used to enforce authorization through the Authorize attribute, which is applied to controllers and action methods. Authorizing Users with Roles In the previous section, I applied the Authorize attribute in its most basic form, which allows any authenticated user to execute the action method. In this section, I will show you how to refine authorization to give finer-grained control over which users can perform which actions. Table 14-6 puts authorization in context.
- 48. CHAPTER 14 ■ APPLYING ASP.NET IDENTITY 12 Tip ■ In Chapter 15, I show you a different approach to authorization using claims, which are an advanced ASP.NET Identity feature. Table 14-7. The Properties Defined by the IdentityRole Class Name Description Id Defines the unique identifier for the role Name Defines the name of the role Users Returns a collection of IdentityUserRole objects that represents the members of the role Adding Support for Roles ASP.NET Identity provides a strongly typed base class for accessing and managing roles called RoleManager<T>, where T is the implementation of the IRole interface supported by the storage mechanism used to represent roles. The Entity Framework uses a class called IdentityRole to implement the IRole interface, which defines the properties shown in Table 14-7. I don’t want to leak references to the IdentityRole class throughout my application because it ties me to the Entity Framework for storing role data, so I start by creating an application-specific role class that is derived from IdentityRole. I added a class file called AppRole.cs to the Models folder and used it to define the class shown in Listing 14-6. Listing 14-6 The Contents of the AppRole.cs File using Microsoft.AspNet.Identity.EntityFramework; namespace Users.Models { public class AppRole : IdentityRole { public AppRole() : base() {} public AppRole(string name) : base(name) { } } } The RoleManager<T> class operates on instances of the IRole implementation class through the methods and properties shown in Table 14-8.
- 49. CHAPTER 14 ■ APPLYING ASP.NET IDENTITY 13 These methods follow the same basic pattern of the UserManager<T> class that I described in Chapter 13. Following the pattern I used for managing users, I added a class file called AppRoleManager.cs to the Infrastructure folder and used it to define the class shown in Listing 14-7. Listing 14-7 The Contents of the AppRoleManager.cs File using System; using Microsoft.AspNet.Identity; using Microsoft.AspNet.Identity.EntityFramework; using Microsoft.AspNet.Identity.Owin; using Microsoft.Owin; using Users.Models; namespace Users.Infrastructure { public class AppRoleManager : RoleManager<AppRole>, IDisposable { public AppRoleManager(RoleStore<AppRole> store) : base(store) { } public static AppRoleManager Create( IdentityFactoryOptions<AppRoleManager> options, IOwinContext context) { return new AppRoleManager(new RoleStore<AppRole>(context.Get<AppIdentityDbContext>())); } } } This class defines a Create method that will allow the OWIN start class to create instances for each request where Identity data is accessed, which means I don’t have to disseminate details of how role data is stored throughout the application. I can just obtain and operate on instances of the AppRoleManager class. You can see how I have registered the role manager class with the OWIN start class, IdentityConfig, in Listing 14-8. This ensures that instances of the AppRoleManager class are created using the same Entity Framework database context that is used for the AppUserManager class. Table 14-8. The Members Defined by the RoleManager<T> Class Name Description CreateAsync(role) Creates a new role DeleteAsync(role) Deletes the specified role FindByIdAsync(id) Finds a role by its ID FindByNameAsync(name) Finds a role by its name RoleExistsAsync(name) Returns true if a role with the specified name exists UpdateAsync(role) Stores changes to the specified role Roles Returns an enumeration of the roles that have been defined
- 50. CHAPTER 14 ■ APPLYING ASP.NET IDENTITY 14 Listing 14-8. Creating Instances of the AppRoleManager Class in the IdentityConfig.cs File using Microsoft.AspNet.Identity; using Microsoft.Owin; using Microsoft.Owin.Security.Cookies; using Owin; using Users.Infrastructure; namespace Users { public class IdentityConfig { public void Configuration(IAppBuilder app) { app.CreatePerOwinContext<AppIdentityDbContext>(AppIdentityDbContext.Create); app.CreatePerOwinContext<AppUserManager>(AppUserManager.Create); app.CreatePerOwinContext<AppRoleManager>(AppRoleManager.Create); app.UseCookieAuthentication(new CookieAuthenticationOptions { AuthenticationType = DefaultAuthenticationTypes.ApplicationCookie, LoginPath = new PathString("/Account/Login"), }); } } } Creating and Deleting Roles Having prepared the application for working with roles, I am going to create an administration tool for managing them. I will start the basics and define action methods and views that allow roles to be created and deleted. I added a controller called RoleAdmin to the project, which you can see in Listing 14-9. Listing 14-9. The Contents of the RoleAdminController.cs File using System.ComponentModel.DataAnnotations; using System.Linq; using System.Threading.Tasks; using System.Web; using System.Web.Mvc; using Microsoft.AspNet.Identity; using Microsoft.AspNet.Identity.Owin; using Users.Infrastructure; using Users.Models; namespace Users.Controllers { public class RoleAdminController : Controller { public ActionResult Index() { return View(RoleManager.Roles); } public ActionResult Create() { return View(); }
- 51. CHAPTER 14 ■ APPLYING ASP.NET IDENTITY 15 [HttpPost] public async Task<ActionResult> Create([Required]string name) { if (ModelState.IsValid) { IdentityResult result = await RoleManager.CreateAsync(new AppRole(name)); if (result.Succeeded) { return RedirectToAction("Index"); } else { AddErrorsFromResult(result); } } return View(name); } [HttpPost] public async Task<ActionResult> Delete(string id) { AppRole role = await RoleManager.FindByIdAsync(id); if (role != null) { IdentityResult result = await RoleManager.DeleteAsync(role); if (result.Succeeded) { return RedirectToAction("Index"); } else { return View("Error", result.Errors); } } else { return View("Error", new string[] { "Role Not Found" }); } } private void AddErrorsFromResult(IdentityResult result) { foreach (string error in result.Errors) { ModelState.AddModelError("", error); } } private AppUserManager UserManager { get { return HttpContext.GetOwinContext().GetUserManager<AppUserManager>(); } } private AppRoleManager RoleManager { get { return HttpContext.GetOwinContext().GetUserManager<AppRoleManager>(); } } } }
- 52. CHAPTER 14 ■ APPLYING ASP.NET IDENTITY 16 I have applied many of the same techniques that I used in the Admin controller in Chapter 13, including a UserManager property that obtains an instance of the AppUserManager class and an AddErrorsFromResult method that processes the errors reported in an IdentityResult object and adds them to the model state. I have also defined a RoleManager property that obtains an instance of the AppRoleManager class, which I used in the action methods to obtain and manipulate the roles in the application. I am not going to describe the action methods in detail because they follow the same pattern I used in Chapter 13, using the AppRoleManager class in place of AppUserManager and calling the methods I described in Table 14-8. Creating the Views The views for the RoleAdmin controller are standard HTML and Razor markup, but I have included them in this chapter so that you can re-create the example. I want to display the names of the users who are members of each role. The Entity Framework IdentityRole class defines a Users property that returns a collection of IdentityUserRole user objects representing the members of the role. Each IdentityUserRole object has a UserId property that returns the unique ID of a user, and I want to get the username for each ID. I added a class file called IdentityHelpers.cs to the Infrastructure folder and used it to define the class shown in Listing 14-10. Listing 14-10. The Contents of the IdentityHelpers.cs File using System.Web; using System.Web.Mvc; using Microsoft.AspNet.Identity.Owin; namespace Users.Infrastructure { public static class IdentityHelpers { public static MvcHtmlString GetUserName(this HtmlHelper html, string id) { AppUserManager mgr = HttpContext.Current.GetOwinContext().GetUserManager<AppUserManager>(); return new MvcHtmlString(mgr.FindByIdAsync(id).Result.UserName); } } } Custom HTML helper methods are defined as extensions on the HtmlHelper class. My helper, which is called GetUsername, takes a string argument containing a user ID, obtains an instance of the AppUserManager through the GetOwinContext.GetUserManager method (where GetOwinContext is an extension method on the HttpContext class), and uses the FindByIdAsync method to locate the AppUser instance associated with the ID and to return the value of the UserName property. Listing 14-11 shows the contents of the Index.cshtml file from the Views/RoleAdmin folder, which I created by right-clicking the Index action method in the code editor and selecting Add View from the pop-up menu. Listing 14-11. The Contents of the Index.cshtml File in the Views/RoleAdmin Folder @using Users.Models @using Users.Infrastructure @model IEnumerable<AppRole> @{ ViewBag.Title = "Roles"; } <div class="panel panel-primary"> <div class="panel-heading">Roles</div> <table class="table table-striped"> <tr><th>ID</th><th>Name</th><th>Users</th><th></th></tr> @if (Model.Count() == 0) {
- 53. CHAPTER 14 ■ APPLYING ASP.NET IDENTITY 17 <tr><td colspan="4" class="text-center">No Roles</td></tr> } else { foreach (AppRole role in Model) { <tr> <td>@role.Id</td> <td>@role.Name</td> <td> @if (role.Users == null || role.Users.Count == 0) { @: No Users in Role } else { <p>@string.Join(", ", role.Users.Select(x => Html.GetUserName(x.UserId)))</p> } </td> <td> @using (Html.BeginForm("Delete", "RoleAdmin", new { id = role.Id })) { @Html.ActionLink("Edit", "Edit", new { id = role.Id }, new { @class = "btn btn-primary btn-xs" }) <button class="btn btn-danger btn-xs" type="submit"> Delete </button> } </td> </tr> } } </table> </div> @Html.ActionLink("Create", "Create", null, new { @class = "btn btn-primary" }) This view displays a list of the roles defined by the application, along with the users who are members, and I use the GetUserName helper method to get the name for each user. Listing 14-12 shows the Views/RoleAdmin/Create.cshtml file, which I created to allow new roles to be created. Listing 14-12. The Contents of the Create.cshtml File in the Views/RoleAdmin Folder @model string @{ ViewBag.Title = "Create Role";} <h2>Create Role</h2> @Html.ValidationSummary(false) @using (Html.BeginForm()) { <div class="form-group"> <label>Name</label> <input name="name" value="@Model" class="form-control" /> </div> <button type="submit" class="btn btn-primary">Create</button> @Html.ActionLink("Cancel", "Index", null, new { @class = "btn btn-default" }) } The only information required to create a new view is a name, which I gather using a standard input element and submit the value to the Create action method.
- 54. CHAPTER 14 ■ APPLYING ASP.NET IDENTITY 18 Testing Creating and Deleting Roles To test the new controller, start the application and navigate to the /RoleAdmin/Index URL. To create a new role, click the Create button, enter a name in the input element, and click the second Create button. The new view will be saved to the database and displayed when the browser is redirected to the Index action, as shown in Figure 14-4. You can remove the role from the application by clicking the Delete button. Figure 14-4. Creating a new role Managing Role Memberships To authorize users, it isn’t enough to just create and delete roles; I also have to be able to manage role memberships, assigning and removing users from the roles that the application defines. This isn’t a complicated process, but it invokes taking the role data from the AppRoleManager class and then calling the methods defined by the AppUserMangager class that associate users with roles. I started by defining view models that will let me represent the membership of a role and receive a new set of membership instructions from the user. Listing 14-13 shows the additions I made to the UserViewModels.cs file. Listing 14-13. Adding View Models to the UserViewModels.cs File using System.ComponentModel.DataAnnotations; using System.Collections.Generic; namespace Users.Models { public class CreateModel { [Required] public string Name { get; set; } [Required] public string Email { get; set; } [Required] public string Password { get; set; } }
- 55. CHAPTER 14 ■ APPLYING ASP.NET IDENTITY 19 public class LoginModel { [Required] public string Name { get; set; } [Required] public string Password { get; set; } } public class RoleEditModel { public AppRole Role { get; set; } public IEnumerable<AppUser> Members { get; set; } public IEnumerable<AppUser> NonMembers { get; set; } } public class RoleModificationModel { [Required] public string RoleName { get; set; } public string[] IdsToAdd { get; set; } public string[] IdsToDelete { get; set; } } } The RoleEditModel class will let me pass details of a role and details of the users in the system, categorized by membership. I use AppUser objects in the view model so that I can extract the name and ID for each user in the view that will allow memberships to be edited. The RoleModificationModel class is the one that I will receive from the model binding system when the user submits their changes. It contains arrays of user IDs rather than AppUser objects, which is what I need to change role memberships. Having defined the view models, I can add the action methods to the controller that will allow role memberships to be defined. Listing 14-14 shows the changes I made to the RoleAdmin controller. Listing 14-14. Adding Action Methods in the RoleAdminController.cs File using System.ComponentModel.DataAnnotations; using System.Linq; using System.Threading.Tasks; using System.Web; using System.Web.Mvc; using Microsoft.AspNet.Identity; using Microsoft.AspNet.Identity.Owin; using Users.Infrastructure; using Users.Models; using System.Collections.Generic; namespace Users.Controllers { public class RoleAdminController : Controller { // ...other action methods omitted for brevity... public async Task<ActionResult> Edit(string id) { AppRole role = await RoleManager.FindByIdAsync(id); string[] memberIDs = role.Users.Select(x => x.UserId).ToArray(); IEnumerable<AppUser> members = UserManager.Users.Where(x => memberIDs.Any(y => y == x.Id));
- 56. CHAPTER 14 ■ APPLYING ASP.NET IDENTITY 20 IEnumerable<AppUser> nonMembers = UserManager.Users.Except(members); return View(new RoleEditModel { Role = role, Members = members, NonMembers = nonMembers }); } [HttpPost] public async Task<ActionResult> Edit(RoleModificationModel model) { IdentityResult result; if (ModelState.IsValid) { foreach (string userId in model.IdsToAdd ?? new string[] { }) { result = await UserManager.AddToRoleAsync(userId, model.RoleName); if (!result.Succeeded) { return View("Error", result.Errors); } } foreach (string userId in model.IdsToDelete ?? new string[] { }) { result = await UserManager.RemoveFromRoleAsync(userId, model.RoleName); if (!result.Succeeded) { return View("Error", result.Errors); } } return RedirectToAction("Index"); } return View("Error", new string[] { "Role Not Found" }); } private void AddErrorsFromResult(IdentityResult result) { foreach (string error in result.Errors) { ModelState.AddModelError("", error); } } private AppUserManager UserManager { get { return HttpContext.GetOwinContext().GetUserManager<AppUserManager>(); } } private AppRoleManager RoleManager { get { return HttpContext.GetOwinContext().GetUserManager<AppRoleManager>(); } } } }
- 57. CHAPTER 14 ■ APPLYING ASP.NET IDENTITY 21 The majority of the code in the GET version of the Edit action method is responsible for generating the sets of members and nonmembers of the selected role, which is done using LINQ. Once I have grouped the users, I call the View method, passing a new instance of the RoleEditModel class I defined in Listing 14-13. The POST version of the Edit method is responsible for adding and removing users to and from roles. The AppUserManager class inherits a number of role-related methods from its base class, which I have described in Table 14-9. Table 14-9. The Role-Related Methods Defined by the UserManager<T> Class Name Description AddToRoleAsync(id, name) Adds the user with the specified ID to the role with the specified name GetRolesAsync(id) Returns a list of the names of the roles of which the user with the specified ID is a member IsInRoleAsync(id, name) Returns true if the user with the specified ID is a member of the role with the specified name RemoveFromRoleAsync(id, name) Removes the user with the specified ID as a member from the role with the specified name An oddity of these methods is that the role-related methods operate on user IDs and role names, even though roles also have unique identifiers. It is for this reason that my RoleModificationModel view model class has a RoleName property. Listing 14-15 shows the view for the Edit.cshtml file, which I added to the Views/RoleAdmin folder and used to define the markup that allows the user to edit role memberships. Listing 14-15. The Contents of the Edit.cshtml File in the Views/RoleAdmin Folder @using Users.Models @model RoleEditModel @{ ViewBag.Title = "Edit Role";} @Html.ValidationSummary() @using (Html.BeginForm()) { <input type="hidden" name="roleName" value="@Model.Role.Name" /> <div class="panel panel-primary"> <div class="panel-heading">Add To @Model.Role.Name</div> <table class="table table-striped"> @if (Model.NonMembers.Count() == 0) { <tr><td colspan="2">All Users Are Members</td></tr> } else { <tr><td>User ID</td><td>Add To Role</td></tr> foreach (AppUser user in Model.NonMembers) { <tr> <td>@user.UserName</td> <td> <input type="checkbox" name="IdsToAdd" value="@user.Id"> </td> </tr> } } </table> </div>
- 58. CHAPTER 14 ■ APPLYING ASP.NET IDENTITY 22 <div class="panel panel-primary"> <div class="panel-heading">Remove from @Model.Role.Name</div> <table class="table table-striped"> @if (Model.Members.Count() == 0) { <tr><td colspan="2">No Users Are Members</td></tr> } else { <tr><td>User ID</td><td>Remove From Role</td></tr> foreach (AppUser user in Model.Members) { <tr> <td>@user.UserName</td> <td> <input type="checkbox" name="IdsToDelete" value="@user.Id"> </td> </tr> } } </table> </div> <button type="submit" class="btn btn-primary">Save</button> @Html.ActionLink("Cancel", "Index", null, new { @class = "btn btn-default" }) } The view contains two tables: one for users who are not members of the selected role and one for those who are members. Each user’s name is displayed along with a check box that allows the membership to be changed. Testing Editing Role Membership Adding the AppRoleManager class to the application causes the Entity Framework to delete the contents of the database and rebuild the schema, which means that any users you created in the previous chapter have been removed. So that there are users to assign to roles, start the application and navigate to the /Admin/Index URL and create users with the details in Table 14-10. Table 14-10. The Values for Creating Example User Name Email Password Alice [email protected] MySecret Bob [email protected] MySecret Joe [email protected] MySecret Tip ■ Deleting the user database is fine for an example application but tends to be a problem in real applications. I show you how to gracefully manage changes to the database schema in Chapter 15. To test managing role memberships, navigate to the /RoleAdmin/Index URL and create a role called Users, following the instructions from the “Testing, Creating, and Deleting Roles” section. Click the Edit button and check the boxes so that Alice and Joe are members of the role but Bob is not, as shown in Figure 14-5.
- 59. CHAPTER 14 ■ APPLYING ASP.NET IDENTITY 23 Tip ■ If you get an error that tells you there is already an open a data reader, then you didn’t set the MultipleActiveResultSets setting to true in the connection string in Chapter 13. Click the Save button, and the controller will update the role memberships and redirect the browser to the Index action. The summary of the Users role will show that Alice and Joe are now members, as illustrated by Figure 14-6. Figure 14-5. Editing role membership
- 60. CHAPTER 14 ■ APPLYING ASP.NET IDENTITY 24 Using Roles for Authorization Now that I have the ability to manage roles, I can use them as the basis for authorization through the Authorize attribute. To make it easier to test role-based authorization, I have added a Logout method to the Account controller, as shown in Listing 14-16, which will make it easier to log out and log in again as a different user to see the effect of role membership. Listing 14-16. Adding a Logout Method to the AccountController.cs File using System.Threading.Tasks; using System.Web.Mvc; using Users.Models; using Microsoft.Owin.Security; using System.Security.Claims; using Microsoft.AspNet.Identity; using Microsoft.AspNet.Identity.Owin; using Users.Infrastructure; using System.Web; namespace Users.Controllers { [Authorize] public class AccountController : Controller { [AllowAnonymous] public ActionResult Login(string returnUrl) { ViewBag.returnUrl = returnUrl; return View(); } [HttpPost] [AllowAnonymous] [ValidateAntiForgeryToken] Figure 14-6. The effect of adding users to a role
- 61. CHAPTER 14 ■ APPLYING ASP.NET IDENTITY 25 public async Task<ActionResult> Login(LoginModel details, string returnUrl) { // ...statements omitted for brevity... } [Authorize] public ActionResult Logout() { AuthManager.SignOut(); return RedirectToAction("Index", "Home"); } private IAuthenticationManager AuthManager { get { return HttpContext.GetOwinContext().Authentication; } } private AppUserManager UserManager { get { return HttpContext.GetOwinContext().GetUserManager<AppUserManager>(); } } } } I have updated the Home controller to add a new action method and pass some information about the authenticated user to the view, as shown in Listing 14-17. Listing 14-17. Adding an Action Method and Account Information to the HomeController.cs File using System.Web.Mvc; using System.Collections.Generic; using System.Web; using System.Security.Principal; namespace Users.Controllers { public class HomeController : Controller { [Authorize] public ActionResult Index() { return View(GetData("Index")); } [Authorize(Roles="Users")] public ActionResult OtherAction() { return View("Index", GetData("OtherAction")); } private Dictionary<string, object> GetData(string actionName) { Dictionary<string, object> dict = new Dictionary<string, object>();
- 62. CHAPTER 14 ■ APPLYING ASP.NET IDENTITY 26 dict.Add("Action", actionName); dict.Add("User", HttpContext.User.Identity.Name); dict.Add("Authenticated", HttpContext.User.Identity.IsAuthenticated); dict.Add("Auth Type", HttpContext.User.Identity.AuthenticationType); dict.Add("In Users Role", HttpContext.User.IsInRole("Users")); return dict; } } } I have left the Authorize attribute unchanged for the Index action method, but I have set the Roles property when applying the attribute to the OtherAction method, specifying that only members of the Users role should be able to access it. I also defined a GetData method, which adds some basic information about the user identity, using the properties available through the HttpContext object. The final change I made was to the Index.cshtml file in the Views/Home folder, which is used by both actions in the Home controller, to add a link that targets the Logout method in the Account controller, as shown in Listing 14-18. Listing 14-18. Adding a Sign-Out Link to the Index.cshtml File in the Views/Home Folder @{ ViewBag.Title = "Index"; } <div class="panel panel-primary"> <div class="panel-heading">User Details</div> <table class="table table-striped"> @foreach (string key in Model.Keys) { <tr> <th>@key</th> <td>@Model[key]</td> </tr> } </table> </div> @Html.ActionLink("Sign Out", "Logout", "Account", null, new {@class = "btn btn-primary"}) Tip ■ The Authorize attribute can also be used to authorize access based on a list of individual usernames. This is an appealing feature for small projects, but it means you have to change the code in your controllers each time the set of users you are authorizing changes, and that usually means having to go through the test-and-deploy cycle again. Using roles for authorization isolates the application from changes in individual user accounts and allows you to control access to the application through the memberships stored by ASP.NET Identity. To test the authentication, start the application and navigate to the /Home/Index URL. Your browser will be redirected so that you can enter user credentials. It doesn’t matter which of the user details from Table 14-10 you choose to authenticate with because the Authorize attribute applied to the Index action allows access to any authenticated user.
- 63. CHAPTER 14 ■ APPLYING ASP.NET IDENTITY 27 However, if you now request the /Home/OtherAction URL, the user details you chose from Table 14-10 will make a difference because only Alice and Joe are members of the Users role, which is required to access the OtherAction method. If you log in as Bob, then your browser will be redirected so that you can be prompted for credentials once again. Redirecting an already authenticated user for more credentials is rarely a useful thing to do, so I have modified the Login action method in the Account controller to check to see whether the user is authenticated and, if so, redirect them to the shared Error view. Listing 14-19 shows the changes. Listing 14-19. Detecting Already Authenticated Users in the AccountController.cs File using System.Threading.Tasks; using System.Web.Mvc; using Users.Models; using Microsoft.Owin.Security; using System.Security.Claims; using Microsoft.AspNet.Identity; using Microsoft.AspNet.Identity.Owin; using Users.Infrastructure; using System.Web; namespace Users.Controllers { [Authorize] public class AccountController : Controller { [AllowAnonymous] public ActionResult Login(string returnUrl) { if (HttpContext.User.Identity.IsAuthenticated) { return View("Error", new string[] { "Access Denied" }); } ViewBag.returnUrl = returnUrl; return View(); } [HttpPost] [AllowAnonymous] [ValidateAntiForgeryToken] public async Task<ActionResult> Login(LoginModel details, string returnUrl) { // ...code omitted for brevity... } [Authorize] public ActionResult Logout() { AuthManager.SignOut(); return RedirectToAction("Index", "Home"); } private IAuthenticationManager AuthManager { get { return HttpContext.GetOwinContext().Authentication; } }
- 64. CHAPTER 14 ■ APPLYING ASP.NET IDENTITY 28 private AppUserManager UserManager { get { return HttpContext.GetOwinContext().GetUserManager<AppUserManager>(); } } } } Figure 14-7 shows the responses generated for the user Bob when requesting the /Home/Index and /Home/ OtherAction URLs. Figure 14-7. Using roles to control access to action methods Tip ■ Roles are loaded when the user logs in, which means if you change the roles for the user you are currently authenticated as, the changes won’t take effect until you log out and authenticate. Seeding the Database One lingering problem in my example project is that access to my Admin and RoleAdmin controllers is not restricted. This is a classic chicken-and-egg problem because in order to restrict access, I need to create users and roles, but the Admin and RoleAdmin controllers are the user management tools, and if I protect them with the Authorize attribute, there won’t be any credentials that will grant me access to them, especially when I first deploy the application. The solution to this problem is to seed the database with some initial data when the Entity Framework Code First feature creates the schema. This allows me to automatically create users and assign them to roles so that there is a base level of content available in the database.
- 65. CHAPTER 14 ■ APPLYING ASP.NET IDENTITY 29 The database is seeded by adding statements to the PerformInitialSetup method of the IdentityDbInit class, which is the application-specific Entity Framework database setup class. Listing 14-20 shows the changes I made to create an administration user. Listing 14-20. Seeding the Database in the AppIdentityDbContext.cs File using System.Data.Entity; using Microsoft.AspNet.Identity.EntityFramework; using Users.Models; using Microsoft.AspNet.Identity; namespace Users.Infrastructure { public class AppIdentityDbContext : IdentityDbContext<AppUser> { public AppIdentityDbContext() : base("IdentityDb") { } static AppIdentityDbContext() { Database.SetInitializer<AppIdentityDbContext>(new IdentityDbInit()); } public static AppIdentityDbContext Create() { return new AppIdentityDbContext(); } } public class IdentityDbInit : DropCreateDatabaseIfModelChanges<AppIdentityDbContext> { protected override void Seed(AppIdentityDbContext context) { PerformInitialSetup(context); base.Seed(context); } public void PerformInitialSetup(AppIdentityDbContext context) { AppUserManager userMgr = new AppUserManager(new UserStore<AppUser>(context)); AppRoleManager roleMgr = new AppRoleManager(new RoleStore<AppRole>(context)); string roleName = "Administrators"; string userName = "Admin"; string password = "MySecret"; string email = "[email protected]"; if (!roleMgr.RoleExists(roleName)) { roleMgr.Create(new AppRole(roleName)); } AppUser user = userMgr.FindByName(userName); if (user == null) { userMgr.Create(new AppUser { UserName = userName, Email = email }, password); user = userMgr.FindByName(userName); }
- 66. CHAPTER 14 ■ APPLYING ASP.NET IDENTITY 30 if (!userMgr.IsInRole(user.Id, roleName)) { userMgr.AddToRole(user.Id, roleName); } } } } Tip ■ For this example, I used the synchronous extension methods to locate and manage the role and user. As I explained in Chapter 13, I prefer the asynchronous methods by default, but the synchronous methods can be useful when you need to perform a sequence of related operations. I have to create instances of AppUserManager and AppRoleManager directly because the PerformInitialSetup method is called before the OWIN configuration is complete. I use the RoleManager and AppManager objects to create a role called Administrators and a user called Admin and add the user to the role. Tip ■ Read Chapter 15 before you add database seeding to your project. I describe database migrations, which allow you to take control of schema changes in the database and which put the seeding logic in a different place. With this change, I can use the Authorize attribute to protect the Admin and RoleAdmin controllers. Listing 14-21 shows the change I made to the Admin controller. Listing 14-21. Restricting Access in the AdminController.cs File using System.Web; using System.Web.Mvc; using Microsoft.AspNet.Identity.Owin; using Users.Infrastructure; using Users.Models; using Microsoft.AspNet.Identity; using System.Threading.Tasks; namespace Users.Controllers { [Authorize(Roles = "Administrators")] public class AdminController : Controller { // ...statements omitted for brevity... } } Listing 14-22 shows the corresponding change I made to the RoleAdmin controller. Listing 14-22. Restricting Access in the RoleAdminController.cs File using System.ComponentModel.DataAnnotations; using System.Linq; using System.Threading.Tasks; using System.Web;
- 67. CHAPTER 14 ■ APPLYING ASP.NET IDENTITY 31 using System.Web.Mvc; using Microsoft.AspNet.Identity; using Microsoft.AspNet.Identity.Owin; using Users.Infrastructure; using Users.Models; using System.Collections.Generic; namespace Users.Controllers { [Authorize(Roles = "Administrators")] public class RoleAdminController : Controller { // ...statements omitted for brevity... } } The database is seeded only when the schema is created, which means I need to reset the database to complete the process. This isn’t something you would do in a real application, of course, but I wanted to wait until I demonstrated how authentication and authorization worked before creating the administrator account. To delete the database, open the Visual Studio SQL Server Object Explorer window and locate and right-click the IdentityDb item. Select Delete from the pop-up menu and check both of the options in the Delete Database dialog window. Click the OK button to delete the database. Now create an empty database to which the schema will be added by right-clicking the Databases item, selecting Add New Database, and entering IdentityDb in the Database Name field. Click OK to create the empty database. Tip ■ There are step-by-step instructions with screenshots in Chapter 13 for creating the database. Now start the application and request the /Admin/Index or /RoleAdmin/Index URL. There will be a delay while the schema is created and the database is seeded, and then you will be prompted to enter your credentials. Use Admin as the name and MySecret as the password, and you will be granted access to the controllers. Caution ■ Deleting the database removes the user accounts you created using the details in Table 14-10, which is why you would not perform this task on a live database containing user details. Summary In this chapter, I showed you how to use ASP.NET Identity to authenticate and authorize users. I explained how the ASP.NET life-cycle events provide a foundation for authenticating requests, how to collect and validate credentials users, and how to restrict access to action methods based on the roles that a user is a member of. In the next chapter, I demonstrate some of the advanced features that ASP.NET Identity provides.
- 68. 1 CHAPTER 15 Advanced ASP.NET Identity In this chapter, I finish my description of ASP.NET Identity by showing you some of the advanced features it offers. I demonstrate how you can extend the database schema by defining custom properties on the user class and how to use database migrations to apply those properties without deleting the data in the ASP.NET Identity database. I also explain how ASP.NET Identity supports the concept of claims and demonstrate how they can be used to flexibly authorize access to action methods. I finish the chapter—and the book—by showing you how ASP.NET Identity makes it easy to authenticate users through third parties. I demonstrate authentication with Google accounts, but ASP.NET Identity has built-in support for Microsoft, Facebook, and Twitter accounts as well. Table 15-1 summarizes this chapter. Table 15-1. Chapter Summary Problem Solution Listing Store additional information about users. Define custom user properties. 1–3, 8–11 Update the database schema without deleting user data. Perform a database migration. 4–7 Perform fine-grained authorization. Use claims. 12–14 Add claims about a user. Use the ClaimsIdentity.AddClaims method. 15–19 Authorize access based on claim values. Create a custom authorization filter attribute. 20–21 Authenticate through a third party. Install the NuGet package for the authentication provider, redirect requests to that provider, and specify a callback URL that creates the user account. 22–25 Preparing the Example Project In this chapter, I am going to continue working on the Users project I created in Chapter 13 and enhanced in Chapter 14. No changes to the application are required, but start the application and make sure that there are users in the database. Figure 15-1 shows the state of my database, which contains the users Admin, Alice, Bob, and Joe from the previous chapter. To check the users, start the application and request the /Admin/Index URL and authenticate as the Admin user.
- 69. CHAPTER 15 ■ ADVANCED ASP.NET IDENTITY 2 I also need some roles for this chapter. I used the RoleAdmin controller to create roles called Users and Employees and assigned the users to those roles, as described in Table 15-2. Figure 15-1. The initial users in the Identity database Table 15-2. The Types of Web Forms Code Nuggets Role Members Users Alice, Joe Employees Alice, Bob Figure 15-2 shows the required role configuration displayed by the RoleAdmin controller.
- 70. CHAPTER 15 ■ ADVANCED ASP.NET IDENTITY 3 Adding Custom User Properties When I created the AppUser class to represent users in Chapter 13, I noted that the base class defined a basic set of properties to describe the user, such as e-mail address and telephone number. Most applications need to store more information about users, including persistent application preferences and details such as addresses—in short, any data that is useful to running the application and that should last between sessions. In ASP.NET Membership, this was handled through the user profile system, but ASP.NET Identity takes a different approach. Because the ASP.NET Identity system uses Entity Framework to store its data by default, defining additional user information is just a matter of adding properties to the user class and letting the Code First feature create the database schema required to store them. Table 15-3 puts custom user properties in context. Figure 15-2. Configuring the roles required for this chapter Table 15-3. Putting Cusotm User Properties in Context Question Answer What is it? Custom user properties allow you to store additional information about your users, including their preferences and settings. Why should I care? A persistent store of settings means that the user doesn’t have to provide the same information each time they log in to the application. How is it used by the MVC framework? This feature isn’t used directly by the MVC framework, but it is available for use in action methods.
- 71. CHAPTER 15 ■ ADVANCED ASP.NET IDENTITY 4 Defining Custom Properties Listing 15-1 shows how I added a simple property to the AppUser class to represent the city in which the user lives. Listing 15-1. Adding a Property in the AppUser.cs File using System; using Microsoft.AspNet.Identity.EntityFramework; namespace Users.Models { public enum Cities { LONDON, PARIS, CHICAGO } public class AppUser : IdentityUser { public Cities City { get; set; } } } I have defined an enumeration called Cities that defines values for some large cities and added a property called City to the AppUser class. To allow the user to view and edit their City property, I added actions to the Home controller, as shown in Listing 15-2. Listing 15-2. Adding Support for Custom User Properties in the HomeController.cs File using System.Web.Mvc; using System.Collections.Generic; using System.Web; using System.Security.Principal; using System.Threading.Tasks; using Users.Infrastructure; using Microsoft.AspNet.Identity; using Microsoft.AspNet.Identity.Owin; using Users.Models; namespace Users.Controllers { public class HomeController : Controller { [Authorize] public ActionResult Index() { return View(GetData("Index")); } [Authorize(Roles = "Users")] public ActionResult OtherAction() { return View("Index", GetData("OtherAction")); }
- 72. CHAPTER 15 ■ ADVANCED ASP.NET IDENTITY 5 private Dictionary<string, object> GetData(string actionName) { Dictionary<string, object> dict = new Dictionary<string, object>(); dict.Add("Action", actionName); dict.Add("User", HttpContext.User.Identity.Name); dict.Add("Authenticated", HttpContext.User.Identity.IsAuthenticated); dict.Add("Auth Type", HttpContext.User.Identity.AuthenticationType); dict.Add("In Users Role", HttpContext.User.IsInRole("Users")); return dict; } [Authorize] public ActionResult UserProps() { return View(CurrentUser); } [Authorize] [HttpPost] public async Task<ActionResult> UserProps(Cities city) { AppUser user = CurrentUser; user.City = city; await UserManager.UpdateAsync(user); return View(user); } private AppUser CurrentUser { get { return UserManager.FindByName(HttpContext.User.Identity.Name); } } private AppUserManager UserManager { get { return HttpContext.GetOwinContext().GetUserManager<AppUserManager>(); } } } } I added a CurrentUser property that uses the AppUserManager class to retrieve an AppUser instance to represent the current user. I pass the AppUser object as the view model object in the GET version of the UserProps action method, and the POST method uses it to update the value of the new City property. Listing 15-3 shows the UserProps.cshtml view, which displays the City property value and contains a form to change it. Listing 15-3. The Contents of the UserProps.cshtml File in the Views/Home Folder @using Users.Models @model AppUser @{ ViewBag.Title = "UserProps";}
- 73. CHAPTER 15 ■ ADVANCED ASP.NET IDENTITY 6 <div class="panel panel-primary"> <div class="panel-heading"> Custom User Properties </div> <table class="table table-striped"> <tr><th>City</th><td>@Model.City</td></tr> </table> </div> @using (Html.BeginForm()) { <div class="form-group"> <label>City</label> @Html.DropDownListFor(x => x.City, new SelectList(Enum.GetNames(typeof(Cities)))) </div> <button class="btn btn-primary" type="submit">Save</button> } Caution ■ Don’t start the application when you have created the view. In the sections that follow, I demonstrate how to preserve the contents of the database, and if you start the application now, the ASP.NET Identity users will be deleted. Preparing for Database Migration The default behavior for the Entity Framework Code First feature is to drop the tables in the database and re-create them whenever classes that drive the schema have changed. You saw this in Chapter 14 when I added support for roles: When the application was started, the database was reset, and the user accounts were lost. Don’t start the application yet, but if you were to do so, you would see a similar effect. Deleting data during development is usually not a problem, but doing so in a production setting is usually disastrous because it deletes all of the real user accounts and causes a panic while the backups are restored. In this section, I am going to demonstrate how to use the database migration feature, which updates a Code First schema in a less brutal manner and preserves the existing data it contains. The first step is to issue the following command in the Visual Studio Package Manager Console: Enable-Migrations –EnableAutomaticMigrations This enables the database migration support and creates a Migrations folder in the Solution Explorer that contains a Configuration.cs class file, the contents of which are shown in Listing 15-4. Listing 15-4. The Contents of the Configuration.cs File namespace Users.Migrations { using System; using System.Data.Entity; using System.Data.Entity.Migrations; using System.Linq;
- 74. CHAPTER 15 ■ ADVANCED ASP.NET IDENTITY 7 internal sealed class Configuration : DbMigrationsConfiguration<Users.Infrastructure.AppIdentityDbContext> { public Configuration() { AutomaticMigrationsEnabled = true; ContextKey = "Users.Infrastructure.AppIdentityDbContext"; } protected override void Seed(Users.Infrastructure.AppIdentityDbContext context) { // This method will be called after migrating to the latest version. // You can use the DbSet<T>.AddOrUpdate() helper extension method // to avoid creating duplicate seed data. E.g. // // context.People.AddOrUpdate( // p => p.FullName, // new Person { FullName = "Andrew Peters" }, // new Person { FullName = "Brice Lambson" }, // new Person { FullName = "Rowan Miller" } // ); // } } } Tip ■ You might be wondering why you are entering a database migration command into the console used to manage NuGet packages. The answer is that the Package Manager Console is really PowerShell, which is a general-purpose tool that is mislabeled by Visual Studio. You can use the console to issue a wide range of helpful commands. See http://go.microsoft.com/fwlink/?LinkID=108518 for details. The class will be used to migrate existing content in the database to the new schema, and the Seed method will be called to provide an opportunity to update the existing database records. In Listing 15-5, you can see how I have used the Seed method to set a default value for the new City property I added to the AppUser class. (I have also updated the class file to reflect my usual coding style.) Listing 15-5. Managing Existing Content in the Configuration.cs File using System.Data.Entity.Migrations; using Microsoft.AspNet.Identity; using Microsoft.AspNet.Identity.EntityFramework; using Users.Infrastructure; using Users.Models; namespace Users.Migrations { internal sealed class Configuration : DbMigrationsConfiguration<AppIdentityDbContext> {
- 75. CHAPTER 15 ■ ADVANCED ASP.NET IDENTITY 8 public Configuration() { AutomaticMigrationsEnabled = true; ContextKey = "Users.Infrastructure.AppIdentityDbContext"; } protected override void Seed(AppIdentityDbContext context) { AppUserManager userMgr = new AppUserManager(new UserStore<AppUser>(context)); AppRoleManager roleMgr = new AppRoleManager(new RoleStore<AppRole>(context)); string roleName = "Administrators"; string userName = "Admin"; string password = "MySecret"; string email = "[email protected]"; if (!roleMgr.RoleExists(roleName)) { roleMgr.Create(new AppRole(roleName)); } AppUser user = userMgr.FindByName(userName); if (user == null) { userMgr.Create(new AppUser { UserName = userName, Email = email }, password); user = userMgr.FindByName(userName); } if (!userMgr.IsInRole(user.Id, roleName)) { userMgr.AddToRole(user.Id, roleName); } foreach (AppUser dbUser in userMgr.Users) { dbUser.City = Cities.PARIS; } context.SaveChanges(); } } } You will notice that much of the code that I added to the Seed method is taken from the IdentityDbInit class, which I used to seed the database with an administration user in Chapter 14. This is because the new Configuration class added to support database migrations will replace the seeding function of the IdentityDbInit class, which I’ll update shortly. Aside from ensuring that there is an admin user, the statements in the Seed method that are important are the ones that set the initial value for the City property I added to the AppUser class, as follows: ... foreach (AppUser dbUser in userMgr.Users) { dbUser.City = Cities.PARIS; } context.SaveChanges(); ...
- 76. CHAPTER 15 ■ ADVANCED ASP.NET IDENTITY 9 You don’t have to set a default value for new properties—I just wanted to demonstrate that the Seed method in the Configuration class can be used to update the existing user records in the database. Caution ■ Be careful when setting values for properties in the Seed method for real projects because the values will be applied every time you change the schema, overriding any values that the user has set since the last schema update was performed. I set the value of the City property just to demonstrate that it can be done. Changing the Database Context Class The reason that I added the seeding code to the Configuration class is that I need to change the IdentityDbInit class. At present, the IdentityDbInit class is derived from the descriptively named DropCreateDatabaseIfModelC hanges<AppIdentityDbContext> class, which, as you might imagine, drops the entire database when the Code First classes change. Listing 15-6 shows the changes I made to the IdentityDbInit class to prevent it from affecting the database. Listing 15-6. Preventing Database Schema Changes in the AppIdentityDbContext.cs File using System.Data.Entity; using Microsoft.AspNet.Identity.EntityFramework; using Users.Models; using Microsoft.AspNet.Identity; namespace Users.Infrastructure { public class AppIdentityDbContext : IdentityDbContext<AppUser> { public AppIdentityDbContext() : base("IdentityDb") { } static AppIdentityDbContext() { Database.SetInitializer<AppIdentityDbContext>(new IdentityDbInit()); } public static AppIdentityDbContext Create() { return new AppIdentityDbContext(); } } public class IdentityDbInit : NullDatabaseInitializer<AppIdentityDbContext> { } } I have removed the methods defined by the class and changed its base to NullDatabaseInitializer<AppIdentit yDbContext>, which prevents the schema from being altered.
- 77. CHAPTER 15 ■ ADVANCED ASP.NET IDENTITY 10 Performing the Migration All that remains is to generate and apply the migration. First, run the following command in the Package Manager Console: Add-Migration CityProperty This creates a new migration called CityProperty (I like my migration names to reflect the changes I made). A class new file will be added to the Migrations folder, and its name reflects the time at which the command was run and the name of the migration. My file is called 201402262244036_CityProperty.cs, for example. The contents of this file contain the details of how Entity Framework will change the database during the migration, as shown in Listing 15-7. Listing 15-7. The Contents of the 201402262244036_ CityProperty.cs File namespace Users.Migrations { using System; using System.Data.Entity.Migrations; public partial class Init : DbMigration { public override void Up() { AddColumn("dbo.AspNetUsers", "City", c => c.Int(nullable: false)); } public override void Down() { DropColumn("dbo.AspNetUsers", "City"); } } } The Up method describes the changes that have to be made to the schema when the database is upgraded, which in this case means adding a City column to the AspNetUsers table, which is the one that is used to store user records in the ASP.NET Identity database. The final step is to perform the migration. Without starting the application, run the following command in the Package Manager Console: Update-Database –TargetMigration CityProperty The database schema will be modified, and the code in the Configuration.Seed method will be executed. The existing user accounts will have been preserved and enhanced with a City property (which I set to Paris in the Seed method). Testing the Migration To test the effect of the migration, start the application, navigate to the /Home/UserProps URL, and authenticate as one of the Identity users (for example, as Alice with the password MySecret). Once authenticated, you will see the current value of the City property for the user and have the opportunity to change it, as shown in Figure 15-3.
- 78. CHAPTER 15 ■ ADVANCED ASP.NET IDENTITY 11 Defining an Additional Property Now that database migrations are set up, I am going to define a further property just to demonstrate how subsequent changes are handled and to show a more useful (and less dangerous) example of using the Configuration.Seed method. Listing 15-8 shows how I added a Country property to the AppUser class. Listing 15-8. Adding Another Property in the AppUserModels.cs File using System; using Microsoft.AspNet.Identity.EntityFramework; namespace Users.Models { public enum Cities { LONDON, PARIS, CHICAGO } public enum Countries { NONE, UK, FRANCE, USA } public class AppUser : IdentityUser { public Cities City { get; set; } public Countries Country { get; set; } public void SetCountryFromCity(Cities city) { switch (city) { case Cities.LONDON: Country = Countries.UK; break; Figure 15-3. Displaying and changing a custom user property
- 79. CHAPTER 15 ■ ADVANCED ASP.NET IDENTITY 12 case Cities.PARIS: Country = Countries.FRANCE; break; case Cities.CHICAGO: Country = Countries.USA; break; default: Country = Countries.NONE; break; } } } } I have added an enumeration to define the country names and a helper method that selects a country value based on the City property. Listing 15-9 shows the change I made to the Configuration class so that the Seed method sets the Country property based on the City, but only if the value of Country is NONE (which it will be for all users when the database is migrated because the Entity Framework sets enumeration columns to the first value). Listing 15-9. Modifying the Database Seed in the Configuration.cs File using System.Data.Entity.Migrations; using Microsoft.AspNet.Identity; using Microsoft.AspNet.Identity.EntityFramework; using Users.Infrastructure; using Users.Models; namespace Users.Migrations { internal sealed class Configuration : DbMigrationsConfiguration<AppIdentityDbContext> { public Configuration() { AutomaticMigrationsEnabled = true; ContextKey = "Users.Infrastructure.AppIdentityDbContext"; } protected override void Seed(AppIdentityDbContext context) { AppUserManager userMgr = new AppUserManager(new UserStore<AppUser>(context)); AppRoleManager roleMgr = new AppRoleManager(new RoleStore<AppRole>(context)); string roleName = "Administrators"; string userName = "Admin"; string password = "MySecret"; string email = "[email protected]"; if (!roleMgr.RoleExists(roleName)) { roleMgr.Create(new AppRole(roleName)); }
- 80. CHAPTER 15 ■ ADVANCED ASP.NET IDENTITY 13 AppUser user = userMgr.FindByName(userName); if (user == null) { userMgr.Create(new AppUser { UserName = userName, Email = email }, password); user = userMgr.FindByName(userName); } if (!userMgr.IsInRole(user.Id, roleName)) { userMgr.AddToRole(user.Id, roleName); } foreach (AppUser dbUser in userMgr.Users) { if (dbUser.Country == Countries.NONE) { dbUser.SetCountryFromCity(dbUser.City); } } context.SaveChanges(); } } } This kind of seeding is more useful in a real project because it will set a value for the Country property only if one has not already been set—subsequent migrations won’t be affected, and user selections won’t be lost. Adding Application Support There is no point defining additional user properties if they are not available in the application, so Listing 15-10 shows the change I made to the Views/Home/UserProps.cshtml file to display the value of the Country property. Listing 15-10. Displaying an Additional Property in the UserProps.cshtml File @using Users.Models @model AppUser @{ ViewBag.Title = "UserProps";} <div class="panel panel-primary"> <div class="panel-heading"> Custom User Properties </div> <table class="table table-striped"> <tr><th>City</th><td>@Model.City</td></tr> <tr><th>Country</th><td>@Model.Country</td></tr> </table> </div> @using (Html.BeginForm()) { <div class="form-group"> <label>City</label> @Html.DropDownListFor(x => x.City, new SelectList(Enum.GetNames(typeof(Cities)))) </div> <button class="btn btn-primary" type="submit">Save</button> }
- 81. CHAPTER 15 ■ ADVANCED ASP.NET IDENTITY 14 Listing 15-11 shows the corresponding change I made to the Home controller to update the Country property when the City value changes. Listing 15-11. Setting Custom Properties in the HomeController.cs File using System.Web.Mvc; using System.Collections.Generic; using System.Web; using System.Security.Principal; using System.Threading.Tasks; using Users.Infrastructure; using Microsoft.AspNet.Identity; using Microsoft.AspNet.Identity.Owin; using Users.Models; namespace Users.Controllers { public class HomeController : Controller { // ...other action methods omitted for brevity... [Authorize] public ActionResult UserProps() { return View(CurrentUser); } [Authorize] [HttpPost] public async Task<ActionResult> UserProps(Cities city) { AppUser user = CurrentUser; user.City = city; user.SetCountryFromCity(city); await UserManager.UpdateAsync(user); return View(user); } // ...properties omitted for brevity... } } Performing the Migration All that remains is to create and apply a new migration. Enter the following command into the Package Manager Console: Add-Migration CountryProperty
- 82. CHAPTER 15 ■ ADVANCED ASP.NET IDENTITY 15 This will generate another file in the Migrations folder that contains the instruction to add the Country column. To apply the migration, execute the following command: Update-Database –TargetMigration CountryProperty The migration will be performed, and the value of the Country property will be set based on the value of the existing City property for each user. You can check the new user property by starting the application and authenticating and navigating to the /Home/UserProps URL, as shown in Figure 15-4. Figure 15-4. Creating an additional user property Tip ■ Although I am focused on the process of upgrading the database, you can also migrate back to a previous version by specifying an earlier migration. Use the –Force argument make changes that cause data loss, such as removing a column. Working with Claims In older user-management systems, such as ASP.NET Membership, the application was assumed to be the authoritative source of all information about the user, essentially treating the application as a closed world and trusting the data that is contained within it. This is such an ingrained approach to software development that it can be hard to recognize that’s what is happening, but you saw an example of the closed-world technique in Chapter 14 when I authenticated users against the credentials stored in the database and granted access based on the roles associated with those credentials. I did the same thing again in this chapter when I added properties to the user class. Every piece of information that I needed to manage user authentication and authorization came from within my application—and that is a perfectly satisfactory approach for many web applications, which is why I demonstrated these techniques in such depth. ASP.NET Identity also supports an alternative approach for dealing with users, which works well when the MVC framework application isn’t the sole source of information about users and which can be used to authorize users in more flexible and fluid ways than traditional roles allow.
- 83. CHAPTER 15 ■ ADVANCED ASP.NET IDENTITY 16 This alternative approach uses claims, and in this section I’ll describe how ASP.NET Identity supports claims- based authorization. Table 15-4 puts claims in context. Table 15-4. Putting Claims in Context Question Answer What is it? Claims are pieces of information about users that you can use to make authorization decisions. Claims can be obtained from external systems as well as from the local Identity database. Why should I care? Claims can be used to flexibly authorize access to action methods. Unlike conventional roles, claims allow access to be driven by the information that describes the user. How is it used by the MVC framework? This feature isn’t used directly by the MVC framework, but it is integrated into the standard authorization features, such as the Authorize attribute. Tip ■ You don’t have to use claims in your applications, and as Chapter 14 showed, ASP.NET Identity is perfectly happy providing an application with the authentication and authorization services without any need to understand claims at all. Understanding Claims A claim is a piece of information about the user, along with some information about where the information came from. The easiest way to unpack claims is through some practical demonstrations, without which any discussion becomes too abstract to be truly useful. To get started, I added a Claims controller to the example project, the definition of which you can see in Listing 15-12. Listing 15-12. The Contents of the ClaimsController.cs File using System.Security.Claims; using System.Web; using System.Web.Mvc; namespace Users.Controllers { public class ClaimsController : Controller { [Authorize] public ActionResult Index() { ClaimsIdentity ident = HttpContext.User.Identity as ClaimsIdentity; if (ident == null) { return View("Error", new string[] { "No claims available" }); } else { return View(ident.Claims); } } } }
- 84. CHAPTER 15 ■ ADVANCED ASP.NET IDENTITY 17 Tip ■ You may feel a little lost as I define the code for this example. Don’t worry about the details for the moment—just stick with it until you see the output from the action method and view that I define. More than anything else, that will help put claims into perspective. You can get the claims associated with a user in different ways. One approach is to use the Claims property defined by the user class, but in this example, I have used the HttpContext.User.Identity property to demonstrate the way that ASP.NET Identity is integrated with the rest of the ASP.NET platform. As I explained in Chapter 13, the HttpContext.User.Identity property returns an implementation of the IIdentity interface, which is a ClaimsIdentity object when working using ASP.NET Identity. The ClaimsIdentity class is defined in the System.Security.Claims namespace, and Table 15-5 shows the members it defines that are relevant to this chapter. Table 15-5. The Members Defined by the ClaimsIdentity Class Name Description Claims Returns an enumeration of Claim objects representing the claims for the user. AddClaim(claim) Adds a claim to the user identity. AddClaims(claims) Adds an enumeration of Claim objects to the user identity. HasClaim(predicate) Returns true if the user identity contains a claim that matches the specified predicate. See the “Applying Claims” section for an example predicate. RemoveClaim(claim) Removes a claim from the user identity. Table 15-6. The Properties Defined by the Claim Class Name Description Issuer Returns the name of the system that provided the claim Subject Returns the ClaimsIdentity object for the user who the claim refers to Type Returns the type of information that the claim represents Value Returns the piece of information that the claim represents Other members are available, but the ones in the table are those that are used most often in web applications, for reason that will become obvious as I demonstrate how claims fit into the wider ASP.NET platform. In Listing 15-12, I cast the IIdentity implementation to the ClaimsIdentity type and pass the enumeration of Claim objects returned by the ClaimsIdentity.Claims property to the View method. A Claim object represents a single piece of data about the user, and the Claim class defines the properties shown in Table 15-6. Listing 15-13 shows the contents of the Index.cshtml file that I created in the Views/Claims folder and that is rendered by the Index action of the Claims controller. The view adds a row to a table for each claim about the user.
- 85. CHAPTER 15 ■ ADVANCED ASP.NET IDENTITY 18 Listing 15-13. The Contents of the Index.cshtml File in the Views/Claims Folder @using System.Security.Claims @using Users.Infrastructure @model IEnumerable<Claim> @{ ViewBag.Title = "Claims"; } <div class="panel panel-primary"> <div class="panel-heading"> Claims </div> <table class="table table-striped"> <tr> <th>Subject</th><th>Issuer</th> <th>Type</th><th>Value</th> </tr> @foreach (Claim claim in Model.OrderBy(x => x.Type)) { <tr> <td>@claim.Subject.Name</td> <td>@claim.Issuer</td> <td>@Html.ClaimType(claim.Type)</td> <td>@claim.Value</td> </tr> } </table> </div> The value of the Claim.Type property is a URI for a Microsoft schema, which isn’t especially useful. The popular schemas are used as the values for fields in the System.Security.Claims.ClaimTypes class, so to make the output from the Index.cshtml view easier to read, I added an HTML helper to the IdentityHelpers.cs file, as shown in Listing 15-14. It is this helper that I use in the Index.cshtml file to format the value of the Claim.Type property. Listing 15-14. Adding a Helper to the IdentityHelpers.cs File using System.Web; using System.Web.Mvc; using Microsoft.AspNet.Identity.Owin; using System; using System.Linq; using System.Reflection; using System.Security.Claims; namespace Users.Infrastructure { public static class IdentityHelpers { public static MvcHtmlString GetUserName(this HtmlHelper html, string id) { AppUserManager mgr = HttpContext.Current.GetOwinContext().GetUserManager<AppUserManager>(); return new MvcHtmlString(mgr.FindByIdAsync(id).Result.UserName); }
- 86. CHAPTER 15 ■ ADVANCED ASP.NET IDENTITY 19 public static MvcHtmlString ClaimType(this HtmlHelper html, string claimType) { FieldInfo[] fields = typeof(ClaimTypes).GetFields(); foreach (FieldInfo field in fields) { if (field.GetValue(null).ToString() == claimType) { return new MvcHtmlString(field.Name); } } return new MvcHtmlString(string.Format("{0}", claimType.Split('/', '.').Last())); } } } Note ■ The helper method isn’t at all efficient because it reflects on the fields of the ClaimType class for each claim that is displayed, but it is sufficient for my purposes in this chapter. You won’t often need to display the claim type in real applications. To see why I have created a controller that uses claims without really explaining what they are, start the application, authenticate as the user Alice (with the password MySecret), and request the /Claims/Index URL. Figure 15-5 shows the content that is generated. Figure 15-5. The output from the Index action of the Claims controller It can be hard to make out the detail in the figure, so I have reproduced the content in Table 15-7.
- 87. CHAPTER 15 ■ ADVANCED ASP.NET IDENTITY 20 The table shows the most important aspect of claims, which is that I have already been using them when I implemented the traditional authentication and authorization features in Chapter 14. You can see that some of the claims relate to user identity (the Name claim is Alice, and the NameIdentifier claim is Alice’s unique user ID in my ASP.NET Identity database). Other claims show membership of roles—there are two Role claims in the table, reflecting the fact that Alice is assigned to both the Users and Employees roles. There is also a claim about how Alice has been authenticated: The IdentityProvider is set to ASP.NET Identity. The difference when this information is expressed as a set of claims is that you can determine where the data came from. The Issuer property for all the claims shown in the table is set to LOCAL AUTHORITY, which indicates that the user’s identity has been established by the application. So, now that you have seen some example claims, I can more easily describe what a claim is. A claim is any piece of information about a user that is available to the application, including the user’s identity and role memberships. And, as you have seen, the information I have been defining about my users in earlier chapters is automatically made available as claims by ASP.NET Identity. Creating and Using Claims Claims are interesting for two reasons. The first reason is that an application can obtain claims from multiple sources, rather than just relying on a local database for information about the user. You will see a real example of this when I show you how to authenticate users through a third-party system in the “Using Third-Party Authentication” section, but for the moment I am going to add a class to the example project that simulates a system that provides claims information. Listing 15-15 shows the contents of the LocationClaimsProvider.cs file that I added to the Infrastructure folder. Listing 15-15. The Contents of the LocationClaimsProvider.cs File using System.Collections.Generic; using System.Security.Claims; namespace Users.Infrastructure { public static class LocationClaimsProvider { public static IEnumerable<Claim> GetClaims(ClaimsIdentity user) { List<Claim> claims = new List<Claim>(); if (user.Name.ToLower() == "alice") { claims.Add(CreateClaim(ClaimTypes.PostalCode, "DC 20500")); claims.Add(CreateClaim(ClaimTypes.StateOrProvince, "DC")); Table 15-7. The Data Shown in Figure 15-5 Subject Issuer Type Value Alice LOCAL AUTHORITY SecurityStamp Unique ID Alice LOCAL AUTHORITY IdentityProvider ASP.NET Identity Alice LOCAL AUTHORITY Role Employees Alice LOCAL AUTHORITY Role Users Alice LOCAL AUTHORITY Name Alice Alice LOCAL AUTHORITY NameIdentifier Alice’s user ID
- 88. CHAPTER 15 ■ ADVANCED ASP.NET IDENTITY 21 } else { claims.Add(CreateClaim(ClaimTypes.PostalCode, "NY 10036")); claims.Add(CreateClaim(ClaimTypes.StateOrProvince, "NY")); } return claims; } private static Claim CreateClaim(string type, string value) { return new Claim(type, value, ClaimValueTypes.String, "RemoteClaims"); } } } The GetClaims method takes a ClaimsIdentity argument and uses the Name property to create claims about the user’s ZIP code and state. This class allows me to simulate a system such as a central HR database, which would be the authoritative source of location information about staff, for example. Claims are associated with the user’s identity during the authentication process, and Listing 15-16 shows the changes I made to the Login action method of the Account controller to call the LocationClaimsProvider class. Listing 15-16. Associating Claims with a User in the AccountController.cs File ... [HttpPost] [AllowAnonymous] [ValidateAntiForgeryToken] public async Task<ActionResult> Login(LoginModel details, string returnUrl) { if (ModelState.IsValid) { AppUser user = await UserManager.FindAsync(details.Name, details.Password); if (user == null) { ModelState.AddModelError("", "Invalid name or password."); } else { ClaimsIdentity ident = await UserManager.CreateIdentityAsync(user, DefaultAuthenticationTypes.ApplicationCookie); ident.AddClaims(LocationClaimsProvider.GetClaims(ident)); AuthManager.SignOut(); AuthManager.SignIn(new AuthenticationProperties { IsPersistent = false }, ident); return Redirect(returnUrl); } } ViewBag.returnUrl = returnUrl; return View(details); } ... You can see the effect of the location claims by starting the application, authenticating as a user, and requesting the /Claim/Index URL. Figure 15-6 shows the claims for Alice. You may have to sign out and sign back in again to see the change.
- 89. CHAPTER 15 ■ ADVANCED ASP.NET IDENTITY 22 Obtaining claims from multiple locations means that the application doesn’t have to duplicate data that is held elsewhere and allows integration of data from external parties. The Claim.Issuer property tells you where a claim originated from, which helps you judge how accurate the data is likely to be and how much weight you should give the data in your application. Location data obtained from a central HR database is likely to be more accurate and trustworthy than data obtained from an external mailing list provider, for example. Applying Claims The second reason that claims are interesting is that you can use them to manage user access to your application more flexibly than with standard roles. The problem with roles is that they are static, and once a user has been assigned to a role, the user remains a member until explicitly removed. This is, for example, how long-term employees of big corporations end up with incredible access to internal systems: They are assigned the roles they require for each new job they get, but the old roles are rarely removed. (The unexpectedly broad systems access sometimes becomes apparent during the investigation into how someone was able to ship the contents of the warehouse to their home address—true story.) Claims can be used to authorize users based directly on the information that is known about them, which ensures that the authorization changes when the data changes. The simplest way to do this is to generate Role claims based on user data that are then used by controllers to restrict access to action methods. Listing 15-17 shows the contents of the ClaimsRoles.cs file that I added to the Infrastructure. Figure 15-6. Defining additional claims for users
- 90. CHAPTER 15 ■ ADVANCED ASP.NET IDENTITY 23 Listing 15-17. The Contents of the ClaimsRoles.cs File using System.Collections.Generic; using System.Security.Claims; namespace Users.Infrastructure { public class ClaimsRoles { public static IEnumerable<Claim> CreateRolesFromClaims(ClaimsIdentity user) { List<Claim> claims = new List<Claim>(); if (user.HasClaim(x => x.Type == ClaimTypes.StateOrProvince && x.Issuer == "RemoteClaims" && x.Value == "DC") && user.HasClaim(x => x.Type == ClaimTypes.Role && x.Value == "Employees")) { claims.Add(new Claim(ClaimTypes.Role, "DCStaff")); } return claims; } } } The gnarly looking CreateRolesFromClaims method uses lambda expressions to determine whether the user has a StateOrProvince claim from the RemoteClaims issuer with a value of DC and a Role claim with a value of Employees. If the user has both claims, then a Role claim is returned for the DCStaff role. Listing 15-18 shows how I call the CreateRolesFromClaims method from the Login action in the Account controller. Listing 15-18. Generating Roles Based on Claims in the AccountController.cs File ... [HttpPost] [AllowAnonymous] [ValidateAntiForgeryToken] public async Task<ActionResult> Login(LoginModel details, string returnUrl) { if (ModelState.IsValid) { AppUser user = await UserManager.FindAsync(details.Name, details.Password); if (user == null) { ModelState.AddModelError("", "Invalid name or password."); } else { ClaimsIdentity ident = await UserManager.CreateIdentityAsync(user, DefaultAuthenticationTypes.ApplicationCookie); ident.AddClaims(LocationClaimsProvider.GetClaims(ident)); ident.AddClaims(ClaimsRoles.CreateRolesFromClaims(ident)); AuthManager.SignOut(); AuthManager.SignIn(new AuthenticationProperties { IsPersistent = false }, ident); return Redirect(returnUrl); } } ViewBag.returnUrl = returnUrl; return View(details); } ...
- 91. CHAPTER 15 ■ ADVANCED ASP.NET IDENTITY 24 I can then restrict access to an action method based on membership of the DCStaff role. Listing 15-19 shows a new action method I added to the Claims controller to which I have applied the Authorize attribute. Listing 15-19. Adding a New Action Method to the ClaimsController.cs File using System.Security.Claims; using System.Web; using System.Web.Mvc; namespace Users.Controllers { public class ClaimsController : Controller { [Authorize] public ActionResult Index() { ClaimsIdentity ident = HttpContext.User.Identity as ClaimsIdentity; if (ident == null) { return View("Error", new string[] { "No claims available" }); } else { return View(ident.Claims); } } [Authorize(Roles="DCStaff")] public string OtherAction() { return "This is the protected action"; } } } Users will be able to access OtherAction only if their claims grant them membership to the DCStaff role. Membership of this role is generated dynamically, so a change to the user’s employment status or location information will change their authorization level. Authorizing Access Using Claims The previous example is an effective demonstration of how claims can be used to keep authorizations fresh and accurate, but it is a little indirect because I generate roles based on claims data and then enforce my authorization policy based on the membership of that role. A more direct and flexible approach is to enforce authorization directly by creating a custom authorization filter attribute. Listing 15-20 shows the contents of the ClaimsAccessAttribute.cs file, which I added to the Infrastructure folder and used to create such a filter. Listing 15-20. The Contents of the ClaimsAccessAttribute.cs File using System.Security.Claims; using System.Web; using System.Web.Mvc; namespace Users.Infrastructure { public class ClaimsAccessAttribute : AuthorizeAttribute {
- 92. CHAPTER 15 ■ ADVANCED ASP.NET IDENTITY 25 public string Issuer { get; set; } public string ClaimType { get; set; } public string Value { get; set; } protected override bool AuthorizeCore(HttpContextBase context) { return context.User.Identity.IsAuthenticated && context.User.Identity is ClaimsIdentity && ((ClaimsIdentity)context.User.Identity).HasClaim(x => x.Issuer == Issuer && x.Type == ClaimType && x.Value == Value ); } } } The attribute I have defined is derived from the AuthorizeAttribute class, which makes it easy to create custom authorization policies in MVC framework applications by overriding the AuthorizeCore method. My implementation grants access if the user is authenticated, the IIdentity implementation is an instance of ClaimsIdentity, and the user has a claim with the issuer, type, and value matching the class properties. Listing 15-21 shows how I applied the attribute to the Claims controller to authorize access to the OtherAction method based on one of the location claims created by the LocationClaimsProvider class. Listing 15-21. Performing Authorization on Claims in the ClaimsController.cs File using System.Security.Claims; using System.Web; using System.Web.Mvc; using Users.Infrastructure; namespace Users.Controllers { public class ClaimsController : Controller { [Authorize] public ActionResult Index() { ClaimsIdentity ident = HttpContext.User.Identity as ClaimsIdentity; if (ident == null) { return View("Error", new string[] { "No claims available" }); } else { return View(ident.Claims); } } [ClaimsAccess(Issuer="RemoteClaims", ClaimType=ClaimTypes.PostalCode, Value="DC 20500")] public string OtherAction() { return "This is the protected action"; } } } My authorization filter ensures that only users whose location claims specify a ZIP code of DC 20500 can invoke the OtherAction method.
- 93. CHAPTER 15 ■ ADVANCED ASP.NET IDENTITY 26 Using Third-Party Authentication One of the benefits of a claims-based system such as ASP.NET Identity is that any of the claims can come from an external system, even those that identify the user to the application. This means that other systems can authenticate users on behalf of the application, and ASP.NET Identity builds on this idea to make it simple and easy to add support for authenticating users through third parties such as Microsoft, Google, Facebook, and Twitter. There are some substantial benefits of using third-party authentication: Many users will already have an account, users can elect to use two-factor authentication, and you don’t have to manage user credentials in the application. In the sections that follow, I’ll show you how to set up and use third-party authentication for Google users, which Table 15-8 puts into context. Table 15-8. Putting Third-Party Authentication in Context Question Answer What is it? Authenticating with third parties lets you take advantage of the popularity of companies such as Google and Facebook. Why should I care? Users don’t like having to remember passwords for many different sites. Using a provider with large-scale adoption can make your application more appealing to users of the provider’s services. How is it used by the MVC framework? This feature isn’t used directly by the MVC framework. Note ■ The reason I have chosen to demonstrate Google authentication is that it is the only option that doesn’t require me to register my application with the authentication service. You can get details of the registration processes required at http://bit.ly/1cqLTrE. Enabling Google Authentication ASP.NET Identity comes with built-in support for authenticating users through their Microsoft, Google, Facebook, and Twitter accounts as well more general support for any authentication service that supports OAuth. The first step is to add the NuGet package that includes the Google-specific additions for ASP.NET Identity. Enter the following command into the Package Manager Console: Install-Package Microsoft.Owin.Security.Google -version 2.0.2 There are NuGet packages for each of the services that ASP.NET Identity supports, as described in Table 15-9.
- 94. CHAPTER 15 ■ ADVANCED ASP.NET IDENTITY 27 Once the package is installed, I enable support for the authentication service in the OWIN startup class, which is defined in the App_Start/IdentityConfig.cs file in the example project. Listing 15-22 shows the change that I have made. Listing 15-22. Enabling Google Authentication in the IdentityConfig.cs File using Microsoft.AspNet.Identity; using Microsoft.Owin; using Microsoft.Owin.Security.Cookies; using Owin; using Users.Infrastructure; using Microsoft.Owin.Security.Google; namespace Users { public class IdentityConfig { public void Configuration(IAppBuilder app) { app.CreatePerOwinContext<AppIdentityDbContext>(AppIdentityDbContext.Create); app.CreatePerOwinContext<AppUserManager>(AppUserManager.Create); app.CreatePerOwinContext<AppRoleManager>(AppRoleManager.Create); app.UseCookieAuthentication(new CookieAuthenticationOptions { AuthenticationType = DefaultAuthenticationTypes.ApplicationCookie, LoginPath = new PathString("/Account/Login"), }); app.UseExternalSignInCookie(DefaultAuthenticationTypes.ExternalCookie); app.UseGoogleAuthentication(); } } } Each of the packages that I listed in Table 15-9 contains an extension method that enables the corresponding service. The extension method for the Google service is called UseGoogleAuthentication, and it is called on the IAppBuilder implementation that is passed to the Configuration method. Next I added a button to the Views/Account/Login.cshtml file, which allows users to log in via Google. You can see the change in Listing 15-23. Table 15-9. The NuGet Authenticaton Packages Name Description Microsoft.Owin.Security.Google Authenticates users with Google accounts Microsoft.Owin.Security.Facebook Authenticates users with Facebook accounts Microsoft.Owin.Security.Twitter Authenticates users with Twitter accounts Microsoft.Owin.Security.MicrosoftAccount Authenticates users with Microsoft accounts Microsoft.Owin.Security.OAuth Authenticates users against any OAuth 2.0 service
- 95. CHAPTER 15 ■ ADVANCED ASP.NET IDENTITY 28 Listing 15-23. Adding a Google Login Button to the Login.cshtml File @model Users.Models.LoginModel @{ ViewBag.Title = "Login";} <h2>Log In</h2> @Html.ValidationSummary() @using (Html.BeginForm()) { @Html.AntiForgeryToken(); <input type="hidden" name="returnUrl" value="@ViewBag.returnUrl" /> <div class="form-group"> <label>Name</label> @Html.TextBoxFor(x => x.Name, new { @class = "form-control" }) </div> <div class="form-group"> <label>Password</label> @Html.PasswordFor(x => x.Password, new { @class = "form-control" }) </div> <button class="btn btn-primary" type="submit">Log In</button> } @using (Html.BeginForm("GoogleLogin", "Account")) { <input type="hidden" name="returnUrl" value="@ViewBag.returnUrl" /> <button class="btn btn-primary" type="submit">Log In via Google</button> } The new button submits a form that targets the GoogleLogin action on the Account controller. You can see this method—and the other changes I made the controller—in Listing 15-24. Listing 15-24. Adding Support for Google Authentication to the AccountController.cs File using System.Threading.Tasks; using System.Web.Mvc; using Users.Models; using Microsoft.Owin.Security; using System.Security.Claims; using Microsoft.AspNet.Identity; using Microsoft.AspNet.Identity.Owin; using Users.Infrastructure; using System.Web; namespace Users.Controllers { [Authorize] public class AccountController : Controller { [AllowAnonymous] public ActionResult Login(string returnUrl) { if (HttpContext.User.Identity.IsAuthenticated) { return View("Error", new string[] { "Access Denied" }); }
- 96. CHAPTER 15 ■ ADVANCED ASP.NET IDENTITY 29 ViewBag.returnUrl = returnUrl; return View(); } [HttpPost] [AllowAnonymous] [ValidateAntiForgeryToken] public async Task<ActionResult> Login(LoginModel details, string returnUrl) { if (ModelState.IsValid) { AppUser user = await UserManager.FindAsync(details.Name, details.Password); if (user == null) { ModelState.AddModelError("", "Invalid name or password."); } else { ClaimsIdentity ident = await UserManager.CreateIdentityAsync(user, DefaultAuthenticationTypes.ApplicationCookie); ident.AddClaims(LocationClaimsProvider.GetClaims(ident)); ident.AddClaims(ClaimsRoles.CreateRolesFromClaims(ident)); AuthManager.SignOut(); AuthManager.SignIn(new AuthenticationProperties { IsPersistent = false }, ident); return Redirect(returnUrl); } } ViewBag.returnUrl = returnUrl; return View(details); } [HttpPost] [AllowAnonymous] public ActionResult GoogleLogin(string returnUrl) { var properties = new AuthenticationProperties { RedirectUri = Url.Action("GoogleLoginCallback", new { returnUrl = returnUrl}) }; HttpContext.GetOwinContext().Authentication.Challenge(properties, "Google"); return new HttpUnauthorizedResult(); } [AllowAnonymous] public async Task<ActionResult> GoogleLoginCallback(string returnUrl) { ExternalLoginInfo loginInfo = await AuthManager.GetExternalLoginInfoAsync(); AppUser user = await UserManager.FindAsync(loginInfo.Login); if (user == null) { user = new AppUser { Email = loginInfo.Email, UserName = loginInfo.DefaultUserName, City = Cities.LONDON, Country = Countries.UK };
- 97. CHAPTER 15 ■ ADVANCED ASP.NET IDENTITY 30 IdentityResult result = await UserManager.CreateAsync(user); if (!result.Succeeded) { return View("Error", result.Errors); } else { result = await UserManager.AddLoginAsync(user.Id, loginInfo.Login); if (!result.Succeeded) { return View("Error", result.Errors); } } } ClaimsIdentity ident = await UserManager.CreateIdentityAsync(user, DefaultAuthenticationTypes.ApplicationCookie); ident.AddClaims(loginInfo.ExternalIdentity.Claims); AuthManager.SignIn(new AuthenticationProperties { IsPersistent = false }, ident); return Redirect(returnUrl ?? "/"); } [Authorize] public ActionResult Logout() { AuthManager.SignOut(); return RedirectToAction("Index", "Home"); } private IAuthenticationManager AuthManager { get { return HttpContext.GetOwinContext().Authentication; } } private AppUserManager UserManager { get { return HttpContext.GetOwinContext().GetUserManager<AppUserManager>(); } } } } The GoogleLogin method creates an instance of the AuthenticationProperties class and sets the RedirectUri property to a URL that targets the GoogleLoginCallback action in the same controller. The next part is a magic phrase that causes ASP.NET Identity to respond to an unauthorized error by redirecting the user to the Google authentication page, rather than the one defined by the application: ... HttpContext.GetOwinContext().Authentication.Challenge(properties, "Google"); return new HttpUnauthorizedResult(); ...
- 98. CHAPTER 15 ■ ADVANCED ASP.NET IDENTITY 31 This means that when the user clicks the Log In via Google button, their browser is redirected to the Google authentication service and then redirected back to the GoogleLoginCallback action method once they are authenticated. I get details of the external login by calling the GetExternalLoginInfoAsync of the IAuthenticationManager implementation, like this: ... ExternalLoginInfo loginInfo = await AuthManager.GetExternalLoginInfoAsync(); ... The ExternalLoginInfo class defines the properties shown in Table 15-10. Table 15-10. The Properties Defined by the ExternalLoginInfo Class Name Description DefaultUserName Returns the username Email Returns the e-mail address ExternalIdentity Returns a ClaimsIdentity that identities the user Login Returns a UserLoginInfo that describes the external login I use the FindAsync method defined by the user manager class to locate the user based on the value of the ExternalLoginInfo.Login property, which returns an AppUser object if the user has been authenticated with the application before: ... AppUser user = await UserManager.FindAsync(loginInfo.Login); ... If the FindAsync method doesn’t return an AppUser object, then I know that this is the first time that this user has logged into the application, so I create a new AppUser object, populate it with values, and save it to the database. I also save details of how the user logged in so that I can find them next time: ... result = await UserManager.AddLoginAsync(user.Id, loginInfo.Login); ... All that remains is to generate an identity the user, copy the claims provided by Google, and create an authentication cookie so that the application knows the user has been authenticated: ... ClaimsIdentity ident = await UserManager.CreateIdentityAsync(user, DefaultAuthenticationTypes.ApplicationCookie); ident.AddClaims(loginInfo.ExternalIdentity.Claims); AuthManager.SignIn(new AuthenticationProperties { IsPersistent = false }, ident); ...
- 99. CHAPTER 15 ■ ADVANCED ASP.NET IDENTITY 32 Testing Google Authentication There is one further change that I need to make before I can test Google authentication: I need to change the account verification I set up in Chapter 13 because it prevents accounts from being created with e-mail addresses that are not within the example.com domain. Listing 15-25 shows how I removed the verification from the AppUserManager class. Listing 15-25. Disabling Account Validation in the AppUserManager.cs File using Microsoft.AspNet.Identity; using Microsoft.AspNet.Identity.EntityFramework; using Microsoft.AspNet.Identity.Owin; using Microsoft.Owin; using Users.Models; namespace Users.Infrastructure { public class AppUserManager : UserManager<AppUser> { public AppUserManager(IUserStore<AppUser> store) : base(store) { } public static AppUserManager Create( IdentityFactoryOptions<AppUserManager> options, IOwinContext context) { AppIdentityDbContext db = context.Get<AppIdentityDbContext>(); AppUserManager manager = new AppUserManager(new UserStore<AppUser>(db)); manager.PasswordValidator = new CustomPasswordValidator { RequiredLength = 6, RequireNonLetterOrDigit = false, RequireDigit = false, RequireLowercase = true, RequireUppercase = true }; //manager.UserValidator = new CustomUserValidator(manager) { // AllowOnlyAlphanumericUserNames = true, // RequireUniqueEmail = true //}; return manager; } } } Tip ■ You can use validation for externally authenticated accounts, but I am just going to disable the feature for simplicity.
- 100. CHAPTER 15 ■ ADVANCED ASP.NET IDENTITY 33 To test authentication, start the application, click the Log In via Google button, and provide the credentials for a valid Google account. When you have completed the authentication process, your browser will be redirected back to the application. If you navigate to the /Claims/Index URL, you will be able to see how claims from the Google system have been added to the user’s identity, as shown in Figure 15-7. Figure 15-7. Claims from Google Summary In this chapter, I showed you some of the advanced features that ASP.NET Identity supports. I demonstrated the use of custom user properties and how to use database migrations to preserve data when you upgrade the schema to support them. I explained how claims work and how they can be used to create more flexible ways of authorizing users. I finished the chapter by showing you how to authenticate users via Google, which builds on the ideas behind the use of claims. And that is all I have to teach you about the ASP.NET platform and how it supports MVC framework applications. I started by exploring the request handling life cycle and how it can be extended, managed, and disrupted. I then took you on a tour of the services that ASP.NET provides, showing you how they can be used to enhance and optimize your applications and improve the experience you deliver to your users. When writing MVC framework applications, it is easy to take the ASP.NET platform for granted, but this book has shown you just how much low-level functionality is available and how valuable it can be. I wish you every success in your web application projects, and I can only hope you have enjoyed reading this book as much as I enjoyed writing it.