


![36 DB2 Deployment Guide
Figure 2-1 DB2 Configuration Assistance
To export the connectivity information, select from the menu Configure →
Export Profile. There are three options for your choice: All, Database
Connections, and Customize. You can choose to export all of the entries or only
some of them. For example, if we choose Database Connections, the output file
generated by DB2 Configuration Assistant looks similar to the one shown in
Example 2-1.
Example 2-1 File generated by DB2 configuration Assistant
;Use BINARY file transfer
[FILE_DESCRIPTION]
APPLICATION=DB2/LINUXX8664 9.5.1
FILE_CONTENT=DB2 CCA Exported Data Sources
FILE_TYPE=CommonServer
FILE_FORMAT_VERSION=2.0
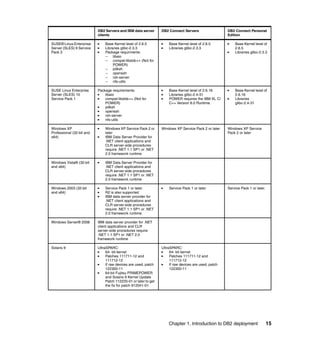
Platform=30
DB2SYSTEM=MENSA
Instance=db2inst1
[INST>db2inst1]
instance_name=db2inst1
NodeType=4
ServerType=DB2OS390
Authentication=SERVER
DB2COMM=tcpip
[NODE>ZAIRE01]
ServerType=DB2UNKNOWN
Nodetype=U
Protocol=TCPIP
Hostname=zaire
Portnumber=50000
Security=0](https://image.slidesharecdn.com/db2deploymentguide-sg247653-161209093309/85/Db2-deployment-guide-50-320.jpg)
![Chapter 2. DB2 server deployment 37
[DB>ZAIRE01:ITSODB]
Dir_entry_type=REMOTE
Authentication=NOTSPEC
DBName=ITSODB
[DB>!LOCAL:SAMPLE]
Dir_entry_type=INDIRECT
Drive=/home/db2inst1/db2home
DBName=SAMPLE
db2cfexp and db2cfimp
The export and import of configuration profile can also be performed from the
command line using the DB2 utilities db2cfexp and db2cfimp. The db2cfexp is
used to do export, while db2cfimp is used to do import.
DB2 Configuration Assistant provides other functionalities besides exporting and
importing a configuration profile. The db2cfexp and db2cfimp commands focus
on connectivity information and a few other associated configurations. The
configuration information that can be exported and imported using the db2cfexp
and db2cfimp commands are:
Database information (including DCS and ODBC information)
Node information
Protocol information
Database manager configuration settings
Registry settings
Common ODBC/CLI settings
The db2cfexp and db2cfimp commands are handy on platforms where the DB2
Configuration Assistant cannot be installed — for example, AIX and other UNIX
platforms, where tools based on the command line are more often utilized.
Table 2-1 shows the three available options for db2cfexp.
Table 2-1 Options for db2cfexp
Option Explanation
TEMPLATE Creates a generic export profile to transfer this configuration to
another workstation. (Includes configuration, catalog, and ODBC
information.)
BACKUP Creates a configuration profile of the DB2 database instance for local
backup purposes. This profile contains all of the instance configuration
information, including information of a specific nature relevant only to
this local instance.
MAINTAIN Creates a database export profile to transfer the database catalog
information to another workstation.](https://image.slidesharecdn.com/db2deploymentguide-sg247653-161209093309/85/Db2-deployment-guide-51-320.jpg)


![Chapter 2. DB2 server deployment 47
Note that db2_install is only available on UNIX and Linux platforms. Some
people prefer this method because it bypasses the configuration performed by
DB2 Setup and allows you to configure DB2 your preferred way in the first place.
Though not interactive as DB2 Setup, db2_install will prompt the user for the
required information if no options are specified.
The command usage of db2_install is as follows:
db2_install [-b <installpath>] [-p <db2producttobeinstalled>]
[-c <imagelocation>] [-l <logfile>] [-f NOTSAMP]
[-t <trcFile>] [-n] [-L <language>] [-h|-?]
For the explanation of the command parameters, refer to the DB2 Information
Center at:
http://publib.boulder.ibm.com/infocenter/db2luw/v9r5/topic/
com.ibm.db2.luw.admin.cmd.doc/doc/r0023669.html
The steps for DB2 server deployment with db2_install are as follows:
1. Extract the installation image to a temporary folder. If it is on a DVD, mount it
with an operating system command. Change to the directory where
db2_install is located.
2. Issue db2_install from the command line to start the installer. When issuing
it without the command line option, it prompts you with a few questions as
shown in Example 2-4.
Example 2-4 The output of command db2_install
[root@Zaire /tmp/v95ga/ese] #./db2_install
Default directory for installation of products - /opt/IBM/db2/V9.5
***********************************************************
Do you want to choose a different directory to install [yes/no] ?
......
Enter full path name for the install directory -
------------------------------------------------
......
Specify one of the following keywords to install DB2 products.
ESE
CLIENT
RTCL
Note: If you are installing a non-English version of DB2, National Language
Pack might be required. Use -L option of db2_install to specify the location of
it.](https://image.slidesharecdn.com/db2deploymentguide-sg247653-161209093309/85/Db2-deployment-guide-61-320.jpg)


![Chapter 2. DB2 server deployment 51
The db2rspgn utility automatically creates an instance configuration profile for all
instances on current system. However, you can also specify a configuration
profile for select instances. The configuration profile gets saved to the same path
as that of the response file.
The db2rspgn utility can be invoked from the DB2 Command Line Processor
window:
db2rspgn –d <destination directory> [-i <instance>]
Where:
-d <destination directory>: The destination directory for a response file and
any instance files. This parameter is required.
-i <instance>: A list of instances for which you want to create a
profile. The default is to generate an instance
profile file for all instances. This parameter is
optional. Also, it can be specified multiple times
to input more than one instance.
Execution of the db2rspgn utility will generate response file (*.rsp) and INS file
(*.INS) for each instance associated with this DB2 copy. The INS file is a
configuration profile file that contains the following information:
Database information (including DCS and ODBC information)
Node information
Protocol information
Database manager configuration settings
Registry settings
Common ODBC/CLI settings
Example 2-6 demonstrates the use of the db2rspgn command.
Example 2-6 Using db2rspgn
C:MyInst>db2rspgn -d C:MyInst -i DB2
C:MyInst>dir
Volume in drive C has no label.
Volume Serial Number is DCDC-8C9E
Directory of C:MyInst
06/10/2008 02:55 PM <DIR> .
06/10/2008 02:55 PM <DIR> ..
06/10/2008 02:55 PM 1,979 DB2.INS
06/10/2008 02:55 PM 2,425 db2ese.rsp
2 File(s) 4,404 bytes
2 Dir(s) 146,450,423,808 bytes free](https://image.slidesharecdn.com/db2deploymentguide-sg247653-161209093309/85/Db2-deployment-guide-65-320.jpg)


![Chapter 2. DB2 server deployment 59
2.3.1 Setup of SSH and NFS
Before we can start the mass deployment, a secure and convenient
authentication channel must be set up to allow us to issue commands with proper
privileges to the remote machines.
Installing SSH on managed machines
For AIX platforms, OpenSSH and its prerequisites might not be installed by
default. Since in our case, ssh is required as the remote shell tool, OpenSSH has
to be installed and configured. For details, visit the AIX Information Center on the
IBM Web site and select the appropriate version of the AIX:
http://publib16.boulder.ibm.com/pseries/index.htm
After OpenSSH has been installed, we can see the file sets, similar to those in
Example 2-9.
Example 2-9 NFS file sets on AIX
openssh.base.client 4.3.0.5301 COMMITTED Open Secure Shell Commands
openssh.base.server 4.3.0.5301 COMMITTED Open Secure Shell Server
openssh.license 4.3.0.5301 COMMITTED Open Secure Shell License
openssh.man.en_US 4.3.0.5301 COMMITTED Open Secure Shell
openssh.msg.en_US 4.3.0.5301 COMMITTED Open Secure Shell Messages -
openssh.base.client 4.3.0.5301 COMMITTED Open Secure Shell Commands
openssh.base.server 4.3.0.5301 COMMITTED Open Secure Shell Server
After the ssh service is available on your UNIX or Linux system, you can use the
ssh client to connect to it. The basic ssh command is shown below:
ssh [user]@<hostname> [command]
During the first ssh connection to the machine, you will be prompted to accept a
RSA authentication key. Type yes and input the user’s password. See
Example 2-10.
Note: For Linux platforms, OpenSSH is generally installed by default. Use the
command rpm to check for availability of OpenSSH on your Linux:
rpm -qa|grep -i ssh
Then ensure that the ssh service is up and running. For example, on SUSE
Linux or Red Hat Linux, you can issue the service command to obtain a
status report from the operating system:
service sshd status](https://image.slidesharecdn.com/db2deploymentguide-sg247653-161209093309/85/Db2-deployment-guide-73-320.jpg)


![66 DB2 Deployment Guide
# command-line syntax
syntax()
{
echo "
db2srv_install -D|-R -N <NFSpath> -H hostA,hostB,...,hostN
-r response_file -b install_path -f NOTSAMP
-p productShortName -c NLPACK_location -n
-L language -l logfile -t tracefile
"
}
# verify only one deployment method is specified
chksyntax()
{
set ${setopts?}
if [ -z "$MOD" ] || [ `echo "$MOD"|awk '{print length($0)}'` != 1 ]; then
syntax
exit 1
fi
}
# mount nfs onto remote machine
mountnfs()
{
set ${setopts?}
SKIP=0
# make a temporary mount point
${RCMD} mkdir $LOCALNFS
${RCMD} mount -o ro "$BASEHOST":"$NFSPATH" "$LOCALNFS"
rc=$?
# if mount fails, try once more
if [ $rc != 0 ]; then
echo "Mount failed on machine $host. Will try again 2 seconds later."
sleep 2
echo "Trying mount again..."
${RCMD} mount -o ro "$BASEHOST":"$NFSPATH" "$LOCALNFS"
rc=$?
if [ $rc != 0 ]; then
echo "Mount failed twice on machine $host. Will skip it."
SKIP="1"
# remove the temporary mount point
${RCMD} rmdir $LOCALNFS
fi
fi
return $SKIP
}
umountnfs()](https://image.slidesharecdn.com/db2deploymentguide-sg247653-161209093309/85/Db2-deployment-guide-80-320.jpg)
![Chapter 2. DB2 server deployment 67
{
set ${setopts?}
${RCMD} umount "$LOCALNFS"
rc=$?
# if unmount fails, try once more
if [ $rc != 0 ]; then
echo "Unmount failed on machine $host. Will try again 2 seconds later."
sleep 2
echo "Trying unmount again..."
${RCMD} umount "$LOCALNFS"
rc=$
if [ $rc != 0 ]; then
echo "Umount failed twice on machine $host. You need to do it manually."
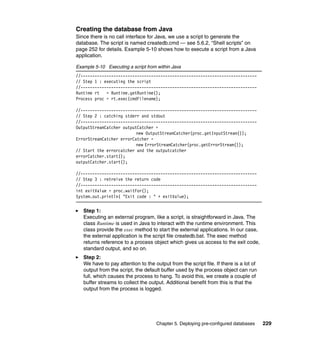
fi
fi
}
# deploy DB2 using specified response file
resp_dply()
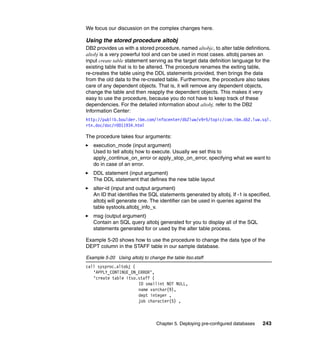
{
# the response file has to be accessible from remote machine
# so put it under $LOCALNFS
${RCMD} $LOCALNFS/db2setup -r "$LOCALNFS/$RESFILE"
rc=$?
if [ "$rc" != 0 ]; then
printf "n Deployment returns an error code "%s".n" $rc
fi
return $rc
}
# deploy DB2 using db2_install
db2install_dply()
{
set ${setopts?}
# when $INSTPATH specified, no conflict is allowed
if [ ! -z "$INSTPATH" ]; then
${RCMD} db2ls|egrep '^'"$INSTPATH"' ' > /dev/null 2>&1
rc=$?
if [ $rc == 0 ]; then
echo "The specified install path already exists."
echo "This machine is ignored."
rc=1
else
# populate the command line params for db2_install
INSTALL_PARAM=`echo ${INSTPATH:+"-b $INSTPATH"}" "${SAMP:+"-f $SAMP"}" "
${PROD:+"-p $PROD"}" "${NLPATH:+"-c $NLPATH"}" "
${NLNAME:+"-L $NLNAME"}" "${LOGFILE:+"-l $LOGFILE "}" "](https://image.slidesharecdn.com/db2deploymentguide-sg247653-161209093309/85/Db2-deployment-guide-81-320.jpg)

![Chapter 2. DB2 server deployment 69
do
# populate command and do basic testing to ensure ssh can work.
RCMD="ssh $host"
${RCMD} hostname 2> /dev/null|egrep -i '^'"$host"'$' > /dev/null 2>&1
rc=$?
if [ $rc != 0 ]; then
# if ssh fails, target host is ignored.
echo " ============================
Error:
Machine $host could not be connected successfully. Please check.
It will be ignored in this deployment.
"
else
# mount NFS
mountnfs
rc=$?
if [ $rc != 0 ]; then
continue
fi
# using various deployment method according to cmd line option
echo " ============================"
case $MOD in
"R") MSG="response file"
printf "$BMSG1" $host "$MSG"
printf "$BMSG2" $host
resp_dply ;;
"D") MSG="db2_install"
printf "$BMSG1" $host "$MSG"
printf "$BMSG2" $host
db2install_dply ;;
esac
printf "$EMSG1" $host
# unmount NFS & remove temporary mount point
umountnfs
${RCMD} rmdir $LOCALNFS
fi
done
echo
echo "Deployment finished."
Command line options
The following command line syntax is used for db2srv_install:
db2srv_install -D|-R -N <NFSpath> -H hostA,hostB,...,hostN -r response_file -b
install_path -f NOTSAMP -p productShortName -c NLPACK_location -n -L language
-l logfile -t tracefile](https://image.slidesharecdn.com/db2deploymentguide-sg247653-161209093309/85/Db2-deployment-guide-83-320.jpg)


![82 DB2 Deployment Guide
# -b base_install_path -c image_location
# -f level -f db2lib -f NOTSAMP -f install|update
# -l log_file -t trace_file
#
##############################################################
setopts="${setopts:-+x}"
set ${setopts?}
# clean variables
unset CMDOPTS FOPT
# command-line syntax
syntax()
{
echo "
db2fp_install -N NFSpath -H hostA,hostB,...,hostN
-b base_install_path -c image_location
-f level -f db2lib -f NOTSAMP -f install|update
-l log_file -t trace_file
"
}
# mount nfs onto remote machine
mountnfs()
{
set ${setopts?}
SKIP=0
# make a temporary mount point
${RCMD} mkdir $LOCALNFS
${RCMD} mount -o ro "$BASEHOST":"$NFSPATH" "$LOCALNFS"
rc=$?
# if mount fails, try once more
if [ $rc != 0 ]; then
echo "Mount failed on machine $host. Will try again 2 seconds later."
sleep 2
echo "Trying mount again..."
${RCMD} mount -o ro "$BASEHOST":"$NFSPATH" "$LOCALNFS"
rc=$?
if [ $rc != 0 ]; then
echo "Mount failed twice on machine $host. Will skip it."
SKIP="1"
# remove the temporary mount point
${RCMD} rmdir $LOCALNFS
fi
fi
return $SKIP
}](https://image.slidesharecdn.com/db2deploymentguide-sg247653-161209093309/85/Db2-deployment-guide-96-320.jpg)
![Chapter 2. DB2 server deployment 83
umountnfs()
{
set ${setopts?}
${RCMD} umount "$LOCALNFS"
rc=$?
# if unmount fails, try once more
if [ $rc != 0 ]; then
echo "Unmount failed on machine $host. Will try again 2 seconds later."
sleep 2
echo "Trying unmount again..."
${RCMD} umount "$LOCALNFS"
rc=$
if [ $rc != 0 ]; then
echo "Umount failed twice on machine $host. You need to do it manually."
fi
fi
}
# check in memory if DB2 instance processes still exist.
chkdb2proc()
{
set ${setopts?}
# check if db2ilist exists
${RCMD} test -f $INSTPATH/instance/db2ilist
rc=$?
if [ $rc == 0 ]; then
# get DB2 instances list
for inst in `${RCMD} $INSTPATH/instance/db2ilist`
do
# check if db2_ps exists
${RCMD} su - "$inst -c "which db2_ps"" > /dev/null 2>&1
rc=$?
if [ $rc == 0 ]; then
# count the number of db2 processes
PSCOUNT=`${RCMD} su - $inst -c "db2_ps"|egrep -v '^Node | *UID| completed ok$'|
sed '/ */d'|wc -l`
if [ $PSCOUNT -gt 0 ]; then
printf "Process associated with DB2 instance %s found in memory.n" $inst
printf "Please clean all DB2 processes before deloying fix pack.n"
return 1
else
rc=0
fi
fi
done
else
return 1
fi](https://image.slidesharecdn.com/db2deploymentguide-sg247653-161209093309/85/Db2-deployment-guide-97-320.jpg)
![84 DB2 Deployment Guide
return 0
}
# deploy DB2 fixpack using installFixPack
db2fp_dply()
{
set ${setopts?}
# check if $INSTPATH exists
${RCMD} test -d $INSTPATH
rc=$?
if [ $rc != 0 ]; then
printf "Specified path %s does not exist.n" $INSTPATH
rc=1
else
# verify input base path exists in remote machine
${RCMD} "su - root -c db2ls"|egrep '^'"$INSTPATH"' ' > /dev/null 2>&1
rc=$?
if [ $rc != 0 ]; then
echo "No DB2 installation found under $INSTPATH."
echo "This machine is ignored."
rc=2
else
# populate the command line params for installFixPack
INSTALL_PARAM=`echo ${INSTPATH:+"-b $INSTPATH"}" "${NLPATH:+"-c $LOCALNFS/$NLPATH"}"
-n "
${FOPT:+"$FOPT"}" "${LOGFILE:+"-l $LOGFILE"}" "${TRC:+"-t $TRC"}`
# check if any DB2 process in memory
chkdb2proc
if [ $? == 0 ]; then
${RCMD} $LOCALNFS/installFixPack $INSTALL_PARAM
rc=$?
fi
fi
fi
return $rc
}
# main program
# parse command line options
case $# in
0) syntax
exit 1;;
*) while getopts "N:H:b:c:f:l:t:" OPT
do
case $OPT in
# NFS mount path, and host list
N) NFSPATH=$OPTARG ;;
H) HOSTLIST=`echo "$OPTARG"|sed 's/,/ /g'`;;
b) INSTPATH=$OPTARG ;;
c) NLPATH=$OPTARG ;;](https://image.slidesharecdn.com/db2deploymentguide-sg247653-161209093309/85/Db2-deployment-guide-98-320.jpg)
![Chapter 2. DB2 server deployment 85
f) FOPT="$FOPT""-f $OPTARG " ;; # force options can be combined
l) LOGFILE=$OPTARG ;;
t) TRC=$OPTARG ;;
?) syntax && exit 1;;
esac
done ;;
esac
# set variables
BASEHOST=`hostname`
LOCALNFS="/db2nfs.$$"
BMSG1=" Starting fixpack deployment on machine %s using %s...n"
BMSG2=" Messages returned from %s:n ---------------n"
EMSG1=" ---------------n Fixpack deployment finished on machine %s.n"
# go through the host list
for host in $HOSTLIST
do
# populate command and do basic testing to ensure ssh can work.
RCMD="ssh $host"
${RCMD} hostname 2> /dev/null|egrep -i '^'"$host"'$' > /dev/null 2>&1
rc=$?
if [ $rc != 0 ]; then
# if ssh fails, target host is ignored.
echo " ============================
Error:
Machine $host could not be connected successfully. Please check.
It will be ignored in this deployment.
"
else
# mount NFS
mountnfs
rc=$?
if [ $rc != 0 ]; then
continue
fi
# Deploy fixpack onto machine $host
echo " ============================"
printf "$BMSG1" $host "$MSG"
printf "$BMSG2" $host
db2fp_dply
printf "$EMSG1" $host
# unmount NFS & remove temporary mount point
umountnfs
${RCMD} rmdir $LOCALNFS](https://image.slidesharecdn.com/db2deploymentguide-sg247653-161209093309/85/Db2-deployment-guide-99-320.jpg)


![134 DB2 Deployment Guide
Mapping a network drive from each thin client to the code
server
To map a network drive from the thin client, perform the following steps:
1. Launch Windows Explorer.
2. On the Tools menu, click Map Network Drive.
3. In the Drive list, select the drive to which you want to map the location of the
code server.
4. In the Folder field, specify the location of the share as follows:
computer_nameshare_name
Where:
computer_name represents the computer name of the code server.
share_name represents the share name of the shared directory on the code
server.
5. Select the Reconnect at Logon check box to make the share persistent.
Setting up thin clients using the thnsetup command
The thnsetup command sets up the thin client workstation and makes the
required links to the code server.
The syntax for thnsetup command is:
Thnsetup /P <drive:path> /U <drive:pathresponsefile> [/L
<drive:pathlogfile>] /M <machine> [/S <sharename>]
where:
/P Specifies the path where the DB2 code is installed on the code server.
This parameter is required. If you have not already mapped a persistent
network drive to the code server. The value of this parameter should be
the drive letter used to represent the network drive.
/U Specifies the fully qualified response file name. This parameter is
required. Normally, the file is located on the code server in the directory,
C:Program FilesIBMsqllibthnsetup, where C:Program FilesIBMsqllib
represents the drive where you installed your thin client code server.
/L Specifies the fully qualified log file name, where setup information and
any errors occurring during setup will be logged. This parameter is
optional. If you do not specify the log file name, the default db2.log file
name is used. This file will be created in the db2log directory, on the drive
where your operating system is installed.
/M Specifies the name of the code server. This parameter is required.](https://image.slidesharecdn.com/db2deploymentguide-sg247653-161209093309/85/Db2-deployment-guide-148-320.jpg)


![Chapter 4. Deploying applications with DB2 161
r) REDIS_LIST=$OPTARG ;;
o) OUTPUT_FILE=$OPTARG ;;
?) echo "invalid command line option $*"
syntax
exit 1;;
esac
done
;;
esac
# temp file
FLIST="filelist.$$"
# build command line for different file format
echo $CLIDRV_FILE|egrep -i '.gz *$' > /dev/null
if [ "$?" == 0 ]; then
# for .tar.gz
CMD="gunzip -c $CLIDRV_FILE"
else
echo $CLIDRV_FILE|egrep -i '.Z *$' > /dev/null
if [ "$?" == 0 ]; then
# for .tar.Z
CMD="zcat $CLIDRV_FILE"
fi
fi
# list the contents of ODBC and CLI driver
# and then add redistributable file names to temp file
$CMD | tar -tf -|sed '/^ *$/d'|awk '{print $1}'|egrep -v '/$'|
while read fpath
do
BNAME=`basename $fpath|sed 's/././g'`
egrep '^ *'"$BNAME"' *$' "$REDIS_LIST" > /dev/null 2>&1
if [ $? == 0 ]; then
echo $fpath >> $FLIST
fi
done
# get the root path of ODBC and CLI driver
CLIROOT=`head -n 1 $FLIST |sed 's//.*//'`
# extract redistributable files from ODBC and CLI driver
# and then make a new package
$CMD | tar -xf - `cat $FLIST`
tar -cf - $CLIROOT|gzip -c > $OUTPUT_FILE.tar.gz
# show summary
COUNT=`wc -l $FLIST|awk '{print $1}'`
echo "Totally "$COUNT" files added to new package "$OUTPUT_FILE.tar.gz"."
# clean up
rm -Rf $FLIST $CLIROOT](https://image.slidesharecdn.com/db2deploymentguide-sg247653-161209093309/85/Db2-deployment-guide-175-320.jpg)


![164 DB2 Deployment Guide
Example 4-10 A failed connect test using itso_cliapp
db2inst1@mensa:~/work> ./itso_cliapp mensa 50000 itso db2inst1 wrongassword
Connecting to the database itso ...
Failed to connect to the database itso.
SQLSTATE = 08001
SQLCODE = -30082
Message: [IBM][CLI Driver] SQL30082N Security processing failed with
reason "24" ("USERNAME AND/OR PASSWORD INVALID"). SQLSTATE=08001
Preparing the deployment package
Once the redistributable driver files and the application executable file are ready,
you can package them together for deploying. We have built a redistributable
package itso_cli.tar.gz and a sample application called itso_cliapp. Now we put
them into a single package and deploy the package using a script:
1. Under the DB2 development environment, create a working folder
install_image. Create two subdirectories under install_image, named bin and
odbcdrv.
mkdir -p ~/install_image/bin ~/install_image/odbcdrv
2. Copy the sample application and ODBC CLI driver into the subdirectories
respectively. So we copy itso_cliapp to bin, and itso_cli.tar.gz to odbcdrv.
3. Create a deployment script app_install under directory app_install. The entire
directory should look as shown in Example 4-11.
Example 4-11 The complete contents of install_image
db2app@mensa:~/install_image> ls -Rl
.:
total 4
-rwxr--r-- 1 db2app appgrp 2771 2008-06-20 17:40 app_install
drwxr-xr-x 2 db2app appgrp 72 2008-06-20 16:20 bin
drwxr-xr-x 2 db2app appgrp 80 2008-06-20 16:20 odbcdrv
./bin:
total 12
-rwxr-xr-x 1 db2app appgrp 11801 2008-06-20 16:20 itso_cliapp
./odbcdrv:
total 9345
-rw-r--r-- 1 db2app appgrp 9557108 2008-06-20 16:20 odbc_cli.tar.gz](https://image.slidesharecdn.com/db2deploymentguide-sg247653-161209093309/85/Db2-deployment-guide-178-320.jpg)

![166 DB2 Deployment Guide
case $OPT in
p) INSTPATH=$OPTARG
mkdir -p $INSTPATH ;;
r) REGVAR=Y ;;
?) echo "invalid command line option $*"
syntax
exit 1 ;;
esac
done
;;
esac
# verify the ODBC driver files and application files are ready
# and then start the deployment
TESTPATH=`echo $0|egrep '^/'`
if [ -z $TESTPATH ]; then
dirname `pwd`/$0|read CURPATH
else
CURPATH=`dirname $0`
fi
cd $CURPATH
if [ ! -d $DIR_DRV ] || [ ! -d $DIR_APP ]; then
echo " ODBC CLI driver or Application directory not existing.n Abort."
exit 1
fi
# deploy applications and ODBC CLI driver to specified path
cd $INSTPATH
cp -R "$CURPATH/$DIR_APP" .
mkdir -p "$DIR_DRV"
cd $DIR_DRV
for file in "$CURPATH/$DIR_DRV/*.tar.gz"
do
gunzip -c $file|tar -xf -
done
# register system variable
ODBCLIBPATH=`find $INSTPATH/$DIR_DRV -type d -name lib`
case $REGVAR in
Y) echo "
# The following lines have been added by app_install script
export LIBPATH=$LIBPATH:$ODBCLIBPATH
export LD_LIBRARY_PATH=$LD_LIBRARY_PATH:$ODBCLIBPATH
" >> ~/.profile
if [ `uname` == "AIX" ]; then
echo " export
DB2_CLI_DRIVER_INSTALL_PATH=$DB2_CLI_DRIVER_INSTALL_PATH:$ODBCLIBPATH" >> ~/.profile
fi](https://image.slidesharecdn.com/db2deploymentguide-sg247653-161209093309/85/Db2-deployment-guide-180-320.jpg)
![Chapter 4. Deploying applications with DB2 167
echo "
System variables registered.
Please re-login to have the settings be effective."
;;
*) echo "
You choose not registering system variable.
It could be finished later by adding following lines to your user profile:
export LIBPATH=$LIBPATH:$ODBCLIBPATH
export LD_LIBRARY_PATH=$LD_LIBRARY_PATH:$ODBCLIBPATH"
if [ `uname` == "AIX" ]; then
echo " export
DB2_CLI_DRIVER_INSTALL_PATH=$DB2_CLI_DRIVER_INSTALL_PATH:$ODBCLIBPATH"
fi
;;
esac
printf "n Deployment finished.n"
5. After placing the three files under their own directories, we can create a
package based on this directory structure and redistribute it to the target
machine where we want the application to be deployed. Example 4-13 shows
how a package file, app_installer.tar.gz, is created using the commands tar
and gzip.
Example 4-13 Generate a gz package from install_image directory
db2app@mensa:~/app_install/install_image> tar -cvf - *|gzip -c >
../app_installer.tar.gz
app_install
bin/
bin/itso_cliapp
odbcdrv/
odbcdrv/odbc_cli.tar.gz
Deploying the application package to the target system
On the target system, you have to configure the IBM Data Server Driver for
ODBC and CLI to prepare the system for the application. For the driver
configuration, refer to 4.1.2, “IBM Data Server Driver for ODBC, CLI, and .NET,
and IBM Data Server Driver for ODBC and CLI” on page 143 for platform specific
steps.
The db2cli.ini and other system environment variables may also require
configuration based on the database connection used in the application. You can
manually configure the target system or automate these configurations with a
deployment script.](https://image.slidesharecdn.com/db2deploymentguide-sg247653-161209093309/85/Db2-deployment-guide-181-320.jpg)


![172 DB2 Deployment Guide
In our example, we place these files in the directory /home/user1/phpdrivers.
2. Create php.ini file:
Change to the lib directory where the PHP is installed. For example:
cd /opt/www/php/lib
Create a php.ini file if there is not one already present:
touch php.ini
vi php.ini
3. Add extension path and extension name in the php.ini file:
Example 4-16 shows the lines that have to be added to the php.ini file.
Add only the extension you will use. For example, if you are going to use
ibm_db2_xx.so only, then you do not have to add pdo_ibm_xx.so in the
php.ini file.
Example 4-16 Lines to added to php.ini file
extension_dir=/home/user1/phpdrivers
extension=ibm_db2_xx.so
extension=pdo_ibm_xx.so
4. PHP drivers is installed dynamically after adding the extension to the php.ini
file. Check it with the following command:
php -m
This displays all extensions of PHP dynamically, hence the new additions will
show immediately. Check for presence of ibm_db2 and pdo_ibm in the
output. Example 4-17 shows an abbreviated output.
Example 4-17 Output of php -m
itsouser@ubuntu:~$ php -m
[PHP Modules]
ctype
...
ibm_db2
...
PDO
pdo_ibm
pdo_informix
...
zlib
[Zend Modules]](https://image.slidesharecdn.com/db2deploymentguide-sg247653-161209093309/85/Db2-deployment-guide-186-320.jpg)


![Chapter 4. Deploying applications with DB2 175
In order to run the application, create a directory and save the application as
itso_phpapp.php. Example 4-18 shows how to run the application in detail. The
example demonstrates a successful connection to a remote uncataloged
database.
Example 4-18 A successful connection using itso_phpapp.php
itsouser@ubuntu:~/redbook$ php itso_phpapp.php mensa 50001 test db2inst1
password
Trying to establish connection...
Connection succeeded.
Closing connection..
Connection closed.
If you provide any incorrect information, the connection will fail and an error
message will be thrown. This is shown in Example 4-19.
Example 4-19 Failed connection using itso_phpapp.php
itsouser@ubuntu:~/redbook$ php itso_phpapp.php mensa 50001 test db2inst1
wrongpassword
Trying to establish connection...
[IBM][CLI Driver] SQL30082N Security processing failed with reason "24"
("USERNAME AND/OR PASSWORD INVALID"). SQLSTATE=08001 SQLCODE=-30082
Connection failed.
4.4.6 Deploying a PHP application with the DB2 drivers
In this section, we demonstrate how to deploy a DB2 PHP application with DB2
drivers. We assume that the target system has already have the PHP installed
but the DB2 drivers for PHP are not built during the PHP installation.
These general tasks for deploying a PHP application with ODBC CLI driver are
discussed in the following paragraphs:
Prepare the DB2 PHP driver and the redistributable DB2 ODBC and CLI
driver files
Prepare the PHP application package
Prepare the deployment package
Deploy the deployment package to the target system
We organize all the deployment files under a directory, php_deploy.](https://image.slidesharecdn.com/db2deploymentguide-sg247653-161209093309/85/Db2-deployment-guide-189-320.jpg)

![Chapter 4. Deploying applications with DB2 177
# -r specify to configure system variable for ODBC and CLI driver
#
# example: php_app_install -p /home/db2app/myapp -r"
#
##########################################################################
#set -x
# Define variables
DIR_DRV=odbcdrv # directory for odbc and cli driver files
DIR_APP=bin # directory for applications
DIR_PHP=phpdriver # directory for driver file
unset REGVAR
# command-line syntax
syntax()
{
echo "
php_app_install -p <installpath> -r
-p specify the location where application and ODBC lib files will be deployed
-r specify to configure system variable for ODBC and CLI driver
example: php_app_install -p /home/db2app/myapp -r"
}
# main program
# process command-line options
case $# in
0) syntax
exit 1;;
*)
while getopts "p:r" OPT;
do
case $OPT in
p) INSTPATH=$OPTARG
mkdir -p $INSTPATH ;;
r) REGVAR=Y ;;
?) echo "invalid command line option $*"
syntax
exit 1 ;;
esac
done
;;
esac
# verify the ODBC driver files and application files are ready
# and then start the deployment
TESTPATH=`echo $0|egrep '^/'`
if [ -z $TESTPATH ]; then
dirname `pwd`/$0|read CURPATH
else
CURPATH=`dirname $0`
fi](https://image.slidesharecdn.com/db2deploymentguide-sg247653-161209093309/85/Db2-deployment-guide-191-320.jpg)
![178 DB2 Deployment Guide
cd $CURPATH
if [ ! -d $DIR_DRV ] || [ ! -d $DIR_APP ] || [ ! -d $DIR_PHP ] ; then
echo " ODBC CLI driver, Application or driver directory not existing.n Abort."
exit 1
fi
# deploy application and php driver
cd $INSTPATH
cp -R "$CURPATH/$DIR_APP" .
cp -R "$CURPATH/$DIR_PHP" .
# Install the php driver
PHPPATH=`which php`
FILENAME=`dirname $PHPPATH|sed 's//[^/]*$//'`"/lib/php.ini"
echo "extension_dir="$INSTPATH/$DIR_PHP >> $FILENAME
echo "extension=ibm_db2.so" >> $FILENAME
# Uncompress ODBC CLI driver to specified path
cd $INSTPATH
mkdir -p "$DIR_DRV"
cd $DIR_DRV
for file in "$CURPATH/$DIR_DRV/*.tar.gz"
do
gunzip -c $file|tar -xf -
done
# register system variable
ODBCLIBPATH=`find $INSTPATH/$DIR_DRV -type d -name lib`
case $REGVAR in
Y) echo "
# The following lines have been added by app_install script
export LIBPATH=$LIBPATH:$ODBCLIBPATH
export LD_LIBRARY_PATH=$LD_LIBRARY_PATH:$ODBCLIBPATH
" >> ~/.profile
if [ `uname` == "AIX" ]; then
echo " export
DB2_CLI_DRIVER_INSTALL_PATH=$DB2_CLI_DRIVER_INSTALL_PATH:$ODBCLIBPATH" >> ~/.profile
fi
echo "
System variables registered.
Please re-login to have the settings be effective."
;;
*) echo "
You choose not registering system variable.
It could be finished later by adding following lines to your user profile:
export LIBPATH=$LIBPATH:$ODBCLIBPATH
export LD_LIBRARY_PATH=$LD_LIBRARY_PATH:$ODBCLIBPATH"
if [ `uname` == "AIX" ]; then
echo " export
DB2_CLI_DRIVER_INSTALL_PATH=$DB2_CLI_DRIVER_INSTALL_PATH:$ODBCLIBPATH"](https://image.slidesharecdn.com/db2deploymentguide-sg247653-161209093309/85/Db2-deployment-guide-192-320.jpg)


![Chapter 4. Deploying applications with DB2 183
4.5.3 Creating a sample Ruby application
In order to demonstrate Ruby application deployment, we have a sample
application named itso_rubyapp.rb that reads the connectivity information from
the command line and establishes connection to a database. The database can
be both local or remote. If the connection fails, the application returns an error
message. The complete code is shown in A.3, “Ruby” on page 263 and is
available for download. For the download instructions, refer to Appendix B,
“Additional material” on page 267.
To run the application, create a directory and then save the application as
itso_rubyapp.rb. You can run the application as in Example 4-25. demonstrating
a successful connection to a remote database with uncatalog connection.
Example 4-25 Successful connection using itso_rubyapp.rb
itsouser@ubuntu:~/redbook$ ruby itso_rubyapp.rb mensa 50001 test db2inst1
password
Trying to establish connection...
Is connection active? : true
Closing connection...
Connection closed.
If there is any incorrect information, the connection will fail and an error message
will be thrown as shown in Example 4-26.
Example 4-26 Failed connection using itso_rubyapp.rb
itsouser@ubuntu:~/redbook$ ruby itso_rubyapp.rb mensa 50001 test db2inst1
wrongpassword
Trying to establish connection...
[IBM][CLI Driver] SQL30082N Security processing failed with reason "24"
("USERNAME AND/OR PASSWORD INVALID"). SQLSTATE=08001 SQLCODE=-30082
4.5.4 Deploying a Ruby application with the DB2 drivers
In this section, we demonstrate how to deploy a DB2 Ruby application with the
DB2 drivers. We assume that the target system already have the Ruby and Rails
framework installed but DB2 components are not installed on the system. The
general tasks for deploying a Ruby application with ODBC and CLI driver are:
Prepare IBM_DB2 gem file and redistributable DB2 ODBC and CLI driver files
Prepare the Ruby application package
Prepare the deployment package
Deploy the deployment package to the target system
We organize all the deployment files under a directory, ruby_deploy.](https://image.slidesharecdn.com/db2deploymentguide-sg247653-161209093309/85/Db2-deployment-guide-197-320.jpg)

![Chapter 4. Deploying applications with DB2 185
#
##########################################################################
#set -x
# Define variables
DIR_DRV=odbcdrv # directory for odbc and cli driver files
DIR_APP=bin # directory for applications
DIR_GEM=gem # directory for gem file
unset REGVAR
# command-line syntax
syntax()
{
echo "
ruby_app_install -p <installpath> -r
-p specify the location where application and ODBC lib files will be deployed
-r specify to configure system variable for ODBC and CLI driver
example: ruby_app_install -p /home/db2app/myapp -r"
}
# main program
# process command-line options
case $# in
0) syntax
exit 1;;
*)
while getopts "p:r" OPT;
do
case $OPT in
p) INSTPATH=$OPTARG
mkdir -p $INSTPATH ;;
r) REGVAR=Y ;;
?) echo "invalid command line option $*"
syntax
exit 1 ;;
esac
done
;;
esac
# verify the ODBC driver files and application files are ready
# and then start the deployment
TESTPATH=`echo $0|egrep '^/'`
if [ -z $TESTPATH ]; then
dirname `pwd`/$0|read CURPATH
else
CURPATH=`dirname $0`
fi
cd $CURPATH
if [ ! -d $DIR_DRV ] || [ ! -d $DIR_APP ] || [ ! -d $DIR_GEM ] ; then](https://image.slidesharecdn.com/db2deploymentguide-sg247653-161209093309/85/Db2-deployment-guide-199-320.jpg)
![186 DB2 Deployment Guide
echo " ODBC CLI driver, Application, or gem directory not existing.n Abort."
exit 1
fi
# deploy applications and ODBC CLI driver to specified path
cd $INSTPATH
cp -R "$CURPATH/$DIR_APP" .
# Install the driver.
cd $CURPATH/$DIR_GEM
gem install ibm_db --ignore-dependencies
cd $INSTPATH
mkdir -p "$DIR_DRV"
cd $DIR_DRV
for file in "$CURPATH/$DIR_DRV/*.tar.gz"
do
gunzip -c $file|tar -xf -
done
# register system variable
ODBCLIBPATH=`find $INSTPATH/$DIR_DRV -type d -name lib`
case $REGVAR in
Y) echo "
# The following lines have been added by ruby_app_install script
export LIBPATH=$LIBPATH:$ODBCLIBPATH
export LD_LIBRARY_PATH=$LD_LIBRARY_PATH:$ODBCLIBPATH
" >> ~/.profile
if [ `uname` == "AIX" ]; then
echo " export
DB2_CLI_DRIVER_INSTALL_PATH=$DB2_CLI_DRIVER_INSTALL_PATH:$ODBCLIBPATH" >> ~/.profile
fi
echo "
System variables registered.
Please re-login to have the settings be effective."
;;
*) echo "
You choose not registering system variable.
It could be finished later by adding following lines to your user profile:
export LIBPATH=$LIBPATH:$ODBCLIBPATH
export LD_LIBRARY_PATH=$LD_LIBRARY_PATH:$ODBCLIBPATH"
if [ `uname` == "AIX" ]; then
echo " export
DB2_CLI_DRIVER_INSTALL_PATH=$DB2_CLI_DRIVER_INSTALL_PATH:$ODBCLIBPATH"
fi
;;
esac
printf "n Deployment finished.n"](https://image.slidesharecdn.com/db2deploymentguide-sg247653-161209093309/85/Db2-deployment-guide-200-320.jpg)


![Chapter 4. Deploying applications with DB2 193
Closing connection...
Connection closed.
If there is any incorrect information, the connection will fail and an error message
is returned as shown in Example 4-33.
Example 4-33 Failed connection using itso_pyapp.py
itsouser@ubuntu:~/redbook$ python itso_pyapp.py mensa 50001 test db2inst1
wrongpassword
Trying to establish connection...
Traceback (most recent call last):
File "itso_pyapp.py", line 38, in <module>
main(sys.argv[1:])
File "itso_pyapp.py", line 31, in main
conn = ibm_db.connect( dsn, "", "" )
Exception: [IBM][CLI Driver] SQL30082N Security processing failed with reason
"24" ("USERNAME AND/OR PASSWORD INVALID"). SQLSTATE=08001 SQLCODE=-30082
We now introduce deployment considerations.
4.6.6 Deploying a Python application with the DB2 drivers
In this section, we demonstrate how to deploy a DB2 Python application with
DB2 drivers. We assume that the target system already has the Python installed
but the DB2 driver for Ruby application is not on the system. The steps for
deploying a Python application with ODBC CLI driver are as follows:
Prepare the Python driver file and redistributable DB2 driver files
Prepare the Python application package
Prepare the deployment package
Deploying the deployment package to the target system
We organize all the deployment files under a directory, python_deploy.
Preparing Python driver and redistributable DB2 driver files
If your application is using only the IBM_DB driver, then it is not necessary to
package IBM_DB_SA as well. Similarly, you do not have to set up
PYTHONPATH for the IBM_DB_DBI wrapper if your application is not using it.
You can obtain the driver egg file from any of the methods described in
“Installation procedure” on page 191. For this example, we have built the driver
egg file from source code named ibm_db-0.2.9-py2.5-linux-x86_64.egg and the
setup tools from the Internet named setuptools-0.6c7-py2.5.egg.](https://image.slidesharecdn.com/db2deploymentguide-sg247653-161209093309/85/Db2-deployment-guide-207-320.jpg)

![Chapter 4. Deploying applications with DB2 195
DIR_EGG=egg # directory for egg file
unset REGVAR
# command-line syntax
syntax()
{
echo "
py_app_install -p <installpath> -r
-p specify the location where application and ODBC lib files will be deployed
-r specify to configure system variable for ODBC and CLI driver
example: py_app_install -p /home/db2app/myapp -r"
}
# main program
# process command-line options
case $# in
0) syntax
exit 1;;
*)
while getopts "p:r" OPT;
do
case $OPT in
p) INSTPATH=$OPTARG
mkdir -p $INSTPATH ;;
r) REGVAR=Y ;;
?) echo "invalid command line option $*"
syntax
exit 1 ;;
esac
done
;;
esac
# verify the ODBC driver files and application files are ready
# and then start the deployment
TESTPATH=`echo $0|egrep '^/'`
if [ -z $TESTPATH ]; then
dirname `pwd`/$0|read CURPATH
else
CURPATH=`dirname $0`
fi
cd $CURPATH
if [ ! -d $DIR_DRV ] || [ ! -d $DIR_APP ] || [ ! -d $DIR_EGG ] ; then
echo " ODBC CLI driver, Application, or Egg directory not existing.n Abort."
exit 1
fi
# deploy applications and ODBC CLI driver to specified path
cd $INSTPATH
cp -R "$CURPATH/$DIR_APP" .](https://image.slidesharecdn.com/db2deploymentguide-sg247653-161209093309/85/Db2-deployment-guide-209-320.jpg)
![196 DB2 Deployment Guide
# Install the setuptools and egg.
cd $CURPATH/$DIR_EGG
sh setuptools*.egg
easy_install ibm_db*.egg
cd $INSTPATH
mkdir -p "$DIR_DRV"
cd $DIR_DRV
for file in "$CURPATH/$DIR_DRV/*.tar.gz"
do
gunzip -c $file|tar -xf -
done
# register system variable
ODBCLIBPATH=`find $INSTPATH/$DIR_DRV -type d -name lib`
case $REGVAR in
Y) echo "
# The following lines have been added by py_app_install script
export LIBPATH=$LIBPATH:$ODBCLIBPATH
export LD_LIBRARY_PATH=$LD_LIBRARY_PATH:$ODBCLIBPATH
" >> ~/.profile
if [ `uname` == "AIX" ]; then
echo " export
DB2_CLI_DRIVER_INSTALL_PATH=$DB2_CLI_DRIVER_INSTALL_PATH:$ODBCLIBPATH" >> ~/.profile
fi
echo "
System variables registered.
Please re-login to have the settings be effective."
;;
*) echo "
You choose not registering system variable.
It could be finished later by adding following lines to your user profile:
export LIBPATH=$LIBPATH:$ODBCLIBPATH
export LD_LIBRARY_PATH=$LD_LIBRARY_PATH:$ODBCLIBPATH"
if [ `uname` == "AIX" ]; then
echo " export
DB2_CLI_DRIVER_INSTALL_PATH=$DB2_CLI_DRIVER_INSTALL_PATH:$ODBCLIBPATH"
fi
;;
esac
printf "n Deployment finished.n"
We placed the deployment script under our deployment directory
/python_deploy. Example 4-35 shows the contents of python_deploy directory
that now has all the files to be deployed.](https://image.slidesharecdn.com/db2deploymentguide-sg247653-161209093309/85/Db2-deployment-guide-210-320.jpg)


![Chapter 4. Deploying applications with DB2 203
If there is any incorrect information, the connection will fail and suitable error
message will be thrown as shown in Example 4-43.
Example 4-43 Failed connection using itso_perlapp.pl
itsouser@ubuntu:~/redbook$ perl itso_perlapp.pl mensa 50001 test db2inst1
wrongpassword
Trying to establish connection...
Database connection not made: [IBM][CLI Driver] SQL30082N Security processing
failed with reason "24" ("USERNAME AND/OR PASSWORD INVALID"). SQLSTATE=08001
4.7.4 Deploying a Perl application with the DB2 drivers
In this section, we demonstrate how to deploy a DB2 Perl application with the
DB2 drivers. We assume that the target system has already has Perl installed,
but the DB2 drivers for Perl are not in place yet. The general tasks for deploying
a Perl application with ODBC CLI driver are as follows:
Prepare the Perl driver and the redistributable DB2 driver files.
Prepare the Perl application package.
Prepare the deployment package.
Deploying the deployment package to the target system.
We organize all the deployment files under a directory perl_deploy.
Preparing Perl driver and redistributable DB2 driver files
You can obtain the DBI and the driver file as described in “Installation of IBM Perl
driver” on page 200. The driver deployment procedure differs on Linux, UNIX and
Windows systems. For Windows, you can use IBM Data Server Driver for ODBC,
CLI (and .NET). You require IBM Data Server Client for Linux and UNIX for
building DBD::DB2.
In our example, we have downloaded the DBI and DBD::DB2 from the Internet
for Linux named as DBI-1.605.tar.gz and DBD-DB2-1.1.tar.gz respectively. We
have assumed that Perl is installed on the deployment machine and the user has
sufficient read and write permissions to install DBI and DBD::DB2. Our target
deployment machine also has IBM Data Server Client installed. We place the
DBI and driver file under perl_deploy/driver.
If you are on a Windows system, you can copy and redistribute some of the IBM
Data Server Driver for ODBC and CLI files. We discuss how to prepare the
redistributable driver files in “Preparing the redistributable driver files” on
page 159. The procedure also can be applied for preparing the DB2 drivers for
Perl to be deployed along with the application. The script requires a slight
modification.](https://image.slidesharecdn.com/db2deploymentguide-sg247653-161209093309/85/Db2-deployment-guide-217-320.jpg)

![Chapter 4. Deploying applications with DB2 205
# main program
# process command-line options
case $# in
0) syntax
exit 1;;
*)
while getopts "p:s:" OPT;
do
case $OPT in
p) INSTPATH=$OPTARG
mkdir -p $INSTPATH ;;
s) DB2PATH=$OPTARG
export DB2_HOME=$DB2PATH ;;
?) echo "invalid command line option $*"
syntax
exit 1 ;;
esac
done
;;
esac
# verify the ODBC driver files and application files are ready
# and then start the deployment
TESTPATH=`echo $0|egrep '^/'`
if [ -z $TESTPATH ]; then
dirname `pwd`/$0|read CURPATH
else
CURPATH=`dirname $0`
fi
cd $CURPATH
if [ ! -d $DIR_DRV ] || [ ! -d $DIR_APP ] ; then
echo " Application, or driver directory not existing.n Abort."
exit 1
fi
# deploy applications to specified path
cd $INSTPATH
cp -R "$CURPATH/$DIR_APP" .
# extract the dbi and dbd::db2.
mkdir -p "$DIR_DRV"
cd $DIR_DRV
for file in $CURPATH/$DIR_DRV/*.tar.gz
do
gunzip -c $file|tar -xf -
done
# install dbi
cd DBI*
perl Makefile.PL
make
make install](https://image.slidesharecdn.com/db2deploymentguide-sg247653-161209093309/85/Db2-deployment-guide-219-320.jpg)


![224 DB2 Deployment Guide
Invocation of the CLP is identical on Windows and UNIX. The only difference
between Windows and UNIX is how the return code is checked. We discuss how
to perform error handling on each platform and give a full example for the
Windows platform.
UNIX script
On the UNIX platform the result of the last executed command is available in
“$?”. In example Example 5-7 we show three different ways to check the return
code of a call to the command line processor.
Example 5-7 Check the command line processor return code on UNIX
#------------------------------------------------
#Call the command line processor
#------------------------------------------------
db2 -o- -l itsodb.log -f itsodb.ddl
#------------------------------------------------
# Example A
#------------------------------------------------
if [ "$?" -eq "4" ]; then
exit 4
fi
exit 0
#------------------------------------------------
# Example B
#------------------------------------------------
if [ "$?" -ge "4" ]; then
exit 4
fi
exit 0
#------------------------------------------------
# Example C
#------------------------------------------------
case “$?” in
"0" | “1” | “2” | “3”)
exit 0;;
"4" | “5” | “6” | “7”)
exit 4;;
"*")
Note: The return code is available when the CLP has processed the entire file,
and the return code is a “logical or” of the return codes from each statement. If
some statements returned 2, other statements returned 1 and the rest of the
statements were successful (return code 0) then the return code for the entire
file is 3.](https://image.slidesharecdn.com/db2deploymentguide-sg247653-161209093309/85/Db2-deployment-guide-238-320.jpg)


![238 DB2 Deployment Guide
load from "staff.ixf" of ixf messages "staff.msg" insert into itso.staff copy
no indexing mode autoselect;
set integrity for itso.employee allow no access immediate checked;
set integrity for itso.adefusr allow no access immediate checked;
Because referential integrities are not checked during load, you can load the
tables in any order you like. However, the set integrity commands must be
issued in the right order. It must be done until no tables in the database are in
check pending mode.
Checking one table can put another table in check pending mode.
There are several other options that can be used to control the load utility. For a
thorough description, refer to the DB2 Infocenter:
http://publib.boulder.ibm.com/infocenter/db2luw/v9r5/topic/com.ibm.db2.luw.admi
n.dm.doc/doc/c0004587.html
The set integrity statement that is usually required after a load is described in the
DB2 Infocenter at:
http://publib.boulder.ibm.com/infocenter/db2luw/v9r5/topic/com.ibm.db2.luw.sql.
ref.doc/doc/r0000998.html
The db2move utility
Both the import utility and the load utility operates on individual tables. It can
therefore be quite cumbersome to move data between databases if there are a
lot of tables. We can use the DB2 utility db2move to help us manage a group of
tables, for instance, all the table under one schema. db2move works as a calling
interface to the export, import, and load commands. The syntax of the command
is as follows:
db2move dbname action [options]
Where action can be export, import, load, or copy. The copy option is not covered
in this book. The options allow us to specify a group of tables, action options, and
so on.
Note: Only a small subset of the options from the different utilities can be
specified in db2move. For instance, the identifyoverride option for load is not
available in db2move.](https://image.slidesharecdn.com/db2deploymentguide-sg247653-161209093309/85/Db2-deployment-guide-252-320.jpg)


![260 DB2 Deployment Guide
**
http://publib.boulder.ibm.com/infocenter/db2luw/v9r5/topic/com.ibm.db2.luw.apdv
.cli.doc/doc/t0007141.html
**
** For example, on Linux x86_64 env:
** gcc -o itso_cliapp -m64 -I/home/db2inst1/sqllib/include
** -L/home/db2inst1/sqllib/lib64 -ldb2 itso_cliapp.c
**
****************************************************************************/
#include <stdio.h>
#include <string.h>
#include <stdlib.h>
#include <string.h>
#include <sqlenv.h>
#include <sqlcli1.h>
#include <sqlutil.h>
#define MAX_UID_LENGTH 18
#define MAX_PWD_LENGTH 30
int main(int argc, char *argv[])
{
SQLRETURN cliRC = SQL_SUCCESS;
struct sqlca sqlca;
SQLHANDLE henv; /* environment handle */
SQLHANDLE hdbc; /* connection handle */
char ip[255];
char port[8];
char dbname[SQL_MAX_DSN_LENGTH + 1];
char user[MAX_UID_LENGTH + 1];
char passwd[MAX_PWD_LENGTH + 1];
SQLCHAR message[SQL_MAX_MESSAGE_LENGTH + 1];
SQLCHAR sqlstate[SQL_SQLSTATE_SIZE + 1];
SQLINTEGER sqlcode;
SQLSMALLINT length;
SQLCHAR connStr[255]; /* connection string */
/* verify the number of arguments */
if( argc != 6 )
{
printf(" ERROR: incorrect command line.nt%s hostname port database_name
user passwordn", argv[0]);
return 1;
}](https://image.slidesharecdn.com/db2deploymentguide-sg247653-161209093309/85/Db2-deployment-guide-274-320.jpg)
![Appendix A. Sample applications 261
/* get connection information from command line arguments */
strcpy(ip, argv[1]);
strcpy(port, argv[2]);
strcpy(dbname, argv[3]);
strcpy(user, argv[4]);
strcpy(passwd, argv[5]);
/* populate the connection string */
sprintf((char *)connStr,
"Database=%s; Protocol=tcpip; Hostname=%s; Servicename=%s; Uid=%s;
Pwd=%s",
dbname, ip, port, user, passwd);
/* allocate an environment handle */
cliRC = SQLAllocHandle(SQL_HANDLE_ENV, SQL_NULL_HANDLE, &henv);
if (cliRC != SQL_SUCCESS)
{
printf("n ERROR while allocating the environment handle.n");
return 1;
}
/* allocate a connection handle */
cliRC = SQLAllocHandle(SQL_HANDLE_DBC, henv, &hdbc);
if (cliRC != SQL_SUCCESS)
{
printf("n ERROR while allocating the connection handle.n");
return 1;
}
printf("n Connecting to the database %s ...n", dbname);
/* connect to database using dsn-less connection */
cliRC = SQLDriverConnect(hdbc, (SQLHWND)NULL, connStr, SQL_NTS, NULL, 0,
NULL, SQL_DRIVER_NOPROMPT);
if (cliRC != SQL_SUCCESS )
{
printf ("n Failed to connect to the database %s.n", dbname);
/* get the first field settings of diagnostic record */
cliRC = SQLGetDiagRec(SQL_HANDLE_DBC, hdbc, 1, sqlstate, &sqlcode,
message, SQL_MAX_MESSAGE_LENGTH + 1, &length);
printf("n SQLSTATE = %s", sqlstate);
printf("n SQLCODE = %d", sqlcode);
printf("n Message: %s", message);
}else
{
printf("n Connected to the database %s.n", dbname);](https://image.slidesharecdn.com/db2deploymentguide-sg247653-161209093309/85/Db2-deployment-guide-275-320.jpg)
![262 DB2 Deployment Guide
/* disconnect from the database */
printf("n Disconnecting from the database %s...n", dbname);
cliRC = SQLDisconnect(hdbc);
}
/* free connection handle & environment handle */
cliRC = SQLFreeHandle(SQL_HANDLE_DBC, hdbc);
cliRC = SQLFreeHandle(SQL_HANDLE_ENV, henv);
}
A.2 PHP
Example A-2 shows the application used to demonstrate the deployment of the
DB2 PHP application.
Example: A-2 Sample PHP application
<?php
/* A sample php application.
Use this program to test connection to a database.
Database connectivity information is read as command line arguments.
Give arguments in the following order:
hostname port_number database_name user password
Run the application as following:
php itso_phpapp.php hostname port_number database_name user password
*/
# Varifying the number of command line arguments.
if($argc != 6) {
printf(" ERROR: incorrect command line arguments.n Use hostname
port_number database_name user_name passwordn", $argv[0]);
exit(1);
}
# Creating dsn from command line arguments.
$dsn = "HOSTNAME=" . $argv[1] .
";PORT=" . $argv[2] .
";DATABASE=" . $argv[3] .
";PROTOCOL=TCPIP" .
";UID=" . $argv[4] .
";PWD=" . $argv[5];
print "Trying to establish connection...n";](https://image.slidesharecdn.com/db2deploymentguide-sg247653-161209093309/85/Db2-deployment-guide-276-320.jpg)
![Appendix A. Sample applications 263
$conn = db2_connect($dsn, '', '');
if ($conn) {
echo "Connection succeeded.n";
echo "Closing connection...n";
db2_close($conn);
echo "Connection closed.n";
}
else {
echo db2_conn_errormsg(), "n";
echo "Connection failed.n";
}
?>
A.3 Ruby
Example A-3 shows the application used to demonstrate the deployment of the
DB2 PHP application.
Example: A-3 Sample Ruby application
# A sample Ruby application.
# Use this program to test connection to a database.
# Database connectivity information is read as command line arguments.
# Give arguments in the following order:
# hostname port_number database_name user password
#
# Run the application as following:
# ruby itso_rubyapp.rb hostname port_number database_name user password
#
require 'ibm_db'
if ARGV.length != 5
puts " ERROR: incorrect command line arguments.n Use hostname port_number
database_name user_name passwordn"
else
# Creating dsn from command line arguments.
dsn = ""
dsn << "HOSTNAME=" << ARGV[0] <<
";PORT=" << ARGV[1] <<
";DATABASE=" << ARGV[2] <<](https://image.slidesharecdn.com/db2deploymentguide-sg247653-161209093309/85/Db2-deployment-guide-277-320.jpg)
![264 DB2 Deployment Guide
";PROTOCOL=TCPIP" <<
";UID=" << ARGV[3] <<
";PWD=" << ARGV[4]
puts "Trying to establish connection..."
conn = IBM_DB::connect( dsn, "", "" )
if conn
puts "Is connection active? : #{IBM_DB::active(conn)}"
puts "Closing connection..."
IBM_DB::close(conn)
puts "Connection closed."
else
puts IBM_DB::conn_errormsg()
end
end
A.4 Python
Example A-4 shows the application used to demonstrate the deployment of the
DB2 Python application.
Example: A-4 Sample Python application
""" A sample python application.
Use this program to test connection to a database.
Database connectivity information is read as command line arguments.
Give arguments in the following order:
hostname port_number database_name user password
Run the application as following:
python itso_pyapp.py hostname port_number database_name user password
"""
import sys
import ibm_db
def main(argv):
# Varifying the number of command line arguments.
if len(argv) != 5:
print " ERROR: incorrect command line arguments.n Use hostname
port_number database_name user_name passwordn"
sys.exit()](https://image.slidesharecdn.com/db2deploymentguide-sg247653-161209093309/85/Db2-deployment-guide-278-320.jpg)
![Appendix A. Sample applications 265
# Creating dsn from command line arguments.
dsn = "HOSTNAME=" + argv[0] +
";PORT=" + argv[1] +
";DATABASE=" + argv[2] +
";PROTOCOL=TCPIP" +
";UID=" + argv[3] +
";PWD=" + argv[4]
print "Trying to establish connection..."
conn = ibm_db.connect( dsn, "", "" )
print "Is connection active? : ", ibm_db.active(conn)
print "Closing connection..."
ibm_db.close(conn)
print "Connection closed."
if __name__ == "__main__":
main(sys.argv[1:])
A.5 Perl
Example A-5 shows the application used to demonstrate the deployment of the
DB2 Perl application.
Example: A-5 Sample Perl application
# A sample perl application.
# Use this program to test connection to a database.
# Database connectivity information is read as command line arguments.
# Give arguments in the following order:
# hostname port_number database_name user password
#
# Run the application as following:
# perl itso_perlapp.pl hostname port_number database_name user password
#
use DBI;
# Varifying the number of command line arguments.
if ($#ARGV != 4){
print " ERROR: incorrect command line arguments.n Use hostname port_number
database_name user_name passwordn";
exit 1;
}](https://image.slidesharecdn.com/db2deploymentguide-sg247653-161209093309/85/Db2-deployment-guide-279-320.jpg)
![266 DB2 Deployment Guide
# Creating dsn from command line arguments.
$dsn = "HOSTNAME=" . $ARGV[0] .
";PORT=" . $ARGV[1] .
";DATABASE=" . $ARGV[2] .
";PROTOCOL=TCPIP" .
";UID=" . $ARGV[3] .
";PWD=" . $ARGV[4];
print "Trying to establish connection...n";
$dbh = DBI->connect("dbi:DB2:$dsn",
"", "",
{PrintError => 0}
) || die "Database connection not made: $DBI::errstr";
print "Connection successful.n";
print "Closing connection...n";
$dbh->disconnect();
print "Connection closed.n";](https://image.slidesharecdn.com/db2deploymentguide-sg247653-161209093309/85/Db2-deployment-guide-280-320.jpg)


Ad
More Related Content
What's hot (16)
Viewers also liked (10)


Ad
Similar to Db2 deployment guide (20)


Ad
More from bupbechanhgmail (20)


Recently uploaded (20)


Db2 deployment guide
- 1. ibm.com/redbooks DB2 Deployment Guide Whei-Jen Chen Jian TJ Tang Carsten Block John Chun Learn to deploy DB2 Data Servers and Clients AutomateDB2massdeployment with scripts Deploy DB2 with applications Front cover
- 3. DB2 Deployment Guide October 2008 International Technical Support Organization SG24-7653-00
- 4. © Copyright International Business Machines Corporation 2008. All rights reserved. Note to U.S. Government Users Restricted Rights -- Use, duplication or disclosure restricted by GSA ADP Schedule Contract with IBM Corp. First Edition (October 2008) This edition applies to DB2 for Linux, UNIX, and Windows Version 9.5. Note: Before using this information and the product it supports, read the information in “Notices” on page vii.
- 5. © Copyright IBM Corp. 2008. All rights reserved. iii Contents Notices . . . . . . . . . . . . . . . . . . . . . . . . . . . . . . . . . . . . . . . . . . . . . . . . . . . . . . vii Trademarks . . . . . . . . . . . . . . . . . . . . . . . . . . . . . . . . . . . . . . . . . . . . . . . . . . . viii Preface . . . . . . . . . . . . . . . . . . . . . . . . . . . . . . . . . . . . . . . . . . . . . . . . . . . . . . .ix The team that wrote this book . . . . . . . . . . . . . . . . . . . . . . . . . . . . . . . . . . . . . .ix Acknowledgements . . . . . . . . . . . . . . . . . . . . . . . . . . . . . . . . . . . . . . . . . . . . x Become a published author . . . . . . . . . . . . . . . . . . . . . . . . . . . . . . . . . . . . . . . .xi Comments welcome. . . . . . . . . . . . . . . . . . . . . . . . . . . . . . . . . . . . . . . . . . . . . .xi Chapter 1. Introduction to DB2 deployment . . . . . . . . . . . . . . . . . . . . . . . . . 1 1.1 DB2 deployment overview. . . . . . . . . . . . . . . . . . . . . . . . . . . . . . . . . . . . . . 2 1.2 DB2 9.5 for UNIX, Linux, and Windows products . . . . . . . . . . . . . . . . . . . . 3 1.2.1 DB2 Server products. . . . . . . . . . . . . . . . . . . . . . . . . . . . . . . . . . . . . . 3 1.2.2 DB2 clients and drivers . . . . . . . . . . . . . . . . . . . . . . . . . . . . . . . . . . . . 4 1.2.3 DB2 standalone and connect products . . . . . . . . . . . . . . . . . . . . . . . . 7 1.2.4 Other DB2 products . . . . . . . . . . . . . . . . . . . . . . . . . . . . . . . . . . . . . . 8 1.3 Deployment considerations . . . . . . . . . . . . . . . . . . . . . . . . . . . . . . . . . . . . 10 1.3.1 New environment versus environment with existing DB2 installation 11 1.3.2 DB2 version considerations . . . . . . . . . . . . . . . . . . . . . . . . . . . . . . . 16 1.3.3 DB2 product considerations . . . . . . . . . . . . . . . . . . . . . . . . . . . . . . . 17 1.3.4 License considerations . . . . . . . . . . . . . . . . . . . . . . . . . . . . . . . . . . . 20 1.3.5 Authorization considerations . . . . . . . . . . . . . . . . . . . . . . . . . . . . . . . 22 1.3.6 Configuration considerations. . . . . . . . . . . . . . . . . . . . . . . . . . . . . . . 26 1.3.7 Other considerations . . . . . . . . . . . . . . . . . . . . . . . . . . . . . . . . . . . . . 26 Chapter 2. DB2 server deployment . . . . . . . . . . . . . . . . . . . . . . . . . . . . . . . 29 2.1 Server deployment planning . . . . . . . . . . . . . . . . . . . . . . . . . . . . . . . . . . . 30 2.1.1 System requirement . . . . . . . . . . . . . . . . . . . . . . . . . . . . . . . . . . . . . 30 2.1.2 User and group required in deployment . . . . . . . . . . . . . . . . . . . . . . 30 2.1.3 Non-root/non-Administrator installation. . . . . . . . . . . . . . . . . . . . . . . 32 2.1.4 DB2 configuration profile and database profile . . . . . . . . . . . . . . . . . 34 2.1.5 Considerations for a partitioned database . . . . . . . . . . . . . . . . . . . . 39 2.2 DB2 server deployment methods . . . . . . . . . . . . . . . . . . . . . . . . . . . . . . . 42 2.2.1 DB2 Setup wizard . . . . . . . . . . . . . . . . . . . . . . . . . . . . . . . . . . . . . . . 43 2.2.2 db2_install . . . . . . . . . . . . . . . . . . . . . . . . . . . . . . . . . . . . . . . . . . . . . 46 2.2.3 Response file . . . . . . . . . . . . . . . . . . . . . . . . . . . . . . . . . . . . . . . . . . 48 2.2.4 Payload file deployment (for Linux and UNIX) . . . . . . . . . . . . . . . . . 57 2.3 Mass deployment of DB2 server using a script . . . . . . . . . . . . . . . . . . . . . 58 2.3.1 Setup of SSH and NFS . . . . . . . . . . . . . . . . . . . . . . . . . . . . . . . . . . . 59
- 6. iv DB2 Deployment Guide 2.3.2 DB2 license . . . . . . . . . . . . . . . . . . . . . . . . . . . . . . . . . . . . . . . . . . . . 63 2.3.3 Creating the deployment script . . . . . . . . . . . . . . . . . . . . . . . . . . . . . 64 2.3.4 Windows deployment scripts. . . . . . . . . . . . . . . . . . . . . . . . . . . . . . . 73 2.4 Fix pack deployment . . . . . . . . . . . . . . . . . . . . . . . . . . . . . . . . . . . . . . . . . 75 2.4.1 Fix pack overview . . . . . . . . . . . . . . . . . . . . . . . . . . . . . . . . . . . . . . . 76 2.4.2 Mass deployment of DB2 fix pack with a script. . . . . . . . . . . . . . . . . 78 Chapter 3. DB2 client deployment . . . . . . . . . . . . . . . . . . . . . . . . . . . . . . . . 89 3.1 Client deployment planning. . . . . . . . . . . . . . . . . . . . . . . . . . . . . . . . . . . . 90 3.1.1 Select the right client type . . . . . . . . . . . . . . . . . . . . . . . . . . . . . . . . . 90 3.1.2 Footprint . . . . . . . . . . . . . . . . . . . . . . . . . . . . . . . . . . . . . . . . . . . . . . 91 3.1.3 Reducing the size of the install image. . . . . . . . . . . . . . . . . . . . . . . . 91 3.1.4 Configuration and customization. . . . . . . . . . . . . . . . . . . . . . . . . . . . 92 3.1.5 Compatibility . . . . . . . . . . . . . . . . . . . . . . . . . . . . . . . . . . . . . . . . . . . 93 3.1.6 Licensing . . . . . . . . . . . . . . . . . . . . . . . . . . . . . . . . . . . . . . . . . . . . . . 94 3.1.7 How to deploy the DB2 client . . . . . . . . . . . . . . . . . . . . . . . . . . . . . . 94 3.2 IBM Data Server Client, Runtime Client, Driver for ODBC, CLI, and .NET 94 3.2.1 IBM data server client installation methods. . . . . . . . . . . . . . . . . . . . 95 3.2.2 Client instance on the DB2 server. . . . . . . . . . . . . . . . . . . . . . . . . . . 97 3.2.3 Reducing the installation image . . . . . . . . . . . . . . . . . . . . . . . . . . . . 97 3.2.4 Mass deployment of IBM data server client product . . . . . . . . . . . . 100 3.3 Thin Client deployment . . . . . . . . . . . . . . . . . . . . . . . . . . . . . . . . . . . . . . 131 Chapter 4. Deploying applications with DB2 . . . . . . . . . . . . . . . . . . . . . . 137 4.1 Introduction to application deployment package . . . . . . . . . . . . . . . . . . . 138 4.1.1 IBM Data Server Driver for JDBC and SQLJ . . . . . . . . . . . . . . . . . 138 4.1.2 IBM Data Server Driver for ODBC, CLI, and .NET, and IBM Data Server Driver for ODBC and CLI . . . . . . . . . . . . . . . . . . . . . . . . . . . . . . . . 143 4.2 Java. . . . . . . . . . . . . . . . . . . . . . . . . . . . . . . . . . . . . . . . . . . . . . . . . . . . . 150 4.3 Deploying C/C++ applications . . . . . . . . . . . . . . . . . . . . . . . . . . . . . . . . . 154 4.3.1 CLI and ODBC . . . . . . . . . . . . . . . . . . . . . . . . . . . . . . . . . . . . . . . . 154 4.3.2 Sample application . . . . . . . . . . . . . . . . . . . . . . . . . . . . . . . . . . . . . 156 4.3.3 Considerations for deployment of CLI and ODBC applications . . . 158 4.3.4 Deploying a CLI application along with ODBC CLI driver . . . . . . . . 159 4.3.5 Embedded SQL and Administrative API . . . . . . . . . . . . . . . . . . . . . 169 4.4 PHP . . . . . . . . . . . . . . . . . . . . . . . . . . . . . . . . . . . . . . . . . . . . . . . . . . . . . 169 4.4.1 PDO_IBM . . . . . . . . . . . . . . . . . . . . . . . . . . . . . . . . . . . . . . . . . . . . 170 4.4.2 IBM_DB2. . . . . . . . . . . . . . . . . . . . . . . . . . . . . . . . . . . . . . . . . . . . . 170 4.4.3 Installation of IBM PHP drivers . . . . . . . . . . . . . . . . . . . . . . . . . . . . 170 4.4.4 PHP. . . . . . . . . . . . . . . . . . . . . . . . . . . . . . . . . . . . . . . . . . . . . . . . . 171 4.4.5 Sample application . . . . . . . . . . . . . . . . . . . . . . . . . . . . . . . . . . . . . 174 4.4.6 Deploying a PHP application with the DB2 drivers . . . . . . . . . . . . . 175 4.5 Ruby . . . . . . . . . . . . . . . . . . . . . . . . . . . . . . . . . . . . . . . . . . . . . . . . . . . . 181
- 7. Contents v 4.5.1 IBM IBM_DB gem . . . . . . . . . . . . . . . . . . . . . . . . . . . . . . . . . . . . . . 181 4.5.2 Installation of IBM_DB gem. . . . . . . . . . . . . . . . . . . . . . . . . . . . . . . 181 4.5.3 Creating a sample Ruby application . . . . . . . . . . . . . . . . . . . . . . . . 183 4.5.4 Deploying a Ruby application with the DB2 drivers . . . . . . . . . . . . 183 4.5.5 Help and support. . . . . . . . . . . . . . . . . . . . . . . . . . . . . . . . . . . . . . . 188 4.6 Python . . . . . . . . . . . . . . . . . . . . . . . . . . . . . . . . . . . . . . . . . . . . . . . . . . . 189 4.6.1 IBM_DB driver. . . . . . . . . . . . . . . . . . . . . . . . . . . . . . . . . . . . . . . . . 189 4.6.2 IBM_DB_DBI wrapper. . . . . . . . . . . . . . . . . . . . . . . . . . . . . . . . . . . 189 4.6.3 IBM_DB_SA adaptor. . . . . . . . . . . . . . . . . . . . . . . . . . . . . . . . . . . . 190 4.6.4 Installation of IBM Python drivers . . . . . . . . . . . . . . . . . . . . . . . . . . 190 4.6.5 Creating a sample Python application. . . . . . . . . . . . . . . . . . . . . . . 192 4.6.6 Deploying a Python application with the DB2 drivers . . . . . . . . . . . 193 4.6.7 Help and support. . . . . . . . . . . . . . . . . . . . . . . . . . . . . . . . . . . . . . . 199 4.7 Perl . . . . . . . . . . . . . . . . . . . . . . . . . . . . . . . . . . . . . . . . . . . . . . . . . . . . . 199 4.7.1 DBD::DB2 . . . . . . . . . . . . . . . . . . . . . . . . . . . . . . . . . . . . . . . . . . . . 199 4.7.2 Installation of IBM Perl driver . . . . . . . . . . . . . . . . . . . . . . . . . . . . . 200 4.7.3 Creating a sample Perl application . . . . . . . . . . . . . . . . . . . . . . . . . 202 4.7.4 Deploying a Perl application with the DB2 drivers . . . . . . . . . . . . . 203 4.7.5 Help and support. . . . . . . . . . . . . . . . . . . . . . . . . . . . . . . . . . . . . . . 208 4.8 .NET . . . . . . . . . . . . . . . . . . . . . . . . . . . . . . . . . . . . . . . . . . . . . . . . . . . . 208 Chapter 5. Deploying pre-configured databases . . . . . . . . . . . . . . . . . . . 213 5.1 Introduction . . . . . . . . . . . . . . . . . . . . . . . . . . . . . . . . . . . . . . . . . . . . . . . 214 5.1.1 Sample database . . . . . . . . . . . . . . . . . . . . . . . . . . . . . . . . . . . . . . 215 5.2 Deploying a database using scripts. . . . . . . . . . . . . . . . . . . . . . . . . . . . . 216 5.2.1 Collecting information about the database . . . . . . . . . . . . . . . . . . . 217 5.2.2 Using a shell script . . . . . . . . . . . . . . . . . . . . . . . . . . . . . . . . . . . . . 222 5.2.3 Using an application . . . . . . . . . . . . . . . . . . . . . . . . . . . . . . . . . . . . 228 5.3 Deploying a database using a backup image . . . . . . . . . . . . . . . . . . . . . 231 5.4 Populating the database . . . . . . . . . . . . . . . . . . . . . . . . . . . . . . . . . . . . . 232 5.4.1 Using SQL statements . . . . . . . . . . . . . . . . . . . . . . . . . . . . . . . . . . 232 5.4.2 Using DB2 utilities . . . . . . . . . . . . . . . . . . . . . . . . . . . . . . . . . . . . . . 235 5.5 Updating an existing installation . . . . . . . . . . . . . . . . . . . . . . . . . . . . . . . 240 5.5.1 Updating non-table objects . . . . . . . . . . . . . . . . . . . . . . . . . . . . . . . 241 5.5.2 Updating table objects. . . . . . . . . . . . . . . . . . . . . . . . . . . . . . . . . . . 242 5.5.3 Automating update using DB2 metadata with a Java application . . 246 5.5.4 Alternatives: DB2 tools . . . . . . . . . . . . . . . . . . . . . . . . . . . . . . . . . . 251 5.6 Samples overview . . . . . . . . . . . . . . . . . . . . . . . . . . . . . . . . . . . . . . . . . . 251 5.6.1 Scripts . . . . . . . . . . . . . . . . . . . . . . . . . . . . . . . . . . . . . . . . . . . . . . . 252 5.6.2 Shell scripts. . . . . . . . . . . . . . . . . . . . . . . . . . . . . . . . . . . . . . . . . . . 252 5.6.3 Java applications. . . . . . . . . . . . . . . . . . . . . . . . . . . . . . . . . . . . . . . 255 Appendix A. Sample applications . . . . . . . . . . . . . . . . . . . . . . . . . . . . . . . 259
- 8. vi DB2 Deployment Guide A.1 C/C++ . . . . . . . . . . . . . . . . . . . . . . . . . . . . . . . . . . . . . . . . . . . . . . . . . . . 259 A.2 PHP. . . . . . . . . . . . . . . . . . . . . . . . . . . . . . . . . . . . . . . . . . . . . . . . . . . . . 262 A.3 Ruby . . . . . . . . . . . . . . . . . . . . . . . . . . . . . . . . . . . . . . . . . . . . . . . . . . . . 263 A.4 Python. . . . . . . . . . . . . . . . . . . . . . . . . . . . . . . . . . . . . . . . . . . . . . . . . . . 264 A.5 Perl . . . . . . . . . . . . . . . . . . . . . . . . . . . . . . . . . . . . . . . . . . . . . . . . . . . . . 265 Appendix B. Additional material . . . . . . . . . . . . . . . . . . . . . . . . . . . . . . . . 267 Locating the Web material . . . . . . . . . . . . . . . . . . . . . . . . . . . . . . . . . . . . . . . 267 Using the Web material . . . . . . . . . . . . . . . . . . . . . . . . . . . . . . . . . . . . . . . . . 268 System requirements for downloading the Web material . . . . . . . . . . . . . 268 How to use the Web material . . . . . . . . . . . . . . . . . . . . . . . . . . . . . . . . . . 268 Related publications . . . . . . . . . . . . . . . . . . . . . . . . . . . . . . . . . . . . . . . . . . 269 IBM Redbooks . . . . . . . . . . . . . . . . . . . . . . . . . . . . . . . . . . . . . . . . . . . . . . . . 269 Other publications . . . . . . . . . . . . . . . . . . . . . . . . . . . . . . . . . . . . . . . . . . . . . 269 Online resources . . . . . . . . . . . . . . . . . . . . . . . . . . . . . . . . . . . . . . . . . . . . . . 272 How to get Redbooks . . . . . . . . . . . . . . . . . . . . . . . . . . . . . . . . . . . . . . . . . . . 273 Help from IBM . . . . . . . . . . . . . . . . . . . . . . . . . . . . . . . . . . . . . . . . . . . . . . . . 273 Index . . . . . . . . . . . . . . . . . . . . . . . . . . . . . . . . . . . . . . . . . . . . . . . . . . . . . . . 275
- 9. © Copyright IBM Corp. 2008. All rights reserved. vii Notices This information was developed for products and services offered in the U.S.A. IBM may not offer the products, services, or features discussed in this document in other countries. Consult your local IBM representative for information on the products and services currently available in your area. Any reference to an IBM product, program, or service is not intended to state or imply that only that IBM product, program, or service may be used. Any functionally equivalent product, program, or service that does not infringe any IBM intellectual property right may be used instead. However, it is the user's responsibility to evaluate and verify the operation of any non-IBM product, program, or service. IBM may have patents or pending patent applications covering subject matter described in this document. The furnishing of this document does not give you any license to these patents. You can send license inquiries, in writing, to: IBM Director of Licensing, IBM Corporation, North Castle Drive, Armonk, NY 10504-1785 U.S.A. The following paragraph does not apply to the United Kingdom or any other country where such provisions are inconsistent with local law: INTERNATIONAL BUSINESS MACHINES CORPORATION PROVIDES THIS PUBLICATION "AS IS" WITHOUT WARRANTY OF ANY KIND, EITHER EXPRESS OR IMPLIED, INCLUDING, BUT NOT LIMITED TO, THE IMPLIED WARRANTIES OF NON-INFRINGEMENT, MERCHANTABILITY OR FITNESS FOR A PARTICULAR PURPOSE. Some states do not allow disclaimer of express or implied warranties in certain transactions, therefore, this statement may not apply to you. This information could include technical inaccuracies or typographical errors. Changes are periodically made to the information herein; these changes will be incorporated in new editions of the publication. IBM may make improvements and/or changes in the product(s) and/or the program(s) described in this publication at any time without notice. Any references in this information to non-IBM Web sites are provided for convenience only and do not in any manner serve as an endorsement of those Web sites. The materials at those Web sites are not part of the materials for this IBM product and use of those Web sites is at your own risk. IBM may use or distribute any of the information you supply in any way it believes appropriate without incurring any obligation to you. Information concerning non-IBM products was obtained from the suppliers of those products, their published announcements or other publicly available sources. IBM has not tested those products and cannot confirm the accuracy of performance, compatibility or any other claims related to non-IBM products. Questions on the capabilities of non-IBM products should be addressed to the suppliers of those products. This information contains examples of data and reports used in daily business operations. To illustrate them as completely as possible, the examples include the names of individuals, companies, brands, and products. All of these names are fictitious and any similarity to the names and addresses used by an actual business enterprise is entirely coincidental. COPYRIGHT LICENSE: This information contains sample application programs in source language, which illustrate programming techniques on various operating platforms. You may copy, modify, and distribute these sample programs in any form without payment to IBM, for the purposes of developing, using, marketing or distributing application programs conforming to the application programming interface for the operating platform for which the sample programs are written. These examples have not been thoroughly tested under all conditions. IBM, therefore, cannot guarantee or imply reliability, serviceability, or function of these programs.
- 10. viii DB2 Deployment Guide Trademarks IBM, the IBM logo, and ibm.com are trademarks or registered trademarks of International Business Machines Corporation in the United States, other countries, or both. These and other IBM trademarked terms are marked on their first occurrence in this information with the appropriate symbol (® or ™), indicating US registered or common law trademarks owned by IBM at the time this information was published. Such trademarks may also be registered or common law trademarks in other countries. A current list of IBM trademarks is available on the Web at http://www.ibm.com/legal/copytrade.shtml The following terms are trademarks of the International Business Machines Corporation in the United States, other countries, or both: AIX® Cloudscape® DB2® DB2 Connect™ Distributed Relational Database Architecture™ DRDA® eServer™ General Parallel File System™ GPFS™ i5/OS® IBM® Informix® InfoSphere™ iSeries® Lotus® OpenPower® OS/390® OS/400® POWER™ pSeries® pureXML™ Rational® Redbooks® Redbooks (logo) ® REXX™ System i® System z9® System z® Tivoli® WebSphere® z/OS® z9® zSeries® The following terms are trademarks of other companies: AMD, AMD Athlon, the AMD Arrow logo, and combinations thereof, are trademarks of Advanced Micro Devices, Inc. SUSE, the Novell logo, and the N logo are registered trademarks of Novell, Inc. in the United States and other countries. Oracle, JD Edwards, PeopleSoft, Siebel, and TopLink are registered trademarks of Oracle Corporation and/or its affiliates. J2EE, Java, Java runtime environment, JDBC, JRE, JVM, Solaris, Sun, and all Java-based trademarks are trademarks of Sun Microsystems, Inc. in the United States, other countries, or both. Microsoft, MS, SQL Server, Windows Server, Windows Vista, Windows, and the Windows logo are trademarks of Microsoft Corporation in the United States, other countries, or both. Intel Pentium, Intel Xeon, Intel, Itanium, Pentium, Intel logo, Intel Inside logo, and Intel Centrino logo are trademarks or registered trademarks of Intel Corporation or its subsidiaries in the United States, other countries, or both. UNIX is a registered trademark of The Open Group in the United States and other countries. Linux is a trademark of Linus Torvalds in the United States, other countries, or both. Other company, product, or service names may be trademarks or service marks of others.
- 11. © Copyright IBM Corp. 2008. All rights reserved. ix Preface DB2® provides various installation methods as well as features and tools to deploy a large number of clients and servers. Database administrators, application developers, and application architects have a number of available options when deploying DB2 9.5 for Linux®, UNIX®, and Windows® (DB2 for LUW). Focusing on the DB2 V9.5 deployment methodology, this IBM® Redbooks® publication provides general guidance and serves as a reference resource for DB2 based solution deployment. These techniques and considerations are also applicable to other recent versions of DB2 for LUW. Deployment begins at planning. We introduce various DB2 for LUW products to help you choose the right DB2 product for your enterprise. DB2 9.5 can be installed interactively using a graphical installer, or in a silent install where input is passed to the installer through a response file. We show details on how to deploy DB2 servers and clients to both single and multiple systems using the DB2 provided functions and features as well as a customized script. We also describe how to deploy DB2 through Microsoft® System Management Server (SMS). In addition, we cover how to deploy DB2 with various applications, including Java™, C/C++, PHP, Python, Ruby, Perl, and .Net. Finally, we explain how to deploy a pre-configured database. The team that wrote this book This book was produced by a team of specialists from around the world working at the International Technical Support Organization, San Jose Center. Whei-Jen Chen is a Project Leader at the International Technical Support Organization, San Jose Center. She has extensive experience in database design and modeling, DB2 system administration, and application development,. Whei-Jen is an IBM Certified Solutions Expert in Database Administration and Application Development as well as an IBM Certified IT Specialist. Jian TJ Tang is an Advisory IT Specialist working for the Software Support Group in Global Technology Services, IBM China. He has seven years of experience in various DBMSs, including DB2, Sybase, Oracle® and MS® SQL Server®. He joined IBM in 2004. His areas of expertise include DB2 troubleshooting, administration, and performance tuning. Currently he mainly
- 12. x DB2 Deployment Guide focuses on DB2 MPP system and performance tuning in complex environments. He also has a job role in a leading critical situation support team for large customers. Prior to joining IBM, he was an application developer providing data warehouse/BI solutions to customers. He is a Certified DB2 Application Developer and Database Administrator. Carsten Block is a Senior IT Specialist with IBM Global Services in Denmark. He has been working in the computer industry for the last 15 years, and has worked at IBM for the last eight years. His area of expertise is mainly the J2EE™ platform, with a strong focus on back-end integration. He holds a Masters degree in Computer Science from the University of Copenhagen, Denmark. John Chun is a Specialist of the DB2 Advanced Support team working in the area of application development and tooling. He has worked in the IBM DBT Toronto lab for eight years resolving DB2 application issues with various languages including Java, C, C++, Perl, REXX™, C#, Ruby, and others. John has worked on a number of projects involving DB2 CLI and OLEDB driver, as well as .NET data provider. John is a DB2 Certified Solutions Expert and Certified WebSphere® Administrator. Jian, John, and Carsten Acknowledgements Thanks to Abhigyan Agrawal from IBM India for his written content. The authors would also like to thank the following people for their contributions to this project: Chris Gruber Christine Law Jason V. Shayer Paolo Cirone IBM Toronto Laboratory, Canada
- 13. Preface xi Helmut Riegler IBM Austria Yvonne Lyon, Sangam Racherla, Emma Jacobs International Technical Support Organization, San Jose Center Become a published author Join us for a two- to six-week residency program! Help write a book dealing with specific products or solutions, while getting hands-on experience with leading-edge technologies. You will have the opportunity to team with IBM technical professionals, Business Partners, and Clients. Your efforts will help increase product acceptance and customer satisfaction. As a bonus, you will develop a network of contacts in IBM development labs, and increase your productivity and marketability. Find out more about the residency program, browse the residency index, and apply online at: ibm.com/redbooks/residencies.html Comments welcome Your comments are important to us! We want our books to be as helpful as possible. Send us your comments about this book or other IBM Redbooks in one of the following ways: Use the online Contact us review Redbooks form found at: ibm.com/redbooks Send your comments in an e-mail to: [email protected] Mail your comments to: IBM Corporation, International Technical Support Organization Dept. HYTD Mail Station P099 2455 South Road Poughkeepsie, NY 12601-5400
- 14. xii DB2 Deployment Guide
- 15. © Copyright IBM Corp. 2008. All rights reserved. 1 Chapter 1. Introduction to DB2 deployment In this chapter, we introduce various aspects of DB2 9.5 for Linux, UNIX, and Windows deployment. We present various DB2 9.5 product offerings and items to consider during deployment planning. We discuss the following topics: Various product offerings from DB2 9.5 for Linux, UNIX, and Windows Key items to consider during deployment planning 1
- 16. 2 DB2 Deployment Guide 1.1 DB2 deployment overview Database administrators, application developers, and application architects have a number of available options when deploying DB2 9.5 for Linux, UNIX, and Windows. Planning the deployment of DB2 based solutions among various operating system platforms and DB2 products might appear be a complex endeavor. In order to assist with deployment planning, this book provides general guidance and serves as a reference resource for DB2 based solution deployment. DB2 V9.5 provides various installation methods as well as features and tools to deploy a large number of clients and servers. The primary focus of this book is on the DB2 V9.5 deployment methodology. However, these techniques and considerations are also applicable to other recent versions of DB2 for Linux, UNIX, and Windows. DB2 9.5 can be installed interactively using a graphical installer or in a silent installation where input is passed to the installer through a response file. The advantage of silent installation, which is also known as unattended installation, is that it does not require the user to be present during the installation process. It is also ideal for mass deployment and ensuring that consistent installation is performed with identical options throughout a given deployment. The silent installation also negates the requirement for the Java Runtime environment, which is necessary for the graphical installer. Deploying DB2 9.5 for Linux, UNIX, and Windows means more than just installing DB2 products or drivers. One can create multiple instances, catalog and create databases, set profile registry variables, set database manager configuration parameters, and import instance profiles generated using the Connectivity Configuration Export tool, db2cfexp. Also, DB2 can be deployed through third party technologies such as the Microsoft System Management Server (SMS) or Microsoft System Center Configuration Manager (SCCM). With various options available for deployment, DB2 9.5 for Linux, UNIX, and Windows provides flexibility and a seamless way to distribute a DB2 solution to any enterprise environment. Regardless of whatever DB2 product you are deploying, all deployment starts with planning. In the following section, we cover various DB2 product offerings and deployment considerations that must be addressed prior to any deployment.
- 17. Chapter 1. Introduction to DB2 deployment 3 1.2 DB2 9.5 for UNIX, Linux, and Windows products One of the first things to consider during deployment planning is to choose the right DB2 product for your enterprise. The DB2 product is available on Windows 2000/2003/XP/Vista, Linux, AIX®, Hewlett-Packard’s HP-UX, Sun™ Microsystems’ Solaris™, OS/400®, i5/OS®, VSE/VM, and z/OS®. The SQL API is common to all platforms for DB2 products, allowing data to be accessed freely across various platforms. The DB2 9.5 with a pureXML™ and relational hybrid is no longer just a traditional database but is a complete data server. For the scope of this book, we introduce only the DB2 product family available for UNIX, Linux, and Windows platforms. Even within this limited scope, there are over fifteen DB2 9.5 products. 1.2.1 DB2 Server products DB2 provides different editions for satisfying various enterprise requirements. These products are full relational databases that accept remote connections. Note that not all products are available on all platforms. DB2 Express-C and DB2 Express-C FTL Edition Designed for use with a small number of clients, it is ideal for small and medium businesses. DB2 Express-C is a full functional database without certain features, such as Query Patroller, Geodetic Performance Expert, Connection Concentrator, Governor, Workload Management, Compression Backup, and Table Partitioning. DB2 Express-C is optimized for two processing cores and 2 GB of memory. If your hardware has a higher configuration than the optimized setting, DB2 Express-C will throttle down its resource usage to optimized level (maximum memory usage limit of 2 GB). The difference between freely distributed DB2 Express-C and DB2 Express-C FTL (Fix Term license) is that DB2 Express-C FTL includes 12 months license and subscription (includes support). DB2 Express Edition This edition is similar to DB2 Express-C, but the High Availability Feature, Homogeneous Federation Feature for Express, and pureXML Feature for Express can be purchased on top of the base product. Resource consumption limit measured in Processor Value Unit (PVU) is raised to 200 and memory limit of 4 GB. This product is available on Linux, Windows, and Solaris (x64 as of fp1).
- 18. 4 DB2 Deployment Guide DB2 Workgroup Server Edition Designed for midsize businesses, it has all of the functionality of DB2 Express plus an optional Query Optimization Feature. It has more extensive licensing and a resource usage limit of 480 Processor Value Unit (PVU) and memory limit of 16 GB. This product is available on AIX, Windows, Linux, HP-UX, and Solaris. DB2 Enterprise Server Edition Scalable to handle large volume transaction processing, it is designed for large businesses. All features available to DB2 can be had in the DB2 Enterprise Server Edition with exception of the Data Partitioning Feature (DPF) with unlimited Processor Value Unit (PVU) and unlimited memory. This product is available on AIX, Windows, Linux, HP-UX, and Solaris. 1.2.2 DB2 clients and drivers DB2 clients and drivers are used to access databases that reside on DB2 servers. A database cannot be created on a DB2 client. IBM Data Server Runtime Client Previously known as DB2 Runtime Client, this product provides various means for applications and user to establish connection against remote DB2 databases. In order to reduce disk footprint, it is not shipped with any graphical user interface (GUI) tools or DB2 bind files. It includes DB2 Command Line Processor (CLP) as wheel as base client support to handle database connections, SQL statements, XQuery statements, and DB2 commands. Support for common database interfaces include: Java Database Connectivity (JDBC™) DB2 Command Line Interface (CLI) Open Database Connectivity (ODBC) ADO.NET Object Linking and Embedding Database (OLE DB) DB Data Server Runtime client allows free redistribution. IBM Data Server Runtime client is also available as Windows Installer merge module on supported Windows platforms. This allows only part of the client you want, through specific RTCL DLL files, to be included in a custom application installation package. IBM Data Server Client IBM Data Server Client contains all the functionality of the DB2 Data Server Runtime Client plus graphical user interface (GUI) tools to perform database
- 19. Chapter 1. Introduction to DB2 deployment 5 administration and client/server configuration. Note that GUI tools are available for Windows on x86 32 bit, Windows on x64 (EM64T/AMD64), Linux on x86/ EM64T/AMD64. It also contains tools to assist with application development and contains bind files. The application development tools include application header files, pre-compilers, bind utilities, and sample codes. It was previously known as DB2 Administration Client or DB2 Client. IBM Data Server Driver for ODBC, CLI, and .NET New to DB2 9.5, IBM Data Server Driver for ODBC, CLI and .NET is a lightweight deployment solution for Windows applications. It provides runtime support for applications using DB2 CLI API, ODBC API, or .NET API without having to install Data Server Client or the Data Server Runtime Client. IBM Data Server Driver for ODBC, CLI and .NET supports application that uses CLI, ODBC, .NET, PHP, or Ruby to access DB2 databases. The client is available as an installable image on Windows operating systems and merge modules are available for embedding client in Windows installer based installation. On Linux and UNIX operating systems, a separate deliverable called IBM Data Server Driver for ODBC and CLI provides a similar lightweight deployment solution without the .NET support in tar file format. IBM Data Server Driver for JDBC and SQLJ IBM Data Server Driver for JDBC and SQLJ is a driver which includes both JDBC Type 2 and JDBC Type 4 behaviors. It consists of single driver which is available in two versions. The IBM Data Server Driver for JDBC and SQLJ Version 3.5 is JDBC 3.0 compliant and Version 4.0 supports JDBC 3.0 and some JDBC 4.0 functions. Both versions of the driver include SQLJ application programming interfaces. IBM Data Server Driver for JDBC and SQLJ supports Java 2 Platform, Enterprise Edition (J2EE) Java Transaction Service (JTS), and Java Transaction API (JTA) specifications. Using the Type 2 connectivity, Java user-defined functions and stored procedures can establish connection to a database. Note that IBM Data Server Driver for JDBC and SQLJ has following requirements: SDK for Java 1.4.2 or later has to be installed. For JDBC 4.0 functions, SDK for Java 6 or later is required. All JVMs that run Java application which accesses DB2 database must include native threads support.
- 20. 6 DB2 Deployment Guide Any SQLJ or JDBC application that accesses i5/OS using IBM Data Server Driver for JDBC and SQLJ type 4 connectivity, must ensure that the OS/400 operating system supports the Unicode UTF-8 encoding scheme. Downloadable DB2 products and components are listed in Table 1-1. Table 1-1 Downloadable DB2 products and components DB2 Products and components Download IBM DB2 9.5 Express-C https://www14.software.ibm.com/webapp/iwm/web/ preLogin.do?lang=en_US&source=swg-db2expresscviper2 IBM Data Server Client https://www14.software.ibm.com/webapp/iwm/web/ preLogin.do?lang=en_US&source=swg-idsc11 IBM Data Server Runtime Clients https://www14.software.ibm.com/webapp/iwm/web/ preLogin.do?lang=en_US&source=swg-idsrc11 DB2 Runtime Client Installer for Windows 32 bit https://www14.software.ibm.com/webapp/iwm/web/ preLogin.do?lang=en_US&source=swg-db2rciwin32 DB2 Runtime Client Installer for Windows AMD™ 64 bit https://www14.software.ibm.com/webapp/iwm/web/ preLogin.do?lang=en_US&source=swg-db2rciwin DB2 Runtime Client Merge Modules https://www14.software.ibm.com/webapp/iwm/web/ preLogin.do?lang=en_US&source=swg-db2rcmm DB2 Runtime Client Merge Modules Language Pack https://www14.software.ibm.com/webapp/iwm/web/ preLogin.do?lang=en_US&source=swg-db2rcmmlp IBM Data Server Driver for ODBC, CLI and .Net https://www14.software.ibm.com/webapp/iwm/web/ preLogin.do?lang=en_US&source=swg-swg-idsdocn11 IBM Data Server Driver for ODBC and CLI https://www14.software.ibm.com/webapp/iwm/web/ preLogin.do?lang=en_US&source=swg-idsdoc11 IBM Data Server Driver for JDBC and SQLJ https://www14.software.ibm.com/webapp/iwm/web/ preLogin.do?lang=en_US&source=swg-idsjs11 IBM DB2 9.5 Data Server trial https://www14.software.ibm.com/webapp/iwm/web/ preLogin.do?lang=en_US&source=swg-dm-db295trial IBM DB2 9.5 Net Search Extender https://www14.software.ibm.com/webapp/iwm/web/ preLogin.do?lang=en_US&source=swg-dm-db295nse IBM DB2 9.5 Spatial Extender https://www14.software.ibm.com/webapp/iwm/web/ preLogin.do?lang=en_US&source=swg-dm-db295gse IBM DB2 9.5 Information Center https://www14.software.ibm.com/webapp/iwm/web/ preLogin.do?lang=en_US&source=swg-dm-db295info IBM DB2 9.5 National Language Media Pack https://www14.software.ibm.com/webapp/iwm/web/ preLogin.do?lang=en_US&source=swg-dm-db295nlpack IBM Data Studio http://www14.software.ibm.com/webapp/download/ search.jsp?go=y&rs=swg-ids
- 21. Chapter 1. Introduction to DB2 deployment 7 1.2.3 DB2 standalone and connect products DB2 also provides various flexibility and options in its product offering. The DB2 connect products provide connectivity to host databases, while the DB2 personal edition provides standalone database for local use. DB2 Personal Edition This is a restricted desktop product with a full functional database, without Query Patroller, TSA, Geodetic Performance Expert, and Heterogeneous Federation. It does not accept any remote incoming requests and therefore local database(s) can only be accessed by local clients. It has all the functionality of the DB2 Client for accessing databases on DB2 Servers. This product is available for Linux and Windows. DB2 Connect Personal Edition This is a restricted desktop product that allows a personal computer to which it is installed to access a host database (databases residing on System z®, System I, and VM/VSE). As with DB2 Personal Edition, it can only be accessed by local clients and does not accept any remote incoming requests. Therefore, it cannot serve as a gateway to handle host connections. This product is available for Linux, Windows, and Solaris (x64 as of fp1). DB2 Connect Enterprise Edition Designed for multi-tier applications, where it can be used as a gateway to facilitate connectivity to host databases (databases residing on System z, System i®, and VM/VSE). It concentrates and manages connections from multiple remote clients. This product is available on AIX, HP-UX, Solaris, Linux, and Windows. DB2 Connect Application Server Edition This edition provides Web and Application Server based connectivity for multi-tier applications. This is similar to DB2 Connect™ Enterprise Edition but with a different license scheme. DB2 Connect Unlimited Edition for System z This product provides access to DB2 on z/OS data servers. It contains both DB2 Connect Personal edition and DB2 Connect Enterprise Edition. DB2 Connect Unlimited Edition for System i This product provides access to DB2 on System i databases.
- 22. 8 DB2 Deployment Guide 1.2.4 Other DB2 products DB2 products are also available in different packaged bundles for specific enterprise requirements. IBM Database Enterprise Developer Edition (DEDE) 9.5 The IBM Database Enterprise Developer Edition is not an actual product but is a product bundle. It allows the application developer to deign, build, and prototype applications for deployment on various IBM Information Management clients or servers. This edition is for test or development use only, not for production use. The IBM Database Enterprise Developer Edition includes the following listed products and the right to use all DB2 priced features with some restrictions: DB2 Workgroup Server Edition DB2 Enterprise Server Edition 9.5 DB2 Connect Unlimited Server Edition for zSeries® and iSeries® IBM Data Server Runtime Client DB2 Data Server Client IBM Data Studio DB2 Embedded Application Server DB2 Information Center (IC) and Updates DB2 Documentation CD (PDF) Mobility on Demand IDS Enterprise Edition V11.10 Net Search Extender Spatial Extender (SP) Query Patroller (QP) WebSphere MQ (Restricted Use) Rational® Web Developer (Restricted Use) Tivoli® System Automation for Windows IBM Data Server Drivers Database Partitioning Feature Geodetic Data Management Feature Performance Optimization Feature Storage Optimization Feature Advanced Access Control Feature IBM Homogeneous Federation Feature for ESE pureXML feature for WSE pureXML feature for ESE IBM Homogeneous Replication Feature
- 23. Chapter 1. Introduction to DB2 deployment 9 InfoSphere Warehouse (as of 9.5.1) InfoSphere™ Warehouse was called DB2 Warehouse Edition (DWE) in 9.5.0. It is another product bundle that includes DB2 9.5 Enterprise Edition with the Data Partitioning Feature (DPF) as well as other tools and features. There are six different versions of this product offering: DB2 Warehouse Starter Edition DB2 Warehouse Intermediate Edition DB2 Warehouse Base Edition DB2 Warehouse Advanced Edition DB2 Warehouse Enterprise Edition DB2 Warehouse Developer Edition InfoSphere Warehouse includes the following additional tools and features: InfoSphere Warehouse Cubing Services InfoSphere Warehouse Design Studio InfoSphere Warehouse SQL Warehousing Tool IBM DB2 Database Partitioning IBM WebSphere Application Server IBM Alphablox Note that not all of the additional tools and features are included in each Warehouse Edition. Depending on the InfoSphere Warehouse Edition, the items included vary. Table 1-2 summarizes DB2 product availability by platforms. Table 1-2 DB2 product availability Platforms DB2Enterprise and DB2 Connect Enterprise DB2 Workgroup DB2 Express and DB2 Express-C DB2 Personal DB2 Connect Personal Windows XP, Vista 32bit Workstation No1 Yes Yes Yes Yes XP x64, Vista x64 AMD64 EM64T No1 Yes Yes Yes Yes Server 2003 32-bit Yes Yes Yes Yes Yes Server 2003, x64 AMD64, EM64T Yes Yes Yes Yes Yes Linux 64bit x64 Yes Yes Yes Yes Yes 64bit System z Yes No No No No 64bit POWER™ Yes Yes Yes No No AIX 64bit Power 3+ Yes Yes No No No HP-UX 64bit IA64 Yes Yes No No No
- 24. 10 DB2 Deployment Guide 1 These products can be installed on given platforms but they are not supported for production use (only for development and test purposes) 2 As of DB2 9.5 Fix pack 1 1.3 Deployment considerations Deployment planning is essential to the start of any DB2 based solutions and should be planned from the beginning of the project. Before selecting a DB2 product for deployment, you must have a clear picture of the current environment and deployment requirements. Here are the key points that you should consider during deployment planning: Understanding your enterprise environment: – New environment versus environment with existing DB2 installation – Nature of the client and application – Client/server relationship – Hardware and software considerations DB2 version considerations DB2 product considerations License considerations: – Authorized User License – Processor Value Unit (PVU) metric license Authorization considerations Configuration considerations Other considerations Solaris 64bit SPARC Yes Yes No No No 64bit x64 Yes Yes Yes2 No Yes2 Platforms DB2Enterprise and DB2 Connect Enterprise DB2 Workgroup DB2 Express and DB2 Express-C DB2 Personal DB2 Connect Personal
- 25. Chapter 1. Introduction to DB2 deployment 11 1.3.1 New environment versus environment with existing DB2 installation Unless given deployment is to take place in a brand new environment, it is likely that DB2 client product or servers are already in place. As such, you should take full inventory of all the DB2 clients and server currently in place as well as the users and applications that utilize them. If the DB2 product is currently installed in an environment where deployment is to take place, consider the compatibility of the various DB2 versions. Note that connections to and from DB2 V7 to V9.5 are not supported. Another consideration is installing multiple products and versions in the same system. As of Version 9 and later, you can install and run multiple DB2 copies on the same computer, where a DB2 copy refers to one or more installation of DB2 database products in a particular location on the same computer. Each of the DB2 Version 9.x copies can be at the same or different code levels. This means that: Applications that require different DB2 versions on the same computer at the same time can be deployed. Independent copies of DB2 products for different functions can be run on the same system. Testing is allowed on the same computer before moving the production database to the later version of the DB2 product. Independent Software Vendors (ISPs) can embed a DB2 server product into their product and hide the DB2 database from end users.
- 26. 12 DB2 Deployment Guide Table 1-3 outlines supported combinations of client and server versions. Table 1-3 Supported client /server matrix Note that when a client is located on the same system as a DB2 server and they are different versions, local client-to-server connections using Interprocess Communication (IPC) are not supported. For more information regarding supported clients and servers for V9.5, refer to: http://publib.boulder.ibm.com/infocenter/db2luw/v9r5/index.jsp?topic=/ com.ibm.db2.luw.qb.client.doc/doc/r0009731.html Information regarding supported clients and servers for V9.1 can be found in: http://publib.boulder.ibm.com/infocenter/db2luw/v9/index.jsp?topic=/ com.ibm.db2.udb.uprun.doc/doc/r0009731.htm Information regarding supported clients and servers for V8 can be found in: http://publib.boulder.ibm.com/infocenter/db2luw/v8/index.jsp?topic=/ com.ibm.db2.udb.doc/start/r0009731.htm Nature of the client and application It is equally important to understand the role of clients that connect to the DB2 Servers. If a client consists of solely JDBC or ODBC applications, then full deployment of a DB2 product might not be necessary. To determine the required features of the product, also consider whether the client has to perform database administration or DB2 application development. DB2 Clients Version 8 32-bit Server UNIX, Windows, Linux Version 8 32-bit Server UNIX, Windows, Linux Version 9 Server UNIX, Windows, Linux Version 9.5 Server UNIX, Windows, Linux Version 9.5 Yes Yes Yes Yes Version 9.1 Yes Yes Yes Yes Version 8 (64-bit) Yes Yes Yes Yes Version 8 (32-bit) Yes Yes Yes Yes DB2 for z/OS and OS/ 390® Version 7 and higher Yes Yes Yes Yes DB2 for i5/OS Version 5 and higher Yes Yes Yes Yes DB2 VM and VSE Version 7 Yes Yes Yes Yes
- 27. Chapter 1. Introduction to DB2 deployment 13 Client/server relationship If DB2 servers are taking part in workload balancing, then determining the correct number of client requests and workload would be essential to allocating sufficient resource for a given environment. When deploying an application that interacts with the DB2 database, one of the key decisions that have to be made is whether or not it should reside locally with the DB2 server. As with any decision, there are pros and cons that must be weighed for each specific scenario. Hardware and software considerations Each DB2 version and product has specific minimal hardware and software requirements. It is important to review current system specifications in a given deployment setting to ensure that it meets DB2 requirements. Table 1-4 lists the DB2 9.5 hardware requirements for various platforms. Table 1-4 Hardware requirements for Version 9.5 DB2 Servers and IBM data server clients DB2 Connect Servers DB2 Connect Personal Edition AIX 64-bit Common Hardware Reference Platform (CHRP) architecture. 64-bit Common Hardware Reference Platform (CHRP) architecture. N/A Linux x86 (Intel® Pentium®, Intel Xeon®, and AMD) 32-bit Intel and AMD processors x64 (64-bit AMD64 and Intel EM64T processors) POWER (IBM eServer™ OpenPower®, System i or pSeries® systems that support Linux)-Requires a minimum of SLES 10 Service Pack 1 or RHEL 5 eServer System z or System z9® x86 ( Intel Pentium®, Intel Xeon, and AMD Athlon™) x86–64 (Intel EM64T and AMD64) POWER (any System i or pSeries that support Linux) eServer zSeries x86 ( Intel Pentium, Intel Xeon, and AMD Athlon) x86–64 (Intel EM64T and AMD64) Windows All Intel and AMD processors capable of running the supported Windows operating systems (32-bit and x64 based systems) All Intel and AMD processors capable of running the supported Windows operating systems (32-bit and x64 based systems) All Intel and AMD processors capable of running the supported Windows operating systems (32-bit and x64 based systems) Solaris UltraSPARC for Solaris 9 and 10 Solaris x64 (Intel 64 or AMD64) for Solaris 10 UltraSPARC for Solaris 9 and 10 Solaris x64 (Intel 64 or AMD64) for Solaris 10 Solaris x64 (Intel 64 or AMD64) for Solaris 10 (with V9.5 FixPack1) HP-UX Itanium® based HP Integrity Series Systems Itanium based HP Integrity Series Systems N/A
- 28. 14 DB2 Deployment Guide Table 1-5 illustrates the software requirements for DB2 9.5. Table 1-5 Software requirement for DB2 9.5 DB2 Servers and IBM data server clients DB2 Connect Servers DB2 Connect Personal Edition AIX Version 5.3 64-bit AIX kernel required AIX 5.3 Technology Level (TL) 6 and Service Pack (SP) 2 plus APAR IZ03063 Minimum C++ runtime level requires the xlC.rte 9.0.0.1 and xlC.aix50.rte 9.0.0.1 filesets. These filesets are included in the August 2007 IBM C++ Runtime Environment Components for AIX package. 64-bit AIX kernel required AIX 5.3 Technology Level (TL) 6 and Service Pack (SP) 2 plus APAR IZ03063 Minimum C++ runtime level requires the xlC.rte 9.0.0.1 and xlC.aix50.rte 9.0.0.1 filesets. These filesets are included in the August 2007 IBM C++ Runtime Environment Components for AIX package. N/A AIX Version 6.1 64-bit AIX kernel required Minimum C++ runtime level requires the xlC.rte 9.0.0.1 and xlC.aix61.rte 9.0.0.1 filesets. These filesets are included in the October 2007 IBM C++ Runtime Environment Components for AIX package. DB2 installation is supported only on a System WPAR. Encrypted JFS2 file system or set of files are not supported for use with multiple partition instances. 64-bit AIX kernel required Minimum C++ runtime level requires the xlC.rte 9.0.0.1 and xlC.aix61.rte 9.0.0.1 filesets. These filesets are included in the October 2007 IBM C++ Runtime Environment Components for AIX package. N/A Red Hat Enterprise Linux (RHEL) 4 Update 4 Base Kernel level of 2.6.9 Libraries glibc-2.3.4 Package requirments: – libaio – compat-libstdc++ (Not for POWER) – pdkshu – openssh – openssh-server – rsh-server – nfs-utils Base Kernel level of 2.6.9 Libraries glibc-2.3.4 Base Kernel level of 2.6.9 Libraries glibc-2.3.4 Red Hat Enterprise Linux (RHEL) 5 Base Kernel level of 2.6.18 Libraries libstdc++.so.5 POWER requires the IBM XL C/C++ Version 8.0 Runtime. Package requirments: – libaio – compat-libstdc++ (Not for POWER) – pdkshu – openssh – openssh-server – rsh-server – nfs-utils Base Kernel level of 2.6.18 Libraries libstdc++.so.5 POWER requires the IBM XL C/ C++ Version 8.0 Runtime. Base Kernel level of 2.6.18 Libraries libstdc++.so.5 POWER requires the IBM XL C/C++ Version 8.0 Runtime.
- 29. Chapter 1. Introduction to DB2 deployment 15 SUSE® Linux Enterprise Server (SLES) 9 Service Pack 3 Base Kernel level of 2.6.5 Libraries glibc-2.3.3 Package requirments: – libaio – compat-libstdc++ (Not for POWER) – pdksh – openssh – rsh-server – nfs-utils Base Kernel level of 2.6.5 Libraries glibc-2.3.3 Base Kernel level of 2.6.5 Libraries glibc-2.3.3 SUSE Linux Enterprise Server (SLES) 10 Service Pack 1 Package requirements: libaio compat-libstdc++ (Not for POWER) pdksh openssh rsh-server nfs-utils Base Kernel level of 2.6.16 Libraries glibc-2.4-31 POWER requires the IBM XL C/ C++ Version 8.0 Runtime. Base Kernel level of 2.6.16 Libraries glibc-2.4-31 Windows XP Professional (32-bit and x64) Windows XP Service Pack 2 or later IBM Data Server Provider for .NET client applications and CLR server-side procedures require .NET 1.1 SP1 or .NET 2.0 framework runtime Windows XP Service Pack 2 or later Windows XP Service Pack 2 or later Windows Vista® (32-bit and x64) IBM Data Server Provider for .NET client applications and CLR server-side procedures require .NET 1.1 SP1 or .NET 2.0 framework runtime Windows 2003 (32-bit and x64) Service Pack 1 or later. R2 is also supported IBM data server provider for .NET client applications and CLR server-side procedures require .NET 1.1 SP1 or .NET 2.0 framework runtime Service Pack 1 or later. Service Pack 1 or later. Windows Server® 2008 IBM data server provider for .NET client applications and CLR server-side procedures require .NET 1.1 SP1 or .NET 2.0 framework runtime Solaris 9 UltraSPARC: 64- bit kernel Patches 111711-12 and 111712-12 If raw devices are used, patch 122300-11 64-bit Fujitsu PRIMEPOWER and Solaris 9 Kernel Update Patch 112233-01 or later to get the fix for patch 912041-01 UltraSPARC: 64- bit kernel Patches 111711-12 and 111712-12 If raw devices are used, patch 122300-11 DB2 Servers and IBM data server clients DB2 Connect Servers DB2 Connect Personal Edition
- 30. 16 DB2 Deployment Guide Information regarding DB2 9.5 installation requirements can be found in: http://publib.boulder.ibm.com/infocenter/db2luw/v9r5/index.jsp?topic=/ com.ibm.db2.luw.qb.server.doc/doc/r0025127.html Known issues regarding HP-UX with DB2 can be found in: http://www-1.ibm.com/support/docview.wss?&uid=swg21257602 1.3.2 DB2 version considerations In addition to considering compatibility with existing DB2 installation, you should consider the end of support date of any DB2 version that you are planning to install, as well as what features you require. For information regarding the end of life cycle (end of support) date of all IBM software products, refer to: http://www.ibm.com/software/data/support/lifecycle/ Also consider the features associated with each version. Each new version of DB2 brings significant enhancements and feature additions. For example, if you want native XML storage and XML services, consider DB2 V9.x for deployment. Solaris 10 UltraSPARC: – 64- bit kernel – If raw devices are used, patch 125100-07 Solaris x64: – 64- bit kernel – Patch 118855-33 – If raw devices are used, patch 125101-07 UltraSPARC: – 64- bit kernel – If raw devices are used, patch 125100-07 Solaris x64: – 64- bit kernel – Patch 118855-33 – If raw devices are used, patch 125101-07 Solaris x64: 64- bit kernel Patch 118855-33 If raw devices are used, patch 125101-07 HP-UX HP-UX 11iv2 (11.23.0505) with: – May 2005 Base Quality (QPKBASE) bundle – May 2005 Applications Quality (QPKAPPS) bundle HP-UX 11iv3 (11.31) HP-UX 11iv2 (11.23.0505) with: – May 2005 Base Quality (QPKBASE) bundle – May 2005 Applications Quality (QPKAPPS) bundle N/A DB2 Servers and IBM data server clients DB2 Connect Servers DB2 Connect Personal Edition
- 31. Chapter 1. Introduction to DB2 deployment 17 1.3.3 DB2 product considerations As discussed in 1.2, “DB2 9.5 for UNIX, Linux, and Windows products” on page 3, DB2 is available is different editions and packages. All DB2 editions and products share the same code base but are available with different features, licensing, and different system limits. Table 1-6 summaries various DB2 for LUW editions. Table 1-6 DB2 for LUW Server product listing: Features and functions Express-C and Express-C FTL DB2 Express edition DB2 Workgroup Server Edition DB2 Enterprise Server Edition Platform Availability Windows, Linux POWER, Linux x64, Solaris x64 (with FixPack 1) Windows, Linux POWER, Linux x64 and Solaris x64 (with FixPack 1) AIX, Windows, Linux POWER, Linux x64, Solaris and HP-UX IA-64 AIX, WIndows, Linux, Solaris and HPUX IA-64 Imposed System Limit 2 cores and 2 GB memory for DB2 Express-C and 4 cores and 4 GB memory for DB2 Express-C FTL 200 PVU and 4 GB of memory 480 PVU and 16 GB of memory No limit Licensing Scheme DB2 Express-FTL is licensed per server Licensed with authorized user license or per processor based on underlying server’s PVU rating Licensed with authorized user license or per processor based on underlying server’s PVU rating Licensed with authorized user license or per processor based on underlying server’s PVU rating Homogenous SQL Replication Yes with DB2 Express-C FTL Yes Yes Yes Homogenous Q Replication No No No Yes with Homogeneous Replication Feature for ESE option High Availability Disaster Recovery Yes with DB2 Express-C FTL Yes with High Availability Feature option Yes Yes Tivoli System Automation Yes with DB2 Express-C FTL Yes with High Availability Feature option Yes Yes Online REORG No Yes with High Availability Feature option Yes Yes Advanced Copy Services No Yes with High Availability Feature option Yes Yes MQT No No Yes with Query Optimization Feature option Yes MDC No No Yes with Query Optimization Feature option Yes Query Parallelism No No Yes with Query Optimization Feature option Yes
- 32. 18 DB2 Deployment Guide Connection Concentrator No No No Yes Table Partitioning No No No Yes Governor No No No Yes Homogenous Federation No Yes with Homogeneous Federation Feature option Yes with Homogeneous Federation Feature option Yes with Homogeneous Federation Feature option Compression: Row Level or Backup No No No Yes with Storage Optimization Feature option Query Patroller No No No Yes with Performance Optimization Feature option Workload Management No No No Yes with Performance Optimization Feature option Performance Expert No No No Yes with Performance Optimization Feature option pureXML Storage Yes Yes with pureXML Feature for Express option Yes with pureXML Feature for WSE option Yes with pureXML Feature for ESE option Express-C and Express-C FTL DB2 Express edition DB2 Workgroup Server Edition DB2 Enterprise Server Edition Note: Database Partitioning Feature (DPF) is now only available through InfoSphere Warehouse Version 9.5. Existing DPF licenses will be upgraded automatically to the IBM Base Warehouse Feature for DB2 Version 9.5. Customers can also acquire the IBM Enterprise Warehouse Feature for DB2 Version 9.5 to obtain DPF.
- 33. Chapter 1. Introduction to DB2 deployment 19 In addition to differences in features, each edition also sets different system limits. As shown in Table 1-6 on page 17, each edition has different CPU or PVU limits in addition to memory utilization limits set for DB2 operation. Therefore, when planning the DB2 server deployment, the planner must gather information regarding the potential workload. Generalized workload capabilities of DB2 server products are shown in Figure 1-1. Figure 1-1 DB2 9.5 server product overview InfoSphere Warehouse/DB2 Warehouse Edition (DWE) - Unlimited CPU/PVU and unlimited memory DB2 Enterprise Edition - Unlimited CPU/PVU and unlimited memory DB2 Workgroup Edition - 480 Processor Value Units (PVUs) and 16 GB of memory DB2 Express Edition - 200 Processor Value Units (PVUs) and 4 GB of memory DB2 Express-C FTL Edition - 4 Cores and 4 GB of memory DB2 Express-C Edition - 2 Cores and 2 GB of memory More features More workload More scalable
- 34. 20 DB2 Deployment Guide Figure 1-2 shows the DB2 9.5 product decision flow. Figure 1-2 DB2 9.5 product selection chart 1.3.4 License considerations DB2 products are generally licensed based on either Authorized User or Processor Value Unit with notable exceptions being DB2 Personal edition, DB2 Express-C FTL edition, and DB2 Personal Connect edition. Authorized User license This is a license based on the number of users that access given specific DB2 data servers. Require connection to host database(s)? Start IBM Data Server Client Require graphical tools for DB administration or will be performing application development? Yes IBM Data Server Runtime Client Require CLP and basic client support with heterogeneous application connectivity to the DB2? Yes IBM Data Server Driver for JDBC & SQLJ Only need to deploy Java application with DB2 Connectivity? Yes IBM Data Server Driver for ODBC, DLI and .NET Only need to deploy .NET or CLI application? Yes No No No No Yes No Yes DB2 Connect Personal Edition DB2 Connect Enterprise edition or Unlimited Edition Need to accept remote requests? e.g. Act as a gateway? No Yes DB2 Personal Edition Need to receive remote requests? IBM Data SDB2 Enterprise, DB2 Express, DB2 Express-C, or DB2 Workgroup EditionClient No Require local database(s)? Yes No
- 35. Chapter 1. Introduction to DB2 deployment 21 An Authorized User is defined as one and only one individual with a specific identity within or outside your organization. Each Authorized User has a unique specific identity and ID, which cannot be shared or transferred unless there is a change in employment status. An ID can establish one or more connections to the program and count as a single Authorized User. If an Authorized User makes connections to other DB2 data servers, additional licenses should be acquired for those connections using charge metric for those other DB2 data servers. Processor Value Unit license This license is based on the processor rating of the server replacing the previous processor based licensing. Introduction of the multi-core processor prompted a change to the licensing of IBM software. The Processor Value Unit (PVU) assigns a specific number of processor value units to each processor core. This type of processor rating allows sub-capacity licensing, which provides flexibility to address changes in processor technology. Figure 1-3 outlines current Processor Value Units per core at the time this book was written. Figure 1-3 Processor Value Units per core
- 36. 22 DB2 Deployment Guide For further details and the most updated PVU table, refer to: http://www.ibm.com/software/lotus/passportadvantage/ pvu_licensing_for_customers.html The DB2 Personal edition and DB2 Personal Connection editions are licensed per client device, and DB2 Express-C FTL is licensed per server. There is no licensing cost associated with DB2 Express-C edition as well as DB2 clients outlined in 1.2.2, “DB2 clients and drivers” on page 4. Deployment planning should also ensure that appropriate license has been acquired for DB2 deployment. 1.3.5 Authorization considerations Prior to DB2 version 9.5, installing the product, configuring instances, and uninstalling the product have to be performed with root or administrator privileges. This means that a root or administrator ID has to be used for deploying DB2 products. The Windows installation of a DB2 data server, DB2 connect, and DB2 fix packs require access to the Windows system registry and Windows services. Access to the Windows system registry and Windows services require Administrator privileges. In addition, key DB2 functionalities are implemented because Windows services and these services must be created with administrative authority. The DB2 product also offers extended Windows security in Windows platforms. With the extended Windows security enabled, all users of DB2 have to be part of DB2ADMINS or DB2USERS group. The installation of DB2 products in UNIX and Linux requires certain DB2 processes to access necessary system resources, thus requiring root authority. As of Version 9.5, DB2 allows a non-root user to perform install, uninstall, apply, and rollback fix packs, configure instances, and add features without having root privileges in UNIX and Linux platforms. In Windows, a non-Administrator ID can be used for installing and uninstalling most DB2 products. A non-root/non-Administrator installation of the DB2 product might appeal to Independent Software Vendors (ISVs) who develop software which embeds a DB2 product that does not require root/administrator authority for installation. It could also benefit enterprises that have a large number of workstations and users who want to install the DB2 product without consuming a system administrator’s time.
- 37. Chapter 1. Introduction to DB2 deployment 23 The non-root/non-Administrator might not be ideal for all because it poses some limitations. Before planning to deploy the DB2 product as a non-root/ non-Administrator user, restrictions and requirements associated with non-root/ non-Administrator installation should be fully considered. Requirements and limitations on Linux and UNIX platforms Here we provide the requirements for using non-root/non-administrator installation on Linux and UNIX platforms as well as the limitations of this installation method. Requirements These are the requirements of non-root/non-Administrator installation: Non-root user ID must be able to mount the installation DVD. or have it mounted for you. Non-root user ID is a valid user id that can be used as the owner of a DB2 instance. Non-root user ID must have a primary group other than guests, admins, users, and local. Non-root user ID cannot be longer than eight characters. Non-root user ID cannot begin with IBM, SYS, SQL or a number non-root user ID cannot be DB2 reserved word (USERS, ADMINS, GUESTS,PUBLIC, or LOCAL) or an SQL reserved word. Non-root user ID cannot include accented characters. Non-root user’s home directory path must conform to DB2 installation path rule: – Cannot exceed 128 characters – Cannot contain spaces – Cannot contain non-English characters On AIX Version 5.3, Asynchronous I/O (AIO) must be enabled. Limitations These are the limitations of non-root/non-Administrator installation: Non-root installation of IBM Data Studio, DB2 Embedded Application Server (DB2 EAS), DB2 Query Patroller, DB2 Net Search Extender and locally installed DB2 Information Center is not supported. The DB2 Administration Server (DAS) and its associated commands, dascrt, dasdrop, daslist, dasmigr, and dasupdt are not available on non-root installation.
- 38. 24 DB2 Deployment Guide Configuration Assistant and Control Center are not available on non-root installation. Ability for the db2governor to increase priority is not supported. Agent priority set by Work Load Manager (WLM) in a DB2 services class in a non-root DB2 instance will not respected. Automatic starting of non-root DB2 instances at system reboot is not supported. Sending alert notifications, running script or task action on alert occurrences in Health monitor are not supported in non-root installation. Only single-partition databases are supported in non-root installation (no additional database partition can be added). Non-root user can have only one copy of a DB2 product installed. Non-root installation can have only one DB2 instance created during installation (for non-root user ID). No other instances can be created Root installation and non-root installations can coexist on the same computer in different installation paths. However, DB2 instance action on non-root instance can be performed only by the instance owner of non-root instance. DB2 instance commands such as db2icrt, db2iupdt, db2idrop, and db2imigr are not available in non-root installation. Root installed instance cannot be migrated to a non-root instance. Operating system-based authentication, High Availability (HA) feature, ability to reserve service name in the /etc/services file, ability to increase ulimit (in AIX) are not available in non-root installation. However, these limitations can be overcome by running the Enable root features for the non-root installation command (db2rfe). Further information can be found in the DB2 Information Center: http://publib.boulder.ibm.com/infocenter/db2luw/v9r5/index.jsp?topic=/ com.ibm.db2.luw.qb.server.doc/doc/c0050568.html Requirements and limitations in Windows platforms Here we provide the requirements for using non-root/non-Administrator installation on Windows as well as the limitations of this installation method. Note: As operating system-based authentication is the default authentication type for DB2 products without running db2rfe, non-root user must manually set the authentication type in database manager configuration (dbm cfg) file.
- 39. Chapter 1. Introduction to DB2 deployment 25 Requirements These are the requirements of non-root installation on Windows platforms: Non-Administrator user ID must belong to Power Users group. VS2005 runtime library must be installed before attempting to install a DB2 product. Limitations These are the limitations of non-root installation on Windows platforms: Services that would be automatically started are run as processes in non-Administrator installs. In DB2 Connect, some environment settings must be changed in HKEY_CURRENT_USER. After a non-Administrator has installed the DB2, no other user (including Administrator) can install DB2 on same system. However, the Administrator can uninstall and reinstall the DB2 product. Non-Administrator users cannot uninstall a DB2 product. Further information can be found in the DB2 Information Center: http://publib.boulder.ibm.com/infocenter/db2luw/v9r5/index.jsp?topic=/ com.ibm.db2.luw.qb.dbconn.doc/doc/c0008462.html Table 1-7 summarizes the key differences between root/Administrator installations and non-root/non-Administrator installations. Table 1-7 Key differences The System Administrator and those involved with deployment planning should weigh the pros and cons for particular scenarios before deciding on the non-root/ non-Administrator installation. In this book, we concentrate on root/Administrator installation of the DB2 product and deployment. Criteria Root installations Non-root/non-Administrator installations User can select installation directory Yes No. Db2 products are installed under the user’s home directory Number of DB2 instances allowed Multiple One Files deployed during installation Program files only. Instances must be created after installation. Program files and instance files. The DB2 product is ready for use immediately after installation
- 40. 26 DB2 Deployment Guide 1.3.6 Configuration considerations Decision to create DB2 instance(s) and Database Administration Server (DAS) instance should be fully explored during the deployment planning. Creating DB2 instance(s) during deployment can ease the database configuration process and also ensures consistent environment creation. If deployment includes instance creation, we recommend DB2 product to be installed using the response file. If you wish to deploy DB2 product for immediate use with remote DB2 servers, the db2cfexp command can be an invaluable tool. The DB2 Connectivity Configuration Export (db2cfexp) tool command can export connectivity configuration information to an export profile, which can be imported during response file installation of DB2 product. The output of db2cfexp command contains only the configuration information associated with DB2 instance where the command was issued. The db2cfexp command can be used to export the following items: Database information (including DCS and ODBC information) Node information Protocol information Database manager configuration settings Registry settings Common ODBC/CLI settings. You can use the export profile from db2cfexp command with response file installation to integrate database cataloging with DB2 product deployment. For further information regarding import and export profile method, refer to the DB2 Information Center at: http://publib.boulder.ibm.com/infocenter/db2luw/v9r5/topic/ com.ibm.db2.luw.qb.server.doc/doc/t0007301.html 1.3.7 Other considerations On Linux and UNIX operating systems, you can embed DB2 installation image in your own application. It is also possible for your application to receive installation progress information and prompts from the installer in computer-readable form by specifying the INTERACTIVE response file keyword.
- 41. Chapter 1. Introduction to DB2 deployment 27 There are various methods for installing DB2 products. Table 1-8 provides a summary of various installation methods. Table 1-8 Installation methods These DB2 installation methods are further discussed in Chapter 2, “DB2 server deployment” on page 29 and Chapter 3, “DB2 client deployment” on page 89. Proper consideration should also be given to the deployment testing prior to any DB2 based solution deployment. We recommend that the interactive graphical installer be used to help you understand all terms and keywords that are present in the non-interactive modes of installing prior to testing. Installation method Windows Linux or UNIX DB2 Setup wizard Yes Yes Response file installation Yes Yes db2_install command No Yes Payload file deployment No Yes
- 42. 28 DB2 Deployment Guide
- 43. © Copyright IBM Corp. 2008. All rights reserved. 29 Chapter 2. DB2 server deployment In this chapter, we cover DB2 server deployment considerations and steps involved in the deployment process. In general, the DB2 server deployment takes place prior to the deployment of DB2 clients or DB2 applications. We present various tools from the DB2 and operating systems that facilitate deployment tasks and provide various customization capabilities. We discuss both single server and multiple servers deployment as well as providing deployment scripts to accelerate mass deployment. We also cover preventive maintenance in the form of fix pack deployment. 2
- 44. 30 DB2 Deployment Guide 2.1 Server deployment planning DB2 server deployment planning should take place at the same time that the application is designed or when a DB2 based solution is first being planned. There are numerous factors that you have to take into consideration. Selection of DB2 server editions must be based on the application requirements. For those environments where multiple machines are involved, more detailed planning is required if different hardware types are used. Various DB2 products as well as DB2 hardware and software requirements are discussed in Chapter 1, “Introduction to DB2 deployment” on page 1. In addition to software and hardware requirements, deployment methods as well as post-deployment configurations must be discussed during deployment planning. For a multi-partitioned database system, there are multiple machines (nodes) involved. As such, there are further considerations that have to be taken into account. This topic is presented in a separate section. 2.1.1 System requirement DB2 9.5 is a leading edge hybrid data server capable of supporting both relational and native storage. It is supported on almost all mainstream hardware platforms in the industry. The hardware and software requirements for DB2 9.5 are described in 1.3, “Deployment considerations” on page 10. Note that these are the minimum requirements for DB2 product. 2.1.2 User and group required in deployment Typically there are two types of user accounts involved in a deployment of the DB2 server product. One type is the account that performs the deployment, which we call the installation user account. The second type is the account used to run the DB2 server after the installation, including: instance owner user, fenced user, and administration server user. The second type of user accounts are required when deployment includes instance creation. The installation user account requires sufficient privileges to accomplish product deployment tasks. Prior to DB2 9.5, for the UNIX/Linux platforms, the root account is required, and on Windows platforms, users who belong to the local or domain Administrator group are required to initiate DB2 product deployment. However, DB2 9.5 offers a new installation feature: non-root installation for the UNIX/Linux platform and non-Administrator installation for the Windows platform.
- 45. Chapter 2. DB2 server deployment 31 When using the DB2 Setup installation wizard on Linux and UNIX platforms, instance user, fenced user, and administration server user can be created during the installation process. You do not have to create them in advance. Because response file installation uses the DB2 Setup wizard as well, the situation is the same. But if you are using another installation method, such as db2_install, user account creation has to be done manually. On Windows platforms, DB2 server products can be installed using the DB2 Setup wizard or response file installation. Before proceeding with DB2 server installation on Windows, ensure that the following user accounts are present (unless you are performing non-Administrator install): An installation user account belonging to the Administrators group on the computer where you will perform the installation. (Optional) DB2 Administration Server (DAS) user account. (Optional) DB2 instance user account. You can also use the LocalSystem account for products other than DB2 Enterprise Server Edition. DB2 Users and groups on Linux and UNIX For UNIX/Linux platforms, normally three users are required for a DB2 server to operate with complete functionality. Instance owner user The instance owner user ID is used to start and stop DB2 services. During the instance creation, the name of DB2 instance assumes the name of the instance owner user. The instance is created under this user’s home directory. Fenced user The fenced user is used to run user-defined functions (UDF) and stored procedures outside the address space of the DB2 engine. It acts like a firewall between user code and the DB2 engine to provide enhanced stability. Note: With default installation setting, DB2 takes advantage of system users and groups to perform authentication for security management. An authentication security plug-in module is included with the DB2 server installation. This default security plug-in module uses operating system-based authentication. You can also build your own authentication plug-in if necessary. The flexibility provided by DB2 enables users to achieve customized authentication, for instance, public key based security technology. We cover only the default authentication in this book.
- 46. 32 DB2 Deployment Guide Administration server user DB2 Administration server (DAS) provides support for DB2 GUI tools and other administrative tasks, such as Control Center, Configuration Assistant, and Task Center. Each physical operating system can have only one DAS created. Windows security For Windows environments, an instance owner user and an administration server user are required for a typical DB2 server deployment. DB2 products provides extended Windows security features since the DB2 Version 8.2. It is used to protect DB2 files on the Windows system. It does not change the authentication mechanism. Two additional groups are created in Windows: DB2USERS and DB2ADMNS. Only users who belong to these groups have access to the DB2 files on system. This security feature is enabled by default during the product installation, but group names can be changed. 2.1.3 Non-root/non-Administrator installation In the past, the root/Administrator account has been the only user who could perform DB2 product installation and other related tasks such as applying fix packs and configuring instances. DB2 9.5 introduces the non-root/ non-Administrator installation option for UNIX, Linux, and Windows platforms. It allows you to install DB2 products without root/Administrator privilege, providing convenience to application developers, system administrators, and database administrators. Non-root installation on UNIX/Linux Since non-root installation can be performed by someone who does not have root privilege, it can reduce the system administrator’s time. It is also a more attractive option for the application developer who normally does not have root privilege. Independent Software Vendors (ISVs) might also prefer non-root installation when they are deploying applications that do not require root privilege yet embed a DB2 product. Note: The DB2 server side trace should be taken locally in a Windows environment when it has the extended Windows security feature enabled. Otherwise, only the application request (AR) function would be traced and application server (AS) functions will be absent in the trace.
- 47. Chapter 2. DB2 server deployment 33 There are some limitations of the non-root installation of which you should be aware. For DB2 server products, some limitations of a non-root installation are as follows: DB2 Administration Server and related commands are not available: dascrt, dasdrop, daslist, dasmigr, and dasupdt. DB2 Control Center and DB2 Configuration Assistant are not available. The agent priority set with Work Load Manager (WLM) in a DB2 service class in a non-root DB2 instance is ignored and no SQLCODE is returned. Automatic startup of the non-root DB2 instance is provided, because the system reboot is not supported. Partitioned database is not supported. For a complete list of limitations, refer to the following URL: http://publib.boulder.ibm.com/infocenter/db2luw/v9r5/topic/ com.ibm.db2.luw.qb.server.doc/doc/c0050568.html The differences between root and non-root installation can be found at this URL: http://publib.boulder.ibm.com/infocenter/db2luw/v9r5/topic/ com.ibm.db2.luw.qb.server.doc/doc/c0050566.html By default, non-root installation does not support operating system-based authentication. You have to manually set authentication parameter in the Database Manager Configuration after the installation. However, by running the command db2rfe, you can enable the supported root features according to the configuration file after the non-root installation. In addition to the operating system-based authentication, there are other limitations that can also be restored by running db2rfe: High Availability (HA) feature Adding new service entries in /etc/services Increasing user data limits (ulimit); this ability applies to AIX only Elevated privileges installation on Windows Just like the non-root installation for UNIX/Linux platforms, DB2 9.5 for Windows has a counterpart feature called elevated privileges installation, also known as non-Administrator installation. To perform the elevated privileges installation, prior to the installation you have to identify a non-Administrator account used to perform the installation task. A member of the Administrators group is required to configure the Windows elevated privileges settings to allow the non-Administrator to perform an installation.
- 48. 34 DB2 Deployment Guide On Windows Vista, the non-Administrator account still is prompted for administrative credentials by the DB2 Setup Wizard. So the Administrator’s intervention in the installation is still required. Take the following limitations into considerations before starting the non-Administrator installation: Non-Administrator users can only install fix packs, add-on products, or upgrade DB2 as long as prior installations or upgrades were also performed by the same non-Administrator user. Non-Administrator users cannot uninstall DB2 products, except those on Windows Vista (and later). You can find more detailed instructions for implementing a non-Administrator installation in the Information Center: http://publib.boulder.ibm.com/infocenter/db2luw/v9r5/index.jsp?topic=/ com.ibm.db2.luw.qb.server.doc/doc/t0050571.html 2.1.4 DB2 configuration profile and database profile There are cases where enterprise wide DB2 server deployment has to take place based on an existing DB2 server installation. Such instances arise when you already have DB2 servers running in a test or quality assurance (QA) environment. Databases running on these systems normally have been tuned and configured to handle the expected production workload. The configuration involves parameters associated with database manager configuration (dbm cfg) and database configuration (db cfg). These values can be implemented on the production system during the deployment process to minimize or eliminate post deployment tasks. Tuning the database server to achieve optimum performance is an important step after the installation. It is not a quick or a simple task and requires on-going effort. Therefore, it could be ideal to use configuration settings of the test or QA system as the base line to start the tuning after DB2 server has been installed. Besides the database manager configuration file and database configuration file, connectivity information is an important part for DB2 server as well. Connectivity information is normally required when deploying the DB2 clients. However, the new DB2 server installation might also have to connect to another remote DB2 server.
- 49. Chapter 2. DB2 server deployment 35 Therefore, it might be necessary to consider remote database connectivity/ catalog during the DB2 server deployment planning if you have the following configurations: The applications running on the same machine as the DB2 server has to access a remote database. Database federation is enabled and other databases have to be accessed by the local server through a nickname. High Availability Disaster Recovery (HADR) is set up. DB2 provides useful utilities to copy the configuration from a test environment to a production system easily. In the following sections, we introduce DB2 configuration assistant, db2cfexp, db2cfimp, db2look, and db2rspgn. DB2 Configuration Assistant DB2 Configuration Assistant is a GUI tool that provides assistance with cataloging remote DB2 servers as well as certain administrative tasks. The DB2 Configuration Assistant can perform administrative tasks such as export or import configuration profiles, binding files, adding new databases, and configuring CLI settings. The command for starting DB2 Configuration Assistant is db2ca. On Windows, besides the command line, you can also open it from Start → Programs → IBM DB2 → DB2COPY1(default) → Set-up Tools → Configuration Assistant. The configured connectivity entries, both local and remote, are presented as shown in Figure 2-1. Note: Beginning with DB2 9.1, GUI tools are only available for Windows x86, Windows x64 (AMD64 and Intel EM64T), 32-bit Linux x86, Linux for AMD64, and Intel EM64T. That means you cannot directly use GUI tools on other platforms such as AIX, HP-UX, and Solaris. However, you can continue using the GUI tools on the supported platforms and remotely administer DB2 servers running on AIX, Solaris, or HP-UX where no GUI tools are installed. In general, these GUI tools do not differentiate remote DB2 servers from local ones. Some administrative tasks require an administration server to be created. Make sure that you have DAS created and started on the same machines where the DB2 servers are to be administered by the GUI tools.
- 50. 36 DB2 Deployment Guide Figure 2-1 DB2 Configuration Assistance To export the connectivity information, select from the menu Configure → Export Profile. There are three options for your choice: All, Database Connections, and Customize. You can choose to export all of the entries or only some of them. For example, if we choose Database Connections, the output file generated by DB2 Configuration Assistant looks similar to the one shown in Example 2-1. Example 2-1 File generated by DB2 configuration Assistant ;Use BINARY file transfer [FILE_DESCRIPTION] APPLICATION=DB2/LINUXX8664 9.5.1 FILE_CONTENT=DB2 CCA Exported Data Sources FILE_TYPE=CommonServer FILE_FORMAT_VERSION=2.0 Platform=30 DB2SYSTEM=MENSA Instance=db2inst1 [INST>db2inst1] instance_name=db2inst1 NodeType=4 ServerType=DB2OS390 Authentication=SERVER DB2COMM=tcpip [NODE>ZAIRE01] ServerType=DB2UNKNOWN Nodetype=U Protocol=TCPIP Hostname=zaire Portnumber=50000 Security=0
- 51. Chapter 2. DB2 server deployment 37 [DB>ZAIRE01:ITSODB] Dir_entry_type=REMOTE Authentication=NOTSPEC DBName=ITSODB [DB>!LOCAL:SAMPLE] Dir_entry_type=INDIRECT Drive=/home/db2inst1/db2home DBName=SAMPLE db2cfexp and db2cfimp The export and import of configuration profile can also be performed from the command line using the DB2 utilities db2cfexp and db2cfimp. The db2cfexp is used to do export, while db2cfimp is used to do import. DB2 Configuration Assistant provides other functionalities besides exporting and importing a configuration profile. The db2cfexp and db2cfimp commands focus on connectivity information and a few other associated configurations. The configuration information that can be exported and imported using the db2cfexp and db2cfimp commands are: Database information (including DCS and ODBC information) Node information Protocol information Database manager configuration settings Registry settings Common ODBC/CLI settings The db2cfexp and db2cfimp commands are handy on platforms where the DB2 Configuration Assistant cannot be installed — for example, AIX and other UNIX platforms, where tools based on the command line are more often utilized. Table 2-1 shows the three available options for db2cfexp. Table 2-1 Options for db2cfexp Option Explanation TEMPLATE Creates a generic export profile to transfer this configuration to another workstation. (Includes configuration, catalog, and ODBC information.) BACKUP Creates a configuration profile of the DB2 database instance for local backup purposes. This profile contains all of the instance configuration information, including information of a specific nature relevant only to this local instance. MAINTAIN Creates a database export profile to transfer the database catalog information to another workstation.
- 52. 38 DB2 Deployment Guide This command is used to export configuration profile: db2cfexp cf.exp template This command is used to import a configuration profile: db2cfimp cf.exp The file generated by db2cfexp is very similar to the one generated by the DB2 Configuration Assistant. Database configuration When deploying DB2 server, you might want to configure not only the instance but also the databases. The configuration profile contains only instance level information. There is no database configuration included. Another tool in DB2 called db2look is suitable to complete this job. db2look can extract the DDLs from an existing database as well as the database configurations and the registry variables. The generated DDLs are normally used to create tables, views, and constraints in order to build another similar or identical database as the current one. Chapter 5, “Deploying pre-configured databases” on page 213 covers this topic in further detail. Table 2-2 illustrates the command line options most helpful to the server deployment. Table 2-2 db2look command options For example, issue the following command to extract the database configurations for the database SAMPLE and the registry variables, then output to a file named sample.ddl: db2look -d sample -f -o sample.ddl Note: If there are connectivity entries (database or node) existing with the same name, they will be replaced with the new definitions imported by db2cfimp. Option Description -d Specify database name. -f Specify to extract database configuration parameters and registry variables. -o Specify the name of output file. If not specified, the output is written to standard output.
- 53. Chapter 2. DB2 server deployment 39 The generated sample.ddl is shown in Example 2-2. When using this script to configure a new database, remember to change the database name if it is different from the old one. Example 2-2 db2look output -- This CLP file was created using DB2LOOK Version 9.5 -- Timestamp: Thu 15 Mar 2007 02:47:52 AM PDT -- Database Name: SAMPLE -- Database Manager Version: DB2/LINUXX8664 Version 9.5.1 -- Database Codepage: 1208 -- Database Collating Sequence is: IDENTITY CONNECT TO SAMPLE; -------------------------------------------------------- -- Database and Database Manager configuration parameters -------------------------------------------------------- UPDATE DBM CFG USING cpuspeed 4.000000e-05; UPDATE DBM CFG USING intra_parallel NO; UPDATE DBM CFG USING comm_bandwidth 1.250000; UPDATE DBM CFG USING federated NO; UPDATE DBM CFG USING fed_noauth NO; UPDATE DB CFG FOR SAMPLE USING locklist 100; UPDATE DB CFG FOR SAMPLE USING dft_degree 1; UPDATE DB CFG FOR SAMPLE USING maxlocks 10; UPDATE DB CFG FOR SAMPLE USING avg_appls 1; UPDATE DB CFG FOR SAMPLE USING stmtheap 4096; UPDATE DB CFG FOR SAMPLE USING dft_queryopt 5; --------------------------------- -- Environment Variables settings --------------------------------- COMMIT WORK; CONNECT RESET; TERMINATE; 2.1.5 Considerations for a partitioned database The Database Partitioned Feature offers you a way to implement a highly scalable and high performance database system. A DB2 partitioned database system is often seen in the warehouse/Business Intelligence (BI) system.
- 54. 40 DB2 Deployment Guide A partitioned database is a database created across multiple database partitions. Each database partition has its own processes, memory, and data storage. These resources are not shared between partitions. Queries submitted to the DB2 database are distributed to each database partition and processed in parallel. If there are multiple processors in each database partition node, internal parallelism can be used to achieve better performance. There could be more than one database partition created on a machine. And this is transparent to the user, who does not have to know what happens behind the scenes. In this section, we discuss the considerations pertinent for a partitioned database system. Licensing for a partitioned database The DB2 Data Partitioning Feature (DPF) requires a separate additional license from that of the Enterprise Server Edition (ESE) license. In DB2 9.5, it is only available through InfoSphere package (see 1.2.4, “Other DB2 products” on page 8). The DPF license has to be applied to all the participating database machines. The DB2 Data Partitioning feature can be activated using the db2licm command. For licensing in detail, see 1.3.4, “License considerations” on page 20. For a partitioned database system on Linux and UNIX, where more than one machine participates, a shared directory has to be created on a file system and used as the instance home path. The DB2 instance is created in this shared home directory, and the instance configuration files will be accessible by all database partitions. NFS The Network File System (NFS) is a widely used protocol for remote file access, and it is built based on a Remote Procedure Call (RPC). The NFS allows users and applications to access files over the network as if the remote files are on the local disks. In a partitioned database environment, one computer is set up as the NFS server. The instance home directory is created on this server and exported to other participating machines, which are configured as the NFS clients. The file systems exported on the NFS server are mounted by the NFS clients. The DB2 instance configuration files located on this directory could be accessed by every partition.
- 55. Chapter 2. DB2 server deployment 41 Other file system technologies that provide concurrent access to a common set of files can also be used in creating the instance home directory in a DB2 partitioned database system. The IBM General Parallel File System™ (GPFS™) is an example. It is a high performance scalable file management solution available on both AIX and Linux. For more information about GPFS, refer to: http://www.ibm.com/systems/clusters/software/gpfs/index.html Remote shell For a partitioned database system on the UNIX/Linux platforms, a remote shell utility is required to issue commands to every partition. DB2 9.5 supports two remote utilities: rsh ssh Remote Shell (rsh) is a traditional shell utility that has been supported by DB2 for many years. It is the default shell tool used by DB2 after the installation. It allows the user to execute commands from another computer over the network. But rsh could be considered an insecure utility because it does not provide strong encryption when sending information over a network. Security Shell (ssh) could be taken as an improved version of remote shell. It uses public-key technology to encrypt and decrypt messages and to authenticate a remote user who requests to access a local machine. It is just as flexible as rsh. Support for ssh was introduced in DB2 V8.2. Users and groups in a partitioned database environment There is not much difference between a multi-partitioned database and a single-partitioned database in regard to users and groups. Three users and their groups have to be created on each participating machine. For the instance user and the fenced user, not only the name of the user or group, but also the user ID or the group ID, must be identical on each machine. For the Administration user, it also has to be created on each participating computer, not just the instance owning one, to allow administrative tasks to be performed on that computer. Note: Unlike UNIX and Linux, we do not have to configure remote shell for DB2 on Windows. There is a DB2 service automatically installed to support remote DB2 command executions. It is called DB2 Remote Command Server.
- 56. 42 DB2 Deployment Guide Communication settings DB2 partitions communicate with each other through TCP/IP. During the planning, ensure that there are consecutive ports with same number available on each participating machine. The number of the available ports must be equal to or greater than the number of participating partitions plus two. Suppose that you set up a partitioned database system comprising six partitions. Then you have to reserve at least eight ports on each participating computer. When using DB2 Setup wizard installation, the ports will be reserved in /etc/services for UNIX and Linux, or %SystemRoot%system32driversetcservices for Windows. See Example 2-3. Example 2-3 TCP/IP ports DB2_InstanceName 60000/tcp DB2_InstanceName_1 60001/tcp DB2_InstanceName_2 60002/tcp DB2_InstanceName_3 60003/tcp DB2_InstanceName_4 60004/tcp DB2_InstanceName_END 60005/tcp Only the first port and the last port entries are mandatory. The other entries (such as 60001, 60002, 60003, and 60004 in this example) are used to inform other applications that the ports have been reserved by a DB2 instance. 2.2 DB2 server deployment methods In this section, we discuss all installation methods available for a DB2 server deployment. So far we have finished the preparation tasks in a planning stage. By now, you should have selected one or more DB2 server products, and the platform (operating system) to which deployment will take place. Based on this information, you can go ahead and choose the deployment method that best suits your requirements. Some users prefer a step-by-step installer that provides more explanations and suggestions during the deployment. Such an installer can guide customers through the entire installation process including not only the product deployment, but also some configuration works, such as creating groups and users, setting up an instance, or creating even a sample database. In contrast, others might be looking for more direct way to deploy a DB2 server across multiple machines. They might prefer a non-interactive installation method to automate and customize the installer and embed it into their own scripts or applications.
- 57. Chapter 2. DB2 server deployment 43 DB2 provides a number of deployment methods for various requirements: DB2 Setup Wizard db2_install (Linux and UNIX only) Response file Payload file (Linux and UNIX only) 2.2.1 DB2 Setup wizard This interactive step-by-step installation wizard is probably the most commonly used method for deploying a DB2 server to one or only a few machines. On UNIX and Linux, this wizard is built on Java technology and is invoked through the command db2setup. On Windows, the corresponding command is setup. The functions of these two installers are almost the same, as well as having similar appearances. Most of the differences are platform specific, such as creation of users and groups. We show the DB2 Setup wizard on the AIX platform as an example. The DB2 Setup wizard is a GUI tool. The GUI support is required on the machine from which the DB2 Setup wizard is run. The AIX console usually supports the GUI interface for DB2. If you are working remotely from a different machine, a remote desktop management tool is required to map the AIX GUI onto your local computer. Some of these tools, such as X-Window, make a reverse connection from the AIX to the local machine. Therefore, if the AIX where the DB2 server to be deployed is located behind Network Address Translation (NAT) or a firewall, its outbound connection might have been blocked. This is a common security setup for a production system. To bypass these types of restrictions, you can use other tools such as Virtual Network Computing (VNC) with which you can customize the connection between server and client. Contact your system administrator for further assistance on the GUI display configuration. The DB2 Setup wizard gives a clear explanation for each step during the installation. It is easy for users to understand what each step does and what kind of information should be input. The following high level steps are for installing the DB2 data server with db2setup: 1. Log on AIX with root user and ensure that the GUI can be started correctly. 2. From the directory where the installation image of the DB2 server has been extracted, issue the db2setup command to start the wizard. The Launchpad with a menu on the left side is presented as shown in Figure 2-2. The option Installation Prerequisites in the menu can redirect you to the IBM Web site, including system requirements for a DB2 server deployment.
- 58. 44 DB2 Deployment Guide Figure 2-2 DB2setup launchpad 3. In the menu, clicking Install a Product brings you the introduction of the installation image. A DB2 server installation image can contain multiple products. For instance, the DB2 9.5 Enterprise Server Edition installation image includes: – DB2 Enterprise Server Edition – IBM Data Server Client Version 9.5 – IBM Data Server Runtime Client Version 9.5 4. For each product, choose Install New to start a new installation. DB2 allows multiple copies to co-exist on a single machine. To work with an existing product, choose Work with Existing. You can add or remove components for one of the installed copies. 5. When deploying a new DB2 server product, choose one of the following three types of installation: – Typical: Typical mode deploys the most commonly used components for a DB2 server. It meets most users’ requirements.
- 59. Chapter 2. DB2 server deployment 45 – Compact: Compact mode does not include the following components that are included in a Typical mode installation: • DB2 data source support • DB2 LDAP support • DB2 Instance setup wizard • First steps • Sample database source – Custom Custom mode allows experienced users to select specific components to install. 6. With the wizard, you can create a DB2 instance as well as the Administration Server. It prompts you to define the group and user names for the instance. See Figure 2-3. Figure 2-3 Set user information 7. Before DB2 Setup wizard starts file copy, a summary of settings is presented for review. The summary includes list of components to be installed as well as groups and users to be created for DB2 instance or Administration server. See Figure 2-4.
- 60. 46 DB2 Deployment Guide Figure 2-4 Summary of the installation settings 8. A log file is created by the DB2 Setup wizard at same time. It is used to log the installations steps that DB2 Setup wizard has undergone, and its results. The default path of the log file is /tmp/db2setup.log for root installation. Log file of a non-root installation is /tmp/db2setup_userID.log, where user ID is the user account that executes the installation. On Windows, the installation log file can be located in the path, “My DocumentsDB2LOG”. The installation log file uses the format, DB2-ProductAbbrev-DateTime.log (for example, DB2-ESE-Tues May 27 12_04_45 2008.log). 2.2.2 db2_install The db2_install utility is a command line based installer commonly used by expert users for installing DB2 on larger, more complex multiple-partition systems. Tasks such as setup of user IDs and groups, instance creation, tools catalog database creation, and notification setup, have to be performed manually after the installation.
- 61. Chapter 2. DB2 server deployment 47 Note that db2_install is only available on UNIX and Linux platforms. Some people prefer this method because it bypasses the configuration performed by DB2 Setup and allows you to configure DB2 your preferred way in the first place. Though not interactive as DB2 Setup, db2_install will prompt the user for the required information if no options are specified. The command usage of db2_install is as follows: db2_install [-b <installpath>] [-p <db2producttobeinstalled>] [-c <imagelocation>] [-l <logfile>] [-f NOTSAMP] [-t <trcFile>] [-n] [-L <language>] [-h|-?] For the explanation of the command parameters, refer to the DB2 Information Center at: http://publib.boulder.ibm.com/infocenter/db2luw/v9r5/topic/ com.ibm.db2.luw.admin.cmd.doc/doc/r0023669.html The steps for DB2 server deployment with db2_install are as follows: 1. Extract the installation image to a temporary folder. If it is on a DVD, mount it with an operating system command. Change to the directory where db2_install is located. 2. Issue db2_install from the command line to start the installer. When issuing it without the command line option, it prompts you with a few questions as shown in Example 2-4. Example 2-4 The output of command db2_install [root@Zaire /tmp/v95ga/ese] #./db2_install Default directory for installation of products - /opt/IBM/db2/V9.5 *********************************************************** Do you want to choose a different directory to install [yes/no] ? ...... Enter full path name for the install directory - ------------------------------------------------ ...... Specify one of the following keywords to install DB2 products. ESE CLIENT RTCL Note: If you are installing a non-English version of DB2, National Language Pack might be required. Use -L option of db2_install to specify the location of it.
- 62. 48 DB2 Deployment Guide Enter "help" to redisplay product names. Enter "quit" to exit. *********************************************************** 3. For the installation directory, to deploy DB2 to a different location other than the default, enter yes followed with Enter and then input the target path. To use the default, input no and it will go directly to the last question. 4. For the question, Specify one of the following keywords to install DB2 products, choose the product that you want to install. To install DB2 Enterprise Server Edition, input ESE followed with Enter. Then db2_install starts the deployment. During the installation, db2_install displays time consumed during installation of each component through standard output. 5. Once installation is complete, db2_install prints out the final results and the absolute path of the log file. Details regarding the installation of each component can be reviewed from the given log file. ...... The execution completed successfully. For more information see the DB2 installation log at "/tmp/db2_install.log.721104". If you prefer non-interactive deployment, use the -n option with db2_install. ./db2_install -p ese -b /opt/IBM/db2/V9.5 -n With option -n, db2_install suppresses all the progress information on the screen except the final result. If you embed a DB2 installation image with your application, the -n option allows the application to send the DB2 installation process information with other application messages in a uniform way designed by the application. 2.2.3 Response file The response file is another option for users who would like to perform a non-interactive deployment. It is also known as a silent installation, or an unattended installation. A response file can be created using the DB2 Setup wizard or by editing a sample response file. It allows you to install DB2 across multiple machines with consistent installation and configuration settings. It can also be used to set up a DB2 cluster as well as performing additional configuration activities such as group and user creation, instance setup, and sample database creation. A response file installation is fast, because it bypasses the graphical wizard and does the configuration for you.
- 63. Chapter 2. DB2 server deployment 49 The response file installation is supported on UNIX, Linux, and Windows. The command to start a response file deployment is a command of the DB2 Setup wizard with different command line options. It is db2setup on UNIX/Linux system and setup on Windows. When using the DB2 Setup wizard to generate the response file: The response file can be specified by choosing options in the step, Select the installation action. The response file generated captures the configuration of the installation done by the DB2 Setup wizard. This is a recommended method to make a response file. The response file is generated only when the installation has completed successfully. It is not generated if the installation is cancelled, or if the installation fails with an error. On Windows platform, there is a tool called the response file generator (db2rspgn), which can be used to generate a response file as well as database profiles. We recommend using this tool, especially when you have a more complex configuration. A response file consists of many keyword value pairs. Each pair defines an component to be installed, a feature to be enabled, or a setting to be configured. Example 2-5 shows the format of a response file. Example 2-5 Format of a response file LIC_AGREEMENT = ACCEPT PROD = ENTERPRISE_SERVER_EDITION FILE = /opt/ibm/db2/V9.5 INSTALL_TYPE = CUSTOM ...... When using the response file installation, take note of these considerations: There are changes in the keywords between various DB2 versions. New mandatory keywords are introduced in DB2 9 that DB2 V8 does not recognize. Therefore, the response files created in DB2 V8 should not be used in DB2 9 or 9.5, vice versa. On UNIX and Linux, a response file created for a root installation cannot be used for a non-root installation. There are response file keywords valid for root installation only. Refer to the following URL for more details: http://publib.boulder.ibm.com/infocenter/db2luw/v9r5/topic/ com.ibm.db2.luw.qb.server.doc/doc/r0007505.html
- 64. 50 DB2 Deployment Guide Creating a response file using the DB2 Setup wizard You can create a response file using the DB2 Setup wizard. This is a recommended method to create a response file. To deploy DB2 and generate a response file at the same time using the DB2 Setup wizard, select the option, Install DB2 Enterprise Server Edition Version 9.5 on this computer and save my settings in a response file, from the window, Select installation, response file creation, or both. We recommend this option because the settings for the installation are verified during the installation process. The response file is ready for distribution when generated. To generate a response file only, select Save my installation setting in a response file from the window, Select installation, response file creation, or both. Figure 2-5 shows a Linux system sample. Figure 2-5 Response file can be generated using db2setupC Creating a response file using Response File Generator db2rspgn (for Windows) The response file generator utility db2rspgn is available on Windows platforms only. The DB2 response file generator (db2rspgn) utility takes a snapshot of the DB2 product installation and configuration settings and saves this information to a response file and a configuration profile. This is an ideal method for creating a response file if any configuration involving DB2 has to take place after the installation. This is especially useful if configuration parameter settings as well as cataloging remote nodes and databases are required.
- 65. Chapter 2. DB2 server deployment 51 The db2rspgn utility automatically creates an instance configuration profile for all instances on current system. However, you can also specify a configuration profile for select instances. The configuration profile gets saved to the same path as that of the response file. The db2rspgn utility can be invoked from the DB2 Command Line Processor window: db2rspgn –d <destination directory> [-i <instance>] Where: -d <destination directory>: The destination directory for a response file and any instance files. This parameter is required. -i <instance>: A list of instances for which you want to create a profile. The default is to generate an instance profile file for all instances. This parameter is optional. Also, it can be specified multiple times to input more than one instance. Execution of the db2rspgn utility will generate response file (*.rsp) and INS file (*.INS) for each instance associated with this DB2 copy. The INS file is a configuration profile file that contains the following information: Database information (including DCS and ODBC information) Node information Protocol information Database manager configuration settings Registry settings Common ODBC/CLI settings Example 2-6 demonstrates the use of the db2rspgn command. Example 2-6 Using db2rspgn C:MyInst>db2rspgn -d C:MyInst -i DB2 C:MyInst>dir Volume in drive C has no label. Volume Serial Number is DCDC-8C9E Directory of C:MyInst 06/10/2008 02:55 PM <DIR> . 06/10/2008 02:55 PM <DIR> .. 06/10/2008 02:55 PM 1,979 DB2.INS 06/10/2008 02:55 PM 2,425 db2ese.rsp 2 File(s) 4,404 bytes 2 Dir(s) 146,450,423,808 bytes free
- 66. 52 DB2 Deployment Guide The configuration profile file can also be generated on its own through the Connectivity Configuration Export (db2cfexp) tool command. If the response file was not created using the db2rspgn tool and if you wish to include a database profile in your deployment, generate the DB2 profile using the db2cfexp tool and include the DB2.CLIENT_IMPORT_PROFILE keyword with the configuration profile name. Creating a response file from the sample response file In additional to the DB2 Setup wizard and db2rspgn on Windows, you also can generate a response file using the sample response files contained in the DB2 installation image. For UNIX and Linux, the sample response files are under the path, db2/<platform>/samples/. There are multiple sample files corresponding to various products. For instance, db2ese.rsp corresponds to the DB2 Enterprise Server Edition, and db2wse.rsp corresponds to the DB2 Workgroup Server Edition. The following steps demonstrate how to manually create a response file from the sample file for the DB2 Enterprise Server Edition (on Linux) and perform an unattended installation: 1. Locate the sample response file: As our platform is a Linux x86_64 system, we locate the sample file named db2ese.rsp in db2/linuxamd64/samples path and copy it to a working directory. Here we create a temporary folder db2rsp under /tmp. # mkdir -p /tmp/db2rsp # cd /tmp/db2rsp # cp /software/V95/ese/db2/linuxamd64/samples/db2ese.rsp . 2. Decide what components to deploy: Contained in the sample file are explanatory paragraphs for each keyword to help you understand its meaning and determine if it is necessary for your deployment. To enable an item or include a component in the deployment, just remove the asterisk (*) left of the keyword. There is a complete reference list containing components that are available in the installation image. Check the file db2/linuxamd64/ComponentList.htm, where you can find the detailed information for each component, for example, component name, tar file name, installed size, and component response file ID. Open it with a Web browser, and then select the required component and add it to the response file if it is not included.
- 67. Chapter 2. DB2 server deployment 53 3. Specify the instance information: When the desired components are selected, scroll down in the sample response file to the instance section to specify the information for creating DB2 instance. Here we define two instances, db2inst6 and db2inst7, with respective instance owning user and fence user. We create a local database ITSO under instance db2inst6, and catalog a remote database ITSOD for db2inst7. A DB2 Administration Server db2das is also defined. 4. Instance configuration information: In addition, you can specify database manager configuration parameters for each instance in the response file, as well as instance profile registry and global profile registry. Installer will set these parameters after the creation of instance. 5. Now we have finished the modification based on the sample response file. Example 2-7 shows sample response file with unused keywords and comments removed. Example 2-7 The response file generated from sample *----------------------------------------------------- * Created using sample response file db2ese.rsp * Refer to the DB2 Information Center for more details: * http://publib.boulder.ibm.com/infocenter/db2luw/v9r5/index.jsp *----------------------------------------------------- * Product Installation LIC_AGREEMENT = ACCEPT PROD = ENTERPRISE_SERVER_EDITION FILE = /opt/ibm/db2/V9.5 INSTALL_TYPE = CUSTOM INTERACTIVE = NONE COMP = COMMUNICATION_SUPPORT_TCPIP Note: When you manually create the response file and define new users in the file, the password of each user can be explicitly written down in the response file. This is only applicable for root user installation. For security reasons, we recommend that you change the password after the deployment. The user’s password is encrypted in the response file when it is generated using the DB2 Setup wizard. Note: The keyword INTERACTIVE is set to NONE here because we want a non-interactive deployment. This keyword can be changed to another value for a different interaction mode. See “Deploying DB2 server with application” on page 55 for another case.
- 68. 54 DB2 Deployment Guide COMP = INSTANCE_SETUP_SUPPORT COMP = LDAP_EXPLOITATION COMP = DB2_SAMPLE_DATABASE COMP = SQL_PROCEDURES COMP = REPL_CLIENT COMP = JAVA_SUPPORT COMP = BASE_DB2_ENGINE COMP = CONTROL_CENTER COMP = JDK COMP = DB2_DATA_SOURCE_SUPPORT COMP = CONNECT_SUPPORT COMP = BASE_CLIENT COMP = TEXT_SEARCH COMP = FIRST_STEPS COMP = APPLICATION_DEVELOPMENT_TOOLS *----------------------------------------------- * Das properties *----------------------------------------------- DAS_USERNAME = db2das DAS_PASSWORD = <PASSWORD> DAS_GROUP_NAME = dasgrp DAS_HOME_DIRECTORY = /home/db2das *---------------------------------------------- * Instance properties *---------------------------------------------- INSTANCE = inst1 inst1.TYPE = ese inst1.NAME = db2inst6 inst1.GROUP_NAME = db2iadm6 inst1.HOME_DIRECTORY = /home/db2inst6 inst1.PASSWORD = <PASSWORD> inst1.AUTOSTART = NO inst1.SVCENAME = db2c_db2inst6 inst1.PORT_NUMBER = 50006 inst1.FCM_PORT_NUMBER = 60008 inst1.MAX_LOGICAL_NODES = 4 inst1.CONFIGURE_TEXT_SEARCH = NO inst1.FENCED_USERNAME = db2fenc6 inst1.FENCED_GROUP_NAME = db2fadm6 inst1.FENCED_HOME_DIRECTORY = /home/db2fenc6 inst1.FENCED_PASSWORD = <PASSWORD> INSTANCE = inst2 inst2.TYPE = ese inst2.NAME = db2inst7 inst2.GROUP_NAME = db2iadm7 inst2.HOME_DIRECTORY = /home/db2inst7 inst2.PASSWORD = <PASSWORD> inst2.AUTOSTART = NO inst2.SVCENAME = db2c_db2inst7 inst2.PORT_NUMBER = 50017 inst2.FCM_PORT_NUMBER = 60018 inst2.MAX_LOGICAL_NODES = 4 inst2.CONFIGURE_TEXT_SEARCH = NO
- 69. Chapter 2. DB2 server deployment 55 inst2.FENCED_USERNAME = db2fenc7 inst2.FENCED_GROUP_NAME = db2fadm7 inst2.FENCED_HOME_DIRECTORY = /home/db2fenc7 inst2.FENCED_PASSWORD = <PASSWORD> *---------------------------------------------- * Database section *---------------------------------------------- DATABASE = db01 db01.INSTANCE = inst1 db01.DATABASE_NAME = ITSO db01.LOCATION = LOCAL db01.ALIAS = ITSO db01.PATH = /tmp/db2rsp/db01 DATABASE = db02 db02.INSTANCE = inst2 db02.DATABASE_NAME = ITSODB db02.LOCATION = REMOTE db02.ALIAS = ITSODB db02.SYSTEM_NAME = zaire db02.SVCENAME = 50000 *----------------------------------------------- * Installed Languages *----------------------------------------------- LANG = EN *----------------------------------------------- * SA MP Base Component *----------------------------------------------- INSTALL_TSAMP = NO 6. To start the deployment, issue the db2setup command with option -r followed with the absolute location of the response file: # ./db2setup -r /tmp/db2rsp/db2ese.rsp By default, a log file /tmp/db2setup.log is generated. Using option -l, you can specify a different path for the log file. Deploying DB2 server with application We can deploy the DB2 server and application with only one step. On UNIX and Linux, DB2 installation image can be embedded into an application installation image. This means that you can use a single program to install both DB2 server and application to simplify the deployment. This method uses a response file and requires the INTERACTIVE keyword in the response file to be set to MACHINE. That enables the application which performs the deployment to receive the progress reported by the DB2 installer. There is a sample program named InstallTester included in the DB2 installation image that demonstrates how to embed a response file based DB2 installation into an application. The sample program is written in both C and Java language.
- 70. 56 DB2 Deployment Guide One of the useful functions presented in the sample program is a way to read progress information and general message from the DB2 installer, and report process back to the user. The sample program only installs a DB2 product using a response file. You can add your customized application deployment codes into it, or just use this sample program as one of the steps in your deployment script. These are the steps to build and deploy using the sample program written in C language: 1. Create a working folder for the sample program: # mkdir -p /tmp/db2rsp/smpinst 2. Locate the sample program under the subdirectory in the DB2 installation image. Copy required files to the working place and rename the makefile, which is platform specific. # cd /software/V95/ese/db2/samples/c # cp InstallTester.h Makefile.Linux InstallTester.c /tmp/db2rsp/smpinst # cd /tmp/db2rsp/smpinst # mv Makefile.Linux makefile 3. Use the makefile to build an executable program: # make all gcc -c -O2 -Wall -o InstallTester.o InstallTester.c gcc -o InstallTester InstallTester.o 4. The generated executable program is named InstallTester. It requires two command line options. The first parameter is for the full path of db2setup, and second parameter is for the response file. This binary file can be invoked using the following command: ./InstallTester <location of db2setup> -r <location of response file> 5. Set the INTERACTIVE keyword: Make sure that the INTERACTIVE keyword in the response file is set to MACHINE. We use the response file illustrated in Example 2-7 on page 53 and change the keyword value as shown here in Example 2-8. The value MACHINE for the keyword INTERACTIVE tells DB2 installer to generate progress information and general message in a format that can easily be parsed by another program. In our case, it is parsed by InstallTester. Example 2-8 The value of keyword INTERACTIVE is changed INTERACTIVE = MACHINE 6. Finally, the command to start the deployment is: ./InstallTester /software/V95/ese/db2setup -r /tmp/db2rsp/db2ese.rsp
- 71. Chapter 2. DB2 server deployment 57 During the execution of InstallTester, you can see how original progress information and general messages are processed. For example, a message like this: Message: PROGRESS TASK START :: INSTALLATION :: 3 :: 253 :: SQL procedures Will be transformed to this format: Purpose: Received when a new task starts Task type: INSTALLATION Estimated task time: 3 second(s) Task ID: 253 Task description: SQL procedures With the INTERACTIVE keyword set as MACHINE, DB2 installer outputs the messages with “::” embedded as a delimiter. The InstallTester parses each message according to the delimiter “::” and then presents it back to the user in a more meaningful format. As in response file installation, a default log file is generated in /tmp/ db2setup.log. We can find more details in this log file, for example, what components have been installed, what commands were used in the deployment, and what post deployment tasks have been finished. 2.2.4 Payload file deployment (for Linux and UNIX) A payload file is a compressed tar archive that contains all of the files and metadata for an installable component. This method extracts component files from the payload file, directly save them into the target path, then use db2chgpath to update the embedded runtime path. This deployment method is for the advanced user only and is not a recommended installation method. For more details about the payload file deployment, visit the DB2 Information Center: http://publib.boulder.ibm.com/infocenter/db2luw/v9r5/topic/ com.ibm.db2.luw.qb.server.doc/doc/t0023683.html Note: This method requires further manual configuration steps. Ensure that the payload installation is required for your enterprise before using it in your deployment.
- 72. 58 DB2 Deployment Guide 2.3 Mass deployment of DB2 server using a script It is not uncommon for an enterprise that requires deploying the DB2 server to many systems. In this section, we discuss an approach to implement a mass deployment of the DB2 server. We use a deployment script to automate the installation process as much as we can to save on deployment time and reduce the chances of error that might introduced in a manual process. You also can use db2setup along with a response file to implement a mass DB2 server deployment. For Linux and UNIX platforms, the db2_install utility is another option. In our scenario, we have only three AIX systems. However, the concept and method demonstrated can be applied to a mass deployment of more than three machines. All of our three machines are running the same type of operating system and will use the same version of DB2. Figure 2-6 illustrates our environment topology. There are three AIX boxes (Zaire, Baltic, and Banda.) targeted for deployment. The DB2 installation image is on Zaire, which is served as a file server. From Zaire, we execute the deployment script that will send commands to Baltic and Banda across the network. We set up Zaire as a Network File System (NFS) server with Baltic and Banda acting as NFS clients. Therefore, Baltic and Banda can access the DB2 installation image through the network. Figure 2-6 Network topology of our deployment environment Baltic Banda Zaire NFS Server DB2 image /tmp/v95ga/ese NFS Client NFS Client network
- 73. Chapter 2. DB2 server deployment 59 2.3.1 Setup of SSH and NFS Before we can start the mass deployment, a secure and convenient authentication channel must be set up to allow us to issue commands with proper privileges to the remote machines. Installing SSH on managed machines For AIX platforms, OpenSSH and its prerequisites might not be installed by default. Since in our case, ssh is required as the remote shell tool, OpenSSH has to be installed and configured. For details, visit the AIX Information Center on the IBM Web site and select the appropriate version of the AIX: http://publib16.boulder.ibm.com/pseries/index.htm After OpenSSH has been installed, we can see the file sets, similar to those in Example 2-9. Example 2-9 NFS file sets on AIX openssh.base.client 4.3.0.5301 COMMITTED Open Secure Shell Commands openssh.base.server 4.3.0.5301 COMMITTED Open Secure Shell Server openssh.license 4.3.0.5301 COMMITTED Open Secure Shell License openssh.man.en_US 4.3.0.5301 COMMITTED Open Secure Shell openssh.msg.en_US 4.3.0.5301 COMMITTED Open Secure Shell Messages - openssh.base.client 4.3.0.5301 COMMITTED Open Secure Shell Commands openssh.base.server 4.3.0.5301 COMMITTED Open Secure Shell Server After the ssh service is available on your UNIX or Linux system, you can use the ssh client to connect to it. The basic ssh command is shown below: ssh [user]@<hostname> [command] During the first ssh connection to the machine, you will be prompted to accept a RSA authentication key. Type yes and input the user’s password. See Example 2-10. Note: For Linux platforms, OpenSSH is generally installed by default. Use the command rpm to check for availability of OpenSSH on your Linux: rpm -qa|grep -i ssh Then ensure that the ssh service is up and running. For example, on SUSE Linux or Red Hat Linux, you can issue the service command to obtain a status report from the operating system: service sshd status
- 74. 60 DB2 Deployment Guide Example 2-10 Accept the authentication key the first time accessing a machine using ssh $ ssh root@baltic The authenticity of host 'baltic (9.43.86.48)' can't be established. RSA key fingerprint is 48:56:a4:d9:27:25:12:0f:b3:11:5a:60:52:7a:25:e0. Are you sure you want to continue connecting (yes/no)? yes Warning: Permanently added 'baltic,9.43.86.48' (RSA) to the list of known hosts. root@baltic's password: Enabling SSH automatic login for root user In addition to the authentication key that has to be accepted during the first ssh connection, you have to provide a user password each time you log in. To make our mass deployment script accessible across various machines without being prompted to accept an authentication key or to specify a password, we can set up an automatic ssh login. Because the deployment scenario we demonstrate in this section is performed using a root ID, we have to enable the automatic login for the root user. The machine where we initiate the deployment is Zaire. So the root user on Zaire requires sufficient privileges to send commands to other machines, including Baltic and Banda, where the DB2 server is to be deployed. So we must enable automatic login on them. The procedure to enable SSH automatic login on a remote machine is as follows: 1. Login to the file server machine as a root user from where the deployment command will be executed. In our case, the machine is Zaire. Under the root user’s home directory, create a subdirectory .ssh if it does not already exist. The public and private key files will be saved in it. Example 2-11 shows the commands. Do the same thing on every remote machine. Example 2-11 Create subdirectory and grant correct permission # mkdir -p ~/.ssh # chmod 700 ~/.ssh 2. Generate a private and public key pair from the command line. See Example 2-12. Example 2-12 Generate a public and private key pair using DSA # cd ~/.ssh # ssh-keygen -t dsa -f ~/.ssh/id_dsa -N ""
- 75. Chapter 2. DB2 server deployment 61 Here we use Digital Signature Algorithm (DSA) as the key type. You can use RSA instead. The corresponding command is shown in Example 2-13. Example 2-13 Generate a public and private key pair using RSA # cd ~/.ssh # ssh-keygen -t rsa -f ~/.ssh/id_rsa -N "" The option -N "" informs the command ssh-keygen to use an empty passphrase when generating the key files. A passphrase is like a password for the key file. Option -f specifies the file name for a key file. Example 2-14 shows the key files generated by the foregoing commands. Files with suffix .pub are public key files. Files without any suffix are private files. Example 2-14 Files generated by above commands # ls -alt total 40 drwx------ 2 root system 256 Jun 18 16:12 . -rw------- 1 root system 1679 Jun 18 16:12 id_rsa -rw-r--r-- 1 root system 392 Jun 18 16:12 id_rsa.pub -rw------- 1 root system 672 Jun 18 16:11 id_dsa -rw-r--r-- 1 root system 600 Jun 18 16:11 id_dsa.pub drwxr-xr-x 28 root system 4096 Jun 11 10:47 .. Ensure that the file permission of the key file is correct. By default, the private key file can only be read and written by the root user. 3. Distribute the public key file to the remote machines where automatic login of the root user is to be enabled. The command is: cat ~/.ssh/id_dsa.pub | ssh root@baltic 'cat >> ~/.ssh/authorized_keys' In this step we read the public key file and redirect its content to ssh through a pipe. Then we use ssh to execute a command to Baltic, which is the remote machine. And we append the content of this public key to a file named authorized_keys. This file is located in the folder .ssh under the root user’s home directory on a remote machine. Example 2-15 shows the prompts we encounter when executing this remote command. The first prompt is a warning because this is the first time we connect to the machine Baltic. An authentication key has to be accepted. The second prompt asks for the root user’s password to login to Baltic. Example 2-15 Distribute the public key file to remote machine # cat ~/.ssh/id_dsa.pub | ssh root@baltic 'cat >> ~/.ssh/authorized_keys' The authenticity of host 'baltic (9.43.86.48)' can't be established. RSA key fingerprint is 48:56:a4:d9:27:25:12:0f:b3:11:5a:60:52:7a:25:e0.
- 76. 62 DB2 Deployment Guide Are you sure you want to continue connecting (yes/no)? yes Warning: Permanently added 'baltic,9.43.86.48' (RSA) to the list of known hosts. root@baltic's password: For RSA encryption, the command is almost the same as DSA, except for the name of the public key file. cat ~/.ssh/id_rsa.pub | ssh root@baltic 'cat >> ~/.ssh/authorized_keys' 4. Now we have successfully enabled automatic login on the remote machine Baltic. As a root user, we can issue the following command from Zaire (file server) to login to Baltic without specifying the password: ssh Baltic On Baltic, we can have a look at the authorized_keys file, which is used to keep the public key for root user of Zaire. See Example 2-16. Example 2-16 Public key is kept in authorized_keys on Baltic # cd ~/.ssh # ls -alt total 16 drwx------ 2 root system 256 Jun 18 16:53 . -rw-r--r-- 1 root system 600 Jun 18 16:53 authorized_keys drwxr-xr-x 33 root system 4096 Jun 09 15:24 .. # cat authorized_keys ssh-dss AAAAB3NzaC1kc3MAAACBAPk6QOR2/cQ+t3H3SIhQXxawPa5T0/ o4KnHy02AZ0p1woawkvMPSjPwkuMw+70zFKVNZFKnCzaheSCjjbzSQRG4ZJlgNjcZetDr/ 1+zKKpfj4696qbZ7wxffZz9aIkibIi ...... M+6TNy16P0v3l4aOENOLxIZAL9Lbg0fkEW7Ay4XW9V7a5IvbvbuxM= root@Zaire 5. There is another remote machine, Banda, where the DB2 server must be deployed. Therefore, we have to copy the public key to Banda just like we did in step 3. cat ~/.ssh/id_dsa.pub | ssh root@banda 'cat >> ~/.ssh/authorized_keys' Note: The automatic login that we have enabled on Baltic and Banda works in only one direction. This means that the root user on Zaire can login to Baltic or Banda without a password prompt, but the root user on Baltic or Banda still has to specify a password on each login attempt to Zaire. This is because we did not distribute Baltic’s or Banda’s public key file to Zaire. In our mass deployment scenario, we do not require bidirectional automatic login.
- 77. Chapter 2. DB2 server deployment 63 NFS configuration In a mass deployment scenario, copying the installation image to each target machine is not a convenient method. It is time consuming and requires extra temporary space to be allocated on each machine to keep the image. A better approach is to keep the installation image in a file server and make it available to other systems. We keep the installation image on Zaire and make the image available to others through Network File System (NFS). The steps required to set up the NFS share on Zaire are as follows: 1. Install NFS software if it is not found on your system. Then start the NFS server. You can use smit or smitty to start the NFS daemon: smitty nfsconfigure 2. Add the installation image path to the NFS exports list. The default mode of the exported directory is read-write. As we do not change the installation image from the deployed machine, the mode can be changed to read-only. The following command adds a directory to the Exports list: smitty mknfsexp 3. Verify that the desired path has been exported correctly. In Example 2-17, we extract the installation image of DB2 Enterprise Server Edition into the path / tmp/v95ga/ese for everyone to access. Example 2-17 Verify NFS configuration from command line # showmount -e zaire export list for zaire: /tmp/v95ga/ese (everyone) After finishing the SSH and NFS configuration, we are now ready for the mass deployment. 2.3.2 DB2 license DB2 server products require appropriate licenses based on the features and products you are deploying. DB2 provides a method for automatically installing licenses during the deployment process. This involves copying the license files to the db2/license directory from the install image. When a given DB2 server product image is deployed, DB2 automatically installs the licenses present in the db2/license directory.
- 78. 64 DB2 Deployment Guide 2.3.3 Creating the deployment script The SSH and NFS should be configured prior to implementing the DB2 server deployment. These are basis for running an automatic deployment across the network without any user interaction. Our deployment script performs the following tasks: Parse the command line options and perform basic syntax checking. Go through the hosts one by one and perform installation in sequence. The host names are read in from the command line. For each target host, mount the DB2 server installation image to the local file system using NFS. If the mount fails, this machine will be skipped. For response file based deployment, the response file should be placed on a NFS directory for others to access. After installation is finished on one machine, unmount NFS and move on to the next target host. If we encounter any error, the script will try forwarding a message to the standard output. In addition, an installation log file is generated on each installation target by db2setup or db2_install (for Linux and UNIX). Figure 2-7 depicts the process.
- 79. Chapter 2. DB2 server deployment 65 Figure 2-7 Logic of the mass deployment script Example 2-18 shows our sample deployment script db2srv_install. Example 2-18 Source code of db2srv_install #!/usr/bin/ksh ############################################################## # # Mass deployment script for DB2 for UNIX/Linux # ############################################################## # # db2srv_install -D|-R -N <NFSpath> -H hostA,hostB,...,hostN # -r response_file -b install_path -f NOTSAMP # -p productShortName -c NLPACK_location -n # -L language -l logfile -t tracefile" # ############################################################## #setopts=-x setopts="${setopts:-+x}" set ${setopts?} # clean variables unset CMDOPTS MOD Script Start Parse command line options Do basic synatx check on options chksyntax () Mount NFS on remote machine mountnfs () Try ssh connection Perform response file deployment resp_dply () Perform db2_install deployment db2install_dply () Unmount NFS on remote machine umountnfs () Read next hostname Script End Empty Failure
- 80. 66 DB2 Deployment Guide # command-line syntax syntax() { echo " db2srv_install -D|-R -N <NFSpath> -H hostA,hostB,...,hostN -r response_file -b install_path -f NOTSAMP -p productShortName -c NLPACK_location -n -L language -l logfile -t tracefile " } # verify only one deployment method is specified chksyntax() { set ${setopts?} if [ -z "$MOD" ] || [ `echo "$MOD"|awk '{print length($0)}'` != 1 ]; then syntax exit 1 fi } # mount nfs onto remote machine mountnfs() { set ${setopts?} SKIP=0 # make a temporary mount point ${RCMD} mkdir $LOCALNFS ${RCMD} mount -o ro "$BASEHOST":"$NFSPATH" "$LOCALNFS" rc=$? # if mount fails, try once more if [ $rc != 0 ]; then echo "Mount failed on machine $host. Will try again 2 seconds later." sleep 2 echo "Trying mount again..." ${RCMD} mount -o ro "$BASEHOST":"$NFSPATH" "$LOCALNFS" rc=$? if [ $rc != 0 ]; then echo "Mount failed twice on machine $host. Will skip it." SKIP="1" # remove the temporary mount point ${RCMD} rmdir $LOCALNFS fi fi return $SKIP } umountnfs()
- 81. Chapter 2. DB2 server deployment 67 { set ${setopts?} ${RCMD} umount "$LOCALNFS" rc=$? # if unmount fails, try once more if [ $rc != 0 ]; then echo "Unmount failed on machine $host. Will try again 2 seconds later." sleep 2 echo "Trying unmount again..." ${RCMD} umount "$LOCALNFS" rc=$ if [ $rc != 0 ]; then echo "Umount failed twice on machine $host. You need to do it manually." fi fi } # deploy DB2 using specified response file resp_dply() { # the response file has to be accessible from remote machine # so put it under $LOCALNFS ${RCMD} $LOCALNFS/db2setup -r "$LOCALNFS/$RESFILE" rc=$? if [ "$rc" != 0 ]; then printf "n Deployment returns an error code "%s".n" $rc fi return $rc } # deploy DB2 using db2_install db2install_dply() { set ${setopts?} # when $INSTPATH specified, no conflict is allowed if [ ! -z "$INSTPATH" ]; then ${RCMD} db2ls|egrep '^'"$INSTPATH"' ' > /dev/null 2>&1 rc=$? if [ $rc == 0 ]; then echo "The specified install path already exists." echo "This machine is ignored." rc=1 else # populate the command line params for db2_install INSTALL_PARAM=`echo ${INSTPATH:+"-b $INSTPATH"}" "${SAMP:+"-f $SAMP"}" " ${PROD:+"-p $PROD"}" "${NLPATH:+"-c $NLPATH"}" " ${NLNAME:+"-L $NLNAME"}" "${LOGFILE:+"-l $LOGFILE "}" "
- 82. 68 DB2 Deployment Guide ${SILENT:+"-n"}" "${TRC:+"-t $TRC"}` ${RCMD} $LOCALNFS/db2_install $INSTALL_PARAM rc=$? fi fi return $rc } # main program # parse command line options case $# in 0) syntax exit 1;; *) while getopts "RDN:H:r:b:f:p:c:L:l:nt:i:" OPT do case $OPT in R) MOD="R$MOD" ;; D) MOD="D$MOD" ;; # NFS mount path, and host list N) NFSPATH=$OPTARG ;; H) HOSTLIST=`echo "$OPTARG"|sed 's/,/ /g'`;; # command params for response file r) RESFILE=$OPTARG ;; # command params for db2_install b) INSTPATH=$OPTARG ;; f) SAMP=$OPTARG ;; p) PROD=$OPTARG ;; c) NLPATH=$OPTARG ;; L) NLNAME=$OPTARG ;; l) LOGFILE=$OPTARG ;; n) SILENT="Y" ;; t) TRC=$OPTARG ;; ?) syntax && exit 1;; esac done ;; esac chksyntax # set variables BASEHOST=`hostname` LOCALNFS="/db2nfs.$$" BMSG1=" Starting deployment on machine %s using %s...n" BMSG2=" Messages returned from %s:n ---------------n" EMSG1=" ---------------n Deployment finished on machine %s.n" # go through the host list for host in $HOSTLIST
- 83. Chapter 2. DB2 server deployment 69 do # populate command and do basic testing to ensure ssh can work. RCMD="ssh $host" ${RCMD} hostname 2> /dev/null|egrep -i '^'"$host"'$' > /dev/null 2>&1 rc=$? if [ $rc != 0 ]; then # if ssh fails, target host is ignored. echo " ============================ Error: Machine $host could not be connected successfully. Please check. It will be ignored in this deployment. " else # mount NFS mountnfs rc=$? if [ $rc != 0 ]; then continue fi # using various deployment method according to cmd line option echo " ============================" case $MOD in "R") MSG="response file" printf "$BMSG1" $host "$MSG" printf "$BMSG2" $host resp_dply ;; "D") MSG="db2_install" printf "$BMSG1" $host "$MSG" printf "$BMSG2" $host db2install_dply ;; esac printf "$EMSG1" $host # unmount NFS & remove temporary mount point umountnfs ${RCMD} rmdir $LOCALNFS fi done echo echo "Deployment finished." Command line options The following command line syntax is used for db2srv_install: db2srv_install -D|-R -N <NFSpath> -H hostA,hostB,...,hostN -r response_file -b install_path -f NOTSAMP -p productShortName -c NLPACK_location -n -L language -l logfile -t tracefile
- 84. 70 DB2 Deployment Guide Option -D or -R determines which deployment method is to be used, D for db2_install and R for response file. Option -N specifies the NFS path which has been exported on the file server machine Zaire. In our case, it is /tmp/v95ga/ese. This directory contains the DB2 server image, db2_install, and db2setup as shown in Example 2-19. Example 2-19 NFS path where db2 image has been extracted # ls -l total 120 drwxr-xr-x 6 daemon staff 4096 Jun 03 2008 db2 -r-xr-xr-x 1 bin bin 4700 Jun 03 2008 db2_deinstall -r-xr-xr-x 1 bin bin 4570 Jun 03 2008 db2_install -r-xr-xr-x 1 bin bin 4560 Jun 03 2008 db2prereqcheck -r-xr-xr-x 1 bin bin 4552 Jun 03 2008 db2setup drwxr-xr-x 16 bin bin 4096 Jun 03 2008 doc -r-xr-xr-x 1 bin bin 4588 Jun 03 2008 installFixPack drwxr-xr-x 5 root system 256 Jun 03 2008 nlpack drwxr-xr-x 15 bin bin 4096 Jun 03 2008 readmefirst -r--r--r-- 1 bin bin 1503 Jun 03 2008 readmefirst.htm -r--r--r-- 1 bin bin 678 Jun 03 2008 readmefirst.txt Option -H specifies all of the machines where the DB2 server are to be deployed. Each machine name is separated by a comma (,). No spaces are allowed between host names, before or after the comma. Option -r specifies the name of the response file. It can not be used together with option D. If used, it is ignored. The response file has to be placed on the path specified by the option N. We continue using the response file we used in 2.2.3, “Response file” on page 48. In Example 2-20, we copy it to /tmp/v95ga/ese. Example 2-20 Copy response file to NFS path # cp /tmp/db2rsp/db2ese.rsp /tmp/v95ga/ese/ All other command line options are for the db2_install command. They follow the same syntax stated in the DB2 Information Center: http://publib.boulder.ibm.com/infocenter/db2luw/v9r5/topic/ com.ibm.db2.luw.admin.cmd.doc/doc/r0023669.html Our script just passes these options to db2_install without change. Note: Keeping the response file accessible and consistent to every machine is critical to the success of the deployment. Therefore, it is placed in the NFS path and shared with everyone.
- 85. Chapter 2. DB2 server deployment 71 The following example demonstrates the use of the deployment script: db2srv_install -D -N /tmp/v95ga/ese -H baltic,banda -n -p ese -b /opt/IBM/db2/ V9.5 -l /tmp/mass_db2dply.log This command deploys DB2 Enterprise Server Edition to machines Baltic and Banda with installation location /opt/IBM/db2/V9.5 specified. A log file /tmp/ mass_db2dply.log is generated for each machine during the deployment. For a mass deployment using the response file, the command line should look like this: db2srv_install -R -N /tmp/v95ga/ese -H baltic,banda -r db2ese.rsp Running a mass deployment Here we deploy the DB2 server to two target machines Baltic and Banda. We outline the steps for performing a mass DB2 server deployment using our script: 1. Login to the file server machine Zaire where DB2 installation image is located. 2. Change the directory to where db2srv_install is located and run the db2srv_install script to start the deployment. Example 2-21 shows a db2_install based mass deployment. Option -D is used to specify db2_install. Example 2-21 Mass deployment using db2_install # ./db2srv_install.sh -D -N /tmp/v95ga/ese -H baltic,banda -n -p ese -b / opt/IBM/db2/V9.5 -l /tmp/mass_db2dply.log ============================ Starting deployment on machine baltic using db2_install... Messages returned from baltic: --------------- The execution completed successfully. For more information see the DB2 installation log at "/tmp/ mass_db2dply.log". --------------- Deployment finished on machine baltic. ============================ Starting deployment on machine banda using db2_install... Messages returned from banda: --------------- The execution completed successfully. Note: The sample deployment script db2srv_install can be placed in any path. As we are using a root user to perform the deployment, the script should be given sufficient permission to be read and executed by the root user.
- 86. 72 DB2 Deployment Guide For more information see the DB2 installation log at "/tmp/ mass_db2dply.log". --------------- Deployment finished on machine banda. Deployment finished. Example 2-22 shows an output of the script performing a DB2 installation using a response file. Example 2-22 Mass deployment using response file mensa:/tmp/tj01 # ./db2srv_install.sh -R -N /tmp/v95ga/ese -H baltic,banda -r db2ese.rsp ============================ Starting deployment on machine baltic using response file... Messages returned from baltic: --------------- DBI1191I db2setup is installing and configuring DB2 according to the response file provided. Please wait. The execution completed successfully. For more information see the DB2 installation log at "/tmp/db2setup.log". --------------- Deployment finished on machine baltic. ============================ Starting deployment on machine banda using response file... Messages returned from banda: --------------- DBI1191I db2setup is installing and configuring DB2 according to the response file provided. Please wait. The execution completed successfully. For more information see the DB2 installation log at "/tmp/db2setup.log". --------------- Deployment finished on machine banda. Deployment finished. 3. When running the deployment script with the db2_install method, our script checks if the specified installation path conflicts with the existing DB2 copies. In Example 2-23, we can see that two versions of DB2 are already present on the given machine.
- 87. Chapter 2. DB2 server deployment 73 Example 2-23 DB2 copies existing on baltic # db2ls -------------------------------------------------------------------------- /opt/IBM/db2/V9.1 9.1.0.3 3 /opt/IBM/db2/V9.5 9.5.0.1 1 The following command is used to execute the deployment script against Baltic to install DB2 in the /opt/IBM/db2/V9.5 path: db2srv_install.sh -D -N /tmp/v95ga/ese -H baltic -n -p ese -b /opt/ibm/db2/ V9.5 -l /tmp/mass_db2dply.log When a conflict is detected, the script aborts the installation and displays error messages on the screen as shown in Example 2-24. Example 2-24 Install path conflicts with existing DB2 copy ============================ Starting deployment on machine baltic using db2_install... Messages returned from baltic: --------------- The specified install path already exists. Abort. --------------- Deployment finished on machine baltic. After the deployment is complete, you can issue the db2ls command to see every installed DB2 copies on the system. You can also review the installation by logon to each machine. 2.3.4 Windows deployment scripts All mass deployment of DB2 products in Windows platform requires a response file. There are two common methods for deploying DB2 servers in Windows: Using a deployment script Creating a package in a third party software deployment tool These deployment methods are same for deploying DB2 Data server clients and DB2 Data Server Runtime clients. As such, we present usage of a deployment script in this section and cover usage of software deployment tools, namely Microsoft System Management Server and Microsoft System Center Configuration Manager 2007, in Chapter 3, “DB2 client deployment” on page 89. Note: We have a limited number of exception handling functions embedded in our deployment script. Ensure that SSH and NFS are configured properly prior to executing our sample deployment script.
- 88. 74 DB2 Deployment Guide The general procedure for deploying multiple DB2 servers is as follows: 1. Create a response file: – Modify a sample response file or manually create one. – Use the DB2 Setup wizard to generate a response file. – Use the response file generator (db2rspgn). 2. If the response file was not created using the db2rspgn tool and if you wish to include a database profile in your deployment, generate a DB2 profile using the db2cfexp tool and include the DB2.CLIENT_IMPORT_PROFILE keyword with the configuration profile name. 3. Place the DB2 install image on a share drive or a file server that is accessible to all target systems. 4. Ensure that the proper license files are acquired and placed in the db2license directory of the install image. 5. Create a deployment script that executes the setup using the –u option with the response file. As mentioned in the previous section, the DB2 server product install image should be placed on a file server that is accessible to all systems to which installation will take place. The Samba file system or any network accessible drive is ideal for DB2 server deployment in Windows. It is prudent to make this centralized file server permanently available (as read-only) to ensure proper future maintenance (for example, repair). The deployment scripts for response file installation on the Windows platform can be written in any language including Perl, Java, C, or batch files. In Example 2-25, we have a batch file called DB2Deploy.bat to perform DB2 server installation on Windows. This batch file maps the DB2 install image location to the local drive z using user ID somebody and password password. Example 2-25 Windows batch file deployment script (DB2Deploy.bat) Net use z: 9.43.86.84SoftwareDB2_serverWinESEESEimage /user:somebody password z:setup /U Z:PROD_ESE.rsp echo %ERRORLEVEL% Net use z: /DELETE You can modify this batch script to take in the user ID and password as parameters by changing the first line to: Net use z: 9.43.86.84SoftwareDB2_serverWinESEESEimage /user:%1 %2
- 89. Chapter 2. DB2 server deployment 75 The script then performs silent installation using the provided response file and unmaps the DB2 installation image. As mentioned earlier, it might be prudent to leave given mapped drive intact. Execution of this script will result in the output shown in Example 2-26. Example 2-26 Sample Windows deployment script output C:>dir *.bat Volume in drive C has no label. Volume Serial Number is DCDC-8C9E Directory of C: 07/25/2007 01:17 PM 0 AUTOEXEC.BAT 06/12/2008 11:25 AM 209 DB2Deploy.bat 2 File(s) 209 bytes 0 Dir(s) 151,635,767,296 bytes free C:>DB2deploy.bat C:>Net use z: 9.43.86.84SoftwareDB2_serverWinESEESEimage / user:somebody password The command completed successfully. C:>z:setup /U Z:PROD_ESE.rsp C:>echo 0 0 C:>net use z: /DELETE z: was deleted successfully. Regardless of the language used, all deployment scripts should reference a central common installation location and use the response file installation method. Usage of the deployment tool is discussed in-depth in 3.2.4, “Mass deployment of IBM data server client product” on page 100. 2.4 Fix pack deployment In this section, we discuss various methods for deploying DB2 fix pack. Deploying a fix pack is one of the installation maintenance tasks for Database Administrators or System Administrators.
- 90. 76 DB2 Deployment Guide 2.4.1 Fix pack overview A fix pack is a package that contains updates and fixes for reported problems (also known as Authorized Program Analysis Reports, or “APARs”) with the DB2 product. Each fix pack contains an APARLIST.TXT file, which lists the fixes it contains. Fix packs are cumulative. This means that you can just install the latest fix pack, which contains all of the updates from previous fix packs for the same DB2 version. For UNIX and Linux system, fix packs are normally delivered as compressed packages. Before starting the installation, you have to uncompress and extract the fix pack to a temporary directory. For Windows, they are normally delivered in compressed executable format and can be uncompressed by executing them. Fix packs can be found in the following DB2 support site. http://www.ibm.com/software/data/db2/udb/support.html There are different types of fix pack available on the IBM support Web site. You have to decide which one meet your requirement by corresponding the fix pack type to your existing DB2 installation. The most frequently used types include: DB2 server fix pack: This fix pack can be applied to any of the following server products: – Enterprise Server Edition – Workgroup Server Edition – Express Edition – Personal Edition – Connect Enterprise Edition – Connect Application Server Edition – Connect Unlimited Edition for zSeries – Connect Unlimited Edition for i5/OS – IBM Data Server Client Note: A single DB2 server fix pack can be used as an installation image for the DB2 database server product at a particular fix pack level. This is a useful feature for users who are looking to install DB2 directly at a particular fix pack level without having to install GA (General Availability), then applying a fix pack to it. This installation method uses the license “Try and Buy” by default. So do not forget to apply your own license after the install.
- 91. Chapter 2. DB2 server deployment 77 DB2 fix pack for non-server products: This type of fix pack can only be used if you do not have DB2 server installed, and just other DB2 client or add-on products have to be updated. It cannot be used to update a DB2 server product. DB2 universal fix pack (available only on UNIX and Linux): This fix pack should be used when there are more than one DB2 product installed, for example, if you have DB2 Enterprise Server Edition and WebSphere Federation Server installed. Then DB2 universal fix pack should be used instead of the separately applying DB2 server fix pack and WebSphere Federation Server fix pack. A discussion about the difference between universal fix packs and product specific fix packs can be found at: http://publib.boulder.ibm.com/infocenter/db2luw/v9r5/topic/ com.ibm.db2.luw.qb.server.doc/doc/c0025286.html Visit the DB2 Information Center for more information about DB2 fix packs: http://publib.boulder.ibm.com/infocenter/db2luw/v9r5/topic/ com.ibm.db2.luw.qb.server.doc/doc/t0006352.html Stopping all DB2 processes before deployment Before installing the DB2 fix pack, you have to ensure that every DB2 process has been stopped. As DB2 now supports multiple copies coexisting on one machine, you have to stop only those DB2 processes that are associated with the copy to be updated. The DB2 Information Center provides detailed steps showing how to stop DB2 processes before the fix pack installation. For UNIX and Linux system, refer to: http://publib.boulder.ibm.com/infocenter/db2luw/v9r5/topic/ com.ibm.db2.luw.qb.server.doc/doc/t0024969.html For Windows systems, refer to: http://publib.boulder.ibm.com/infocenter/db2luw/v9r5/topic/ com.ibm.db2.luw.qb.server.doc/doc/t0024968.html Note: On UNIX and Linux platforms, the ps system command can be used when checking if a specific process is in the memory. On Windows systems, Task Manager can be used to show all the processes running in the memory. In addition, there is a command line utility called tasklist which outputs process information on Windows XP/Vista/2003. This convenient tool can be used in a customized script to detect and stop DB2 processes automatically.
- 92. 78 DB2 Deployment Guide Deployment method Various methods are available for a fix pack deployment, as summarized here: UNIX and Linux: – Install the fix pack as a new DB2 database product. – Update an existing DB2 database product. Windows: On a Windows platform, only the db2setup installation command is available. The installation method differs according to the number of DB2 database products involved and whether DB2 is configured to use Microsoft Cluster Server (MSCS): – Install fix pack for a single DB2 database product. – Install fix pack for multiple DB2 database products. – Install fix pack using response file. – Install fix pack in an MSCS environment. For details, visit the DB2 Information Center: http://publib.boulder.ibm.com/infocenter/db2luw/v9r5/topic/ com.ibm.db2.luw.qb.server.doc/doc/c0025016.html Tasks after fix pack deployment Prior to DB2 9.5, on UNIX and Linux platforms, there are manual tasks required after fix pack installation, for example, updating the DB2 instance and DAS, and binding files to databases. Beginning with DB2 9.5, all these tasks are performed automatically by the fix pack installer. Refer to the following URL for performing post installation steps manually: http://publib.boulder.ibm.com/infocenter/db2luw/v9r5/topic/ com.ibm.db2.luw.qb.server.doc/doc/c0025015.html 2.4.2 Mass deployment of DB2 fix pack with a script In this section, we introduce a script, db2fp_install, for automatic mass deployment of DB2 fix packs. This script is based on the DB2 server deployment script db2srv_install, discussed in 2.3.3, “Creating the deployment script” on page 64. Environment We continue using the environment used in 2.3, “Mass deployment of DB2 server using a script” on page 58. The environment is almost the same, except for the directory on the filer server on Zaire, where the shared fix pack installation image
- 93. Chapter 2. DB2 server deployment 79 is located. The temporary path for the fix pack image is /tmp/v95fp1/ese as shown in Figure 2-8. It is exported to every other machine using NFS. Figure 2-8 Network topology of mass fix pack deployment Just as for with mass server deployment, you have to ensure that SSH and NFS are installed. For steps to configure SSH and NFS, refer to 2.3.1, “Setup of SSH and NFS” on page 59. Script logic and command line options The fix pack deployment script is similar to the DB2 server deployment script. The major difference is that we have to check and stop the DB2 processes associated with the DB2 copy to be updated. Our fix pack deployment script performs the following tasks: Parse the command line options. Go through the hosts one by one and perform installation in sequence. The host names are read in from the command line. For each target host, mount the DB2 server installation image to the local file system using NFS. If the mount fails, this machine will be skipped. Check if any DB2 instance processes still exist. If not, then start the fix pack deployment. Baltic Banda Zaire NFS Server DB2 image /tmp/v95fp1/ese NFS Client NFS Client network
- 94. 80 DB2 Deployment Guide After deployment has finished on one machine, unmount NFS and go to the next target host. Figure 2-9 shows the script logic flow. Figure 2-9 Logics of DB2 fix pack mass deployment script The command line syntax for the fix pack deployment script is: db2fp_install -N NFSpath -H hostA,hostB,...,hostN -b base_install_path -c nlpack_location -n -f level -f db2lib -f NOTSAMP -f install|update -l log_file -t trace_file Note: Our deployment script only checks for DB2 instance processes and not all associated DB2 processes. Also, it does not detect shared libraries in the memory. Therefore we recommend that you ensure that all the DB2 processes have been stopped prior to running our script. The fix pack installer installFixPack also detects if all DB2 processes have been stopped. For related information, refer to the section “Stopping all DB2 processes before deployment” on page 77. Script Start Parse command line options Mount NFS on remote machine mountnfs () Try ssh connection Perform fixpack deployment db2fp_dply () Unmount NFS on remote machine umountnfs () Read next hostname Script End Empty Failure Verify no db2 process in memory chkdb2proc ()Failure Success
- 95. Chapter 2. DB2 server deployment 81 In the fix pack deployment script: Option -N specifies the NFS path that has been exported on the file server. In our case, it is /tmp/v95fp1/ese. This directory contains the DB2 fix pack image and installFixPack. Option -H specifies all of the machine names where DB2 fix packs are to be deployed. Each name is separated by a comma (,) with no space between names and before and after the comma. Option -c specifies the location of DB2 National Language Pack. This option is mandatory when option -n is used. The DB2 NLPACK location has to be provided explicitly only if all of the following conditions are met: – The -n option is specified. – The installation requires National Language (non-English) support. – The DB2 NLPACK is not located on the DB2 DVD or in the same subdirectory as the DB2 product being installed. In our scenario, we have made National Language Pack made available to others by creating a subdirectory called nlpack under /tmp/v95fp1/ese, which is already exported through NFS. We specify a relative path of nlpack for the option -c in our example. All other command line options are for the installFixPack command. The command line options for the installFixPack command can be found at the following URL: http://publib.boulder.ibm.com/infocenter/db2luw/v9r5/topic/ com.ibm.db2.luw.admin.cmd.doc/doc/r0023700.html Our script just passes these options to the db2_install. Sample deployment script Example 2-27 shows our deployment script. Example 2-27 Source code of fix pack mass deployment script #!/usr/bin/ksh ############################################################## # # Mass deployment script for DB2 fix pack on UNIX/Linux # ############################################################## # # db2fp_install -N NFSpath -H hostA,hostB,...,hostN Note: Be aware that the usage of option -c is a bit different than the one used by installFixPack. Our script only accepts the relative path.
- 96. 82 DB2 Deployment Guide # -b base_install_path -c image_location # -f level -f db2lib -f NOTSAMP -f install|update # -l log_file -t trace_file # ############################################################## setopts="${setopts:-+x}" set ${setopts?} # clean variables unset CMDOPTS FOPT # command-line syntax syntax() { echo " db2fp_install -N NFSpath -H hostA,hostB,...,hostN -b base_install_path -c image_location -f level -f db2lib -f NOTSAMP -f install|update -l log_file -t trace_file " } # mount nfs onto remote machine mountnfs() { set ${setopts?} SKIP=0 # make a temporary mount point ${RCMD} mkdir $LOCALNFS ${RCMD} mount -o ro "$BASEHOST":"$NFSPATH" "$LOCALNFS" rc=$? # if mount fails, try once more if [ $rc != 0 ]; then echo "Mount failed on machine $host. Will try again 2 seconds later." sleep 2 echo "Trying mount again..." ${RCMD} mount -o ro "$BASEHOST":"$NFSPATH" "$LOCALNFS" rc=$? if [ $rc != 0 ]; then echo "Mount failed twice on machine $host. Will skip it." SKIP="1" # remove the temporary mount point ${RCMD} rmdir $LOCALNFS fi fi return $SKIP }
- 97. Chapter 2. DB2 server deployment 83 umountnfs() { set ${setopts?} ${RCMD} umount "$LOCALNFS" rc=$? # if unmount fails, try once more if [ $rc != 0 ]; then echo "Unmount failed on machine $host. Will try again 2 seconds later." sleep 2 echo "Trying unmount again..." ${RCMD} umount "$LOCALNFS" rc=$ if [ $rc != 0 ]; then echo "Umount failed twice on machine $host. You need to do it manually." fi fi } # check in memory if DB2 instance processes still exist. chkdb2proc() { set ${setopts?} # check if db2ilist exists ${RCMD} test -f $INSTPATH/instance/db2ilist rc=$? if [ $rc == 0 ]; then # get DB2 instances list for inst in `${RCMD} $INSTPATH/instance/db2ilist` do # check if db2_ps exists ${RCMD} su - "$inst -c "which db2_ps"" > /dev/null 2>&1 rc=$? if [ $rc == 0 ]; then # count the number of db2 processes PSCOUNT=`${RCMD} su - $inst -c "db2_ps"|egrep -v '^Node | *UID| completed ok$'| sed '/ */d'|wc -l` if [ $PSCOUNT -gt 0 ]; then printf "Process associated with DB2 instance %s found in memory.n" $inst printf "Please clean all DB2 processes before deloying fix pack.n" return 1 else rc=0 fi fi done else return 1 fi
- 98. 84 DB2 Deployment Guide return 0 } # deploy DB2 fixpack using installFixPack db2fp_dply() { set ${setopts?} # check if $INSTPATH exists ${RCMD} test -d $INSTPATH rc=$? if [ $rc != 0 ]; then printf "Specified path %s does not exist.n" $INSTPATH rc=1 else # verify input base path exists in remote machine ${RCMD} "su - root -c db2ls"|egrep '^'"$INSTPATH"' ' > /dev/null 2>&1 rc=$? if [ $rc != 0 ]; then echo "No DB2 installation found under $INSTPATH." echo "This machine is ignored." rc=2 else # populate the command line params for installFixPack INSTALL_PARAM=`echo ${INSTPATH:+"-b $INSTPATH"}" "${NLPATH:+"-c $LOCALNFS/$NLPATH"}" -n " ${FOPT:+"$FOPT"}" "${LOGFILE:+"-l $LOGFILE"}" "${TRC:+"-t $TRC"}` # check if any DB2 process in memory chkdb2proc if [ $? == 0 ]; then ${RCMD} $LOCALNFS/installFixPack $INSTALL_PARAM rc=$? fi fi fi return $rc } # main program # parse command line options case $# in 0) syntax exit 1;; *) while getopts "N:H:b:c:f:l:t:" OPT do case $OPT in # NFS mount path, and host list N) NFSPATH=$OPTARG ;; H) HOSTLIST=`echo "$OPTARG"|sed 's/,/ /g'`;; b) INSTPATH=$OPTARG ;; c) NLPATH=$OPTARG ;;
- 99. Chapter 2. DB2 server deployment 85 f) FOPT="$FOPT""-f $OPTARG " ;; # force options can be combined l) LOGFILE=$OPTARG ;; t) TRC=$OPTARG ;; ?) syntax && exit 1;; esac done ;; esac # set variables BASEHOST=`hostname` LOCALNFS="/db2nfs.$$" BMSG1=" Starting fixpack deployment on machine %s using %s...n" BMSG2=" Messages returned from %s:n ---------------n" EMSG1=" ---------------n Fixpack deployment finished on machine %s.n" # go through the host list for host in $HOSTLIST do # populate command and do basic testing to ensure ssh can work. RCMD="ssh $host" ${RCMD} hostname 2> /dev/null|egrep -i '^'"$host"'$' > /dev/null 2>&1 rc=$? if [ $rc != 0 ]; then # if ssh fails, target host is ignored. echo " ============================ Error: Machine $host could not be connected successfully. Please check. It will be ignored in this deployment. " else # mount NFS mountnfs rc=$? if [ $rc != 0 ]; then continue fi # Deploy fixpack onto machine $host echo " ============================" printf "$BMSG1" $host "$MSG" printf "$BMSG2" $host db2fp_dply printf "$EMSG1" $host # unmount NFS & remove temporary mount point umountnfs ${RCMD} rmdir $LOCALNFS
- 100. 86 DB2 Deployment Guide fi done echo echo "Deployment finished." We use the following command to start the mass deployment of the DB2 fix pack against the remote machines, Baltic and Banda: db2fp_install -N /tmp/v95fp1/ese -H baltic,banda -b /opt/IBM/db2/V9.5 -c nlpack -l /tmp/db2fp_dply.log Example 2-28 shows the screen output. Example 2-28 Performing the mass deployment of DB2 fix pack # ./db2fp_install -N /tmp/v95fp1/ese -H baltic,banda -b /opt/IBM/db2/V9.5 -c nlpack -l / tmp/db2fp_dply.log ============================ Starting fixpack deployment on machine baltic using ... Messages returned from baltic: --------------- DBI1017I installFixPack is updating the DB2 product(s) installed in location /opt/IBM/db2/V9.5. The execution completed successfully. For more information see the DB2 installation log at "/tmp/db2fp_dply.log". --------------- Fixpack deployment finished on machine baltic. ============================ Starting fixpack deployment on machine banda using ... Messages returned from banda: --------------- DBI1017I installFixPack is updating the DB2 product(s) installed in location /opt/IBM/db2/V9.5. The execution completed successfully. For more information see the DB2 installation log at "/tmp/db2fp_dply.log". --------------- Fixpack deployment finished on machine banda. Deployment finished.
- 101. Chapter 2. DB2 server deployment 87 On each target machine, you can use the db2ls command to list all of the installed DB2 copies. Example 2-29 shows that our DB2 copy under /opt/IBM/ db2/V9.5 has been upgraded to fix pack 1. Example 2-29 List the installed DB2 copies # db2ls Install Path Level Fix Pack Special Install Number ---------------------------------------------------------------------------- /opt/IBM/db2/V9.5 9.5.0.1 1
- 102. 88 DB2 Deployment Guide
- 103. © Copyright IBM Corp. 2008. All rights reserved. 89 Chapter 3. DB2 client deployment In this chapter, we discuss various DB2 client deployment methods for various platforms. We discuss the following topics: Client deployment planning IBM Data Server Client, IBM Data Server Runtime Client, and IBM Data Server Driver for ODBC, CLI, and .NET – Client instance on the DB2 server – The db2iprune command line utility – Mass deployment of the IBM data server client product Thin Client deployment 3
- 104. 90 DB2 Deployment Guide 3.1 Client deployment planning Client deployment planning is a task to consider at the time when the application is designed and architected. Based on the requirements of the application, you decide on which client to use and how it is configured. The design considerations should include details such as footprint and setup consistency. 3.1.1 Select the right client type Figure 3-1 illustrates this topic as seen from an application point of view. In general, there are three options that enable an application to connect to a DB2 server: Option A: IBM Data Server Driver When you just want to connect to a DB2 server, the most simple approach is to use the IBM Data Server Driver. This setup is restricted to the supported platforms and languages. Configuration options are also limited In this setup. For a Java application, this solution is very simple to deploy because you do not have to install any DB2 software. It is sufficient to just package the driver files along with the application. Option B: IBM DB2 clients The other options available are the IBM Data Server Client and the IBM Data Server Runtime Client. Which of these clients to prefer depends on the supportive requirements of the applications. In a production environment, the IBM Data Server Runtime Client is usually the one chosen. In other environments, such as test environment, you can benefit from the tools provided with the IBM Data Server Client. Option C: Mix of option A and B In the large environments, you can benefit from a mix of option A and B. In a large environment, you might want to configure the connection to DB2 in different ways, optimizing for different uses of DB2.
- 105. Chapter 3. DB2 client deployment 91 Figure 3-1 How to connect our application to the DB2 server 3.1.2 Footprint The size of the footprint can also play a role in the client selection. The footprint increases with the complexity and number of features of the product. The DB2 Data Server Driver has the smallest footprint, and the DB2 Data Server Client has the largest footprint. In between is the DB2 Data Server Runtime Client. The DB2 Data Server Driver is especially well suited to be used in a mass deployment scenario. It is designed for ease of use in this scenario. For example, both driver registration and configuration during installation as well as driver unregistration during uninstallation are handled automatically by the DB2 installation program. 3.1.3 Reducing the size of the install image The default install image for a DB2 Data Server Client contains all the features and many language options. This makes the install image relatively larger than other client options. Besides, you may only interested in a subset of the features and one of the language options. In large scale deployment or embedding, the DB2 client in the application is required; you can remove unused features and language options from the install image. Application DB2 Server ? Application DB2 Server Driver DB2 ClientApplication A B C
- 106. 92 DB2 Deployment Guide A smaller install image with only the required features and language options can be obtained by using the command line tool db2iprune. This tool creates a new and tailored install image based on the input provided. We show how to use db2iprune in 3.2.3, “Reducing the installation image” on page 97. 3.1.4 Configuration and customization When the DB2 client is installed, you must configure a number of settings such as server nodes and database aliases to set up the connectivity. Any specific behavior of the client must also be configured. These specific application configurations and customizations must be taken into account when planning for client deployment. Configuration profile The configuration profile is a file containing the connectivity information for a DB2 client. The configuration profile can be used to copy connectivity settings between clients. These settings include the node directory and the database directory, but other settings, such as the ODBC settings, are also included. You can generate the configuration profile through an export from a client by using the command line utility db2cfexp and then use db2cfimp to import the profile on another client. More information about db2cfexp, including a link to db2cfimp, can be found at the DB Information Center: http://publib.boulder.ibm.com/infocenter/db2luw/v9r5/topic/com.ibm.db2.luw.admi n.cmd.doc/doc/r0002442.html db2cli.ini initialization file This file contains various keywords and values used to configure the behavior of the DB2 client and the applications using it. The keywords are associated with the database alias and affect all CLI and ODBC applications that access the database. The default location for the file is the sqllib directory on the Windows platform and the sqllib/cfg directory on Linux and UNIX. Note: db2iprune is a command line utility for Windows only. The feature is not available on Linux and UNIX. Note: The configuration profile can also be imported during installation of the client when using the response file installation method. This eliminates the use of db2cfimp.
- 107. Chapter 3. DB2 client deployment 93 To read more about db2cli.ini and keyword option, use the DB2 Information Center: http://publib.boulder.ibm.com/infocenter/db2luw/v9r5/topic/com.ibm.db2.luw.apdv .cli.doc/doc/c0007882.html 3.1.5 Compatibility You also have to consider compatibility issues in the deployment planning. Multiple instance compatibility If the application must coexist with other applications that use DB2, you might face compatibility problems. You must decide if all the DB2 dependent applications can use the same client, or if multiple clients are required. DB2 does support multiple instances of clients on the same machine. These instances might be of different versions or multiple instances of the same version. However, the compatibility considerations should be extended beyond DB2. An example is the use of distributed transactions, where the application is dependent on an external transaction manager. This transaction manager might not be able to handle more than one DB2 instances, which is the case with Microsoft Distributed Transaction Coordinator (MSDTC). Client /Server compatibility DB2 clients are backwards compatible, which means that you are not bound to have the same version level of DB2 on the client side as on the server side. Refer to Table 1-3 on page 12 for a matrix that shows the compatibility between different client and server versions. If any of your clients differ in version from the server, or if any of your clients are running on a different platform than the server, you will require at least one IBM Data Server Client for each version/platform that differs from the server. The reason is that a given client requires some bound packages on the server. These packages are created though the bind files that only come with the IBM Data Server Client. The packages are automatically bound the first time you connect through the IBM Data Server Client. The only scenario where you do not require the IBM Data Server Client is when all the clients are the exact same version as the server and they are running on the same operating system Note: The initialization file is NOT a part of the configuration profile. You have to handle them separately.
- 108. 94 DB2 Deployment Guide 3.1.6 Licensing The IBM Data Server Runtime Client and the IBM Data Server Driver can be distributed without any licensing. These products are free, while the IBM Data Server Driver require a license. 3.1.7 How to deploy the DB2 client Another important decision is how you want to deploy the DB2 client. There are several methods we can choose from, and each of them has its pros and cons. Each methods is described thoroughly in this chapter. 3.2 IBM Data Server Client, Runtime Client, Driver for ODBC, CLI, and .NET The installation methods for IBM Data Server Client, IBM Data Server Runtime Client, and IBM Data Server Driver for ODBC, CLI, and .NET are similar, and these IBM clients are generally referred to as the IBM data server client. If the system already has prior version of a client installed, migration should be considered. DB2 products, including IBM data server client, can be installed multiple times on a single machine. However, the following restrictions apply for the IBM data server client when installing multiple DB2 copies on a single system: Non-root/Non-Administrator installations do not support multiple DB2 copies. Multiple copies must be installed in a different path. The default directory name for installing multiple copies of DB2 product is: – C:Program FilesIBMsqllib_nn for Windows. – /opt/ibm/db2/V9.5_xx for Linux. – /opt/IBM/db2/V9.5_xx for AIX, HP-UX or Solaris. Where nn is the number of copies installed in that machine minus one, and xx is the number in the range 01 to 99. On a Windows platform, a maximum of 16 copies of Data Server Runtime Client and 16 copies of Data Server Driver for ODBC, CLI, and .NET can be installed on any given system.
- 109. Chapter 3. DB2 client deployment 95 For further details regarding installing multiple DB2 copies, refer to the following URLs in the DB2 Information Center: http://publib.boulder.ibm.com/infocenter/db2luw/v9r5/index.jsp?topic=/com.ibm.d b2.luw.admin.dbobj.doc/doc/r0024057.html http://publib.boulder.ibm.com/infocenter/db2luw/v9r5/index.jsp?topic=/com.ibm.d b2.luw.qb.client.doc/doc/t0007315.html The default copy name of the Data Server Driver for ODBC, CLI, and .NET on Windows is: IBMDBCL1 The default copy name of the Data Server Client or Data Server Runtime Client on Windows is: DB2COPY1 When installing a Data Server Client on a machine that already has a DB2 for Linux, UNIX, and Windows (LUW) Version 8 copy installed, users will be presented with the option to install a new copy or to migrate the DB2 Version 8 copy. Installing a new copy preserves the DB2 Version 8 copy and installs an additional DB2 Version 9 copy. Choosing to migrate will copy the DB2 Version 8 client instance settings to the DB2 Version 9 copy, then remove the DB2 8 copy. If a machine already has a DB2 Version 8 copy installed, the Version 9 copies cannot be set to default. When installing a Data Server Runtime Client, the installation program always installs a new copy. 3.2.1 IBM data server client installation methods The IBM data server client can be installed using the following methods: DB2 Setup wizard db2_install script (in Linux and UNIX) Response file The installation methods available for IBM data server client are similar to those available for IBM data server.
- 110. 96 DB2 Deployment Guide DB2 Setup wizard The DB2 Setup wizard can be executed in a language other than the default system language by manually invoking the DB2 Setup wizard and specifying a language code. For example, the setup –i fr command runs the DB2 Setup wizard in French on Windows (the db2setup –i fr command runs the DB2 Setup wizard in French in Linux and UNIX). For the Data Server Runtime Client or Data Server Driver for ODBC, CLI, and .NET, there are separate install images for each language. For further details regarding language identifiers for the DB2 Setup wizard, refer to the following URL: http://publib.boulder.ibm.com/infocenter/db2luw/v9r5/index.jsp?topic=/com.ibm.d b2.luw.qb.server.doc/doc/r0007940.html db2_install script The db2_install is for Linux and UNIX. This script installs all features of a DB2 product to a given path. This is similar to db2_install method available for DB2 server product. Refer to 2.2.2, “db2_install” on page 46 for details. Response file install A response file installation of the IBM data server client is similar to that of a DB2 server installation. Here are the steps for installing the IBM data server client using a response file: 1. Create a response file: – Modify a sample response file or manually create one. – Use the DB2 Setup wizard to generate a response file. – On Windows, you can also use the response file generator (db2rspgn). 2. If the response file was not created using the db2rspgn tool and if you want to include a database profile in your deployment, generate a DB2 profile using db2cfexp tool and include the DB2.CLIENT_IMPORT_PROFILE keyword with the configuration profile name. 3. Execute setup using the –u option with the response file. For further details regarding response file installation, refer to 2.2.3, “Response file” on page 48.
- 111. Chapter 3. DB2 client deployment 97 3.2.2 Client instance on the DB2 server If the machine already has a DB2 server product installed, it is not necessary to install a client because the DB2 server provides all the capability found in an IBM data server client. You can also create a separate client instance in the machine that has the DB2 server product installed. To create a separate client instance, use the db2icrt command with the -s option, as shown in the following example: db2icrt -s client <instname> 3.2.3 Reducing the installation image Despite the small footprint associated with the DB2 Data Server Runtime Client and the DB2 Data Server Client, you can further reduce the size of the DB2 product installation image on Windows by using the new db2iprune command. The db2iprune command line utility The db2iprune command line utility is located in the directory, db2windowsutilitesdb2iprune, and consists of an input file and a db2iprune executable file. It is available for Windows platforms and has the following syntax: Db2iprune –r <input file path> -p <root directory path> –o <destination directory path> Where: -r <input file path> Specifies the full path to the input file that is to be used. The input file, or .prn file, contains a full list of removable components and is used to indicate what features and languages you would like removed from the installation image. Note: After deployment, bind the CLI and DB2 utility package using the following commands: db2 bind @db2cli.lst blocking all grant public db2 bind @db2ubind.lst blocking all grant public Bind has to be done only once from any one client of the same DB2 level. You do not have to perform bind with every client (of the same DB2 level) to a server during deployment.
- 112. 98 DB2 Deployment Guide -p <root directory path> Specifies the full path to the root directory of the source installation image. This directory contains setup.exe, and is the root directory of the DB2 installation DVD. -o <destination directory path> Specifies the full path to where the new DB2 pruned image is copied. Make sure that you have write access to this directory. The input file for db2iprune contains a full list of removable features and has the .prn extension. The input file contains three keywords: PROD, LANG, and COMP. The PROD keyword identifies the DB2 installation image to be pruned. The LANG keyword specifies the languages. The COMP keyword specifies the features. You can uncomment several COMP or LANG keywords in the same input file to remove several features or languages. The db2iprune utility removes the cabinet (.cab) files associated with those features and languages that have not been commented out in the input file (.prn file). Once pruned image is installed, the resulting product will only contain a subset of features and take up a smaller footprint than that of a full DB2 product image. For example, if you want to remove the DB2 Configuration assistant, DB2 Control Center, as well as language support for Japanese and Korean, you have to remove the comments from the following lines in db2client.prn (Example 3-1). Example 3-1 Entries in the .prn file COMP = CONFIGURATION_ASSISTANT ** Configuration Assistant COMP = CONTROL_CENTER ** Control Center LANG = JP ** Japanese (ja_JP) LANG = KR ** Korean (ko_KR) The following steps are for reducing the size of a DB2 product installation image using the db2iprune utility: 1. Open the input file (.prn file) located in the db2iprune directory on the install image. Uncomment the features and languages you want to remove from the DB2 installation image by removing the asterisk(*). 2. Execute the db2iprune command from the command line. db2iprune –r C:db2rtcl.prn –p d: -o e:compact_rtcl
- 113. Chapter 3. DB2 client deployment 99 3. Use any of the installation methods discussed earlier to install and maintain a pruned DB2 installation image. Considerations for a pruned DB2 installation Consider the following precautions if you plan to prune a DB2 installation: DB Setup wizard installation: – With the TYPICAL installation, the regular TYPICAL components for that product are installed without the components removed by the db2iprune command. – With the COMPACT installation, the regular COMPACT components for that product are installed without the components removed by the db2iprune command. – With the CUSTOM installation, only the remaining components are displayed in the feature selection panel. The components removed by the db2iprune command are not displayed as optional components to install. However, the removed languages will still be displayed in the language selection panel. Ensure that you do not select a language that has been removed from the image using the db2iprune command. If you select a language that has been removed, you will receive an error message. Response file installation: – Ensure that you specify only the languages and features available in the DB2 pruned installation image. If your response file contains components that have been removed, you will get an error message. – The db2iprune input file is used to specify which features and languages are to be removed from the DB2 install image, whereas the product response file is used to specify components that you want to install. – The db2iprune input file is used to cut/remove unwanted features and languages from the install image, while the product response file is used to select components to be installed from the image. Therefore, any features and languages that were removed using db2iprune from the image cannot be installed if selected in the response file, and an error will be returned. Fix pack considerations with db2iprune install – As the DB2 fix pack installation image for Windows consists of a full installation image, the db2iprune command can be used with fix pack images. The fix pack application process is the same for full and pruned images. When the DB2 fix pack is installed, it detects and updates only the components that were installed using the db2iprune command and ignores any components that are not installed.
- 114. 100 DB2 Deployment Guide 3.2.4 Mass deployment of IBM data server client product We have discussed general deployment methods for the DB2 server product in 2.2, “DB2 server deployment methods” on page 42 and these methods are also applicable to the IBM data server client. The general types of deployment methods involve either push deployment or pull deployment. The push deployment method involves DB2 installation being initialized by a central location without any user intervention, while the pull deployment involves DB2 installation being initiated by each deployment target system on its own. With the use of a deployment script, you have to ensure that the installation image is accessible to all deployment targets. An example of the pull deployment method using a script is described in 2.2, “DB2 server deployment methods” on page 42. The push deployment method usually involves an automated service such as rshd, sshd, Microsoft System Management Server, Microsoft System Center Configuration Manager, or other third party deployment software. IBM data server client deployment on Windows With Microsoft Systems Management Server (SMS) and Microsoft System Center Configuration Manager (SCCM), you can install DB2 products across a network, and set up the installation from a central location. The Microsoft System Center Configuration Manager is a new release of Microsoft Systems Management Server. An SMS/SCCM installation minimizes the amount of work the users will have to perform. This installation method is ideal if you want to roll out an installation based on the same setup on a large number of clients. You must have at least SMS Version 2.0 installed and configured on your network for both your SMS server and SMS workstation. Refer to Microsoft's Systems Management Server Administrator's Guide for your platform for more details on how to: Set up SMS (including setting up primary and secondary sites). Add clients to the SMS system. Set up inventory collection for clients. When you are using SMS/SCCM, you have control over which response file you will use. You can have several different installation options, resulting in several different response files. When you configure the SMS/SCCM install package, you can specify which response file to use.
- 115. Chapter 3. DB2 client deployment 101 For further details regarding Microsoft’s Systems Management Server, refer to the following URL: http://www.microsoft.com/technet/downloads/sms.mspx To install DB2 products using SMS/SCCM, perform these steps: 1. Import the DB2 install file into SMS/SCCM. 2. Create the SMS/SCCM package on the SMS/SCCM server. 3. Distribute the DB2 installation package across your network. Packaging IBM data server client product using Microsoft SMS The steps for importing DB2 install file and packaging IBM data server client product using Microsoft Systems Management Server are as follows: 1. Place the IBM data server client installation image on a location where it can be accessed and edited. 2. Use db2iprune to reduce installation image if necessary. 3. Create a DB2 response file. 4. Start the SMS Administrator Console on a SMS 2003 distribution point server by selecting Start → Programs → Systems Management Server → SMS Administrator Console. 5. Open the Site Database object tree from the SMS Administrator Console and right-click Packages, then select New → Package From Definition as shown in Figure 3-2. Figure 3-2 SMS Administration Console
- 116. 102 DB2 Deployment Guide 6. Click Next to continue from the window, Welcome to the Create Package from Definition Wizard, as shown in Figure 3-3. Figure 3-3 Welcome screen 7. On the window, Create Package from Definition Wizard (Figure 3-4), click Browse to search for the DB2 package definition file (.pdf). Figure 3-4 Package Definition window
- 117. Chapter 3. DB2 client deployment 103 8. Select the appropriate .pdf file from the DB2 installation image. These images are located in the db2Windowssamples path. In this example we are installing the DB2 Data Server Client. Select db2client.pdf as shown in Figure 3-5, then click Open. Figure 3-5 Selecting DB2 package definition 9. You will be returned to the window, Create Package from Definition Wizard. The DB2 product you have selected should now appear in the Package definition box. In our scenario, “IBM Data Server Client” is shown in the Package definition box as in Figure 3-6. Click Next to continue. Figure 3-6 Package definition window with DB2 package selected
- 118. 104 DB2 Deployment Guide 10.From the Source Files window, select Create a compressed version of the source as shown in Figure 3-7. The default is “This package does not contain any files”. Click Next to continue. Figure 3-7 Source Files window 11.From the Source Directory window, you can either specify a local drive or a network path for the IBM Data Server client installation image. In our case, it is located in the local drive. Click the Browse button to find the image or specify the IBM Data Server Client installation image path as shown in Figure 3-8. Click Next to continue. Figure 3-8 Specify source directory for selected package
- 119. Chapter 3. DB2 client deployment 105 12.From the window, Create Package from Definition Wizard, select Finish to complete the Create Package from Definition Wizard as shown in Figure 3-9. Figure 3-9 Completing the Create Package from Definition Wizard 13.You will be returned to the window, Create Package from Definition Wizard, as shown in Figure 3-10. Figure 3-10 Create Package from Definition Wizard
- 120. 106 DB2 Deployment Guide Distributing DB2 installation packages to clients using the Microsoft SMS Once the DB2 installation package has been created in Microsoft SMS, it is now available for distribution across your SMS network. Next we list the general steps for distributing the DB2 installation package across a SMS network: 1. From the window, Create Package from Definition Wizard, right-click Packages and select All Tasks → Distribute Software as shown in Figure 3-11. Figure 3-11 Start software distribution
- 121. Chapter 3. DB2 client deployment 107 2. Click Next on the window, Welcome to the Distribute Software Wizard, as shown in Figure 3-12, to proceed. Figure 3-12 Welcome to the Distribute Software Wizard 3. Select the radio button, Select an existing package, and select the DB2 product you want to deploy from the Packages window as shown in Figure 3-13. Click Next to continue. Figure 3-13 Selecting an existing package for distribution
- 122. 108 DB2 Deployment Guide 4. Select the distribution points for the DB2 package from the Distribution Software Wizard. All available distribution points will be shown in the panel. We have chosen only distribution point LEAD as shown in Figure 3-14. Click Next to continue. Figure 3-14 Selecting distribution points 5. Ensure that the radio button for advertising a program is set to Yes in the Advertise a Program window as shown in Figure 3-15. This should be the default. Click Next to continue. Figure 3-15 Advertise a Program window
- 123. Chapter 3. DB2 client deployment 109 6. Select a program to be advertised to members of SMS distribution from the Select a Program to Advertise window as shown in Figure 3-16. Click Next to continue. Figure 3-16 Select a Program to Advertise window 7. Select either an existing collection of machines where you want to advertise and install the DB2 program selected, or create a new collection of machines as shown in Figure 3-17. Click Next to continue. Figure 3-17 Advertisement Target window
- 124. 110 DB2 Deployment Guide 8. You can specify name to identify the advertisement in the Name field and add an optional comment from the Advertisement Name window as shown in Figure 3-18. Click Next to continue. Figure 3-18 Advertisement Name window 9. Select whether the advertisement should apply to subcollections or not from the Advertise to Subcollections window as shown in Figure 3-19. Click Next to continue. Figure 3-19 Advertise to Subcollections window
- 125. Chapter 3. DB2 client deployment 111 10.Specify when you want the program to be advertised and installed, on the Advertisement Schedule window, as shown in Figure 3-20. Click Next to continue. Figure 3-20 Advertisement Schedule window 11.Specify whether this program deployment should be mandatory for your SMS clients or not, on the Assign Program window, as shown in Figure 3-21. Click Next to continue. Figure 3-21 Assign Program window
- 126. 112 DB2 Deployment Guide 12.Now the window, Completing the Distribute Package Wizard, will appear and you can click Finish to advertise the program to SMS Clients (Figure 3-22). Figure 3-22 Completing the Distribute Software Wizard window Packaging IBM data server client product using Microsoft SCCM Perform the following steps to import DB2 install files, and package the IBM data server client product using Microsoft System Center Configuration Manager 2007: 1. Place the IBM data server client installation image in a location where it can be accessed and edited. 2. Use db2iprune to reduce the installation image if necessary. 3. Create a DB2 response file. 4. Start the Configuration Manager Console on the System Center Configuration Manager distribution point server by selecting Start → Programs → Microsoft System Center → Configuration Manager 2007 → ConfigMgr Console. 5. Open the Site Database object tree from the Configuration Manager Console and expand the Computer Management section. Under the Computer Management section, you should see the Software Distribution. Expand the Software Distribution and right-click the Packages, then select New → Package From Definition as shown in Figure 3-23.
- 127. Chapter 3. DB2 client deployment 113 Figure 3-23 Configuration Manager Console 6. Click Next to continue from the window, Welcome to the Create Package from Definition Wizard (Figure 3-24).
- 128. 114 DB2 Deployment Guide Figure 3-24 Welcome to the Create Package from Definition Wizard window 7. From the window, Create Package from Definition (Figure 3-25), click Browse to search for the DB2 package definition file. Figure 3-25 Create Package from Definition Wizard window 8. Select the appropriate .pdf file from the DB2 installation image. These images are located in the db2WindowsSamples path.
- 129. Chapter 3. DB2 client deployment 115 In this example we are installing DB2 Data Server Client. Select db2client.pdf as shown in Figure 3-26, then click Open. Figure 3-26 Selecting.pdf file 9. You will be returned to the window, Create Package from Definition Wizard. The DB2 product you have selected should now appear in the Package definition box. In our scenario “IBM Data Server Client” is shown in the Package definition box as in Figure 3-27. Click Next to continue. Figure 3-27 Create Package from Definition Wizard window
- 130. 116 DB2 Deployment Guide 10.From the Source Files window, select Create a compressed version of the source files as shown in Figure 3-28. Click Next to continue. Figure 3-28 Source Files window
- 131. Chapter 3. DB2 client deployment 117 11.From the Source Directory window, you can either specify a local drive or a network path for the IBM Data Server Client installation image. In our case, it is located in the local drive. Click the Browse button to find the image or specify the IBM Data Server Client installation image path as shown in Figure 3-29. Click Next to continue. Figure 3-29 Source Directory window
- 132. 118 DB2 Deployment Guide 12.From the window, Create Package from Definition Wizard, select Finish to complete the Create Package from Definition Wizard as shown in Figure 3-30. Figure 3-30 Completing the Create Package from Definition Wizard
- 133. Chapter 3. DB2 client deployment 119 13.You will be returned to the window, Create Package from Definition Wizard (Figure 3-31). Figure 3-31 Create Package from Definition Wizard window Distributing DB2 install packages using the Microsoft SCCM After the DB2 installation package has been created in Microsoft SCCM, it is now available for distribution across your SCCM network. Here we list the general steps for distributing the DB2 installation package across an SCCM network: 1. From the window, Create Package from Definition Wizard, right-click Packages and select All Tasks → Distribute Software as shown Figure 3-32.
- 134. 120 DB2 Deployment Guide Figure 3-32 Starting software distribution 2. Click Next on the window, Welcome to the Distribute Software Wizard, as shown in Figure 3-33, to proceed. Figure 3-33 Welcome to the Distribute Software Wizard window 3. Select the radio button, Select an existing package, and select the DB2 product you want to deploy from the Packages window, as shown in Figure 3-34. Click Next to continue.
- 135. Chapter 3. DB2 client deployment 121 Figure 3-34 Packages window 4. Select the distribution points for the DB2 package from the Distribution Software Wizard. We have chosen only the distribution point LOCHNESE as shown in Figure 3-35. Click Next to continue. Figure 3-35 Distribution Points window
- 136. 122 DB2 Deployment Guide 5. Ensure that the radio button for Yes is selected for the advertising program for the package listed on the Advertise Program window, as shown in Figure 3-36. This should be the default. Click Next to continue. Figure 3-36 Advertise a Program window
- 137. Chapter 3. DB2 client deployment 123 6. Select the Setup program to be advertised to members of the SCCM distribution from the window, Select a Program to Advertise, as shown in Figure 3-37. Click Next to continue. Figure 3-37 Select a Program to Advertise window
- 138. 124 DB2 Deployment Guide 7. Select either an existing collection of machines where you want to advertise and install the DB2 program selected, or create a new collection of machines as shown in Figure 3-38. Click Next to continue. Figure 3-38 Advertisement Target window
- 139. Chapter 3. DB2 client deployment 125 8. You can specify a name to identify the advertisement in the Name field and add an optional comment from the Advertisement Name window, as shown in Figure 3-39. Click Next to continue. Figure 3-39 Advertisement Name window
- 140. 126 DB2 Deployment Guide 9. Select whether the advertisement should apply to subcollections or not from the window, Advertise to Subcollections, as shown in Figure 3-40. Click Next to continue. Figure 3-40 Advertise to Subcollections window
- 141. Chapter 3. DB2 client deployment 127 10.Specify when you want the program to be advertised and installed on the window, Advertisement Schedule, as shown in Figure 3-41. Click Next to continue. Figure 3-41 Advertisement Schedule window
- 142. 128 DB2 Deployment Guide 11.Specify whether this program deployment should be mandatory for your SCCM clients or not on the window, Assign Program, as shown in Figure 3-42. Click Next to continue. Figure 3-42 Assign Program window
- 143. Chapter 3. DB2 client deployment 129 12.Now the window, Completing the Distribute Package Wizard, will be displayed. You can click Finish to advertise the program to SCCM Clients. See Figure 3-43. Figure 3-43 Distribute Package Wizard window After clicking the Next button, you should see the message, The Distribute Software Wizard completed successfully, as shown in Figure 3-44.
- 144. 130 DB2 Deployment Guide Figure 3-44 Completion of Distribute Software Wizard IBM data server client deployment on Linux and UNIX A common method for deploying the IBM data server client is through use of a script, which is executed on the target machine. This is referred to as push deployment and has been discussed in 2.2, “DB2 server deployment methods” on page 42. The push deployment involves installation initiated from a central point where it establishes connection to the deployment targets and does not require any user action. The pull deployment can utilize third party software or an automated service such as rshd, sshd, or other such services. Example 3-2 demonstrates push deployment. This example takes in a parameter that is a target machine where DB2 is to be installed and performs a single installation. A given script can be further modified to include a for loop to list the number of target workstations, or be placed with in a loop of another script. Example 3-2 Push deployment script #! /bin/sh ssh -l root "$1" "mkdir /DB2TEMPS; # Makes directory on the target # Mounts nfs to newly created directory mount -t nfs -o ro mensa:/softwares/DB2/Client /DB2TEMPS; db2setup -u db2client.rsp; # Install db2 using response file umount /DB2TEMPS; rmdir /DB2TEMPS" # Unmount the nfs and remove dir
- 145. Chapter 3. DB2 client deployment 131 3.3 Thin Client deployment The Thin Client is an alternative method for leveraging an IBM data server client, which is available for the Windows 32-bit environment. The thin client topology involves the IBM data server client code being installed on the code server, rather than on each client workstation. Each thin client workstation only has a minimal amount of code and configuration is required. In a thin client, IBM data server client code is dynamically loaded from the code server as required. The thin client then connects to the database in the usual fashion. Use of thin clients is ideal for situations where client workstations require only occasional access to a database or when it would be difficult to set up the IBM data server client on each client workstation. The thin client implementation requires less disk space on each workstation and you can install, update, or migrate the code on only one code server. A disadvantage of using a thin client is that the DB2 code must be loaded dynamically from the code server across a LAN connection, thus impacting performance and increasing network traffic. The catalog information is maintained on each thin client workstation and not at the code server. The db2rspgn command is not supported on the thin client. For DB2 Connect Personal Edition, each thin client workstation requires license for given product. The thin client topology is only available for installing IBM data Server Client or DB2 Connect Personal edition on Windows 32-bit environment. This method does not apply to IBM Data Server Runtime Client or IBM Data Server Driver for ODBC, CLI, and .NET. Further information regarding thin client topology can be found in: http://publib.boulder.ibm.com/infocenter/db2luw/v9r5/index.jsp?topic=/com.ibm.d b2.luw.qb.client.doc/doc/c0007236.html These are the steps for thin client installation: 1. Installing an IBM Data Server Client or DB2 Connect Personal Edition on the code server. 2. Making the code directory on the code server available to all thin workstations. 3. Creating a thin client response file. 4. Mapping a network drive from each thin client workstation to the code server. 5. Running the thnsetup command to enable each thin client.
- 146. 132 DB2 Deployment Guide Installing IBM Data Server Client or DB2 Connect Personal Edition on the code server The installation steps for installing IBM Data Server client or DB2 Connect Personal Edition on the code server is similar to installing any other DB2 product. However, you must select Custom installation type and from the Select the Features to install Windows, select Server Support, and then select Thin Client Code server as shown in Figure 3-45. Figure 3-45 Select the features to install Making the code directory available to all thin client workstations In order to load the required code from the code server, each of the target thin client workstations must be able to read the directory where IBM Data Server Client or DB2 Connect Personal Edition source code is installed. The following steps demonstrate an example for Windows XP: 1. On the code server, launch Windows Explorer. 2. Select the directory on the code server that will be used to serve thin client workstations. For this example, select the C:Program FilesIBMsqllib directory to set up the share. 3. Select File → Properties from the menu bar.
- 147. Chapter 3. DB2 client deployment 133 4. Click the Sharing tab. 5. Click the radio button, Share this folder. 6. In the Share Name field, enter a share name that is eight characters or fewer. For example, enter NTCODESV. 7. Provide read access to the code directory to all thin client users: a. Click Permissions. The Share Permissions window opens. b. In the Group or Users Name list, highlight the Everyone group. Note that you can give access to the Everyone group, to a group that you have specifically defined for thin client users, or to individual thin client users. c. Select Read as shown in Figure 3-46. d. Click OK until all windows are closed. Figure 3-46 Sharing the code server directory Creating a thin client response file After IBM Data Server client or DB2 Connect Personal Edition has been installed on the code server, you will require a response file for the thin client. The thin client sample response file, db2thin.rsp, is located in the directory, C:Program FilesIBMsqllibthnsetup, where C:Program FilesIBMsqllib represents the location where you installed your thin client code server.
- 148. 134 DB2 Deployment Guide Mapping a network drive from each thin client to the code server To map a network drive from the thin client, perform the following steps: 1. Launch Windows Explorer. 2. On the Tools menu, click Map Network Drive. 3. In the Drive list, select the drive to which you want to map the location of the code server. 4. In the Folder field, specify the location of the share as follows: computer_nameshare_name Where: computer_name represents the computer name of the code server. share_name represents the share name of the shared directory on the code server. 5. Select the Reconnect at Logon check box to make the share persistent. Setting up thin clients using the thnsetup command The thnsetup command sets up the thin client workstation and makes the required links to the code server. The syntax for thnsetup command is: Thnsetup /P <drive:path> /U <drive:pathresponsefile> [/L <drive:pathlogfile>] /M <machine> [/S <sharename>] where: /P Specifies the path where the DB2 code is installed on the code server. This parameter is required. If you have not already mapped a persistent network drive to the code server. The value of this parameter should be the drive letter used to represent the network drive. /U Specifies the fully qualified response file name. This parameter is required. Normally, the file is located on the code server in the directory, C:Program FilesIBMsqllibthnsetup, where C:Program FilesIBMsqllib represents the drive where you installed your thin client code server. /L Specifies the fully qualified log file name, where setup information and any errors occurring during setup will be logged. This parameter is optional. If you do not specify the log file name, the default db2.log file name is used. This file will be created in the db2log directory, on the drive where your operating system is installed. /M Specifies the name of the code server. This parameter is required.
- 149. Chapter 3. DB2 client deployment 135 /S Specifies the share name of the code server where you installed the DB2 product. This parameter is necessary only if you did not map a persistent network drive. This parameter is mandatory on Windows XP and Windows Server 2003 operating systems. Here is a sample command for thnsetup: x:thnsetupthnsetup /P x: /U x:thnsetuptest.rsp /M machineName Upon completion of the thnsetup command, the db2.log in y:db2log directory should be checked for any message (where y is the drive on which the DB2 code is installed). All deployment methods should be tested in a test environment prior to full deployment in a production environment.
- 150. 136 DB2 Deployment Guide
- 151. © Copyright IBM Corp. 2008. All rights reserved. 137 Chapter 4. Deploying applications with DB2 In this chapter, we discuss deploying various applications with DB2 drivers. We introduce deployment on Java, C/C++, PHP, Ruby, Python, Perl, and .NET. We focus on how to access a DB2 database from various applications without installing a full DB2 Client. We introduce DB2 products that facilitate this functionality and ways to deploy them with your application. 4
- 152. 138 DB2 Deployment Guide 4.1 Introduction to application deployment package The application deployment package, in the context of this book, consists of your application and a DB2 product that is required to access DB2 databases. It is used to facilitate the deployment process of your application with a DB2 product. DB2 offers various products that can be used to create the application deployment package. Many of these products can be re-distributed with your application. We have already discussed DB2 server products (Chapter 2 on page 29) as well as the DB2 Data Server client and DB2 Data Server Runtime client (Chapter 3 on page 89). In this section, we discuss the IBM Data Server Driver for JDBC and SQLJ, IBM Data Server Driver for ODBC and CLI, and IBM Data Server Driver for ODBC, CLI, and .NET. 4.1.1 IBM Data Server Driver for JDBC and SQLJ IBM Data Server Driver for JDBC and SQLJ is a single driver that includes JDBC Type 2 and JDBC Type 4 connection as well as SQLJ support. We should clarify that even though IBM Data Server Driver for JDBC and SQLJ includes both Type 2 and Type 4 connection functionality, we utilize Type 4 connectivity, which is available through downloading db2jcc.jar or db2jcc4.jar as well as sqlj.zip or sqlj4.zip from the DB2 database server, or through the IBM download site mentioned in Table 1-1 on page 6. This minimize the footprint and reduces the size of the application deployment package that has to be transferred through the network. Two versions of the JDBC drivers are available for the IBM Data Server Driver for JDBC and SQLJ. The db2jcc.jar and sqlj.zip files are JDBC 3.0 compliant, and db2jcc4.jar and sqlj4.zip files are JDBC 4.0 compliant. Prerequisites The prerequisites for installing IBM Data Server Driver for JDBC and SQLJ are listed here: Java SDK 1.4.2 or later: For all DB2 products except IBM Data Server Runtime Client, the installation process automatically installs Java SDK, version 4. For JDBC 4.0 functions, you have to install Java SDK 6 or later manually. Java native thread support: Java Virtual Machine (JVM™) must include native thread support if you run Java applications that access DB2 databases.
- 153. Chapter 4. Deploying applications with DB2 139 IBM Data Server Driver for JDBC and SQLJ license files for connection to DB2 for z/OS and DB2 for i5/OS: License file db2jcc_license_cisuz.jar can be found in the sqllibjava directory for Windows systems, or the sqllib/java directory for UNIX or Linux systems. These files have to be included in the CLASSPATH. If your applications use IBM Data Server Driver for JDBC and SQLJ to connect to iSeries servers or HP-UX clients and servers, the following requirements are necessary: Unicode support for iSeries servers: If your applications use Type 4 connectivity to connect to a DB2 for i5/OS server, the OS/400 operating system must support the Unicode UTF-8 encoding scheme. Table 4-1 lists the OS/400 Program Temporary Fix (PTF) that you require for Unicode UTF-8 support. Table 4-1 lOS/400 PTFs for Unicode UTF-8 support Java support for HP-UX clients and servers: – HP-UX servers: The IBM Data Server Driver for JDBC and SQLJ does not support databases that are in the HP-UX default character set, Roman8. Therefore, while creating a database on an HP-UX server that you plan to access with the IBM Data Server Driver for JDBC and SQLJ, use a different character set such as utf8. – HP-UX clients and servers: The Java environment on an HP-UX system requires special setup to run stored procedures under the IBM Data Server Driver for JDBC and SQLJ. For example, you have to give HP-UX runtime linker access to Java shared libraries. Refer to the following Web site for instructions on how to set up HP-UX systems to run Java stored procedures: http://publib.boulder.ibm.com/infocenter/db2luw/v9r5/index.jsp?topic=/co m.ibm.db2.luw.apdv.java.doc/doc/t0004877.html Note: License files are not required for connection to the DB2 Database Server for Linux, UNIX, and Windows. OS/400 version PTF numbers V5R3 or later None (support is included) V5R2 SI06541, SI06796, SI07557, SI07564, SI07565, SI07566, and SI07567 V5R1 SI06308, SI06300, SI06301, SI06302, SI06305, SI06307, and SI05872
- 154. 140 DB2 Deployment Guide Installation procedure You can obtain the IBM Data Server Driver for JDBC and SQLJ from the DB2 product CD or download it from the IBM Web site at: http://www.ibm.com/software/data/db2/ad/deploy.html Remember that this downloaded driver can be used for Type 4 mode only. To install the downloaded driver on the client machine: 1. Uncompress the compressed file, db2_v9_db2driver_for_jdbc_sqlj.zip, to a directory. The directory now contains db2jcc.jar, db2jcc4.jar, sqlj.zip and sqlj4.zip files. 2. Include db2jcc.jar and sqlj.zip in the CLASSPATH to start using the JDBC 3.0 specification driver. If you wish to use JDBC 4.0 specification driver, include db2jcc4.jar and sqlj4.zip in the CLASSPATH instead. 3. A license file is required if connecting to a database in z/OS or i5/OS. Include the license file named db2jcc_license_cisuz.jar in CLASSPATH to connect to DB2 for z/OS and DB2 for i5/OS databases. All DB2 connect products include this license file which is located in sqllib/java for the Linux or UNIX systems and sqllibjava for the Windows systems. IBM Data Server Driver for JDBC and SQLJ files The IBM Data Server Driver for JDBC and SQLJ are installed by default when you install IBM Data Server Client, IBM Data Server Runtime Client and server products such as DB2 Enterprise Server Edition If your application is running on the same system with these products, no further installation is required. If the driver is installed with DB2 server product or client products, the class files are placed in sqllib/java directory for Linux or UNIX systems and sqllibjava directory for Windows systems. The files are: db2jcc.jar and db2jcc4.jar These file contain all JDBC classes and the SQLJ runtime classes for the IBM Data Server Driver for JDBC and SQLJ. DB2 includes db2jcc.jar in the CLASSPATH during installation process. This file is for applications that use JDBC 3.0 and earlier functions. You have to manually include db2jcc4.jar in the CLASSPATH for using JDBC 4.0 and earlier functions. Do not include both. Note: If you want to use Type 2 connectivity with your application, DB2 Data Server Runtime client or another full DB2 product will be required.
- 155. Chapter 4. Deploying applications with DB2 141 sqlj.zip and sqlj4.zip: These file contain classes that are required to prepare SQLJ applications for execution under the IBM Data Server Driver for JDBC and SQLJ. DB2 includes sqlj.zip in the CLASSPATH during the installation process. This file is for applications that use JDBC 3.0 and earlier functions. You have to manually include sqlj4.zip in the CLASSPATH to use JDBC 4.0 and earlier functions. Do not include both. On DB2 server products that can perform Connect gateway functionality, IBM Data Server Driver for JDBC and SQLJ license files are installed and placed in the sqllib/java directory for the Linux or UNIX systems and the sqllibjava directory for the Windows systems. The license files are not required for connections to the DB2 database for Linux, UNIX, and Windows (LUW) using IBM Data Server Driver for JDBC and SQLJ Version 3.50 or later. IBM Data Server Driver for JDBC and SQLJ native libraries are also installed to support Type 2 connectivity. These are placed in the sqllib/lib directory for Linux and UNIX systems, or the sqllibbin directory for Windows systems. Table 4-2 shows the library file names for different platforms. Table 4-2 Library file names for different platforms Database server configuration setup To allow successful application connection to a DB2 database with IBM Data Server Driver for JDBC and SQLJ, check these settings in the database server: Remote client connectivity: In general, the DB2 database should be already configured to allow remote access. Follow this procedure to configure the database for remote client access: a. Check if TCP/IP is already enabled using the following command: db2set -all Check if DB2COMM=TCPIP is presented in the output. If it is not already present, set the environment variable DB2COMM to TCPIP: db2set DB2COMM=TCPIP Platform File name AIX, HP-UX, Linux, and Solaris libdb2jcct2.so Windows db2jcct2.dll
- 156. 142 DB2 Deployment Guide b. Update the database manager configuration file with the appropriate TCP/IP service name. The service name is specified in the services file located at /etc/services on Linux and UNIX systems and at c:WINDOWSsystem32driversetcservices on Windows systems. update dbm cfg using SVCENAME TCP/IP-service-name c. Run the db2stop and db2start commands for the service name setting change to take effect: db2stop db2start DB2_USE_DB2JCCT2_JROUTINE environment variable: If you plan to run Java stored procedures or user-defined functions, ensure that the DB2_USE_DB2JCCT2_JROUTINE DB2 environment variable is not set, or is set to its default value of YES, yes, ON, on, TRUE, true, or 1 on DB2 for LUW servers. If you have to run stored procedures under the DB2 JDBC Type 2 driver, ensure that DB2_USE_DB2JCCT2_JROUTINE environment variable is set to OFF. Java SDK path: If you plan to run Java stored procedures or user-defined functions, update the database manager configuration on DB2 servers to include the path where the SDK for Java is located: – For database systems on Linux or UNIX: db2 update dbm cfg using JDK_PATH /home/db2inst/jdk15 Assuming that /home/db2inst/jdk15 is the path where the SDK for Java is installed. – For database systems on Windows: db2 update dbm cfg using JDK_PATH c:Program Filesjdk15 Assuming that c:Program Filesjdk15 is the path where the SDK for Java is installed. To verify the correct value for the JDK_PATH field in the DB2 database manager configuration, enter the following command on the database server: db2 get dbm cfg Note: The port number used for applets and SQLJ programs must be the same as the TCP/IP SVCENAME number used in the database configuration file.
- 157. Chapter 4. Deploying applications with DB2 143 You might want to redirect the output to a file for easier viewing. The JDK_PATH field appears near the beginning of the output. Date and time format: If you plan to call the SQL procedures that are on the DB2 servers from a Java program, and the date and time format that is associated with the territory code of the database servers is not the USA format, take the following actions: a. On database server, set the DB2_SQLROUTINE_PREPOPTS registry variable to indicate that the default date and time format is ISO: db2set DB2_SQLROUTINE_PREPOPTS="DATETIME ISO" b. Redefine any existing SQL procedures that you plan to call from Java programs. These steps are necessary to ensure that the calling application receives date and time values correctly. Access DB2 for z/OS database: If you plan to access DB2 for z/OS database servers with your Java applications, follow the instructions at the following site: http://publib.boulder.ibm.com/infocenter/db2luw/v9r5/index.jsp?topic=/com.i bm.db2.luw.apdv.java.doc/doc/t0024156.html 4.1.2 IBM Data Server Driver for ODBC, CLI, and .NET, and IBM Data Server Driver for ODBC and CLI The IBM Data Server Driver for ODBC, CLI, and .NET, and IBM Data Server Driver for ODBC and CLI provides a lightweight deployment solution for applications that utilize the DB2 CLI application programming interface (API), ODBC API, or .NET API (on Windows only). The only distinction between the IBM Data Server Driver for ODBC, CLI, and .NET, and IBM Data Server Driver for ODBC and CLI is that IBM Data Server Driver for ODBC, CLI, and .NET is the driver name for the Windows platform, which includes .NET API support, while the other is for Linux and UNIX, which do not have .NET API support. This driver is not a part of the IBM Data Server Client or IBM Data Server Runtime client, although both the IBM Data Server Client and IBM Data Server Runtime client support CLI and ODBC API. The IBM Data Server Driver for ODBC and CLI and IBM Data Server Driver for ODBC, CLI, and .NET are available as a separate install.
- 158. 144 DB2 Deployment Guide Apart from runtime support for DB2 CLI API and ODBC API, this driver offers runtime support for Transaction API. It also provides database connectivity, Lightweight Directory Access Protocol (LDAP) Database Directory support, as well as tracing, logging, and diagnostic support. IBM Data Server Driver for ODBC and CLI and IBM Data Server Driver for ODBC, CLI, and .NET are provided to facilitate DB2 application deployment. Some of the advantages are: It has a smaller footprint than IBM Data Server Client and the IBM Data Server Runtime Client. It simplifies application deployment. You can include the driver in your database application installation package and redistribute the driver with your application. Also, under certain conditions, you can redistribute the driver with your database application royalty-free. Multiple installations of the driver can reside on a single system. It can co-exist with IBM Data Server Client. Restrictions of IBM Data Server Driver for ODBC, CLI, and .NET, and IBM Data Server Driver for ODBC and CLI The driver supports a subset of the IBM Data Server Client functionality. It does not support the following functionality: Command line processor (CLP). CLI and ODBC application development. Administrative API. Automatic install: The installation and configuration process of IBM Data Server Driver for ODBC and CLI is manual. Some of the IBM Data Server Clients functionality are supported with restrictions: There is no local database directory. LDAP cache is not saved in disk. Messages are reported only in English. Not all diagnostic utilities are available. Obtaining IBM Data Server Driver for ODBC, CLI, and .NET, and IBM Data Server Driver for ODBC and CLI You can obtain IBM Data Server Driver for ODBC and CLI or IBM Data Server Driver for ODBC, CLI, and .NET through IBM Web site. They are also available on a DB2 version 9.5 installation CD.
- 159. Chapter 4. Deploying applications with DB2 145 Download DB2 Driver for ODBC and CLI for Linux and UNIX from the following IBM Web site: https://www14.software.ibm.com/webapp/iwm/web/preLogin.do?lang=en_US&source=swg -idsdoc11 Download DB2 Driver for ODBC, CLI, and .NET for Windows from the following IBM Web site: https://www14.software.ibm.com/webapp/iwm/web/preLogin.do?lang=en_US&source=swg -swg-idsdocn11 You can also copy the driver compressed file from the DB2 Version 9.5 install CD. The compressed file is located at <CD top>/db2/<platform>/clidriver on the CD. The <platform> is one of the following possibilities: aix hpipf hpux linux linux390 linux64 linuxamd64 linuxppc sunos Windows The driver files and their locations are as follows: Windows: db2Windowsclidriverdb2_driver_for_odbc_cli.zip. Linux and UNIX: db2/linux/clidriver/db2_driver_for_odbc_cli.tar.Z. Note: For Windows, you can also obtain IBM Data Server Driver for ODBC, CLI, and .NET, which provides runtime support for applications using DB2 ODBC API, CLI API, and .NET API. This is available as an installable image. The merge modules are available for embedding the client in the Windows installer based installation. The client can be downloaded from: http://www.ibm.com/support/docview.wss?rs=71&uid=swg21288110 Search for IBM Data Server Driver for ODBC, CLI, and .NET and download your specific language version. The code merge module can be downloaded from the same URL by searching for IBM Data Server Driver for ODBC, CLI, and .NET Core Merge Modules.
- 160. 146 DB2 Deployment Guide Installing IBM Data Server Driver for ODBC and CLI To install IBM Data Server Client for ODBC and CLI, perform these steps: 1. Uncompress the compressed file to a directory on the target machine. 2. Create the directory $HOME/db2_cli_odbc_driver, where the driver will be installed. 3. Untar the tar archive with directory structure preserved using the -xvf option. 4. Ensure that db2dump and the db2 directories are writable. Alternatively, the path you have referenced in the diagpath parameter must also be writable. Example 4-1 shows how to uncompress the compressed file in the Linux and UNIX systems. This example assumes that the compressed file is in the directory db2_cli_odbc_driver under the home directory. Example 4-1 Uncompressing the compressed file in Linux and UNIX systems. cd $HOME/db2_cli_odbc_driver uncompress db2_driver_for_odbc_cli.tar.Z tar -xvf db2_driver_for_odbc_cli.tar rm db2_driver_for_odbc_cli.tar Installing IBM Data Server Driver for ODBC, CLI, and .NET To install IBM Data Server Driver for ODBC, CLI, and .NET for Windows systems, uncompress the compressed driver file and run the setup.exe installer file and follow the instructions. For further information regarding setup command options for installing IBM Data Server Driver for ODBC, CLI, and .NET, refer to following URL: http://publib.boulder.ibm.com/infocenter/db2luw/v9r5/index.jsp?topic=/com.ibm.d b2.luw.qb.client.doc/doc/r0051902.html If your system already has an IBM Data Server Client or IBM Data Server Runtime Client installed and you want to install one or more copies of the IBM Data Server Driver for ODBC and CLI, follow the same process described in “Installing IBM Data Server Driver for ODBC and CLI” on page 146. Ensure that the application is using the correct copy of the driver by dynamically loading the driver from the target installation directory. For installing multiple copies of IBM Data Server Driver for ODBC and CLI, ensure that a different path is specified when you untar the extracted file. For installing multiple copies of IBM Data Server Driver for ODBC, CLI, and .NET, you can issue: setup /n "COPY_NAME"
- 161. Chapter 4. Deploying applications with DB2 147 Configuring IBM Data Server Driver for ODBC and CLI You must configure the driver and application runtime environment before your application can use the driver successfully. Perform the following steps: Configure aspects of driver behavior such as data source name, performance options, connection options, and user name by updating the db2cli.ini initialization file. There is no support for CLP, you must update db2cli.ini file manually. This file is located at <install_dir>clidrivercfg on the Linux and UNIX systems and <install_dir>clidriver on the Windows systems. Configure the application environment variables: – Optional: Because there is no support for CLP, DB2 registry variables are supported as environment variables. Set any applicable DB2 environment variables corresponding to its equivalent DB2 registry variables. Table 4-3 shows the environment variables. Table 4-3 DB2 registry variables supported as environment variables Note: If you have multiple copies of the driver installed, each copy has its own db2cli.ini file. Ensure that you make changes to the correct copy. Type of variable Variable names General variables DB2ACCOUNT DB2BIDI DB2CODEPAGE DB2COUNTRY DB2GRAPHICUNICODESERVER DB2LOCALE DB2TERRITORY System environment variables DB2DOMAINLIST Communications variables DB2_FORCE_NLS_CACHE DB2SORCVBUF DB2SOSNDBUF DB2TCP_CLIENT_RCVTIMEOUT Performance variables DB2_NO_FORK_CHECK
- 162. 148 DB2 Deployment Guide – Set the DB2_CLI_DRIVER_INSTALL_PATH: Set the DB2 environment variable DB2_CLI_DRIVER_INSTALL_PATH to the directory where the driver is installed: export DB2_CLI_DRIVER_INSTALL_PATH=$HOME/db2_cli_odbc_driver/clidriver Where $HOME/db2_cli_odbc_driver/clidriver is the path where the driver is installed. Miscellaneous variables DB2CLIINIPATH DB2_ENABLE_LDAP DB2LDAP_BASEDN DB2LDAP_CLIENT_PROVIDER DB2LDAPHOST DB2LDAP_KEEP_CONNECTION DB2LDAP_SEARCH_SCOPE DB2NOEXITLIST Diagnostic variables DB2_DIAGPATH Connection variables AUTHENTICATION PROTOCOL PWDPLUGIN KRBPLUGIN ALTHOSTNAME ALTPORT INSTANCE BIDI Note: If you have multiple copies of the driver installed, ensure that the DB2_CLI_DRIVER_INSTALL_PATH points to the intended copy of the driver. Type of variable Variable names
- 163. Chapter 4. Deploying applications with DB2 149 – Set the system environment variables: Set the system environment variable LIBPATH on AIX or LD_LIBRARY_PATH on the Linux, UNIX, and Windows systems to the directory where the driver is installed. On Linux or UNIX systems, run the following command: export LD_LIBRARY_PATH=$HOME/db2_cli_odbc_driver/clidriver/lib On Windows systems, set the variable using the following command: set LD_LIBRARY_PATH=<clidriver_path>lib This step is not necessary if your application is statically linked to or dynamically loads the driver library (db2cli.dll on Windows systems, or libdb2.a on other systems) with the fully qualified name. On Windows, add the lib and bin directory to the PATH by issuing the following command. set PATH=<clidriver_path>bin;<clidriver_path>lib;%PATH% Register with DTC: If your applications are participating in transactions managed by Microsoft Distributed Transaction Coordinator (DTC), you must register with DTC. Run the db2oreg1.exe utility located at path <clidriver path>/bin: db2oreg1.exe -i To list the parameters taken, and how to use them, run the utility with the -h option: db2oreg1.exe -h Note: Setting these environment variables might break existing applications, if there are multiple versions of the driver installed on the same machine, or if there are other DB2 version 9 products installed on the same machine. Ensure that the environment variables are appropriate for all the applications under the same scope before setting them. Note: The db2oreg1.exe utility makes changes to the Windows registry when you run it after installing the driver. If you uninstall the driver, you should run the utility again to undo these changes. db2oreg1.exe -u
- 164. 150 DB2 Deployment Guide Register with Microsoft driver manager: If your ODBC applications use Microsoft ODBC driver manager, you must register the driver with Microsoft driver manager. Run the db2oreg1.exe utility: db2oreg1.exe -i License requirements IBM Data Server Driver for ODBC and CLI and IBM Data Server Driver for ODBC, CLI, and .NET can be redistributed with your application. For details regarding the terms of the redistribution licence, refer to any of the files in the /license/Windows or /license/UNIX directory for terms and conditions. IBM Data Server Driver for ODBC and CLI can be used to connect only to a properly licensed IBM database server: DB2 for Linux, UNIX, and Windows server DB2 connect server Cloudscape® server WebSphere Federation server Cloudscape Server IBM Data Server Driver for ODBC and CLI and IBM Data Server Driver for ODBC, CLI, and .NET can be used to connect to DB2 for OS/390 and z/OS, DB2 for i5/OS and DB2 for VM/VSE servers, if a connection is established through a properly licensed DB2 Connect server. 4.2 Java Java is an object oriented programming language with a syntax very similar to C++. The intent of Java is to have a platform independent programming language, that is, Write-Once-Run-Anywhere. Java is supported on a wide range of platforms including Windows, UNIX, Linux, and z/OS. Java source code is compiled into bytecode, which is platform independent. Even though it is possible to compile the bytecode into a platform native executable, this is rarely used. The most common way to execute the bytecode is to use a platform dependent Java runtime environment™, often referred to as the JRE™.
- 165. Chapter 4. Deploying applications with DB2 151 To access DB2, Java uses either dynamic SQL or static SQL. Dynamic SQL is supported by the JDBC standard, Java database connectivity, which basically is a Java implementation of ODBC. Static SQL is supported by SQLJ. While JDBC is an open standard that can interact with most database management systems, SQLJ is specific to DB2. Prerequisites Before you can access DB2 from your Java application, these prerequisites must be in place: Java runtime environment: Because Java is an interpreted language, the runtime environment is required in order to execute the bytecode. The runtime environment is platform dependent and must match the operating system. IBM Data Server Driver: If either IBM Data Server Client or IBM Data Server Runtime Client is present, installing the IBM Data Server Driver is not required. Otherwise, IBM Data Server Driver for JDBC and SQLJ is required to run the application. Installation procedure First of all, you have to install the Java runtime environment (JRE), which usually does not come with the operating system. For all the different operating systems, you must ensure that the version of the installed JRE matches the architecture of the operating system. That is, you must use a 64-bit JRE on a 64-bit platform and a 32-bit JRE on a 32-bit platform. AIX: Usually AIX is shipped with a Java runtime environment. The current level shipped with AIX 5.3 is 1.4. You can download another version of the JRE from this Web site: http://www.ibm.com/developerworks/java/jdk/aix/service.html Windows and Linux: Java runtime environments for non-IBM platforms can be downloaded from this Web site: https://cds.sun.com/is-bin/INTERSHOP.enfinity/WFS/CDS-CDS_Developer-Site/en _US/-/USD/ViewProductDetail-Start?ProductRef=jdk-6u6-oth-JPR@CDS-CDS_Develo per The IBM Data Server Driver installation procedure is described in 4.1.1, “IBM Data Server Driver for JDBC and SQLJ” on page 138.
- 166. 152 DB2 Deployment Guide Deployment procedure for a Java application The procedure for deploying a Java application is simple and straightforward. These are the steps involved: 1. Package the application along with the IBM Data Server Driver. Include the Java runtime environment if required. 2. Copy the files to the target environment. 3. Make sure that the path and classpath are set up correctly. We use an example to discuss the general idea of how to deploy a Java application with the IBM Data Server Driver and the Java runtime environment. Both the Java runtime environment and the IBM Data Server Driver are files that can simply be copied along with your application. No specific install program is required for any of them. We build a directory structure containing all the files and then package this directory structure in a portable format. This can be a tar file on Linux and UNIX or a zip file on Windows. For demonstration purposes, we use the Windows environment and generate a self-extracting executable. We use a Java sample application, MigrateExecuter, described in 5.6, “Samples overview” on page 251 as the application to be deployed. The application is packaged in the Java archive file itso.jar. In the Java environment, we have to specify where to find the Java runtime environment, and we have to set up the Java classpath, which tells the Java runtime environment where to find components. We use the command file jmigrate.cmd to do this. Example 4-2 shows the working directory where we assemble our deployment structure. Example 4-2 Deployment structure for our Java application 26-06-2008 21:34 <DIR> db2 26-06-2008 21:27 <DIR> jre1.6.0_05 20-06-2008 08:52 39.784 itso.jar 26-06-2008 21:49 619 jmigrate.cmd In the DB2 directory, the files from the IBM Data Server Driver are located. These are db2jcc.jar, db2jcc4.jar, sqlj.zip, and sqlj4.zip. The Java runtime environment is copied to the subdirectory jrel.6.0.0_05. This working directory is then compressed and extended into the self-extractable executable appjava.exe by using WinZip. Our basic requirement is to copy all our files to a user-selected directory. The use of WinZip is not required, but is used for convenience. We deploy our application by executing appjava.exe and selecting a target directory for the installation. We are now ready to test our deployed application. We do this by executing jmigrate.cmd. A few key lines of the command file are listed in Example 4-3.
- 167. Chapter 4. Deploying applications with DB2 153 Example 4-3 The command file, jmigrate.cmd, used to start the Java application // Step 1 : Setting up the path setlocal set path=jre1.6.0_05bin // Step 2 : Start the application java -cp "itso.jar;db2db2jcc.jar" ibm.itso.sg247653.MigrateExecuter %1 %2 compare %3 %4 Step 1: Setting up the path: We set the path variable to point to the directory where the Java runtime environment is located. The initial line setlocal is just for ensuring that any settings within the command file are local to this file. Step 2: Starting the application: The -cp option to Java is the classpath that tells Java where to look for the application components. We must supply four parameters to the command file: – server:port – database alias – userid – password Output from a successful test of the deployed application is listed in Example 4-4. The important part in this example is the ability to connect to the database. The logic within the application is not essential at this point; this is discussed in “Java sample application: Automating update” on page 247. Example 4-4 Successful test of our deployed application C:javaapp>jmigrate 9.43.86.48:50000 itso db2inst1 *** Connected to : jdbc:db2://9.43.86.48:50000/itso ------------- CHANGE REPORT ------------- **NO NEW TABLES **NO REMOVED TABLES CHANGED TABLES : - ITSO.STAFF ------------- END OF REPORT -------------- Connection reset OK ! In case of any error, we will not get a Change Report as listed. Instead we will see an error message and a Java stack trace. The Java application, excluding the Java runtime environment, is available for download at the IBM Redbooks Web site. Refer to Appendix B, “Additional material” on page 267 for the download instructions.
- 168. 154 DB2 Deployment Guide 4.3 Deploying C/C++ applications C and C++ are probably two of the most popular and well-known programming languages. They are general purpose programming languages developed in the 1970’s. The prevalence of these two languages still continues today on almost all operating systems even though Java and other languages have achieved great success. DB2 provides various sets of APIs for C/C++ programmer for their choices. For users who are focusing on application development and accessing a DB2 database from applications, CLI and ODBC provide the programming interfaces and use dynamic SQL statements as function arguments. Another option is embedded SQL. It takes the advantages of both static and dynamic SQL statements to access the database. Embedded SQL statements are placed in the host programming languages and therefore an additional procedure called precompilation is required. Precompilation transforms the embedded SQL statements into the host language function calls which are recognizable codes for the host language compiler. Not only C and C++, but also COBOL, FORTRAN, and REXX are supported host languages for the embedded programming. There are other tasks which are critical for DB2 maintenance or administration, such as instance start and stop, runstats and reorg, and so on. To perform these administrative tasks against DB2, users can issue commands from CLP, invoke SQL routines, or use DB2 Administrative APIs. DB2 Administrative APIs, also known as DB2 APIs, are a set of callable interfaces that give the customer an easy way to administer DB2 from a programming language. It could be used together with either CLI and ODBC, or embedded SQL. 4.3.1 CLI and ODBC In this section, we discuss an approach to bundle an application and the IBM Data Server Driver for ODBC and CLI in a single package. This package can then be a deployed to other systems. The operating system that our procedure is based upon is either Linux or UNIX. Before getting to the sample application and deployment script, we first discuss some background and considerations for CLI and ODBC applications. DB2 Call Level Interface (DB2 CLI) is IBM’s callable SQL interface to the DB2 family of database servers. It is a C and C++ programming interface. DB2 CLI is based on the Microsoft Open Database Connectivity (ODBC) specification and the International Standard for SQL/CLI. These specifications are the basis for
- 169. Chapter 4. Deploying applications with DB2 155 DB2 CLI. In addition, some DB2 specific extensions have been added to DB2 CLI to facilitate programming with DB2 features. It conforms to ODBC 3.51. Comparison of CLI and ODBC The roles played by the DB2 CLI and ODBC driver might change due to the differences in application environments. Figure 4-1 illustrates the roles played by DB2 CLI and ODBC driver in different environments. When an application accesses a DB2 database through an ODBC driver manager, the DB2 CLI and ODBC driver behaves as an ODBC driver just like other ODBC drivers, shown as A and B. The calls that the application sends to the DB2 database have to go through the ODBC Driver Manager, DB2 ODBC driver, and DB2 client before it can reach the DB2 server. Mapping and transformation are made to these calls during the process. This is shown in the left side of the diagram. In the right side of Figure 4-1, when application calls DB2 CLI specifications, there is no ODBC Driver Manager or other driver manager participating in the action. The calls to a DB2 server are passed to the local DB2 Client immediately by the DB2 CLI driver and the DB2 Client will communicate with the DB2 server and forward the calls to it. As opposed to the ODBC environment, in here, DB2 CLI driver looks as if it is working as both driver manager and underlying driver. Figure 4-1 ODBC vs. CLI ODBC Driver Manager Environment DB2 CLI Environment Application ODBC Driver Manager Other ODBC driver A DBMS A Gateway B DB2 Client DB2 CLI driver Application DB2 server DB2 Server DB2 Mainframe/AS 400 DB2 connect Other ODBC driver B DB2 ODBC driver DB2 Client DB2 connect
- 170. 156 DB2 Deployment Guide When DB2 CLI driver works without the ODBC driver manager, it supports a subset of the functions provided by the ODBC driver. For a detailed description of the supported functions, visit the DB2 Information Center: http://publib.boulder.ibm.com/infocenter/db2luw/v9r5/topic/com.ibm.db2.luw.apdv .cli.doc/doc/c0000670.html The name of the isolation levels in a DB2 environment differs from the ODBC specifications. Table 4-4 maps the isolation levels in DB2 to ODBC. Table 4-4 Isolation level mapping between ODBC and DB2 4.3.2 Sample application To demonstrate the deployment, we create a sample CLI application. We do not implement complex logics in the application because we use it only for a demonstration in subsequent deployment. The complete source code is shown in A.1, “C/C++” on page 259 and is available for download. For the download instructions, refer to Appendix B, “Additional material” on page 267. In this application, we use DSN-less connection. It is the first method in our discussion. See “Connecting to database” on page 158. This means that we do not have to create a file DSN or register the data source with the ODBC driver manager. The connectivity information is read from the application command line, then saved in a connection string, and finally passed to SQLDriverConnect() as a parameter. If the connection fails, the application will get diagnostics data from the connection handle, and send it to the standard output for our attention. The output consists of SQLCODE, SQLSTATE, and an explanatory error message. After the deployment of this application, we test it to know if deployment is successful or not according to the result of this connection. IBM isolation level ODBC isolation level Cursor stability SQL_TXN_READ_COMMITTED Repeatable read SQL_TXN_SERIALIZABLE_READ Read stability SQL_TXN_REPEATABLE_READ Uncommitted read SQL_TXN_READ_UNCOMMITTED No commit (no equivalent in ODBC)
- 171. Chapter 4. Deploying applications with DB2 157 Once the connection succeeds, the application outputs a message to the screen. Then it releases the connection handle and environment handle in sequence. Figure 4-2 shows the logic in our sample application. Figure 4-2 logic of sample application Note: A DSN-less connection means connecting to a data source without a system level DSN or file DSN created. The connection string is used instead of a system level DSN or file DSN to keep the data source connectivity information. The CLI function SQLConnect() does not support a connection string. That is why we use SQLDriverConnect() in our sample application. An introduction to the three types of connection functions in CLI programming can be found at the DB2 Information center: http://publib.boulder.ibm.com/infocenter/db2luw/v9r5/topic/com.ibm.db2.luw.a pdv.cli.doc/doc/t0004608.html Allocate an environment Handle SQLAllocHandle () Allocate an connection Handle SQLAllocHandle () Make a connection to database SQLDriverConnect () Obtain diagnostic information SQLGetDiagRec () Disconnect from database SQLDisconnect () Free the database handle SQLFreeHandle () Free the environment handle SQLFreeHandle () Application Start Read connection info from cmd Application End Output error message printf ()
- 172. 158 DB2 Deployment Guide 4.3.3 Considerations for deployment of CLI and ODBC applications For scenarios where the IBM Data Server Client or Runtime Client has already been installed, deploying a C/C++ application is straightforward. You only have to install the application on the target system and then catalog locally the database to which the application is going to connect. During runtime, application directly reads connectivity information from the local catalog. In this section, we discuss a different case where an application is to be deployed to an environment without the DB2 Client. The IBM Data Server Driver for ODBC and CLI is thus required to be deployed along with the application. Redistributable driver files The IBM Data Server Driver for ODBC and CLI is a freely downloable product. There are conditions required for redistributing the IBM Data Server Driver for ODBC and CLI with an application. We describe this in more detail in 4.1.2, “IBM Data Server Driver for ODBC, CLI, and .NET, and IBM Data Server Driver for ODBC and CLI” on page 143. Make sure that all the required conditions are met prior to packaging the driver with your application for deployment. Connecting to database After deploying C/C++ applications that use the IBM Data Server Driver for ODBC and CLI, some application configuration may be required depending on the connecting method the application used. There are five ways to specify the connectivity information if the application is working only with IBM Data Server Driver for ODBC and CLI: Save connectivity information in a connection string and call SQLDriverConnect() to establish a connection. No particular application specific configuration is required if you use this method and specify database, host, and port in the connection string. This is the method used in our C/C++ application deployment example. Use the CLI initialization file, db2cli.ini, to configure the connection. This method is for CLI applications only, and db2cli.ini change is required. Register the database as an ODBC data source with the ODBC manager. This is required for the ODBC application only. db2cli.ini or other platform specific configuration changes are required. Use the FileDSN CLI/ODBC keyword to specify database connectivity information. db2cli.ini, or other platform specific configuration changes that are required. For a local database only, use PROTOCOL and DB2INSTANCE CLI/ODBC keywords to specify the local database. db2cli.ini change is required.
- 173. Chapter 4. Deploying applications with DB2 159 For a complete introduction to these connectivity configurations, visit the DB2 Information Center: http://publib.boulder.ibm.com/infocenter/db2luw/v9r5/topic/com.ibm.db2.luw.apdv .cli.doc/doc/t0024166.html 4.3.4 Deploying a CLI application along with ODBC CLI driver The general tasks for deploying a CLI application with the ODBC CLI driver are as follows: Prepare the redistributable driver files. Prepare the application executable file. Prepare the deployment package. Deploy the package to the target system. Preparing the redistributable driver files The first step to deploy our application is to build a driver package for redistribution. We obtain the redistributable file list from the license file and generate a package based on the list. We demonstrates this procedure using a shell script. It goes through the redistributable file list and selects the required files to form a new package that can be bundled together with our application. The steps to build this package are as follows: 1. Create a working folder where you have sufficient write and read permissions. Here we create a directory itso_cli under /tmp: mkdir -p /tmp/itso_cli 2. Locate the license file that contains the redistributable files of the ODBC and CLI driver. Copy and paste the file names to a new file and save it in the working folder. In our example, we assign a meaningful name redist.txt to it. Example 4-5 shows part of the file content. Example 4-5 Content of redist.txt db2trc db2ldcfg db2lddrg ...... ...... IBMOSauthclient.so IBMOSauthclient.so.1
- 174. 160 DB2 Deployment Guide 3. Ensure that the ODBC CLI driver file is ready. It could be downloaded from the IBM Web site. See also 4.1.2, “IBM Data Server Driver for ODBC, CLI, and .NET, and IBM Data Server Driver for ODBC and CLI” on page 143. Grant the necessary read permission to the driver file and ensure that the user account you are using can access it without any problems. 4. Create a script file named bldpkg under the working folder. It is used to help us build the package. Example 4-6 contains the complete coding. Example 4-6 Script file bldpkg #!/usr/bin/ksh ########################################################################## # # build an ODBC and CLI driver package for redistribution # # bldpkg -d drv_odbc_cli -r filename -o output_pkg # # -d DB2 Driver file for ODBC and CLI. It has suffix tar.gz or tar.Z # -r Specify a file which consists of file names that can be used # for redistribution # -o Generate a new package will be deployed along with application # # example: bldpkg -d v9.5_linuxx64_odbc_cli.tar.gz -r redist.txt -o odbc_cli # ########################################################################## # command-line syntax syntax() { echo " bldpkg -d drv_odbc_cli -r filename -o output_pkg -d DB2 Driver file for ODBC and CLI. It has suffix tar.gz or tar.Z. -r Specify a file which consists of file names that can be used for redistribution -o Generate a new package will be deployed along with application example: bldpkg -d v9.5_linuxx64_odbc_cli.tar.gz -r redist.txt -o odbc_cli " } # main program # process command-line options case $# in 0) syntax exit 1;; *) while getopts "d:r:o:" OPT; do case $OPT in d) CLIDRV_FILE=$OPTARG ;;
- 175. Chapter 4. Deploying applications with DB2 161 r) REDIS_LIST=$OPTARG ;; o) OUTPUT_FILE=$OPTARG ;; ?) echo "invalid command line option $*" syntax exit 1;; esac done ;; esac # temp file FLIST="filelist.$$" # build command line for different file format echo $CLIDRV_FILE|egrep -i '.gz *$' > /dev/null if [ "$?" == 0 ]; then # for .tar.gz CMD="gunzip -c $CLIDRV_FILE" else echo $CLIDRV_FILE|egrep -i '.Z *$' > /dev/null if [ "$?" == 0 ]; then # for .tar.Z CMD="zcat $CLIDRV_FILE" fi fi # list the contents of ODBC and CLI driver # and then add redistributable file names to temp file $CMD | tar -tf -|sed '/^ *$/d'|awk '{print $1}'|egrep -v '/$'| while read fpath do BNAME=`basename $fpath|sed 's/././g'` egrep '^ *'"$BNAME"' *$' "$REDIS_LIST" > /dev/null 2>&1 if [ $? == 0 ]; then echo $fpath >> $FLIST fi done # get the root path of ODBC and CLI driver CLIROOT=`head -n 1 $FLIST |sed 's//.*//'` # extract redistributable files from ODBC and CLI driver # and then make a new package $CMD | tar -xf - `cat $FLIST` tar -cf - $CLIROOT|gzip -c > $OUTPUT_FILE.tar.gz # show summary COUNT=`wc -l $FLIST|awk '{print $1}'` echo "Totally "$COUNT" files added to new package "$OUTPUT_FILE.tar.gz"." # clean up rm -Rf $FLIST $CLIROOT
- 176. 162 DB2 Deployment Guide There are three command line options for the script. – Option -d specifies the path of the DB2 Driver file for ODBC and CLI. It normally has a suffix tar.gz or tar.Z. – Option -r specifies the file name of the redistributable file list. In our case, it is redist.txt. – Option -o specifies the name of the output file. 5. In Example 4-7 we execute the script to generate a redistributable package. We issue it from the working folder followed with the file name of the ODBC CLI driver, redist.txt, and the output package name. Example 4-7 Issue commands to generate the redistributable package # ./bldpkg -d /software/V95/v9.5_linuxx64_odbc_cli.tar.gz -r redist.txt -o itso_cli Totally 27 files added to new package isto_cli.tar.gz. 6. In Example 4-8, we verify the generated package by listing its content. Example 4-8 Verify package content # ls -al total 9353 -rwxr--r-- 1 root root 2489 Jun 18 12:35 bldpkg -rw-r--r-- 1 root root 9557833 Jun 18 12:40 itso_cli.tar.gz -rw-r--r-- 1 root root 379 Jun 18 12:18 redist.txt # gunzip -c itso_cli.tar.gz|tar -tf - clidriver/ clidriver/adm/ clidriver/adm/db2trc ..... 7. After finishing these steps, we have created a new package called itso_cli.tar.gz. It could be included into the application installation image and redistributed to the target systems. Preparing the application executable file The source code should be compiled and linked to generate a binary executable file for deployment. There are two approaches to build a CLI application executable file. One is to use the bldapp script included in the DB2 installation image. After you have set up an application development environment, you can find it in the directory sample/c under the DB2 installation path. This approach requires a database development environment setup. For how to configure the database application development environment, see the DB2 Information center: http://publib.boulder.ibm.com/infocenter/db2luw/v9r5/topic/com.ibm.db2.luw.apdv .gs.doc/doc/t0004638.html
- 177. Chapter 4. Deploying applications with DB2 163 Another approach is to compile and link manually from the command line. The options used for compile and link vary depending on the platforms. A complete reference can be found at: http://publib.boulder.ibm.com/infocenter/db2luw/v9r5/topic/com.ibm.db2.luw.apdv .cli.doc/doc/t0007141.html In our demonstration, we use the manual method and build the application from the command line. We use gcc, which is a popular compiler on many platforms and sometimes is included in the default installation. The compile flag -m64 is used to inform the compiler that operating system is 64-bit. The build procedure is as follows: 1. Under the DB2 development environment, create a working folder, for example, work. 2. Save the application code into the folder work. Our application is named itso_cliapp.c. 3. Compile and link the application in one step: gcc -o itso_cliapp -m64 -I/home/db2inst1/sqllib/include -L/home/db2inst1/sqllib/lib -ldb2 itso_cliapp.c 4. Test the application by providing it with the connection information of a known database. Required arguments include: host name, port number, database name, user, and password. A successful connection test is shown in Example 4-9. Example 4-9 A successful connection using itso_cliapp db2inst1@mensa:~/work> ./itso_cliapp mensa 50000 itso db2inst1 password Connecting to the database itso ... Connected to the database itso. Disconnecting from the database itso... In case there is any incorrect connectivity information input, the connection might fail, and the application will return diagnostic messages as shown in Example 4-10. Note: Because we are using a DSN-less connection, the database that we are connecting to does not have to be existing in local catalog directory.
- 178. 164 DB2 Deployment Guide Example 4-10 A failed connect test using itso_cliapp db2inst1@mensa:~/work> ./itso_cliapp mensa 50000 itso db2inst1 wrongassword Connecting to the database itso ... Failed to connect to the database itso. SQLSTATE = 08001 SQLCODE = -30082 Message: [IBM][CLI Driver] SQL30082N Security processing failed with reason "24" ("USERNAME AND/OR PASSWORD INVALID"). SQLSTATE=08001 Preparing the deployment package Once the redistributable driver files and the application executable file are ready, you can package them together for deploying. We have built a redistributable package itso_cli.tar.gz and a sample application called itso_cliapp. Now we put them into a single package and deploy the package using a script: 1. Under the DB2 development environment, create a working folder install_image. Create two subdirectories under install_image, named bin and odbcdrv. mkdir -p ~/install_image/bin ~/install_image/odbcdrv 2. Copy the sample application and ODBC CLI driver into the subdirectories respectively. So we copy itso_cliapp to bin, and itso_cli.tar.gz to odbcdrv. 3. Create a deployment script app_install under directory app_install. The entire directory should look as shown in Example 4-11. Example 4-11 The complete contents of install_image db2app@mensa:~/install_image> ls -Rl .: total 4 -rwxr--r-- 1 db2app appgrp 2771 2008-06-20 17:40 app_install drwxr-xr-x 2 db2app appgrp 72 2008-06-20 16:20 bin drwxr-xr-x 2 db2app appgrp 80 2008-06-20 16:20 odbcdrv ./bin: total 12 -rwxr-xr-x 1 db2app appgrp 11801 2008-06-20 16:20 itso_cliapp ./odbcdrv: total 9345 -rw-r--r-- 1 db2app appgrp 9557108 2008-06-20 16:20 odbc_cli.tar.gz
- 179. Chapter 4. Deploying applications with DB2 165 4. The purpose of the script app_install is to copy an application file and extract CLI driver files to the specified path, and to perform application environment configurations after the deployment. Example 4-12 shows the script code. The script app_install has two command line options: – The option -p specifies the path on the target machine indicating where the application is to be deployed. – The option -r indicates that we want the script to configure the system variables for us. Do not use this option if you want the configuration to be done manually. Example 4-12 Source codes of script app_install #!/usr/bin/ksh ########################################################################## # # Deploy application and ODBC CLI driver files to target path # # app_install -p <installpath> -r # # -p specify the location where application and ODBC drv files to be deployed # -r specify to configure system variable for ODBC and CLI driver # # example: app_install -p /home/db2app/myapp -r" # ########################################################################## # Define variables DIR_DRV=odbcdrv # directory for odbc and cli driver files DIR_APP=bin # directory for applications unset REGVAR # command-line syntax syntax() { echo " app_install -p <installpath> -r -p specify the location where application and ODBC lib files will be deployed -r specify to configure system variable for ODBC and CLI driver example: app_install -p /home/db2app/myapp -r" } # main program # process command-line options case $# in 0) syntax exit 1;; *) while getopts "p:r" OPT; do
- 180. 166 DB2 Deployment Guide case $OPT in p) INSTPATH=$OPTARG mkdir -p $INSTPATH ;; r) REGVAR=Y ;; ?) echo "invalid command line option $*" syntax exit 1 ;; esac done ;; esac # verify the ODBC driver files and application files are ready # and then start the deployment TESTPATH=`echo $0|egrep '^/'` if [ -z $TESTPATH ]; then dirname `pwd`/$0|read CURPATH else CURPATH=`dirname $0` fi cd $CURPATH if [ ! -d $DIR_DRV ] || [ ! -d $DIR_APP ]; then echo " ODBC CLI driver or Application directory not existing.n Abort." exit 1 fi # deploy applications and ODBC CLI driver to specified path cd $INSTPATH cp -R "$CURPATH/$DIR_APP" . mkdir -p "$DIR_DRV" cd $DIR_DRV for file in "$CURPATH/$DIR_DRV/*.tar.gz" do gunzip -c $file|tar -xf - done # register system variable ODBCLIBPATH=`find $INSTPATH/$DIR_DRV -type d -name lib` case $REGVAR in Y) echo " # The following lines have been added by app_install script export LIBPATH=$LIBPATH:$ODBCLIBPATH export LD_LIBRARY_PATH=$LD_LIBRARY_PATH:$ODBCLIBPATH " >> ~/.profile if [ `uname` == "AIX" ]; then echo " export DB2_CLI_DRIVER_INSTALL_PATH=$DB2_CLI_DRIVER_INSTALL_PATH:$ODBCLIBPATH" >> ~/.profile fi
- 181. Chapter 4. Deploying applications with DB2 167 echo " System variables registered. Please re-login to have the settings be effective." ;; *) echo " You choose not registering system variable. It could be finished later by adding following lines to your user profile: export LIBPATH=$LIBPATH:$ODBCLIBPATH export LD_LIBRARY_PATH=$LD_LIBRARY_PATH:$ODBCLIBPATH" if [ `uname` == "AIX" ]; then echo " export DB2_CLI_DRIVER_INSTALL_PATH=$DB2_CLI_DRIVER_INSTALL_PATH:$ODBCLIBPATH" fi ;; esac printf "n Deployment finished.n" 5. After placing the three files under their own directories, we can create a package based on this directory structure and redistribute it to the target machine where we want the application to be deployed. Example 4-13 shows how a package file, app_installer.tar.gz, is created using the commands tar and gzip. Example 4-13 Generate a gz package from install_image directory db2app@mensa:~/app_install/install_image> tar -cvf - *|gzip -c > ../app_installer.tar.gz app_install bin/ bin/itso_cliapp odbcdrv/ odbcdrv/odbc_cli.tar.gz Deploying the application package to the target system On the target system, you have to configure the IBM Data Server Driver for ODBC and CLI to prepare the system for the application. For the driver configuration, refer to 4.1.2, “IBM Data Server Driver for ODBC, CLI, and .NET, and IBM Data Server Driver for ODBC and CLI” on page 143 for platform specific steps. The db2cli.ini and other system environment variables may also require configuration based on the database connection used in the application. You can manually configure the target system or automate these configurations with a deployment script.
- 182. 168 DB2 Deployment Guide In our example, there is no special configuration required for our application. Therefore, no application specific configuration steps are included in the deployment script. We move the application package app_installer.tar.gz to target machine lepus using scp. You can choose another method you prefer, such as ftp. Then we deploy it using a local user prodapp as shown in Example 4-14. Example 4-14 Deploy application using scrip app_installt prodapp@lepus:/tmp/app> whoami prodapp prodapp@lepus:/tmp/app> scp db2app@mensa:/home/db2app/app_install/app_installer.tar.gz . Password: app_installer.tar.gz 100% 8914KB 8.7MB/s 00:01 prodapp@lepus:/tmp/app> gunzip app_installer.tar.gz prodapp@lepus:/tmp/app> gunzip -c app_installer.tar.gz|tar -xf - prodapp@lepus:/tmp/app> ls -l total 8929 -rwxr--r-- 1 prodapp appgrp 2771 2008-06-23 14:57 app_install -rw-r--r-- 1 prodapp appgrp 9128168 2008-06-23 15:03 app_installer.tar.gz drwxr-xr-x 2 prodapp appgrp 80 2008-06-23 14:28 bin drwxr-xr-x 2 prodapp appgrp 80 2008-06-20 16:20 odbcdrv prodapp@lepus:/tmp/app> ./app_install -p /home/prodapp/cliapp -r System variables registered. Please re-login to have the settings be effective. Deployment finished. We re-login to the system to have the system variables take effect that were already appended to .profile by the deployment script app_install. The application has been deployed to the specified path. Change to the location where we can see subdirectories bin and odbcdrv. The application executable file itso_cliapp sits under directory bin. Refer to Example 4-15. From there, we execute the application and try to establish a connection to a database on another machine. It succeeds without error. This means that the deployment is successful.
- 183. Chapter 4. Deploying applications with DB2 169 Example 4-15 Verify the connection after deployment prodapp@lepus:~> cd /home/prodapp/cliapp/bin prodapp@lepus:~/cliapp/bin> ./itso_cliapp mensa 50000 itso db2inst1 password Connecting to database itso ... Connected to database itso. Disconnecting from database itso... 4.3.5 Embedded SQL and Administrative API For embedded SQL applications that must have the target database registered in catalog directory, IBM Data Server Client, or IBM Data Server Runtime Client is required. Those applications, either ODBC and CLI or embedded SQL which make use of Administrative APIs, require at least IBM Data Server Client or the IBM Data Server Runtime Client as well. This is because IBM Data Server Driver for ODBC and CLI does not include Administrative APIs support. The general steps to deploy an application who uses either embedded SQL or Administrative APIs are as follows: Deploy the IBM Data Server Client or IBM Data Server Runtime Client to the target system. Deploy the application to the target system. Finish the configuration steps for the application. For more information on restrictions on IBM Data Server Driver for ODBC and CLI, visit: http://publib.boulder.ibm.com/infocenter/db2luw/v9r5/topic/com.ibm.db2.luw.apdv .cli.doc/doc/r0024160.html 4.4 PHP PHP is a powerful server-side scripting language, originally invented for producing dynamic Web pages. It can also be used in standalone applications or from the command line interface. The syntax is similar to C and Perl. PHP is an open source language and can be deployed on most operating systems free of charge. It is a very popular Apache module, and because it generates plain HTML, it is compatible with all Web browsers.
- 184. 170 DB2 Deployment Guide Object handling was re-written in PHP version 5, and from version 5 onwards, PHP also supports various OOP components, such as interfaces, abstract classes. There is one such interface named PHP Data Objects (PDO), which defines a lightweight abstraction layer to access databases from PHP. So, you can use the same methods and functions to query and fetch data from all databases that implement the PDO specification. IBM provides two drivers, PDO_IBM and IBM_DB2, for you to access IBM DB2 databases. 4.4.1 PDO_IBM PDO_IBM is an open source driver of PHP PDO specification implementation. This extension is supported on PHP release version 5.1 and greater. You can use PDO_IBM to connect to both cataloged and non-cataloged databases. Through PDO_IBM, you can use DB2 features, such as issue SQL queries, call stored procedures, work with large objects, persistent connections, and prepared connections. As PDO is not present in versions lower than PHP version 5, use of IBM_DB2 is recommended. You can get more information about PDO_IBM at: http://www.php.net/manual/en/ref.pdo-ibm.php 4.4.2 IBM_DB2 IBM_DB2 provides an interface to connect to IBM DB2 databases. This extension is supported on PHP releases version 4 and greater. You can use IBM_DB2 to connect to both cataloged and non-cataloged databases. In addition to providing methods to issue SQL queries, call stored procedures, work with large objects, persistent connections, and prepared connections; IBM_DB2 also provides functions for getting details about database client and server by querying the system catalog tables. For more information about IBM_DB2 functions, visit: http://www.php.net/manual/en/ref.ibm-db2.php 4.4.3 Installation of IBM PHP drivers Installation procedure of both IBM_DB2 and PDO_IBM is similar. Hence, we discuss both simultaneously: first, the prerequisites to installing IBM PHP drivers, and then the installation process for Linux, UNIX, and Windows. Note: There is also an extension named PDO_INFORMIX to access Informix® databases. Further information can be found in the following URL: http://www.php.net/manual/en/ref.pdo-informix.php
- 185. Chapter 4. Deploying applications with DB2 171 Prerequisites Before installing IBM_DB2 or PDO_IBM, you will require the following software. 4.4.4 PHP PHP version 5 or greater is required for PDO_IBM and PHP version 4 or greater is required for IBM_DB2. Most Linux and UNIX systems come with PHP installed, but you might want to install a local copy of PHP on which you have full control. You can download the latest PHP from: http://www.php.net/downloads.php For Windows, the binaries are also available on the same page. You can optionally download PHP documentation from: http://www.php.net/download-docs.php IBM Data Server Driver for CLI support All PHP interfaces communicate to DB2 using CLI. If either IBM Data Server Client or IBM Data Server Runtime Client is present, this step is not required. Otherwise, you will require IBM Data Server Driver for ODBC and CLI to run your application. Alternatively, for Windows systems, you can use IBM Data Server Driver for ODBC, CLI, and .NET. Both are described in detail in 4.1.2, “IBM Data Server Driver for ODBC, CLI, and .NET, and IBM Data Server Driver for ODBC and CLI” on page 143. Installation procedure on Linux and UNIX There are two ways to install the DB2 drivers for PHP. One is by installing DB2 products and the other is through building PHP drivers. The installation procedure of PDO_IBM and IBM_DB2 is similar. The procedures discussed in this section can be applied to both PDO_IBM and IBM_DB2. Perform the following steps to install DB2 drivers for PHP from DB2 Clients: 1. Extract the drivers: IBM DB2 version 9.5 Linux, UNIX, and Windows, IBM Data Server Client and IBM Data Server Runtime Client are shipped with PHP driver files. If your application is not on the same system as the DB2 server, or you only require the drivers from the DB2 Clients, you can extract the driver files from the DB2 products installed and placed them in a local directory. Both DB2 drivers for PHP are located under <Path to sqllib>/sqllib/phpxx (where xx is 32 or 64). They are ibm_db2_xx.so and pdo_ibm_xx.so (where xx is the version). These drivers can be copied over to other systems of the same platform.
- 186. 172 DB2 Deployment Guide In our example, we place these files in the directory /home/user1/phpdrivers. 2. Create php.ini file: Change to the lib directory where the PHP is installed. For example: cd /opt/www/php/lib Create a php.ini file if there is not one already present: touch php.ini vi php.ini 3. Add extension path and extension name in the php.ini file: Example 4-16 shows the lines that have to be added to the php.ini file. Add only the extension you will use. For example, if you are going to use ibm_db2_xx.so only, then you do not have to add pdo_ibm_xx.so in the php.ini file. Example 4-16 Lines to added to php.ini file extension_dir=/home/user1/phpdrivers extension=ibm_db2_xx.so extension=pdo_ibm_xx.so 4. PHP drivers is installed dynamically after adding the extension to the php.ini file. Check it with the following command: php -m This displays all extensions of PHP dynamically, hence the new additions will show immediately. Check for presence of ibm_db2 and pdo_ibm in the output. Example 4-17 shows an abbreviated output. Example 4-17 Output of php -m itsouser@ubuntu:~$ php -m [PHP Modules] ctype ... ibm_db2 ... PDO pdo_ibm pdo_informix ... zlib [Zend Modules]
- 187. Chapter 4. Deploying applications with DB2 173 The PHP drivers are open source for you to build and install. The building DB2 PHP drivers will generate ibm_db2.so and pdo_ibm.so files. Once these files are generated, you can follow steps 2 to 4 to install drivers. The download sites and driver built instructions can be found in the following URLs: Download the source for IBM_DB2: http://pecl.php.net/package/ibm_db2 Download the source for PDO_IBM from: http://pecl.php.net/package/pdo_ibm Build instructions: http://in2.php.net/manual/en/install.pecl.php The specific instructions for IBM_DB2 can be found at: http://in2.php.net/manual/en/ibm-db2.installation.php The specific instructions for PDO_IBM can be found at: http://in2.php.net/pdo_ibm Installation procedure on Windows In the Windows environment, there are three way to install DB2 drivers. First way: You can configure the environment using the PHP drivers shipped with DB2 products. The required steps are as follows: 1. Add the drivers to the PHP extension directory. If you have IBM DB2 version 9.5 Linux, UNIX, and Windows, IBM Data Server Client, or IBM Data Server Runtime Client installed, you can find the driver files under <Path to sqllib>/sqllib/phpxx (where xx is 32 or 64). The driver files have the extension dll. Copy and paste these files to the <PHP installation Path>/ext directory. 2. Open the php.ini file located in the PHP install path. Add the following lines at the end of the file: extension=php_ibm_db2.dll extension=php_pdo_ibm.dll 3. PHP drivers should be installed now. Confirm the PHP driver installation by issuing the following command: php -m Note: You will require sqllib include files to build the drivers. Install IBM Data Server Client to build them.
- 188. 174 DB2 Deployment Guide This displays all extensions of PHP dynamically. Check for ibm_db2 and pdo_ibm in the output. Second way: For the Windows environment, you can also download the latest driver files (with extension dll) from the Internet: Download latest IBM_DB2 from: http://pecl4win.php.net/ext.php/php_ibm_db2.dll Download latest PDO_IBM from: http://pecl4win.php.net/ext.php/php_pdo_ibm.dll Once you have finished downloading DB2 PHP drivers, copy them to the PHP extension directory and update the php.ini file as described above. Third way: You also can install both PDO_IBM and IBM_DB2 during the installation of PHP. When selecting the install path and setting up the Web server (if required) during the PHP installation process, the PHP setup tool will prompt you to choose items to install. Select IBM_DB2 and PDO_IBM under the extensions tree and proceed with the installation. If you have already installed PHP, you can run the setup again and choose change installation option. You can follow the same instructions as given in previous paragraph. You can seek assistance for any problem related to use of either PDO_IBM or IBM_DB2 by sending your queries to [email protected]. 4.4.5 Sample application We now create a simple PHP application for demonstrating the deployment. This sample application named itso_phpapp.php reads the connectivity information from the command line and uses it to connect to a database. The database can be either local or remote. If the connection fails, the application will return an error message. If the connection succeeds, the application shows the success message. The complete code is shown in A.2, “PHP” on page 262 and is available for download. For the download instructions, refer to Appendix B, “Additional material” on page 267. Note: You can gain more knowledge about PHP drivers by issuing the following commands” php --re pdo_ibm php --re ibm_db2
- 189. Chapter 4. Deploying applications with DB2 175 In order to run the application, create a directory and save the application as itso_phpapp.php. Example 4-18 shows how to run the application in detail. The example demonstrates a successful connection to a remote uncataloged database. Example 4-18 A successful connection using itso_phpapp.php itsouser@ubuntu:~/redbook$ php itso_phpapp.php mensa 50001 test db2inst1 password Trying to establish connection... Connection succeeded. Closing connection.. Connection closed. If you provide any incorrect information, the connection will fail and an error message will be thrown. This is shown in Example 4-19. Example 4-19 Failed connection using itso_phpapp.php itsouser@ubuntu:~/redbook$ php itso_phpapp.php mensa 50001 test db2inst1 wrongpassword Trying to establish connection... [IBM][CLI Driver] SQL30082N Security processing failed with reason "24" ("USERNAME AND/OR PASSWORD INVALID"). SQLSTATE=08001 SQLCODE=-30082 Connection failed. 4.4.6 Deploying a PHP application with the DB2 drivers In this section, we demonstrate how to deploy a DB2 PHP application with DB2 drivers. We assume that the target system has already have the PHP installed but the DB2 drivers for PHP are not built during the PHP installation. These general tasks for deploying a PHP application with ODBC CLI driver are discussed in the following paragraphs: Prepare the DB2 PHP driver and the redistributable DB2 ODBC and CLI driver files Prepare the PHP application package Prepare the deployment package Deploy the deployment package to the target system We organize all the deployment files under a directory, php_deploy.
- 190. 176 DB2 Deployment Guide Preparing DB2 PHP driver and redistributable DB2 ODBC and CLI driver files You can obtain the DB2 PHP driver file from any of the method described in “Installation procedure on Linux and UNIX” on page 171. For this example, we have built the ibm_db2 driver and taken the driver file named ibm_db2.so. In the target system where the PHP has been installed, you can just register the IBM PHP driver. We place the PHP driver file ibm_db2.so under php_deploy/phpdriver. You only have to prepare the DB2 PHP driver your PHP application will use. If your application uses only IBM_DB2, then there is no necessity to package PDO_IBM as well. We discuss how to prepare the redistributable ODBC and CLI driver files in “Preparing the redistributable driver files” on page 159. The redistributable ODBC and CLI driver is required for preparing the DB2 PHP drivers for distribution with PHP applications. The script introduced in ODBC and CLI section requires minor modification. In this example, we gather the required DB2 driver files under php_deploy/odbcdrv and zip them in a package itso_cli.tar.gz. Preparing the PHP application package This step is to identify all the PHP application files. In real life, the application is usually under some type of library control system and can be gathered easily. In our example, we only have a simple PHP application file for demonstration purpose. We place it under /php_deploy/bin. Preparing the deployment package To automate the application deployment process, we create a deployment script, php_app_install. The script copies the application file and PHP driver file to the specified path and makes PHP recognize the driver file. It also extracts ODBC and CLI driver files to a specified path and performs environmental configuration. Example 4-20 shows the deployment script. There are two command line options for the script: The flag -p specifies the location where application to be deployed. The flag -r registers required system variables. Example 4-20 Deployment script php_app_install #!/usr/bin/ksh ########################################################################## ## Deploy application and ODBC CLI driver files to target path # # php_app_install -p <installpath> -r # # -p specify the location where application and ODBC drv files to be deployed
- 191. Chapter 4. Deploying applications with DB2 177 # -r specify to configure system variable for ODBC and CLI driver # # example: php_app_install -p /home/db2app/myapp -r" # ########################################################################## #set -x # Define variables DIR_DRV=odbcdrv # directory for odbc and cli driver files DIR_APP=bin # directory for applications DIR_PHP=phpdriver # directory for driver file unset REGVAR # command-line syntax syntax() { echo " php_app_install -p <installpath> -r -p specify the location where application and ODBC lib files will be deployed -r specify to configure system variable for ODBC and CLI driver example: php_app_install -p /home/db2app/myapp -r" } # main program # process command-line options case $# in 0) syntax exit 1;; *) while getopts "p:r" OPT; do case $OPT in p) INSTPATH=$OPTARG mkdir -p $INSTPATH ;; r) REGVAR=Y ;; ?) echo "invalid command line option $*" syntax exit 1 ;; esac done ;; esac # verify the ODBC driver files and application files are ready # and then start the deployment TESTPATH=`echo $0|egrep '^/'` if [ -z $TESTPATH ]; then dirname `pwd`/$0|read CURPATH else CURPATH=`dirname $0` fi
- 192. 178 DB2 Deployment Guide cd $CURPATH if [ ! -d $DIR_DRV ] || [ ! -d $DIR_APP ] || [ ! -d $DIR_PHP ] ; then echo " ODBC CLI driver, Application or driver directory not existing.n Abort." exit 1 fi # deploy application and php driver cd $INSTPATH cp -R "$CURPATH/$DIR_APP" . cp -R "$CURPATH/$DIR_PHP" . # Install the php driver PHPPATH=`which php` FILENAME=`dirname $PHPPATH|sed 's//[^/]*$//'`"/lib/php.ini" echo "extension_dir="$INSTPATH/$DIR_PHP >> $FILENAME echo "extension=ibm_db2.so" >> $FILENAME # Uncompress ODBC CLI driver to specified path cd $INSTPATH mkdir -p "$DIR_DRV" cd $DIR_DRV for file in "$CURPATH/$DIR_DRV/*.tar.gz" do gunzip -c $file|tar -xf - done # register system variable ODBCLIBPATH=`find $INSTPATH/$DIR_DRV -type d -name lib` case $REGVAR in Y) echo " # The following lines have been added by app_install script export LIBPATH=$LIBPATH:$ODBCLIBPATH export LD_LIBRARY_PATH=$LD_LIBRARY_PATH:$ODBCLIBPATH " >> ~/.profile if [ `uname` == "AIX" ]; then echo " export DB2_CLI_DRIVER_INSTALL_PATH=$DB2_CLI_DRIVER_INSTALL_PATH:$ODBCLIBPATH" >> ~/.profile fi echo " System variables registered. Please re-login to have the settings be effective." ;; *) echo " You choose not registering system variable. It could be finished later by adding following lines to your user profile: export LIBPATH=$LIBPATH:$ODBCLIBPATH export LD_LIBRARY_PATH=$LD_LIBRARY_PATH:$ODBCLIBPATH" if [ `uname` == "AIX" ]; then echo " export DB2_CLI_DRIVER_INSTALL_PATH=$DB2_CLI_DRIVER_INSTALL_PATH:$ODBCLIBPATH"
- 193. Chapter 4. Deploying applications with DB2 179 fi ;; esac printf "n Deployment finished.n" We placed the deployment script under our deployment directory /php_deploy. Example 4-21 shows the contents of the php_deploy directory that now has all the files required for the deployment. Example 4-21 Contents of php_deploy directory itsouser@ubuntu:~/php_deploy$ ls -Rl .: total 16 drwxrwxr-x 2 itsouser itsouser 4096 2008-06-26 22:44 bin drwxrwxr-x 2 itsouser itsouser 4096 2008-06-26 22:44 odbcdrv -rwxr-xr-x 1 itsouser itsouser 3138 2008-06-26 22:44 php_app_install drwxrwxr-x 2 itsouser itsouser 4096 2008-06-26 22:44 phpdriver ./bin: total 4 -rw-r--r-- 1 itsouser itsouser 1125 2008-06-26 22:44 itso_phpapp.php ./odbcdrv: total 7564 -rw-rw-r-- 1 itsouser itsouser 7730644 2008-06-26 22:44 itso_cli.tar.gz ./phpdriver: total 184 -rwxr-xr-x 1 itsouser itsouser 181474 2008-06-26 22:44 ibm_db2.so We can simply archive and compress the entire directory for distribution to other systems. Example 4-22 demonstrates steps for package generation. Example 4-22 Package generation for php_deploy itsouser@ubuntu:~/php_deploy$ tar -cvf - *|gzip -c > ../php_app_installer.tar.gz bin/ bin/itso_phpapp.php odbcdrv/ odbcdrv/itso_cli.tar.gz php_app_install phpdriver/ phpdriver/ibm_db2.so
- 194. 180 DB2 Deployment Guide Deploying the DB2 PHP application The deployment process for the DB2 PHP application involves transfer of the deployment package to the target system, uncompressing/extracting files in the package, and then executing the deployment script. See Example 4-23 for the steps involved in DB2 PHP application deployment. Example 4-23 Deploying using script php_app_install $ whoami php_dep $ gunzip -c php_app_installer.tar.gz |tar -xf - $ ls -l total 7268 drwxrwxr-x 2 php_dep test01 4096 2008-06-26 22:44 bin drwxrwxr-x 2 php_dep test01 4096 2008-06-26 22:44 odbcdrv -rwxr-xr-x 1 php_dep test01 3139 2008-06-26 17:02 php_app_install -rw-rw-r-- 1 php_dep test01 7411435 2008-06-27 00:12 php_app_installer.tar.gz drwxrwxr-x 2 php_dep test01 4096 2008-06-26 22:44 phpdriver $ ./php_app_install -p /home/php_dep/php_app -r System variables registered. Please re-login to have the settings be effective. Deployment finished. After the deployment script is executed, you have to logout and login again in order for the new environment setting to take effect. You can now see the subdirectories in the specified location. The PHP application is placed under the bin subdirectory of the specified location. After successful deployment, you are now ready to proceed with the application testing. Example 4-24 shows the output of our newly deployed sample application, itso_phpapp.php. Example 4-24 Verifying deployed PHP application $ cd /home/php_dep/php_app/bin $ php itso_phpapp.php mensa 50001 test db2inst1 password Trying to establish connection... Connection succeeded. Closing connection... Connection closed.
- 195. Chapter 4. Deploying applications with DB2 181 4.5 Ruby Ruby is a dynamic, general purpose, object-oriented scripting language that has Perl-like syntax and Smalltalk-like features. The style of programming is similar to Lisp, Perl, Python, CLU, and Dylan. Ruby supports different programming paradigms such as procedural, reflection, and object-oriented. Ruby on Rails (RoR), also known as Rails, is a Web application development framework written in Ruby. It is designed with the principles such as “don’t repeat yourself”, and “convention over configuration” in mind to facilitate faster and more efficient Web application development with reduced redundant code. RoR has very quickly become one of the popular Web application development frameworks in Web 2.0 applications. 4.5.1 IBM IBM_DB gem IBM provides support for database connectivity to IBM data servers using Ruby and Ruby on Rails through the IBM_DB gem. The IBM_DB gem allows Ruby applications to access both Informix Data Server (IDS) and DB2 data servers, based on the Distributed Relational Database Architecture™ (DRDA®) protocol. IBM is the only vendor that provides enablement and support for Ruby on Rails. The Ruby Gem, Rails Adapter/Driver for IBM Data Servers is available for download, free of cost, at the following site: http://rubyforge.org/projects/rubyibm/ 4.5.2 Installation of IBM_DB gem We first cover the prerequisites to installing IBM_DB gem and then we discuss about the installation on Linux, UNIX, and Windows. Prerequisites Ensure that the following Ruby and Rails components are installed prior to installing IBM_DB gem to access IBM data servers: Ruby: You can download the latest Ruby from: http://www.ruby-lang.org/en/downloads/ For Linux and UNIX, there is source code available. For Windows, a one-click installer is also available. RubyGems: RubyGems is the standard Ruby package manager. You can download RubyGems from: http://rubyforge.org/frs/?group_id=126
- 196. 182 DB2 Deployment Guide Uncompress the download file, change to the newly created directory, and run the following command to install it on Linux, UNIX, and Windows: ruby setup.rb Rails: You can install Rails from the command line if your system has Internet access by using the following command on Linux, UNIX, and Windows: gem install rails --include-dependencies Otherwise, download the latest Rails from: http://rubyforge.org/frs/?group_id=307 If you are installing Rails manually, install activerecord as well. It can be downloaded from: http://rubyforge.org/projects/activerecord/ IBM Data Server Driver for CLI support: The Ruby driver and Rails adaptor utilize CLI to communicate with DB2. If either IBM Data Server Client or IBM Data Server Runtime Client is present, this step is not required. Otherwise, IBM Data Server Driver for ODBC and CLI is required to access DB2 database. Alternatively, for Windows systems, you can use IBM Data Server Driver for ODBC, CLI, and .NET. Both are described in detail in 4.1.2, “IBM Data Server Driver for ODBC, CLI, and .NET, and IBM Data Server Driver for ODBC and CLI” on page 143. Installation procedure for Linux, UNIX, and Windows IBM DB2 version 9.5 Linux, UNIX, and Windows, IBM Data Server Client and IBM Data Server Runtime Client are shipped with IBM_DB gem files. Copy the gem file from <Path to sqllib>/sqllib/rubyxx (where xx is either 32 or 64). The gem file is named as ibm_db-xx.gem (where xx is the version of IBM_DB). You can install IBM_DB gem on Linux, UNIX and Windows systems by issuing the following command: gem install ibm_db --ignore-dependencies Alternatively, if your system has Internet access, you can get the latest gem by using the following command: gem install ibm_db The latest gem and the source code can be downloaded from: http://rubyforge.org/frs/?group_id=2361
- 197. Chapter 4. Deploying applications with DB2 183 4.5.3 Creating a sample Ruby application In order to demonstrate Ruby application deployment, we have a sample application named itso_rubyapp.rb that reads the connectivity information from the command line and establishes connection to a database. The database can be both local or remote. If the connection fails, the application returns an error message. The complete code is shown in A.3, “Ruby” on page 263 and is available for download. For the download instructions, refer to Appendix B, “Additional material” on page 267. To run the application, create a directory and then save the application as itso_rubyapp.rb. You can run the application as in Example 4-25. demonstrating a successful connection to a remote database with uncatalog connection. Example 4-25 Successful connection using itso_rubyapp.rb itsouser@ubuntu:~/redbook$ ruby itso_rubyapp.rb mensa 50001 test db2inst1 password Trying to establish connection... Is connection active? : true Closing connection... Connection closed. If there is any incorrect information, the connection will fail and an error message will be thrown as shown in Example 4-26. Example 4-26 Failed connection using itso_rubyapp.rb itsouser@ubuntu:~/redbook$ ruby itso_rubyapp.rb mensa 50001 test db2inst1 wrongpassword Trying to establish connection... [IBM][CLI Driver] SQL30082N Security processing failed with reason "24" ("USERNAME AND/OR PASSWORD INVALID"). SQLSTATE=08001 SQLCODE=-30082 4.5.4 Deploying a Ruby application with the DB2 drivers In this section, we demonstrate how to deploy a DB2 Ruby application with the DB2 drivers. We assume that the target system already have the Ruby and Rails framework installed but DB2 components are not installed on the system. The general tasks for deploying a Ruby application with ODBC and CLI driver are: Prepare IBM_DB2 gem file and redistributable DB2 ODBC and CLI driver files Prepare the Ruby application package Prepare the deployment package Deploy the deployment package to the target system We organize all the deployment files under a directory, ruby_deploy.
- 198. 184 DB2 Deployment Guide Preparing IBM_DB gem and redistributable DB2 ODBC and CLI driver files You can obtain the IBM_DB2 gem file from any of the methods described in “Installation procedure for Linux, UNIX, and Windows” on page 182. For this example, we have taken the gem file named ibm_db-0.9.0.gem from IBM Data Server Client. We have assumed that Ruby, RubyGems, and Rails are installed on the target system and the user has sufficient read and write permissions to install IBM_DB gem. We place the IBM_DB gem file under ruby_deploy/gem. You also have to prepare the DB2 ODBC and CLI driver files. We discuss how to prepare the redistributable driver files in “Preparing the redistributable driver files” on page 159. The DB2 ODBC and CLI driver files are also required for deploying the Ruby application that accesses DB2 databases. In this example, we gather the required DB2 driver files under ruby_deploy/odbcdrv and zip them in a package itso_cli.tar.gz. Preparing the Ruby application package This step is to identify all the Ruby application files. In real life, the application is usually under some type of library control system and can be gathered easily. In our example, we only have a simple Ruby application file itso_rubyapp.rb for demonstration purpose. We place it under /puby_deploy/bin. Preparing the deployment package We create a deployment script, ruby_app_install, to automate the deployment process. The script copies the application file to a specified path and installs the gem file. It also extracts ODBC and CLI driver files to specified path and performs environmental configuration. Example 4-27 shows the deployment script. There are two command line options for the script: The flag -p specifies the location where application to be deployed. The flag -r registers required system variables. Example 4-27 Code of script ruby_app_install #!/usr/bin/ksh ########################################################################## # # Deploy application and ODBC CLI driver files to target path # # ruby_app_install -p <installpath> -r # # -p specify the location where application and ODBC drv files to be deployed # -r specify to configure system variable for ODBC and CLI driver # # example: ruby_app_install -p /home/db2app/myapp -r"
- 199. Chapter 4. Deploying applications with DB2 185 # ########################################################################## #set -x # Define variables DIR_DRV=odbcdrv # directory for odbc and cli driver files DIR_APP=bin # directory for applications DIR_GEM=gem # directory for gem file unset REGVAR # command-line syntax syntax() { echo " ruby_app_install -p <installpath> -r -p specify the location where application and ODBC lib files will be deployed -r specify to configure system variable for ODBC and CLI driver example: ruby_app_install -p /home/db2app/myapp -r" } # main program # process command-line options case $# in 0) syntax exit 1;; *) while getopts "p:r" OPT; do case $OPT in p) INSTPATH=$OPTARG mkdir -p $INSTPATH ;; r) REGVAR=Y ;; ?) echo "invalid command line option $*" syntax exit 1 ;; esac done ;; esac # verify the ODBC driver files and application files are ready # and then start the deployment TESTPATH=`echo $0|egrep '^/'` if [ -z $TESTPATH ]; then dirname `pwd`/$0|read CURPATH else CURPATH=`dirname $0` fi cd $CURPATH if [ ! -d $DIR_DRV ] || [ ! -d $DIR_APP ] || [ ! -d $DIR_GEM ] ; then
- 200. 186 DB2 Deployment Guide echo " ODBC CLI driver, Application, or gem directory not existing.n Abort." exit 1 fi # deploy applications and ODBC CLI driver to specified path cd $INSTPATH cp -R "$CURPATH/$DIR_APP" . # Install the driver. cd $CURPATH/$DIR_GEM gem install ibm_db --ignore-dependencies cd $INSTPATH mkdir -p "$DIR_DRV" cd $DIR_DRV for file in "$CURPATH/$DIR_DRV/*.tar.gz" do gunzip -c $file|tar -xf - done # register system variable ODBCLIBPATH=`find $INSTPATH/$DIR_DRV -type d -name lib` case $REGVAR in Y) echo " # The following lines have been added by ruby_app_install script export LIBPATH=$LIBPATH:$ODBCLIBPATH export LD_LIBRARY_PATH=$LD_LIBRARY_PATH:$ODBCLIBPATH " >> ~/.profile if [ `uname` == "AIX" ]; then echo " export DB2_CLI_DRIVER_INSTALL_PATH=$DB2_CLI_DRIVER_INSTALL_PATH:$ODBCLIBPATH" >> ~/.profile fi echo " System variables registered. Please re-login to have the settings be effective." ;; *) echo " You choose not registering system variable. It could be finished later by adding following lines to your user profile: export LIBPATH=$LIBPATH:$ODBCLIBPATH export LD_LIBRARY_PATH=$LD_LIBRARY_PATH:$ODBCLIBPATH" if [ `uname` == "AIX" ]; then echo " export DB2_CLI_DRIVER_INSTALL_PATH=$DB2_CLI_DRIVER_INSTALL_PATH:$ODBCLIBPATH" fi ;; esac printf "n Deployment finished.n"
- 201. Chapter 4. Deploying applications with DB2 187 We placed the deployment script under our deployment directory /ruby_deploy. Example 4-28 shows the contents of the ruby_deploy directory, which now has all the files for deployment. Example 4-28 Contents of ruby_deployment directory itsouser@ubuntu:~/ruby_deploy$ ls -Rl .: total 16 drwxrwxr-x 2 itsouser itsouser 4096 2008-06-27 20:41 bin drwxrwxr-x 2 itsouser itsouser 4096 2008-06-27 20:41 gem drwxrwxr-x 2 itsouser itsouser 4096 2008-06-27 20:41 odbcdrv -rwxr-xr-x 1 itsouser itsouser 2972 2008-06-27 20:41 ruby_app_install ./bin: total 4 -rw-r--r-- 1 itsouser itsouser 1055 2008-06-27 20:41 itso_rubyapp.rb ./gem: total 288 -r--r--r-- 1 itsouser itsouser 289792 2008-06-27 20:41 ibm_db-0.9.0.gem ./odbcdrv: total 7564 -rw-rw-r-- 1 itsouser itsouser 7730644 2008-06-27 20:41 itso_cli.tar.gz We can simply compress and archive the entire directory for distribution to other systems. See Example 4-29. Example 4-29 Package generation for ruby_deploy itsouser@ubuntu:~/ruby_deploy$ tar -cvf - *|gzip -c > ../ruby_app_installer.tar.gz bin/ bin/itso_rubyapp.rb gem/ gem/ibm_db-0.9.0.gem odbcdrv/ odbcdrv/itso_cli.tar.gz ruby_app_install Deploying the DB2 Ruby application The deployment process for the DB2 ruby application involves transfer of the deployment package to the target system, uncompressing/extracting files in the package and then executing the deployment script. See Example 4-30.
- 202. 188 DB2 Deployment Guide Example 4-30 Deploying using script ruby_app_install $ whoami ruby_dep $ gunzip -c ruby_app_installer.tar.gz |tar -xf - $ ls -l total 7480 drwxrwxr-x 2 ruby_dep test01 4096 2008-06-27 20:41 bin drwxrwxr-x 3 ruby_dep test01 4096 2008-06-27 21:33 gem drwxrwxr-x 2 ruby_dep test01 4096 2008-06-27 20:41 odbcdrv -rwxr-xr-x 1 ruby_dep test01 2973 2008-06-27 14:21 ruby_app_install -rw-rw-r-- 1 ruby_dep test01 7630289 2008-06-27 21:31 ruby_app_installer.tar.gz $ ./ruby_app_install -p /home/ruby_dep/ruby_app -r Successfully installed ibm_db-0.9.0 1 gem installed Installing ri documentation for ibm_db-0.9.0... Installing RDoc documentation for ibm_db-0.9.0... System variables registered. Please re-login to have the settings be effective. Deployment finished. After deploying the Ruby application, logout and login again for the new environment setting to take effect. You can see the subdirectories in the specified location. The Ruby application is placed in the bin subdirectory of the specified location. After successful deployment, you are now ready to proceed with the application testing. Example 4-31 shows the output of our newly deployed sample application, itso_rubyapp.rb. Example 4-31 Testing deployed Ruby application $ cd /home/ruby_dep/ruby_app/bin $ ruby itso_rubyapp.rb mensa 50001 test db2inst1 password Trying to establish connection... Is connection active? : true Closing connection... Connection closed. 4.5.5 Help and support You can obtain assistance from IBM using the following forum section in the rubyforge Web site: http://rubyforge.org/forum/?group_id=2361
- 203. Chapter 4. Deploying applications with DB2 189 4.6 Python Python (also known as CPython) is a general purpose, high level scripting language well suited for rapid application development. It is influenced by languages such as C, Perl, Haskell, and Java. Python supports different programming paradigms such as procedural, object-oriented, aspect-oriented, metaprogramming and functional programming. SQLAlchemy is an open source Python SQL toolkit and object-relational mapper (ORM) that gives application developer the full flexibility and power of SQL. SQLAlchemy’s philosophy is that SQL databases behave less and less like object collections the more size and performance start to matter, while object collections behave less and less like tables and rows the more abstraction starts to matter. It is one the prominent ORM tools in usage by Python community. You can learn more about SQLAlchemy from the site: http://www.sqlalchemy.org/ Python has a Database Interface (DBI) specification that aims to standardize the way Python modules access different databases. It specifies the module interface, objects, and methods that are independent of the database being used. In the following sections, we describe the open source products that IBM provides to access DB2 databases. 4.6.1 IBM_DB driver IBM_DB is DB2 Python driver which is used to connect to IBM databases. The IBM_DB driver is the C extension module that wraps IBM Data Server Driver for ODBC and CLI APIs. It provides the means to issue SQL queries, call stored procedures, work with large objects, persistent connections, pureXML, and metadata information against IBM data servers. 4.6.2 IBM_DB_DBI wrapper IBM_DB_DBI is a module that implements the Python DBI API. The Python DBI API is defined by the Python community, and it uses IBM_DB internally to connect to DB2 databases. It is an open source product and is written in Python. The IBM_DB_DBI provides the means to issue SQL queries, call stored procedures, work with large objects, and use pureXML.
- 204. 190 DB2 Deployment Guide 4.6.3 IBM_DB_SA adaptor IBM_DB_SA is an adaptor IBM provides for SQLAlchemy. The IBM_DB_SA adapter provides SQLAlchemy interface to IBM Data Servers that conforms to the SQL Alchemy 0.4.0 specification. IBM_DB_SA internally calls IBM_DB_DBI to connect to DB2 databases. This also is an open source product and is written in Python. 4.6.4 Installation of IBM Python drivers You can install both IBM_DB driver and IBM_DB_DBI wrapper simultaneously in one process. You can install IBM_DB_SA adaptor separately. We first discuss the prerequisites to installing the driver, wrapper, and adaptor and then move to installation. The installation process is the same for Linux and Windows. Prerequisites You must have the following software before you can install and use the driver, DBI wrapper, and SQLAlchemy adaptor: Python: Most Linux and UNIX systems come with Python installed, but you might want to install a local copy of Python on which you have full control. You can download the latest Python from: http://www.python.org/download/ Compressed source code is available for Linux, UNIX, and Windows. The install file is also available for Windows. Optionally, you can download Python documentation from: http://www.python.org/doc/ setuptools: setuptools is required to download, install, upgrade, and uninstall Python packages. You can find the installation instructions at the following URL: http://pypi.python.org/pypi/setuptools/ You can also download setuptools for your environment from this URL. Note: For Linux and UNIX, you also have to install the python2.5-dev package as well. For Debian based systems, issue the following command to install it: sudo apt-get install python2.5-dev
- 205. Chapter 4. Deploying applications with DB2 191 IBM Data Server Driver for CLI support: All Python extensions communicate to DB2 using CLI. If either IBM Data Server Client or IBM Data Server Runtime Client is present, this step is not required. Otherwise, you require IBM Data Server Driver for ODBC and CLI to run your application. Alternatively, for Windows systems, you can use IBM Data Server Driver for ODBC, CLI, and .NET. Both are described in detail in 4.1.2, “IBM Data Server Driver for ODBC, CLI, and .NET, and IBM Data Server Driver for ODBC and CLI” on page 143. Installation procedure You can install IBM_DB driver and IBM_DB_DBI wrapper on Linux, UNIX and Windows systems by issuing the following command: easy_install ibm_db To start using IBM_DB_DBI wrapper, add the path where the egg file resides to the environment variable PYTHONPATH. For Linux and UNIX systems: export PYTHONPATH=<Path where setuptools is installed>/site-packages/ibm_db-xx.egg Similarly, issue the following command on Windows: set PYTHONPATH=<Path where setuptools is installed>site-packagesibm_db-xx.egg You can install IBM_DB_SA adaptor on Linux and Windows systems by issuing the following command: easy_install ibm_db_sa Note: On Linux and UNIX systems, setuptools has dependencies on the zlib-bin and zlib1g-dev packages. These are generally installed on systems; so ensure that you have them installed. Otherwise, install them using the following commands: sudo apt-get install zlib-bin sudo apt-get install zlib1g-dev You can also search for these packages and install them manually. Note: SQLAlchemy is a prerequisite if you want to install IBM_DB_SA adaptor for SQLAlchemy. SQLAlchemy can be downloaded from: http://www.sqlalchemy.org/download.html
- 206. 192 DB2 Deployment Guide You can download the latest source code of IBM_DB driver and IBM_DB_DBI wrapper from: http://pypi.python.org/pypi/ibm_db/ If you have downloaded the source code, you can build and install the driver as well. You can find build instructions in the README file within the compressed file. Similarly, you can download the latest source code of IBM_DB_SA adaptor from: http://pypi.python.org/pypi/ibm_db_sa/ The source can also be browsed online from: http://code.google.com/p/ibm-db/source/browse 4.6.5 Creating a sample Python application We have a simple Python application to demonstrate the application deployment. This sample application named itso_pyapp.py reads the connectivity information from the command line and uses that to connect to a database. The database can be both local or remote. If the connection fails, the application gives an explanatory error message. If the connection succeeds, the application shows the success message. The complete code is shown in A.4, “Python” on page 264 and is available for download. For the download instructions, refer to Appendix B, “Additional material” on page 267. To run the application, create a directory and then save the application as itso_pyapp.py. You can run the application as shown in Example 4-32. The example demonstrates a successful connection to a remote database with the uncatalog connection. You can also test it against a local database as well. Example 4-32 Successful connection using itso_pyapp.py itsouser@ubuntu:~/redbook$ python itso_pyapp.py mensa 50001 test db2inst1 password Trying to establish connection... Is connection active? : True Note: Internet access is required for this method of installation to work. You can also download the appropriate eggs from: http://code.google.com/p/ibm-db/downloads/list Copy these to your system, change to the directory where you have copied the egg, and issue the following command to install: easy_install <egg file name>
- 207. Chapter 4. Deploying applications with DB2 193 Closing connection... Connection closed. If there is any incorrect information, the connection will fail and an error message is returned as shown in Example 4-33. Example 4-33 Failed connection using itso_pyapp.py itsouser@ubuntu:~/redbook$ python itso_pyapp.py mensa 50001 test db2inst1 wrongpassword Trying to establish connection... Traceback (most recent call last): File "itso_pyapp.py", line 38, in <module> main(sys.argv[1:]) File "itso_pyapp.py", line 31, in main conn = ibm_db.connect( dsn, "", "" ) Exception: [IBM][CLI Driver] SQL30082N Security processing failed with reason "24" ("USERNAME AND/OR PASSWORD INVALID"). SQLSTATE=08001 SQLCODE=-30082 We now introduce deployment considerations. 4.6.6 Deploying a Python application with the DB2 drivers In this section, we demonstrate how to deploy a DB2 Python application with DB2 drivers. We assume that the target system already has the Python installed but the DB2 driver for Ruby application is not on the system. The steps for deploying a Python application with ODBC CLI driver are as follows: Prepare the Python driver file and redistributable DB2 driver files Prepare the Python application package Prepare the deployment package Deploying the deployment package to the target system We organize all the deployment files under a directory, python_deploy. Preparing Python driver and redistributable DB2 driver files If your application is using only the IBM_DB driver, then it is not necessary to package IBM_DB_SA as well. Similarly, you do not have to set up PYTHONPATH for the IBM_DB_DBI wrapper if your application is not using it. You can obtain the driver egg file from any of the methods described in “Installation procedure” on page 191. For this example, we have built the driver egg file from source code named ibm_db-0.2.9-py2.5-linux-x86_64.egg and the setup tools from the Internet named setuptools-0.6c7-py2.5.egg.
- 208. 194 DB2 Deployment Guide We have assumed that Python is installed on the deployment machine, and that the user has sufficient read and write permissions to install setuptools and driver eggs. We place the egg files setuptools-0.6c7-py2.5.egg and ibm_db-0.2.9-py2.5-linux-x86_64.egg under python_deploy/gem. You also have to prepare the DB2 driver files. We discuss how to prepare the redistributable driver files in “Preparing the redistributable driver files” on page 159. This procedure can also be applied for preparing the DB2 ODBC and CLI drivers for Python to be deployed along with the application. The script requires a slight modification. In this example, we gather the required DB2 driver files under pythony_deploy/odbcdrv and zip them in a package itso_cli.tar.gz. Preparing the Python application package The application is usually under some type of library control system and can be gathered easily. In our example, we only have a simple Python application file itso_pyapp.py for demonstration purpose. We place it under /python_deploy/bin. Preparing the deployment package To automate the application deployment as much as we can, we create a deployment script, python_app_install. The script copies the application file to specified path and installs the gem file. It also extracts ODBC and CLI driver files to specified path and performs environmental configuration. Example 4-27 shows the deployment script. There are two command line options for the script: The flag -p specifies the location where application to be deployed. The flag -r registers required system variables. Example 4-34 Code of script py_app_install #!/usr/bin/ksh ########################################################################## # # Deploy application and ODBC CLI driver files to target path # # py_app_install -p <installpath> -r # # -p specify the location where application and ODBC drv files to be deployed # -r specify to configure system variable for ODBC and CLI driver # # example: py_app_install -p /home/db2app/myapp -r" # ########################################################################## #set -x # Define variables DIR_DRV=odbcdrv # directory for odbc and cli driver files DIR_APP=bin # directory for applications
- 209. Chapter 4. Deploying applications with DB2 195 DIR_EGG=egg # directory for egg file unset REGVAR # command-line syntax syntax() { echo " py_app_install -p <installpath> -r -p specify the location where application and ODBC lib files will be deployed -r specify to configure system variable for ODBC and CLI driver example: py_app_install -p /home/db2app/myapp -r" } # main program # process command-line options case $# in 0) syntax exit 1;; *) while getopts "p:r" OPT; do case $OPT in p) INSTPATH=$OPTARG mkdir -p $INSTPATH ;; r) REGVAR=Y ;; ?) echo "invalid command line option $*" syntax exit 1 ;; esac done ;; esac # verify the ODBC driver files and application files are ready # and then start the deployment TESTPATH=`echo $0|egrep '^/'` if [ -z $TESTPATH ]; then dirname `pwd`/$0|read CURPATH else CURPATH=`dirname $0` fi cd $CURPATH if [ ! -d $DIR_DRV ] || [ ! -d $DIR_APP ] || [ ! -d $DIR_EGG ] ; then echo " ODBC CLI driver, Application, or Egg directory not existing.n Abort." exit 1 fi # deploy applications and ODBC CLI driver to specified path cd $INSTPATH cp -R "$CURPATH/$DIR_APP" .
- 210. 196 DB2 Deployment Guide # Install the setuptools and egg. cd $CURPATH/$DIR_EGG sh setuptools*.egg easy_install ibm_db*.egg cd $INSTPATH mkdir -p "$DIR_DRV" cd $DIR_DRV for file in "$CURPATH/$DIR_DRV/*.tar.gz" do gunzip -c $file|tar -xf - done # register system variable ODBCLIBPATH=`find $INSTPATH/$DIR_DRV -type d -name lib` case $REGVAR in Y) echo " # The following lines have been added by py_app_install script export LIBPATH=$LIBPATH:$ODBCLIBPATH export LD_LIBRARY_PATH=$LD_LIBRARY_PATH:$ODBCLIBPATH " >> ~/.profile if [ `uname` == "AIX" ]; then echo " export DB2_CLI_DRIVER_INSTALL_PATH=$DB2_CLI_DRIVER_INSTALL_PATH:$ODBCLIBPATH" >> ~/.profile fi echo " System variables registered. Please re-login to have the settings be effective." ;; *) echo " You choose not registering system variable. It could be finished later by adding following lines to your user profile: export LIBPATH=$LIBPATH:$ODBCLIBPATH export LD_LIBRARY_PATH=$LD_LIBRARY_PATH:$ODBCLIBPATH" if [ `uname` == "AIX" ]; then echo " export DB2_CLI_DRIVER_INSTALL_PATH=$DB2_CLI_DRIVER_INSTALL_PATH:$ODBCLIBPATH" fi ;; esac printf "n Deployment finished.n" We placed the deployment script under our deployment directory /python_deploy. Example 4-35 shows the contents of python_deploy directory that now has all the files to be deployed.
- 211. Chapter 4. Deploying applications with DB2 197 Example 4-35 Contents of python_deploy directory itsouser@ubuntu:~/python_deploy$ ls -Rl .: total 16 drwxr-xr-x 2 itsouser itsouser 4096 2008-06-28 17:52 bin drwxr-xr-x 2 itsouser itsouser 4096 2008-06-28 21:29 egg drwxr-xr-x 2 itsouser itsouser 4096 2008-06-28 17:52 odbcdrv -rwxr-xr-x 1 itsouser itsouser 2978 2008-06-28 11:25 py_app_install ./bin: total 4 -rw-r--r-- 1 itsouser itsouser 1164 2008-06-28 17:52 itso_pyapp.py ./egg: total 716 -rw-rw-r-- 1 itsouser itsouser 400192 2008-06-28 21:29 ibm_db-0.2.9-py2.5-linux-x86_64.egg -rw-r--r-- 1 itsouser itsouser 322831 2008-06-28 17:52 setuptools-0.6c7-py2.5.egg ./odbcdrv: total 7564 -rw-rw-r-- 1 itsouser itsouser 7730644 2008-06-28 17:52 itso_cli.tar.gz We can simply archive and compress the entire directory for distributing to other systems. See Example 4-36. Example 4-36 Package generation for python_deploy itsouser@ubuntu:~/python_deploy$ tar -cvf - * | gzip -c > ../py_app_installer.tar.gz bin/ bin/itso_pyapp.py egg/ egg/ibm_db-0.2.9-py2.5-linux-x86_64.egg egg/setuptools-0.6c7-py2.5.egg odbcdrv/ odbcdrv/itso_cli.tar.gz py_app_install Deploying the sample Python application The deployment process for the DB2 Python application involves transfer of the deployment package to the target system, uncompressing/extracting files in the package, and then executing the deployment script. See Example 4-37 for the steps involved in DB2 Python application deployment.
- 212. 198 DB2 Deployment Guide Example 4-37 Deploying using script py_app_install $ whoami python_dep $ gunzip -c py_app_installer.tar.gz | tar -xf - $ ls -l total 7872 drwxr-xr-x 2 python_dep test01 4096 2008-06-28 17:52 bin drwxr-xr-x 2 python_dep test01 4096 2008-06-28 21:29 egg drwxr-xr-x 2 python_dep test01 4096 2008-06-28 17:52 odbcdrv -rwxr-xr-x 1 python_dep test01 2978 2008-06-28 11:25 py_app_install -rw-rw-r-- 1 python_dep test01 8032077 2008-06-28 21:35 py_app_installer.tar.gz $ $ ./py_app_install -p /home/python_dep/py_app -r Processing setuptools-0.6c7-py2.5.egg Copying setuptools-0.6c7-py2.5.egg to /home/python_dep/setup/Python-2.5.1/lib/python2.5/site-packages Adding setuptools 0.6c7 to easy-install.pth file Installing easy_install script to /home/python_dep/setup/Python-2.5.1/bin Installing easy_install-2.5 script to /home/python_dep/setup/Python-2.5.1/bin Installed /home/python_dep/setup/Python-2.5.1/lib/python2.5/site-packages/setuptools-0.6c7-py2.5.e gg Processing dependencies for setuptools==0.6c7 Finished processing dependencies for setuptools==0.6c7 Processing ibm_db-0.2.9-py2.5-linux-x86_64.egg creating /home/python_dep/setup/Python-2.5.1/lib/python2.5/site-packages/ibm_db-0.2.9-py2.5-linux -x86_64.egg Extracting ibm_db-0.2.9-py2.5-linux-x86_64.egg to /home/python_dep/setup/Python-2.5.1/lib/python2.5/site-packages Adding ibm-db 0.2.9 to easy-install.pth file Installed /home/python_dep/setup/Python-2.5.1/lib/python2.5/site-packages/ibm_db-0.2.9-py2.5-linux -x86_64.egg Processing dependencies for ibm-db==0.2.9 Finished processing dependencies for ibm-db==0.2.9 System variables registered. Please re-login to have the settings be effective. Deployment finished. After the deployment script is executed, you have to logout and login again in order for the new environment setting to take effect. You can see the subdirectories in the specified location. The Python application is put under the bin subdirectory of the specified location. After successful deployment, you are now ready to proceed with the application testing. Example 4-38 shows the output of our newly deployed application, itso_pyapp.php .
- 213. Chapter 4. Deploying applications with DB2 199 Example 4-38 Verifying deployed Python application $ cd /home/python_dep/py_app/bin $ python itso_pyapp.py mensa 50001 test db2inst1 password Trying to establish connection... Is connection active? : True Closing connection... Connection closed. 4.6.7 Help and support You can seek assistance related to IBM_DB, IBM_DB_DBI, or IBM_DB_SA from following forum http://groups.google.com/group/ibm_db 4.7 Perl Perl stands for Practical Extraction and Report Language. It is an interpreted language optimized for scanning text files and extracting information from these text files. It is influenced by a variety of languages such as AWK, C, Lisp, and shell scripts. It supports different programming paradigms such as procedural, object-oriented, and functional. There is also a large collection of third party modules, which makes Perl even more useful. Because of these reasons, Perl is widely used in system administration, network programming, as well as Web development along with text manipulation. Perl has the ability to access a wide variety of databases through DBI (Database interface module). DBI defines a set of methods and conventions that you can use independent of the database being used. IBM Perl driver conforms to this DBI specification. This driver is an open source. 4.7.1 DBD::DB2 DBD::DB2 is the IBM provided database driver module that implements DBI for accessing IBM DB2 databases. It is supported on Perl version 5.6 and greater. You can use this driver to connect to IBM DB2 version 8.2 and greater and all DB2 supported operating system platforms. You can use features of DB2 such as issue SQL queries, call stored procedures, and work with large objects.
- 214. 200 DB2 Deployment Guide 4.7.2 Installation of IBM Perl driver First we discuss about prerequisites to installing IBM Perl driver (DBD::DB2) and then we show how to install DBD::DB2. Prerequisites to installing DBD::DB2 Before installing DBD::DB2, you require the following software: Perl version 5.6 or greater: Perl is required to install DBD::DB2. Most Linux and UNIX systems come with Perl installed, but you might want to install a local copy of Perl on which you have full control. You can download the latest Perl from: http://www.perl.com/download.csp This page contains links to download both the source code and binaries for various platforms. You can refer to Perl documentation at: http://www.perl.com/pub/q/documentation DBI version 2.1 or greater: DBD::DB2 is based on DBI and thus, you have to install DBI before installing DBD::DB2. For Linux and UNIX, download the latest DBI from: http://search.cpan.org/author/TIMB/DBI/ Example 4-39 shows how to install DBI on Linux and UNIX systems: Example 4-39 Installing DBI on Linux and UNIX wget http://search.cpan.org/CPAN/authors/id/T/TI/TIMB/DBI-1.605.tar.gz tar -xvf DBI-1.605.tar.gz cd DBI-1.605/ perl Makefile.PL make make test make install If you are using ActiveState Perl distribution (version 5.8 or greater) on Windows, you can install DBI by issuing the following command on the command line: ppm install DBI After DBI is successfully installed, you can check the documentation by issuing the following command on the command line: perldoc DBI
- 215. Chapter 4. Deploying applications with DB2 201 If you are using some other Perl distribution on Windows, you have to install DBI manually. Download and uncompress the latest DBI from: http://search.cpan.org/author/TIMB/DBI/ Example 4-40 shows how to install DBI for Windows for Perl distribution other than ActiveState. The example assumes that you have uncompressed the compressed file into a directory and you are currently in that directory. Example 4-40 Installing DBI for Windows for Perl distribution other than ActiveState perl Makefile.PL nmake nmake test nmake install IBM Data Server Driver for CLI support: All Perl interfaces communicate to DB2 using CLI. You require IBM Data Server Client to use the driver on Linux and UNIX. For Windows systems, you can use IBM Data Server Driver for ODBC and CLI or IBM Data Server Driver for ODBC, CLI, and .NET. Both are described in detail in 4.1.2, “IBM Data Server Driver for ODBC, CLI, and .NET, and IBM Data Server Driver for ODBC and CLI” on page 143. Installation procedure for Linux and UNIX To install DBD::DB2, download the source from: http://www.cpan.org/authors/id/I/IB/IBMTORDB2/DBD-DB2-1.1.tar.gz Uncompress the file in a directory. IBM Data Server Client is required to install it. Example 4-41 shows the installation steps. The example assumes that DB2_HOME is /opt/ibm/db2/V9.5. Example 4-41 Installation commands for installing DBD::DB2 export DB2_HOME=/opt/ibm/db2/V9.5 perl Makefile.PL make make test make install Note: You might have to use dmake instead of nmake depending on the Perl you are using. Refer to your Perl manual for more information.
- 216. 202 DB2 Deployment Guide Installation procedure for Windows If you are using ActiveState Perl distribution (version 5.8 or greater) on Windows, you can install DBI with the help of ppm: ppm install http://theoryx5.uwinnipeg.ca/ppms/DBD-DB2.ppd After it is successfully installed, you can check the documentation and a sample application through perldoc: perldoc DBD::DB2 If you are using some other Perl distribution on Windows, then the installation process is manual. Download the and uncompress DBD::DB2 source from: http://www.cpan.org/authors/id/I/IB/IBMTORDB2/DBD-DB2-1.1.tar.gz After you uncompress the compressed file into a directory, you can issue installation commands shown in Example 4-40 on page 201. Issue the same commands to install DBD::DB2. 4.7.3 Creating a sample Perl application We create a simple Perl application to demonstrate the application deployment. This sample application named itso_perlapp.pl reads the connectivity information from command line and uses that to connect to a database. The database can be both local or remote. If the connection fails, we get an explanatory error message. If the connection succeeds, the application shows the success message. The complete code is shown in A.5, “Perl” on page 265 and is available for download. For the download instructions, refer to Appendix B, “Additional material” on page 267. To run the application, create a directory and save the application as itso_perlapp.pl. Run the application as shown in Example 4-42. The example demonstrates a successful connection to a remote database with uncatalog connection. You can test it against a local database too. Example 4-42 A successful connection using itso_perlapp.pl itsouser@ubuntu:~/redbook$ perl itso_perlapp.pl mensa 50001 test db2inst1 password Trying to establish connection... Connection successful. Closing connection... Connection closed. Note: You can uninstall DBD::DB2 by issuing the following command: ppm uninstall DBD::DB2
- 217. Chapter 4. Deploying applications with DB2 203 If there is any incorrect information, the connection will fail and suitable error message will be thrown as shown in Example 4-43. Example 4-43 Failed connection using itso_perlapp.pl itsouser@ubuntu:~/redbook$ perl itso_perlapp.pl mensa 50001 test db2inst1 wrongpassword Trying to establish connection... Database connection not made: [IBM][CLI Driver] SQL30082N Security processing failed with reason "24" ("USERNAME AND/OR PASSWORD INVALID"). SQLSTATE=08001 4.7.4 Deploying a Perl application with the DB2 drivers In this section, we demonstrate how to deploy a DB2 Perl application with the DB2 drivers. We assume that the target system has already has Perl installed, but the DB2 drivers for Perl are not in place yet. The general tasks for deploying a Perl application with ODBC CLI driver are as follows: Prepare the Perl driver and the redistributable DB2 driver files. Prepare the Perl application package. Prepare the deployment package. Deploying the deployment package to the target system. We organize all the deployment files under a directory perl_deploy. Preparing Perl driver and redistributable DB2 driver files You can obtain the DBI and the driver file as described in “Installation of IBM Perl driver” on page 200. The driver deployment procedure differs on Linux, UNIX and Windows systems. For Windows, you can use IBM Data Server Driver for ODBC, CLI (and .NET). You require IBM Data Server Client for Linux and UNIX for building DBD::DB2. In our example, we have downloaded the DBI and DBD::DB2 from the Internet for Linux named as DBI-1.605.tar.gz and DBD-DB2-1.1.tar.gz respectively. We have assumed that Perl is installed on the deployment machine and the user has sufficient read and write permissions to install DBI and DBD::DB2. Our target deployment machine also has IBM Data Server Client installed. We place the DBI and driver file under perl_deploy/driver. If you are on a Windows system, you can copy and redistribute some of the IBM Data Server Driver for ODBC and CLI files. We discuss how to prepare the redistributable driver files in “Preparing the redistributable driver files” on page 159. The procedure also can be applied for preparing the DB2 drivers for Perl to be deployed along with the application. The script requires a slight modification.
- 218. 204 DB2 Deployment Guide Preparing the Perl application package This step is to identify all the Perl application files. In real life, the application is usually under some type of library control system and can be gathered easily. In our example, we only have a simple Perl application file itso_perlapp.pl for demonstration purpose. We place it under /perl_deploy/bin. Preparing the deployment package To automate the application deployment as much as we can, we create a deployment script perl_app_install. The script copies the application file, DBI file, and DBD::DB2 file to the specified path. It also installs the and makes Perl recognize the driver file. It also installs the DBI and DBD::DB2 driver. Example 4-44 shows the deployment script. There are two command line options for the script: The flag -p specifies the location where application to be deployed. The flag -s specifies the DB2 Home path. Example 4-44 Code of script perl_app_install #!/usr/bin/ksh ########################################################################## # # Deploy application and perl driver files to target path # # perl_app_install -p <installpath> -s <db2homepath> # # -p specify the location where application and driver files to be deployed # -s specify the DB2 Home path # # example: perl_app_install -p /home/db2app/myapp -s /home/db2inst1/sqllib" # ########################################################################## #set -x # Define variables DIR_APP=bin # directory for applications DIR_DRV=driver # directory for dbi and dbd::db2 file unset REGVAR # command-line syntax syntax() { echo " perl_app_install -p <installpath> -s <sqllibpath> -p specify the location where application and ODBC lib files will be deployed -s specify the DB2 Home path example: perl_app_install -p /home/db2app/myapp -s /home/db2inst1/sqllib" }
- 219. Chapter 4. Deploying applications with DB2 205 # main program # process command-line options case $# in 0) syntax exit 1;; *) while getopts "p:s:" OPT; do case $OPT in p) INSTPATH=$OPTARG mkdir -p $INSTPATH ;; s) DB2PATH=$OPTARG export DB2_HOME=$DB2PATH ;; ?) echo "invalid command line option $*" syntax exit 1 ;; esac done ;; esac # verify the ODBC driver files and application files are ready # and then start the deployment TESTPATH=`echo $0|egrep '^/'` if [ -z $TESTPATH ]; then dirname `pwd`/$0|read CURPATH else CURPATH=`dirname $0` fi cd $CURPATH if [ ! -d $DIR_DRV ] || [ ! -d $DIR_APP ] ; then echo " Application, or driver directory not existing.n Abort." exit 1 fi # deploy applications to specified path cd $INSTPATH cp -R "$CURPATH/$DIR_APP" . # extract the dbi and dbd::db2. mkdir -p "$DIR_DRV" cd $DIR_DRV for file in $CURPATH/$DIR_DRV/*.tar.gz do gunzip -c $file|tar -xf - done # install dbi cd DBI* perl Makefile.PL make make install
- 220. 206 DB2 Deployment Guide # install dbd::db2 cd $INSTPATH/$DIR_DRV/DBD* perl Makefile.PL make make install printf "n Deployment finished.n" We placed the deployment script under our deployment directory /perl_deploy. Example 4-45 shows the contents of perl_deploy directory that now has all the files to be deployed. The packaging shown here is just an example where we have put each type of files in different directories. You can of course decide on any packaging you consider good. Example 4-45 Contents of perl_deploy directory itsouser@ubuntu:~/perl_deploy$ ls -Rl .: total 12 drwxrwxr-x 2 itsouser itsouser 4096 2008-06-28 22:51 bin drwxrwxr-x 2 itsouser itsouser 4096 2008-06-28 22:51 driver -rwxr-xr-x 1 itsouser itsouser 2093 2008-06-28 22:51 perl_app_install ./bin: total 4 -rw-r--r-- 1 itsouser itsouser 1133 2008-06-28 22:51 itso_perlapp.pl ./driver: total 588 -rw-r--r-- 1 itsouser itsouser 84030 2008-06-28 22:51 DBD-DB2-1.1.tar.gz -rw-rw-r-- 1 itsouser itsouser 504313 2008-06-28 22:51 DBI-1.605.tar.gz We can simply zip the entire directory for distributing to other systems. See Example 4-22. Example 4-46 Package generation for perl_deploy itsouser@ubuntu:~/perl_deploy$ tar -cvf - * | gzip -c > ../perl_app_installer.tar.gz bin/ bin/itso_perlapp.pl driver/ driver/DBD-DB2-1.1.tar.gz driver/DBI-1.605.tar.gz perl_app_install
- 221. Chapter 4. Deploying applications with DB2 207 Deploying the DB2 Perl application The deployment process for the DB2 Perl application involves transfer of the deployment package to the target system, uncompressing/extracting files in the package, and then executing the deployment script. See Example 4-23 for an excerpt of a sample output. Example 4-47 Deployment using script perl_app_install $ whoami perl_dep $ gunzip -c perl_app_installer.tar.gz | tar -xf - $ ls -l total 596 drwxrwxr-x 2 perl_dep test01 4096 2008-06-28 22:51 bin drwxrwxr-x 2 perl_dep test01 4096 2008-06-28 22:51 driver -rwxr-xr-x 1 perl_dep test01 2093 2008-06-28 22:51 perl_app_install -rw-rw-r-- 1 perl_dep test01 590635 2008-06-30 15:28 perl_app_installer.tar.gz $ ./perl_app_install -p /home/perl_dep/perl_deploy -s /home/db2inst1/sqllib ... ... Writing Makefile for DBI /home/perl_dep/perl/install/bin/perl "-MExtUtils::Command" -e mkpath blib/lib/DBI ... ... Installing /home/perl_dep/perl/install/lib/site_perl/5.10.0/x86_64-linux-multi/auto/DBI/DBI.so Writing /home/perl_dep/perl/install/lib/site_perl/5.10.0/x86_64-linux-multi/auto/DBI/.packlist Appending installation info to /home/perl_dep/perl/install/lib/5.10.0/x86_64-linux-multi/perllocal.pod Configuring DBD::DB2... Remember to actually read the README and CAVEATS files! Using DB2 in "/home/db2inst1/sqllib" ... ... Installing /home/perl_dep/perl/install/lib/site_perl/5.10.0/x86_64-linux-multi/auto/DBD/DB2/DB2.so Installing /home/perl_dep/perl/install/lib/site_perl/5.10.0/x86_64-linux-multi/auto/DBD/DB2/Constan ts/Constants.so Writing /home/perl_dep/perl/install/lib/site_perl/5.10.0/x86_64-linux-multi/auto/DBD/DB2/.packli st Appending installation info to /home/perl_dep/perl/install/lib/5.10.0/x86_64-linux-multi/perllocal.pod Deployment finished.
- 222. 208 DB2 Deployment Guide The Perl application is now deployed. You can see the subdirectories in the specified location. The Perl application is placed in the bin subdirectory of the specified location. You can proceed the application testing. Example 4-48 shows that our application, itso_perl_papp.pl, ran on the target system connecting to a remote database successfully. Example 4-48 Verifying deployed Perl application $ cd /home/perl_dep/perl_deploy/bin $ perl itso_perlapp.pl mensa 50001 test db2inst1 password Trying to establish connection... Connection successful. Closing connection... Connection closed. 4.7.5 Help and support You can seek assistance for any problem related to use of DBD::DB2 by sending your queries at [email protected]. 4.8 .NET The Microsoft .NET framework is the new runtime framework on Windows. The framework is included in Windows Vista and Windows Server 2008, while it is an installable component for Windows XP and Windows Server 2003. The framework consist of two parts: An extensive library: The library consists of pre-coded solutions to address common programming problems and manages the execution of programs written specifically for the framework. Common Language Runtime: Applications written to the .NET framework are compiled into intermediate code, called managed code. The Common Language Runtime provides the appearance of a virtual machine and executes the managed code. The .NET platform supports a wide range of languages such as J# and C#. The .NET framework is not supported on any other platforms than Windows.
- 223. Chapter 4. Deploying applications with DB2 209 Prerequisites Before you can access DB2 from your .NET application, these prerequisites must be in place: .NET Framework Version 2.0 or higher At the time of writing this booki, the latest version of the .NET Framework is 3.5. Usually, you should download and use the latest version. IBM Data Server Driver If either IBM Data Server Client or IBM Data Server Runtime Client is presented, installing IBM Data Server Drive is not required. Otherwise, we require IBM Data Server Driver for ODBC, CLI, and .NET Installation procedure First of all, ensure that the .NET Framework is installed on your Windows environment. You can check this by opening the “Add or Remove Programs” dialog from the Windows Control Center. If installed, the framework will be listed in the program list. If the framework is not presented, download the msi-install file for .NET Framework version 3.5 from the Microsoft Download Center: http://www.microsoft.com/downloads/details.aspx?FamilyID=333325fd-ae52-4e35-b53 1-508d977d32a6&DisplayLang=en Next, install the IBM Data Server Driver as described in 4.1.2, “IBM Data Server Driver for ODBC, CLI, and .NET, and IBM Data Server Driver for ODBC and CLI” on page 143. Deployment procedure for a .NET application We assume that the .NET framework is already installed on the target system, that is, we do not cover this topic in this deployment example. We concentrate on the deployment of the application, IBM Data Server Driver for ODBC, CLI, and the .NET. However, if installing the .NET framework is required, this step can easily be added to the install script, using a silent install of the msi installation file for the framework. Remark: For those familiar with Java and J2EE, there are a lot of similarities between the J2EE and .NET. The execution environment in J2EE is the Java Virtual Machine, which correspond to the Common Language Runtime in .NET. The .NET specifications correspond to the J2EE specifications. .NET supports a large variety of programming languages, but C# (pronounced C-sharp) is considered to be the pendant of Java in the .NET framework. Note: DB2 supports also the old .NET Framework version 1.1. However, it is not recommended to use this old version.
- 224. 210 DB2 Deployment Guide The test application, testconn20.exe, comes with the IBM Data Server Clients and the IBM Data Server Driver. We use this .NET application as the sample application to be deployed. testconn20.exe is very useful to verify a correct installation and can be a help in case of errors. Deploying our application consist of two steps. In the first step we do a silent install of the IBM Data Server Driver. The second step is to install the test application. The most common way to package a .NET application is to provide a msi-file, but in our simple scenario we just copy the application. Finally, we test the application. We use a response file for the silent install of the driver. We use a modified version of the dsdriver.rsp file from the sample directory of the install image for the driver. Example 4-49 shows the content of the response file. Example 4-49 Response file content PROD = IBM_DATA_SERVER_DRIVER LIC_AGREEMENT = ACCEPT FILE = C:Program FilesIBMIBM DATA SERVER DRIVER DEFAULT_CLIENT_INTERFACE_COPY = YES COMP = DOTNET_DATA_PROVIDER Having the response file in place, we install the driver with the command shown in Example 4-50. In the example we assume that the x: drive maps to a server location where the install image for the IBM Data Server Driver has been unpacked. We have put the modified response file in the same directory as the setup application. Example 4-50 Silent install of the IBM Data Server Driver x:setup -o -m -u x:dsdriver.rsp -l setup.log After installing the IBM Data Server Driver we test the connection by calling testconn20. Example 4-51 shows how to call testconn20 with the connection string provided as a parameter. The output is the result of a successful installation. Note: Add -dtc to the end of the call to testconn20.exe to verify distributed transaction handling with Microsoft Distributed Transaction Manager (MSDTC).
- 225. Chapter 4. Deploying applications with DB2 211 Example 4-51 Call to testconn20 and the resulting output c:>testconn20 "database=itso; server=9.43.86.48:50000; user id=db2inst1; password=***" Step 1: Printing version info .NET Framework version: 2.0.50727.832 DB2 .NET provider version: 9.0.0.2, file version: 9.5.1.2 Capability bits: ALLDEFINED Build: 20080328 Factory for invairant name IBM.Data.DB2 verified Elapsed: 1,8226208 Step 2: Connecting using "database=itso; server=9.43.86.48:50000; user id=db2inst1; password=***" Server type and version: DB2/NT 09.01.0003 Elapsed: 6,2289568 Step 3: Selecting rows from SYSIBM.SYSTABLES to validate existance of packages SELECT * FROM SYSIBM.SYSTABLES FETCH FIRST 5 rows only Elapsed: 0,9113104 Step 4: Calling GetSchema for tables to validate existance of schema functions Elapsed: 0,4606624 Test passed. You can download the application along with the response file and command file from the IBM Redbooks Web site. Refer to Appendix B, “Additional material” on page 267 for the download instructions.
- 226. 212 DB2 Deployment Guide
- 227. © Copyright IBM Corp. 2008. All rights reserved. 213 Chapter 5. Deploying pre-configured databases In this chapter we describe how to deploy the pre-configured databases with your application. We present two different ways to create the database, by using DDL statements or by using a backup image. We take a look at different ways to populate the database and explain how to upgrade an already existing database. Throughout the chapter we show how to do these tasks in two different execution environments, which are shell scripts and Java applications. In this chapter we assume that the communication between the DB2 server and the client from where we are deploying the pre-configured database is in place. That is, we assume that we have the user rights and connectivity required to execute our scripts and applications. We do not cover issues such as security, connectivity, or user rights. 5
- 228. 214 DB2 Deployment Guide 5.1 Introduction From a high level view of deploying a pre-configured database, there are four tasks to perform: Create the database. Create the database layout — buffer pools, table spaces, and so on. Create the database objects — tables, views, stored procedures, and so on. Populate tables with data. We can do these tasks in many different ways. One way is simply to restore a backup image — then it all will be in place at once. The opposite approach is to perform the steps one by one using the data definition language (DDL) statements to create the database and the database objects, then use the SQL statements to populate the tables. In between these two extremes, there are a number of different methods to choose from. We concentrate on the methods that use tools provided by DB2, such as load and import. There are many different aspects to take into account before we can decide on which method to use. Here are some of the key aspects: Are the source and target operating systems the same? Is the deployment to replace an existing database, to make changes to an existing database, or to create a new one? What amount of data must be deployed? Let us take a look at the pros and cons of the two main approaches, using a backup image or using scripts. Using a backup image Using a backup image is the easiest way to deploy a pre-configured database. However, there are some limitations that we have to take into account: Compatibility on OS level: The target environment must be the same as the one where the backup image was created: – A backup image from a Windows environment cannot be restored on a UNIX environment. – A backup from a 32-bit UNIX system cannot be restored on a 64-bit UNIX environment.
- 229. Chapter 5. Deploying pre-configured databases 215 Flexibility: Upgrading an existing database might not be as straightforward as it appears: – Keeping data in an existing database is difficult, especially if table layout has changed. – Redirected restore might be required if the storage device on the target system is different from those defined in the backup image. Using scripts Using scripts is the most flexible method and gives you total control with the deployment process. The trade-off is that scripts have to be created either manually or by a tool, data loading can take time, and additional tests are required to ensure that no errors are introduced on the manually created database. 5.1.1 Sample database In this chapter we use a sample database named ITSODB for our examples. This database consists of a subset of objects from the SAMPLE database that comes with DB2. We have taken, from the SAMPLE database, the minimum objects that are sufficient to demonstrate our pre-configured database deployment examples. We have the following database objects in ITSODB: Table Index Summary table Primary key Foreign key View Stored procedure Function Trigger Alias Check constraint Table space
- 230. 216 DB2 Deployment Guide In Figure 5-1, we depict the ITSODB database. Figure 5-1 The sample database ITSODB You can download the DDLs used to create the ITSODB from the IBM Redbooks Web site. Refer to Appendix B, “Additional material” on page 267 for the download instructions. 5.2 Deploying a database using scripts This task is about creating the database and the database objects such as tables, indexes, views, stored procedures, and so on. We assume that this is a new installation, that is, we do not describe update of an existing database. First of all, you have to prepare the set of statements for creating the entire database. Once the statements are ready, you can execute them either through a shell script or using an application. The statements and their options shown in this chapter are limited to our sample database. For more details, refer to the DB2 manuals and Information Center: Command Reference, SC23-5846 SQL Reference, Volume 1, SC23-5861 SQL Reference, Volume 2, SC23-5862 ITSO_TS1 tablespace ITSO_TS2 tablespace ITSO_BP bufferpool STAFF table trigger DEPT table EMPLOYEE table ADEFUSR summarytable Function Stored procedure Check constraint PKPK FK Index View Alias
- 231. Chapter 5. Deploying pre-configured databases 217 5.2.1 Collecting information about the database To deploy a pre-configured database to a new system, the tasks include these: Create the database. Create the database layout. Create the database objects. Database creation The database can be created by executing the CREATE DATABASE command through the Command Line Processor (CLP) or by using one of the DB2 APIs. In Example 5-1 we show how to use the CREATE DATABASE command to create our ITSODB database. Example 5-1 Statement to create the ITSODB sample database CREATE DATABASE ITSODB ON /db2 ALIAS ITSO Database layout Database layout is about buffer pools and table spaces. A table space is a logical storage unit or an abstraction of the physical storage. The mapping from table space to storage devices is handled by the containers. A table space consists of one or more containers that map directly to raw devices or files on a storage device. We use table spaces to group tables and indexes logically. When deploying the pre-configured database, these logical groups can be mapped differently on the target system based on the storage availability and data column. A buffer pool is an in-memory cache for data. A table space is associated with a buffer pool in the table space definition. One buffer pool can be the cache for data in several table spaces. Figure 5-2 illustrates two different ways to map buffer pool, table spaces, and storage for the sample database ITSODB. Note: In this chapter we use Java as a programming language. DB2 does not provide APIs for Java. DB2 provides APIs for C/C++ and COBOL.
- 232. 218 DB2 Deployment Guide Figure 5-2 Two different table space mapping for ITSODB Example 5-2 shows the database layout DDLs of ITSODB. Note that we drop the default user tablespace userspace1, which is created implicitly when we create the database using the CREATE DATABASE command. We remove the table space because it is not used. Example 5-2 ITSODB layout - buffer pool and table spaces CREATE BUFFERPOOL ITSO_BP IMMEDIATE SIZE 250 AUTOMATIC PAGESIZE 4 K; CREATE REGULAR TABLESPACE ITSO1 PAGESIZE 4 K MANAGED BY DATABASE USING ( FILE '/db2/ts/itsodb/itso1.ts' 50M) AUTORESIZE YES BUFFERPOOL ITSO_BP; CREATE REGULAR TABLESPACE ITSO2 PAGESIZE 4 K MANAGED BY DATABASE USING ( FILE '/db2/ts/itsodb/itso2.ts' 50M) AUTORESIZE YES BUFFERPOOL ITSO_BP; DROP TABLESPACE USERSPACE1; If the raw devices are used for the container, you have to create the device for the containers before creating the table spaces. The DDL for table space might require modification, because the devices on the target systems might differ from the devices on the source system. ITSO_BP ITSO_TS2 STAFF ITSO_TS1 DEPT EMPLOYEE ADEFUSR ITSO1.ts ITSO2.ts ITSO_BP ITSO_TS2 STAFF ITSO_TS1 DEPT EMPLOYEE ADEFUSR ITSO1.ts ITSO2.tsITSO2.ts
- 233. Chapter 5. Deploying pre-configured databases 219 Because the storage layouts on the UNIX system and Windows are different, the file reference syntax of the DB2 table space definition is different for Windows and UNIX. See Example 5-3. Note that the only difference is the reference to the storage system. If you are deploying the pre-configured database from a UNIX-based system to a Windows-based system or vise versa, make sure that the DDL is modified. Example 5-3 Table space creation on Windows versus Linux/UNIX // Windows syntax: CREATE REGULAR TABLESPACE ITSO1 PAGESIZE 4 K MANAGED BY DATABASE USING ( FILE 'c:db2tsitsodbitso1.ts' 50M) AUTORESIZE YES BUFFERPOOL ITSO_BP; // Linux/UNIX syntax: CREATE REGULAR TABLESPACE ITSO1 PAGESIZE 4 K MANAGED BY DATABASE USING ( FILE '/work/db2ts/itsodb/itso1.ts' 50M) AUTORESIZE YES BUFFERPOOL ITSO_BP; If automatic storage managed table spaces are used, the path is automatically assigned by DB2 based on the database path, no additional change is required. Database objects Database objects refers to the tables, indexes, stored procedures, and so on; that is, all the objects containing business logic and business information. All database objects can be created with a DDL statement. In Example 5-4 the DDL statement used to create the Department table in the ITSODB sample database is listed. Example 5-4 DDL statement for creating the Department table -- DDL Statements for table CREATE TABLE "ITSO"."DEPARTMENT" ( "DEPTNO" CHAR(3) NOT NULL , "DEPTNAME" VARCHAR(36) NOT NULL , "MGRNO" CHAR(6) , "ADMRDEPT" CHAR(3) NOT NULL , "LOCATION" CHAR(16) ) IN "ITSO1" ; -- DDL Statements for primary key ALTER TABLE "ITSO"."DEPARTMENT" Note: For table objects it is also possible to have them created by the DB2 Import utility. Because the Import utility can create table objects only, we do not discuss it here. Instead, we describe the Import utility in 5.4, “Populating the database” on page 232.
- 234. 220 DB2 Deployment Guide ADD CONSTRAINT "PK_DEPARTMENT" PRIMARY KEY ("DEPTNO"); -- DDL Statements for index CREATE INDEX "ITSO"."XDEPT2" ON "ITSO"."DEPARTMENT" ("MGRNO" ASC) ALLOW REVERSE SCANS; -- DDL Statements for alias CREATE ALIAS "ITSO"."DEPT" FOR "ITSO"."DEPARTMENT"; Dependencies between database objects When creating the DDL statements, you should be aware of object dependencies and arrange the DDL statements in the proper sequence. If object B depends on object A, then object A must be created before object B. In terms of the DDL statements, you must have the DDL statement for object A executed before the DDL statement for object B. This is a rule of thumb, but exceptions do exist. If we look at the DDL statements in Example 5-4, we notice that the table is created before the primary key and the alias — obeying the rule of thumb. The exception is the alias. We can create the alias before the table, this will only lead to a warning. On the other hand, we are not allowed to create the primary key up front, this will lead to an error. db2look DB2 provides one powerful tool, db2look, that can be used to extract database layout and database object definitions from an existing database. Example 5-5 shows how to extract the information from the sample database and save the result in the file itsodb.ddl. Example 5-5 Using db2look to get DDL statements db2look -d itsodb -l -e -o itsodb.ddl The -l option generates the DDLs for the database layout. Using the -e option, you can get a set of DDL statements that define all the objects in the database. The -o option defines the output file. Creating a database with the output from db2look The output generated by db2look can be used to replicate the database structures. It might require modification because db2look does not preserve all of the object dependencies. The output, however, is a simple text file, and it can be edited in any tool such as VI on UNIX or Notepad on Windows.
- 235. Chapter 5. Deploying pre-configured databases 221 These are the most common areas requiring your attention: Remove obsolete buffer pools and table spaces: When a database is created using the CREATE DATABASE command, a set of default buffer pools and table spaces are created. If these default objects are obsolete, you should explicitly add commands to remove them. DDL statements for stored procedures and functions: The DDL statements for stored procedures and functions are out of place and must be moved after the DDL statements for the objects used by the stored procedures and functions, which usually are tables and views. Be aware that DDL statements for stored procedures and functions might also require some rearrangement to align with the dependences among them. DDL statements for aliases: These DDL statements are located before the DDL statements for the schemas and tables referenced in the aliases. This will only lead to a warning, but any non-existing schema referenced in the alias will be created automatically. This has two problems. First of all, the schema might be created with the wrong authentication. Secondly, it will lead to an error when the schema is created in a later DDL statement. DDL statements for schemas: This DDL statement is located at the end of the output. It must be moved to the top before the DDLs for alias or tables. This will ensure that the schema will not be created implicitly. Object dependencies: db2look does not preserve the object dependencies, without modification on the generated DDLs, the table created might be left in integrity pending mode, which mean that the tables are not accessible. An example of this case is the summary table in our sample database. In Example 5-6 we show how to check if any tables are in integrity pending mode by issuing a query against the system catalog and how to correct the problem. Example 5-6 Check and set integrity on our sample database // Issue a query against the system catalog SELECT tabname FROM syscat.tables WHERE access_mode = ‘N’ // The output looks like this TABNAME ----------------------- ADEFUSR 1 record(s) selected.
- 236. 222 DB2 Deployment Guide // Issue this statement to put the table in the right integrity mode SET INTEGRITY FOR itso.adefusr ALLOW NO ACCESS IMMEDIATE CHECKED Regardless of these required adjustments, the output from db2look gives us an excellent starting point for the final set of DDL statements 5.2.2 Using a shell script The DDL statements required to create the database layout and database objects are collected in one file. In our case, it is itso.ddl. You can run the DDL statements by simply invoking the command line processor (CLP) with the -f option as follows: db2 -f itsodb.ddl However, using a shell script to deploy the pre-configured database allows you to have the error handling logic in place. To control the behavior of the script, you can use the command line processor options and the return codes. Options chosen depend on the logic you want to implement. Command line processor options CLP comes with several options for you to control how CLP should behave. In this section, we only discuss the options that is relevant to error handling. For a complete reference of the available options, see DB2 Information Center at: http://publib.boulder.ibm.com/infocenter/db2luw/v9r5/topic/com.ibm.db2.luw.admi n.cmd.doc/doc/r0010410.html To control the CLP in case of errors, we use these two options: -s This option controls whether the CLP will stop the execution or not if an error occurs. Default behavior is that the CLP does not stop. A minus sign (-) immediately following an option letter turns the option off. To stop the execution when an error occurs, add the -s- option. For example: db2 -s- -f itso.ddl We recommend that you use this option if continue the DDL execution is pointless. For instance, if creating the database fail, there is no point to execute the rest of the DDL statements. On the other hand, it will not hurt to continue database object creation if the creation of views fails. -c This option control whether the CLP uses automatic commit or not. Default is on, which means that CLP will issue a commit after each statement. In other words it controls whether each statement is executed in its own unit of work,
- 237. Chapter 5. Deploying pre-configured databases 223 or all the statements are executed within the same unit of work. If executing all the statements in one unit of work is preferred, add -c- as an option. For example: db2 -c- -f itsodb.ddl The CLP also has options to direct the output and log the messages. We show how to obtain a complete history in a log file, and how to run the CLP in silent or non-silent mode. -l filename This option tells the command line processor to log commands and statements executed in a history file. -o This option control whether the CLP displays output data and messages to standard output. Default value is on. To run the CLP in silent mode, add -o- as an option. For example: db2 -o- -f itsodb.ddl The typical scenario is to use the -l option to obtain a log, which can be used for verification and error handling, and then turn output on/off with the -o option based on the progress information requirements in the user interface. CLP return codes When the CLP finishes processing a command or an SQL statement, it returns a return code. You can validate the return code in the script and take actions based on the value. Table 5-1 lists the CLP return codes. The -s option has impact on whether the execution will stop or continue for the various return codes. C in the last column indicates that the execution will continue, while the S indicates that the execution will stop. Table 5-1 CLP return codes and the impact of the -s option Code Description -s/-s- 0 DB2 command or SQL statement executed successfully C/C 1 SELECT or FETCH statement returned no rows C/C 2 DB2 command or SQL statement warning C/C 4 DB2 command or SQL statement error C/S 8 Command line processor system error S/S
- 238. 224 DB2 Deployment Guide Invocation of the CLP is identical on Windows and UNIX. The only difference between Windows and UNIX is how the return code is checked. We discuss how to perform error handling on each platform and give a full example for the Windows platform. UNIX script On the UNIX platform the result of the last executed command is available in “$?”. In example Example 5-7 we show three different ways to check the return code of a call to the command line processor. Example 5-7 Check the command line processor return code on UNIX #------------------------------------------------ #Call the command line processor #------------------------------------------------ db2 -o- -l itsodb.log -f itsodb.ddl #------------------------------------------------ # Example A #------------------------------------------------ if [ "$?" -eq "4" ]; then exit 4 fi exit 0 #------------------------------------------------ # Example B #------------------------------------------------ if [ "$?" -ge "4" ]; then exit 4 fi exit 0 #------------------------------------------------ # Example C #------------------------------------------------ case “$?” in "0" | “1” | “2” | “3”) exit 0;; "4" | “5” | “6” | “7”) exit 4;; "*") Note: The return code is available when the CLP has processed the entire file, and the return code is a “logical or” of the return codes from each statement. If some statements returned 2, other statements returned 1 and the rest of the statements were successful (return code 0) then the return code for the entire file is 3.
- 239. Chapter 5. Deploying pre-configured databases 225 exit 8;; esac Example A: In this example we check explicitly for return code 4, which corresponds to a DB2 error or an SQL error. Remember that the return code from the command line processor is a logical or of the return codes from each statement in the file. This means that the return code other than 4, such as warning 6, will not be caught. Example B: This example checks for a return code greater than or equal to 4. In this case we will capture the DB2 error or SQL error along with any warnings. However, we are not able to distinguish between a DB2/SQL error and a system error identified by a return code of 8. Example C: In this example we distinguishes between system errors and DB2/SQL errors, and consider any return code less than 4 as a success. This example also sets the exit code for the script. For simplicity purposes, we use example B in the examples throughout this chapter. That is, we will not distinguish between a system error and a DB2/SQL error. Windows script On Windows, before invoking the command line processor, the DB2 environment must be initialized. On way to initialize the DB2 environment is by invoking the script from a DB2 command window. From DB2 version 9, you can initialize the environment by setting the DB2CLP environment variable to **$$**. You can either do it before you call the script or you can set the environment variable in the script before any calls to DB2. The return code from the command line processor is stored in the environment variable errorlevel. You can check the value of this environment variable after the call to the command line processor using an if statement as shown in Example 5-8. Note: Setting the environment variable DB2CLP=**$$** is only supported in DB2 version 9 and later. For earlier versions, you have to use the DB2 command window.
- 240. 226 DB2 Deployment Guide Setting an exit code in the script is useful if this script will be invoked from another script or from an application. In this case we must decide whether the command shell where the script is executed should be terminated or not. We use the /b option on the exit code to specify this. Apply the /b option to have the command shell continue running after the script is done. The exit code is then stored in the errorlevel environment variable Omit the /b option to terminate the command shell after the script is done. The exit code will then be the process exit code of the command shell. Example 5-8 Check the command line processor return code on Windows REM Initialize the DB2 environment and call the command line processor REM ------------------------------------------------------------------- set DB2CLP=**$$** db2 -o- -l itsodb.log -f itsodb.ddl REM ------------------------------------------ REM Example A REM ------------------------------------------ if errorlevel == 4 exit /b 4 exit /b 0 REM ------------------------------------------ REM Example B REM ------------------------------------------ db2 -o- -l createdb.log -s CREATE DB ITSO if errorlevel == 8 exit /b 8 if errorlevel == 4 exit /b 4 exit /b 0 Example A: In this example we handle any return code greater than or equal to 4. That is, we do not distinguish between a system error and DB2/SQL error. This is equal to Example B for the UNIX script. Example B: In this example we distinguish between a system error and a DB2/SQL error. This is equal to Example C for the UNIX script. Note: The statement if errorlevel == number evaluates to true if the return code is equal to or greater than the number specified, which mean that you have to check the values in descending order.
- 241. Chapter 5. Deploying pre-configured databases 227 The complete Windows example Example 5-9 shows the full script used to create our ITSO sample database. All DB2 commands are logged in the file createdb.log. Example 5-9 The complete windows script for generating the database @REM ------------------------------------------- @REM Step 1 @REM ------------------------------------------- setlocal set DB2CLP=**$$** @REM ------------------------------------------- @REM Step 2 @REM ------------------------------------------- call createdb.cmd if errorlevel == 4 exit /b %errorlevel% @REM ------------------------------------------- @REM Step 3 @REM ------------------------------------------- db2 -o- -l createdb.log -s CONNECT TO ITSODB if errorlevel == 4 goto error @REM ------------------------------------------- @REM Step 4 @REM ------------------------------------------- db2 -o- -l createdb.log -s -c- -tf itsodb.ddl if errorlevel == 4 goto error @REM ------------------------------------------- @REM Step 5 @REM ------------------------------------------- db2 -o- -l createdb.log commit if errorlevel == 4 goto error goto success @REM ------------------------------------------- @REM Step 6a @REM ------------------------------------------- :error db2 -o- -l createdb.log rollback db2 -o- -l createdb.log connect reset exit /b 4 @REM ------------------------------------------- @REM Step 6b @REM ------------------------------------------- :success
- 242. 228 DB2 Deployment Guide db2 -o- -l createdb.log connect reset exit /b 0 Step 1: We set up the DB2 environment by setting the environment variable DB2CLP to **$$**. The first statement, setlocal, ensures that the environment variables set in the script are local to the script. Step 2: We call another Windows script that creates the database. If any error occurs, we exit directly with the exit code from the sub-script. Step 3: If the database is created, we connect to it. Step 4: Once connected to the database, we execute the script itsodb.ddl to create the database layout and the database objects. Notice that we use the command line processor option -c- that turns off the autocommit. Step 5: Because we have turned off the autocommit, we have to explicitly commit the transaction. Step 6.a: Because we have turned off the autocommit, none of our changes in itsodb.ddl have been applied. In case of any error, we can rollback the transaction and reset the connection to the database. Step 6.b: The database including database layout and objects has been successfully created. We only have to reset the connection. 5.2.3 Using an application DB2 provides a call level interface for C/C++ and COBOL, but not for Java. To create the database through a Java application, you have to either call an external C program or invoke the CREATE DATABASE command through the command line processor. We use the command line processor to create the database in our examples. Once the database is created, you can use JDBC to execute to DDL statements to create the database layout and the database objects. In this section, we show and explain some key features in the Java code with code fragments. The complete Java samples with descriptive comments can be downloaded from the IBM Redbooks Web site. See Appendix B, “Additional material” on page 267 for the download instructions.
- 243. Chapter 5. Deploying pre-configured databases 229 Creating the database from Java Since there is no call interface for Java, we use a script to generate the database. The script is named createdb.cmd — see 5.6.2, “Shell scripts” on page 252 for details. Example 5-10 shows how to execute a script from a Java application. Example 5-10 Executing a script from within Java //--------------------------------------------------------------------------- // Step 1 : executing the script //--------------------------------------------------------------------------- Runtime rt = Runtime.getRuntime(); Process proc = rt.exec(cmdFilename); //--------------------------------------------------------------------------- // Step 2 : catching stderr and stdout //--------------------------------------------------------------------------- OutputStreamCatcher outputCatcher = new OutputStreamCatcher(proc.getInputStream()); ErrorStreamCatcher errorCatcher = new ErrorStreamCatcher(proc.getErrorStream()); // Start the errorcatcher and the outputcatcher errorCatcher.start(); outputCatcher.start(); //--------------------------------------------------------------------------- // Step 3 : retreive the return code //--------------------------------------------------------------------------- int exitValue = proc.waitFor(); System.out.println( "Exit code : " + exitValue); Step 1: Executing an external program, like a script, is straightforward in Java. The class Runtime is used in Java to interact with the runtime environment. This class provide the exec method to start the external applications. In our case, the external application is the script file createdb.bat. The exec method returns reference to a process object which gives us access to the exit code, standard output, and so on. Step 2: We have to pay attention to the output from the script file. If there is a lot of output from the script, the default buffer used by the process object can run full, which causes the process to hang. To avoid this, we create a couple of buffer streams to collect the output. Additional benefit from this is that the output from the process is logged.
- 244. 230 DB2 Deployment Guide Step 3: To get hold of the exit code, we have to wait for the process to end. If we do not call proc.waitFor() the script is still executed, but we will not be able to check the exit code. Creating database layout and database objects from Java From a Java point of view, there is no difference in executing an SQL statement or a DDL statement. This means that creating the database layout and database objects are plain execution of statements against DB2. First of all, you require a connection to the database. From the connection, you obtain a Java Statement object, which is used to execute our SQL and DDL statements. The set of DDL statements is typically read from a file. In our example we read the itsodb.ddl file, where each command is separated by the default delimiter, semicolon. This makes it very easy to parse the file and retrieve the DDL statements. Example 5-11 shows how to execute a list of DDL statements within a Java application. How these are loaded are not shown, as it is not important for the example. In the example we execute all the statements in one transaction, that is, in one unit of work. Example 5-11 Executing DDL statements from a Java application // Step 1 Connection con = getConnection(); Statement stmt = con.createStatement(); String currentStatement = null; try { // Step 2 for ( int ix = 0; ix < statements.size(); ix++) { currentStatement = statements.get(ix); stmt.execute(currentStatement); } // Step 3 con.commit(); } catch (SQLException e) { // Step 4 con.rollback(); System.out.println( “Error executing : " + currentStatement); } Note: Output from our script becomes input to the process object. This is why the output is retrieved as getInputStream().
- 245. Chapter 5. Deploying pre-configured databases 231 finally { // Step 5 stmt.close(); con.close(); } Step 1: First of all we retrieve a connection to the database and from the connection we get a statement object. How to get a connection to the database can either be seen in the downloadable sample program or at the DB2 Infocenter. Step 2: We simply loop through the list of statements and execute them one by one. Step 3: If all the statements are executed successfully, we commit the work. Step 4: In case of an error, we rollback all the statements and display the message that caused the error. Step 5: No matter if all statements were run successfully or failed, we clean up the resources by closing the statement and the connection. In Example 5-11 on page 230, the error handling is kept very simple, we just print the error messages to standard output. Java sample applications Our Java samples are packed in the itso.jar file along with a couple of Windows command files that can be used to start the Java applications. To run this sample code, a Java runtime environment is required. A command file jstmt.cmd can be used to execute a file containing the DDL or SQL statements, while the file jscript.cmd can be used to execute a shell script from within Java. For a detailed description of the Java applications and the command files, see 5.6, “Samples overview” on page 251. 5.3 Deploying a database using a backup image The easiest way to deploy a database is to make a simple restore. Some considerations are required when issuing a restore:
- 246. 232 DB2 Deployment Guide Target directories: If the backup image contains restrictions to specific directories, these directories must exist on the target system. Otherwise, performing a redirected restore is required. Different platforms: Cross platform restore is not supported. You have to prepare a separate backup image for each platform because the backup image from a Windows system cannot be restored to a UNIX system. You also must have different images for 32-bit and 64-bit versions of the different operation systems. Online/Offline backup image: If you ship an offline backup with your installation package, this backup can be restored directly. If you ship an online backup, make sure you also ship the required log files — otherwise the backup cannot be restored. When you take the database backup, you can enable it to include the required log file in the database backup image. We recommend that restoring the backup image is handled separately from the installation of your application. Providing some documentation about the source database layout can help the restore process. 5.4 Populating the database If the pre-configured database is deployed by restoring a backup image, the data is in place after the database is restored. Populating the data is required for the database created from scratch. You can populate the database using the INSERT statement or by the load or import utilities. There are other data movement tools. In this section, we focus on the approaches that utilize the DB2 features and functions. 5.4.1 Using SQL statements Populating data using SQL statements is usually a preferable method if the data to be inserted is input by users or is generated on the fly. There are several options to create the INSERT statements. A straightforward but time consuming method is to create the INSERT statements manually and store them in a file. If the statements are to be executed by an application, they can be created on the fly. This is appropriate, for instance, if the statements depend on user inputs. You also can store the data and rules in a repository and use an application to generate a script with all the statements.
- 247. Chapter 5. Deploying pre-configured databases 233 In our example we have the SQL statements in a set of files, where each statement is separated by a default delimiter, a semicolon. There is no difference in executing a set of DDL statements or a set of SQL statements. This means that the shell scripts are similar to the shell scripts in 5.2, “Deploying a database using scripts” on page 216, and the Java application can be reused. To demonstrate populating data with SQL statements, we create one data insert file for each table in our sample database, that is DEPARTMENT, EMPLOYEE, and STAFF, and one file that contains all the statements. These files are named department.sql, employee.sql, staff.sq, and populate.sql. Using a shell script In Example 5-12 we show how to populate the database by executing the three files independently. All DB2 actions are logged in the file populatedb.log. This example is an extract from the sample populatedb.cmd. Example 5-12 Populating ITSO sample database using a shell script @REM Step 1 @REM ----------------------------------------------------------- db2 -o- -l populatedb.log -s CONNECT TO ITSODB user %1 using %2 if errorlevel == 4 goto error @REM ----------------------------------------------------------- @REM Step 2 @REM ----------------------------------------------------------- db2 -o- -l populatedb.log -s -c- -tf department.sql if errorlevel == 4 goto error db2 -o- -l populatedb.log -s -c- -tf employee.sql if errorlevel == 4 goto error db2 -o- -l populatedb.log -s -c- -tf staff.sql if errorlevel == 4 goto error @REM ----------------------------------------------------------- @REM Step 3 @REM ----------------------------------------------------------- db2 -o- -l populatedb.log commit if errorlevel == 4 goto error goto success @REM ----------------------------------------------------------- @REM Step 4.a @REM ----------------------------------------------------------- :error db2 -o- -l populatedb.log rollback db2 -o- -l populatedb.log connect reset exit /b 4
- 248. 234 DB2 Deployment Guide @REM ----------------------------------------------------------- @REM Step 4.b @REM ----------------------------------------------------------- :success db2 -o- -l populatedb.log connect reset exit /b 0 Step 1: Connect to the database. The user ID and password are passed to the script as the input parameters. Step 2: Once connected, we execute each of the files containing the SQL statements to populate our database. Notice that we use the command line processor option -c- that turn off the autocommit. Step 3: We have to commit the transaction because we turned off the autocommit. Step 4.a: In case of an error, we rollback the transaction and reset the connection to the database. Step 4.b: If all the inserts are successful, we just reset the database connection. Using an application Because there is no difference in executing DDL or SQL statements in a Java application, we can reuse our Java applications described in 5.2.3, “Using an application” on page 228. We supplied two command scripts, jstmt.cmd and jstmt.cmd for running the Java application. Jstmt.cmd is used to execute DDL or SQL statements while jscript.cmd is used to execute a shell script. Example 5-13 shows how to run these two scripts. Example 5-13 Run the Java sample applications # Step A : Start Java application that executes a set of sql statements c:> jstmt populate.sql # Step B : Start Java application that executes a shell script c:> jscript popoulatedb For a more comprehensive description of how to use the scripts, see 5.6, “Samples overview” on page 251.
- 249. Chapter 5. Deploying pre-configured databases 235 5.4.2 Using DB2 utilities Using the DB2 utilities, import, export, and load, to populate the database allows you to move data from a source database to a target database. Data in the source database is exported into a set of files. These files are moved to the target environment and imported or loaded to the target database. This approach has the advantage of being platform independent. It is possible to move data between 32-bit and 64-bit systems as well as to move data from a Windows environment to a UNIX environment and vise versa. Three data file formats are supported: IXF file format: This internal DB2 interchange file format is supported on all DB2 platforms. We recommend this format and use it in our examples. Delimited ASCII file format: The advantage of this format is that it is readable and editable. This file format is useful if you want to create a set of SQL insert statements for a table. However, some considerations are required when using this format, such as code page or character fields containing row separators. We recommend that you IXF file format instead of DEL when moving data across platforms. WSF file format: This format allows Lotus® products to read the files. Exporting data The export utility is very flexible and allow us to export exact the data required. The utility allows you to extract only the specific rows based on a select statement as well as select a subset of the columns as well. For our purposes, we export all columns and all rows. In Example 5-14 we show how to export data from our sample database ITSODB to a set of IXF files. Note that we specify a message file name for each export. In case of errors, examine these message files for further information. Example 5-14 Exporting data from our sample database export to “dept.ixf" of ixf messages “dept.msg" select * from itso.department; export to “staff.ixf” of ixf messages “staff.msg” select * from itso.staff; export to “emp.ixf” of ixf messages “emp.ixf” select * from itso.employee;
- 250. 236 DB2 Deployment Guide For a detailed description of the export utility, refer to the DB2 Infocenter: http://publib.boulder.ibm.com/infocenter/db2luw/v9r5/index.jsp?topic=/com.ibm.d b2.luw.admin.dm.doc/doc/c0004587.html Importing data You can use either the import utility or the load utility to move the exported data into the target database. The import utility is based upon the SQL statements and all the integrities and constraints are obtained during import. In general, the import utility is used if the amount of data is not to big. For large amount of data, the load utility is much faster. However, the load utility does not set referential integrity, which mean that foreign key relations are not checked. After the load utility has completed, some tables might be in integrity pending state and are not accessible. You can use the set integrity command to validate dependencies and bring tables back into accessible mode. Another difference between import and load is that the import utility cannot override the columns defined as generated always. The load utility is required if there are such columns in the tables. Assuming that there are no special requirements or data restrictions that force us to choose one over the other, the choice can usually be based on the amount of data and the performance requirements. If the data volume is large and the performance is a concern, the load utility is preferable. For a thorough comparison of these two methods, refer to the DB2 Infocenter: http://publib.boulder.ibm.com/infocenter/db2luw/v9r5/topic/com.ibm.db2.luw.admi n.dm.doc/doc/r0004639.html Import utility The import utility populates a table with data by using the SQL INSERT statement. There are several options on how to control the behavior of the utility. The most important option is the import mode. This mode controls what to do with existing data in the tables. Table 5-2 lists the different modes. Table 5-2 The different import modes Mode Description INSERT Insert the data into the target table without changing existing data. INSER_UPDATE Update rows with matching primary key values with values of the input rows. If there is no matching row, insert the data row into the table. REPLACE Delete all the existing data and insert the input data. The table and index definitions are kept.
- 251. Chapter 5. Deploying pre-configured databases 237 Because our tables are empty, we choose the insert mode. In Example 5-15 we show the statements to populate our sample database using the IXF files exported in the previous section. Example 5-15 Import statements used to populate our sample database import from "dept.ixf" of ixf messages "dept.msg" insert into itso.department; import from "emp.ixf" of ixf messages "emp.msg" insert into itso.employee; import from "staff.ixf" of ixf messages "staff.msg" insert into itso.staff; Because referential constraints are set during import, tables must be imported in the right order. In our example, there is a foreign key relation from the EMPLOYEE table to the DEPARTMENT table, therefore, we must import the DEPARTMENT table before the EMPLOYEE table. There are several other options that can be used to control the import utility. For a thorough description, refer to the DB2 Infocenter: http://publib.boulder.ibm.com/infocenter/db2luw/v9r5/topic/com.ibm.db2.luw.admi n.dm.doc/doc/c0004573.html4 Load utility The load utility writes formatted pages directly into the database, which makes it much faster then the import utility. The load utility does not perform referential constraints or table constraint checking. The only validation performed is that the uniqueness of the indexes. Like the import utility, different load modes are available to control what to do with the existing data. For an initial load, we can choose between insert or replace mode. Because our tables are empty, it makes no difference which mode is chosen. After load, the tables with constraints will be in the integrity pending mode and cannot be accessed. You can use the set integrity command to check the constraints and bring the table back to the accessible mode. In our sample database we have a referential constraint defined between the EMPLOYEE table to the DEPARTMENT table. After loading, the EMPLOYEE table will be in the integrity pending mode because the foreign key relation has not been checked. Furthermore, the summary table also has to be checked. Example 5-16 shows the load statements and the required check statements to populate our database and make the tables accessible. Example 5-16 The load and integrity check statements for our sample database load from "emp.ixf" of ixf messages "emp.msg" insert into itso.employee copy no indexing mode autoselect; load from "dept.ixf" OF ixf messages "dept.msg" insert into itso.department copy no indexing mode autoselect;
- 252. 238 DB2 Deployment Guide load from "staff.ixf" of ixf messages "staff.msg" insert into itso.staff copy no indexing mode autoselect; set integrity for itso.employee allow no access immediate checked; set integrity for itso.adefusr allow no access immediate checked; Because referential integrities are not checked during load, you can load the tables in any order you like. However, the set integrity commands must be issued in the right order. It must be done until no tables in the database are in check pending mode. Checking one table can put another table in check pending mode. There are several other options that can be used to control the load utility. For a thorough description, refer to the DB2 Infocenter: http://publib.boulder.ibm.com/infocenter/db2luw/v9r5/topic/com.ibm.db2.luw.admi n.dm.doc/doc/c0004587.html The set integrity statement that is usually required after a load is described in the DB2 Infocenter at: http://publib.boulder.ibm.com/infocenter/db2luw/v9r5/topic/com.ibm.db2.luw.sql. ref.doc/doc/r0000998.html The db2move utility Both the import utility and the load utility operates on individual tables. It can therefore be quite cumbersome to move data between databases if there are a lot of tables. We can use the DB2 utility db2move to help us manage a group of tables, for instance, all the table under one schema. db2move works as a calling interface to the export, import, and load commands. The syntax of the command is as follows: db2move dbname action [options] Where action can be export, import, load, or copy. The copy option is not covered in this book. The options allow us to specify a group of tables, action options, and so on. Note: Only a small subset of the options from the different utilities can be specified in db2move. For instance, the identifyoverride option for load is not available in db2move.
- 253. Chapter 5. Deploying pre-configured databases 239 Exporting data with db2move By default, db2move exports all the user tables and is always using the IXF file format. The outcome of an export by db2move is the outcome of the underlying calls to the export utility and a text file db2move.lst, which contains the mapping between the tables and the export files. Example 5-17 shows how to export our sample database using the db2move utility. Example 5-17 Exporting all tables using the db2move utility db2move itsodb export Importing data with db2move In Example 5-18 we show how to use db2move to import data to our sample database. db2move looks for the file db2move.lst and import the tables specified in that file. The default import mode is replace. Here we use the insert mode instead by specifying the option -io insert to the db2move command. Example 5-18 Importing all tables using the db2move utility db2move itsodb import -io insert Loading data with db2move In Example 5-19 we show how to use db2move to load data to our sample database. db2move looks for the file db2move.lst and load the tables specified in that file. db2move performs load only. You have to run the set integrity command if there are tables in the integrity pending state after the load. Example 5-19 Loading all tables using the db2move utility db2move itsodb load set integrity for itso.employee allow no access immediate checked; set integrity for itso.adefusr allow no access immediate checked; For a thorough description of db2move, refer to the DB2 Infocenter: http://publib.boulder.ibm.com/infocenter/db2luw/v9r5/topic/com.ibm.db2.luw.admi n.cmd.doc/doc/r0002079.html Note: The db2move.lst file created by db2move when using the export action has the tables sorted by table name. You might have to rearrange the table sequence in db2move.lst before it can be used for import.
- 254. 240 DB2 Deployment Guide 5.5 Updating an existing installation It is not uncommon that the changes on the database object definitions are required due the application requirements changed. Frequently, the changes are taken place at the test system first then deployed to the production system. The data in the production system sure should be preserved. To discuss this type of pre-configured database deployment, we define a few terms used in this section: Database configuration: This is the database layout along with the database objects. Database migration: Update a database from one configuration to another while preserving its data. In short, “migration” is also used. Current configuration: This is the configuration of the database in the runtime environment (target environment), thereby, the configuration to be updated. New configuration: This is the configuration that the current configuration will be changed to. The new configuration is derived from the source system. We use script, that is DDL and SQL statements, as our basic tool. Using the database backup image is not considered, because the data preservation is a challenging task. Two major tasks are necessary for migrating a database. The first is to identify the changes between the current configuration and the new configuration and second, apply these changes. Figure 5-3 illustrates the basic idea of how to migrate the database. Our starting point is the ITSODB sample database. We make changes on some of the database objects on the source database ITSODB2 and create a new configuration. Our task is to migrate ITSODB to have this new configuration.
- 255. Chapter 5. Deploying pre-configured databases 241 Figure 5-3 Identify and apply changes Get the configurations for the two databases. Compare the two configurations and create the set of DDL and SQL statements that will migrate the target database. Apply the delta script to the target database. 5.5.1 Updating non-table objects Non-table objects are objects that have no direct influence on data in the tables. These are objects such as stored procedures, functions, and views. Updating these objects is fairly easy because no user defined data is touched. You can simply drop the database objects and recreate them. You can either do a delta change only, or completely drop and recreate all non-table objects. The only issue you have to keep in mind concerns the dependencies between the non-table objects and the tables they interact with. For instance, you cannot create a view unless the underlying tables are in place. Follow this sequence to avoid this problem: 1. Drop non-table objects. 2. Update the tables. 3. Recreate non-table objects. Important: Backing up the target system is very important for this task. Because you make changes directly on the target database, if anything goes wrong during the migration, you might not be able to rollback the changes. Therefore, a backup is required. ITSODB2 ITSODBScript Delta New Config Current Config 1 1 2 Compare 3
- 256. 242 DB2 Deployment Guide 5.5.2 Updating table objects When it comes to updating the table objects, certain complications arise. Because tables contain information that has to be preserved, you cannot just drop and recreate them. These are some of the complications: Changing a table might increase the row size to an extent that it will no longer fit in the existing table space. Because you cannot change the table space for a table, you are required to create a new table in a larger table space and then copy data from the old table. With some intermediate renaming, this is possible. Changing the type of a column. To change the type for a given column, type conversion is required but it might not be simple. Shortening fields. If a field has been shorten, you must ensure that the existing data fits in the new column. For instance, changing the type from a int to a short or shortening the length of a character field. Check constraints. If a check constraint is added or changed, you must ensure that the existing data obey this new rule. Preparing data Before getting to the point where you can change a table, you have to ensure that the data in the table will fit in the new layout. For instance, obeying check constraints and fitting into the shortened column length are some of the issues mentioned. First step in migrating a table might therefore be running a script to fix the data. This might itself invoke some changes to the table. For instance, if a check constraint is changed, then you usually have to remove the old constraint up front before you can change the data. The new constraint is then added at the end. Altering the table Once the data is prepared, it is ready to change the table. We roughly categorized the changes as simple and complex changes. Simple changes are those that can be applied by using the ALTER TABLE statement. For the complex changes, we either use the stored procedure altobj provided by DB2 or use custom scripts. Using the ALTER TABLE statement is straightforward, just run the statements. In DB2 9, the ALTER TABLE ... DROP COLUMN and ALTER TABLE ... ALTER COLUMN ... SET NOT NULL allow you to change the table layout easily. A reorg is required after that. New functionality are frequently added to the ALTER TABLE statement. Check the documentation for your current version of DB2 to see whether the ALTER TABLE statement can fulfill your requirements. Use this command whenever possible.
- 257. Chapter 5. Deploying pre-configured databases 243 We focus our discussion on the complex changes here. Using the stored procedure altobj DB2 provides us with a stored procedure, named altobjc, to alter table definitions. altobj is a very powerful tool and can be used in most cases. altobj parses an input create table statement serving as the target data definition language for the existing table that is to be altered. The procedure renames the exiting table, re-creates the table using the DDL statements provided, then brings the data from the old data to the re-created table. Furthermore, the procedure also takes care of any dependent objects. That is, it will remove any dependent objects, change the table and then reapply the dependent objects. This makes it very easy to use the procedure, because you do not have to keep track of these dependencies. For the detailed information about altobj, refer to the DB2 Information Center: http://publib.boulder.ibm.com/infocenter/db2luw/v9r5/topic/com.ibm.db2.luw.sql. rtn.doc/doc/r0011934.html The procedure takes four arguments: execution_mode (input argument) Used to tell altobj how to execute. Usually we set this to apply_continue_on_error or apply_stop_on_error, specifying what we want to do in case of an error. DDL statement (input argument) The DDL statement that defines the new table layout alter-id (input and output argument) An ID that identifies the SQL statements generated by altobj. If -1 is specified, altobj will generate one. The identifier can be used in queries against the table systools.altobj_info_v. msg (output argument) Contain an SQL query altobj generated for you to display all of the SQL statements generated for or used by the alter table process. Example 5-20 shows how to use the procedure to change the data type of the DEPT column in the STAFF table in our sample database. Example 5-20 Using altobj to change the table itso.staff call sysproc.altobj ( ‘APPLY_CONTINUE_ON_ERROR’, ‘create table itso.staff ( ID smallint NOT NULL, name varchar(9), dept integer , job character(5) ,
- 258. 244 DB2 Deployment Guide years smallint , salary decimal (7, 2) , comm decimal (7, 2)) IN itso2', -1, ? ); Note that if the newly added column is added in the middle of the table and the table already has data, altobj might fail in loading the data, or the data loaded is incorrect. Use the STAFF table shown in Example 5-20 as an example, if the JOB is a newly added column. When altobj loads the data, it brings the data from the old table and loads it on a column-by-column basic. The data in the YEARS column will be loaded into the JOB column. Since the data type is different, the load will fail. If the columns happen to have the same data type, the load job succeeds, but the content of the data loaded is incorrect. If you want to add columns between existing columns, use a custom script. Using a custom script One of the problems you have to address when using custom scripts for altering a table is the object dependencies. DB2 will not allow you to make changes to a table that has some specific dependencies on it — for instance, changing a table that has a foreign key relation. The strategy that we use in altering a table by script is to create a shadow table of the table to be altered. Once the shadow table is created and loaded with data from the original table, we drop the original table and rename the shadow table. The detailed steps are as follows: 1. Create the shadow table with the new layout. 2. Add primary keys and indexes to the shadow table, using temporary names. 3. Copy data from the original table to the shadow table. 4. Remove non-data dependencies, such as stored procedures, constraints, and so on from the original table. 5. Drop the original table. 6. Rename the shadow table to the original table name. 7. Rename objects created in step 2; this is necessary. 8. Add non-data dependencies, such as stored procedures, constraints, and so on to the new altered table. Note that these dependencies are not necessarily the same as those being removed in step 4, as these dependencies might have changed as well. Basically, this is also what the stored procedure altobj does. However, the customized script will not have the limitations. You are, for instance, capable of inserting a column at a specific location in a table.
- 259. Chapter 5. Deploying pre-configured databases 245 Figure 5-4 illustrates the changes we want to apply to the table itso.staff in our sample database. We add the AWARDS column and change the data type of column DEPT from smallint to integer. Figure 5-4 Alter the table itso.staff in the sample database Because we change the data type of the DEPT column, we cannot use the alter table command. We are not able to use altobj either, because we want to add the AWARD column as column number two, which is not supported by altobj — at least not when there are data in the table. Example 5-21 shows how to make the changes using a custom script. Example 5-21 Custom script to change itso.staff CREATE TABLE "ITSO"."SHADOWTABLE" ( "ID" SMALLINT NOT NULL , "AWARDS" SMALLINT NOT NULL, "NAME" VARCHAR(9) , "DEPT" INTEGER , "JOB" CHAR(5) , "YEARS" SMALLINT , "SALARY" DECIMAL(7,2) , "COMM" DECIMAL(7,2) ) IN "ITSO2"; INSERT INTO "ITSO"."SHADOWTABLE" ("ID", "AWARDS", "NAME", "DEPT", "JOB", "YEARS", "SALARY", "COMM") SELECT "ID", 0, "NAME", "DEPT", "JOB", "YEARS", "SALARY", "COMM" FROM "ITSO"."STAFF"; DROP TRIGGER "ITSO"."DO_NOT_DEL_SALES"; ALTER TABLE "ITSO"."STAFF" DROP CONSTRAINT "C_JOB"; Current Configuration New Configuration Delta
- 260. 246 DB2 Deployment Guide DROP TABLE "ITSO"."STAFF"; RENAME TABLE "ITSO"."SHADOWTABLE" to "STAFF"; ALTER TABLE "ITSO"."STAFF" ADD CONSTRAINT "C_JOB" CHECK ("JOB" IN ( 'Mgr', 'Clerk', 'Sales')); CREATE TRIGGER do_not_del_sales NO CASCADE BEFORE DELETE ON itso.staff REFERENCING OLD AS oldstaff FOR EACH ROW MODE DB2SQL WHEN(oldstaff.job = 'Sales') BEGIN ATOMIC SIGNAL SQLSTATE '75000' ('Sales staff cannot be deleted... see the DO_NOT_DEL_SALES trigger.');-- END; 5.5.3 Automating update using DB2 metadata with a Java application So far we have assumed that we knew the delta between the current and the new configuration. In this section, we discuss how you can determine this delta. The delta is created based on a comparison of two database configurations. One way of achieving this is by utilizing the DB2 metadata. Whenever an object is created in DB2, metadata is stored in the system catalog tables. You can access these tables through a wide set of views supplied by DB2. Instead of manually keeping track of the changes and manually generate the delta script, you can use an application to do it automatically based the DB2 metadata. We demonstrate this automation with a Java application. The DB2 system catalog tables for database layout, objects, and object dependences are as follows: Database layout: Table 5-3 lists where to find information about database layout in the DB2 system catalog. Table 5-3 DB2 metadata for database layout Database objects: Table 5-4 lists where to find information about some of the most important database objects in the DB2 system catalog. Database layout item DB2 metadata Tablespace sysibm.systablespaces Bufferpool sysibm.sysbufferpools
- 261. Chapter 5. Deploying pre-configured databases 247 Table 5-4 DB2 metadata for some of the database objects Database object dependencies? Table 5-5 lists where to find information about some of the most import dependencies for a table. Table 5-5 Where to find the dependent objects for a table Use this road map to the system catalog views for further information: http://publib.boulder.ibm.com/infocenter/db2luw/v9r5/topic/com.ibm.db2.luw.sql. ref.doc/doc/r0011297.html Java sample application: Automating update In this section we provide a Java application that can determine the difference between two database configurations, generate the required DDL and SQL statements for altering a table, and finally execute the statements. We look at the same scenario as shown in Figure 5-4 on page 245, that is, we have some changes in the itso.staff table in our sample database. The application is intended to be used on the target system with no access to the source system at runtime. Therefore, the application is shipped with the configuration of the source database. Once started, the application connects to the target database and retrieves the configuration by querying the DB2 metadata. Database object DB2 metadata Tables sysibm.systables, syscat.tables Columns sysibm.syscolumns, syscat.columns Views sysibm.sysviews, syscat.views Stored procedures sysibm.procedures, syscat.procedures Functions syscat.functions, syscat.functions Check constraints syscat.checks Triggers sysibm.systriggers Indexes syscat.indexes, syscat.indexes Database object DB2 metadata Views syscat.tabdep Stored procedures syscat.routines, syscat.routinedep, syscat.packagedep Functions syscat.routines, syscat.routinedep
- 262. 248 DB2 Deployment Guide Comparing two database configurations In our sample Java application, both the source and target database configurations are contained in Java classes. We assume that we do not have access to the source database when we run our Java application on the target environment. To simplify our application, the source configuration is hardcoded. The target configuration is retrieved dynamically. The main approach is a table to table comparison. All database objects that are directly related to a specific table are handled along with the table. These are objects like primary key constraints, check constraints, and triggers. The database objects that can span several tables, such as views, function, and stored procedures, are handled independently of the tables. They are compared item by item comparison, for instance, comparing the list of stored procedures on the source database with the list of stored procedures from the target database. This item-by-item comparison produces three lists: A list of new items to be created A list of obsolete items to be deleted A list of changed items The lists with new and obsolete items are easy to handle, while the list of changed items require more effort. If the list contains stored procedures, we just drop the old implementations and create the new ones. If the list contains tables, we use what we call a dependency map to describe the objects such as views and stored procedures that are related to the table. We use the dependency map to determine the database objects that have to be deleted before we can change the table. Building the dependency map We build the dependency map by querying the DB2 metadata. Example 5-22 shows how we retrieve the view, function, and stored procedure dependencies for a specific table, itso.department. Example 5-22 Query to retrieve view dependencies for the itso.department table // View dependencies SELECT tabname FROM syscat.tabdep WHERE dtype = 'V' AND tabschema = 'ITSO' AND bname = 'DEPARTMENT' // Function dependencies SELECT r.routinename FROM syscat.routines r, syscat.routinedep d WHERE r.specificname = d.routinename
- 263. Chapter 5. Deploying pre-configured databases 249 AND r.routinetype = 'F' AND d.btype = 'T' AND d.bschema = 'ITSO' AND d.bname = 'EMPLOYEE' // Stored procedures dependencies SELECT r.routinename FROM syscat.routines r, syscat.routinedep rd, syscat.packagedep pd WHERE r.specificname = rd.routinename AND rd.bschema = pd.pkgschema AND rd.bname = pd.pkgname AND r.routinetype = 'P' AND rd.btype = 'K' AND pd.btype = 'T' AND pd.bschema = 'ITSO' AND pd.bname = 'EMPLOYEE'; Our sample application only covers checking constraints and triggers. The focus of the application is to show how an implementation can be made, and uses changes to the table layout as a starting point. We do not build the dependently map in the sample application. The big picture of the application The application is intended for use at the target system, with no access to the source system, which is a common scenario. The new database configuration is therefore packaged with the application. In the case of our sample application the new database configuration is hardcoded. Information about the target database are given as parameters to the application. Figure 5-5 shows an overview of the application. The numbered circles represent actions. The squares with bold text are Java classes that implements logic. Those with the underlined text represent Java classes containing data.
- 264. 250 DB2 Deployment Guide Figure 5-5 Overview of the Java application : The main class in the application is the MigrateMainController. The first action is to retrieve the current database configuration. This is done by issuing a set of queries against the DB2 metadata in ITSODB. In the figure only the TableInfoQuery is shown. Other queries are left out to keep the figure simple. The MigrateMainController has now access to both the new and the current configuration which is shipped with the controller. : The ChangeController is then initiated taking the two DatabaseConfiguration classes as input parameters. The ChangeController compares the two database configurations to determine new tables, tables to be removed, and tables that have to be changed. : For tables, we then use TableChangeController to create the set of required DDL and SQL statements to update ITSODB to meet the new configuration. For each table the set of statements are collected into a job, which are returned back to the MigrateMainController. : Finally the MigrateMainController uses the MigrateCommand to execute all the jobs against the database. We execute the statements in the same ways as described in 5.2.3, “Using an application” on page 228. Within the Java application we use the class DatabaseConfiguration to contain the configuration of a database. This class contains a set of classes that reflect the DB2 metadata. For instance, we use the ColumnInfo class to contain the ITSODB 12 3 4
- 265. Chapter 5. Deploying pre-configured databases 251 information about a column, the TriggerInfo class to obtain the information about a trigger, and so on. Furthermore, the metadata information for a given database object is added up in the class representing it. For instance, the TableInfo class consists of a list of columns, a list of check constraints, and so on. Figure 5-6 show the class diagram used in our application. Figure 5-6 Class diagram that reflects DB2 metadata Our application only uses a small subset of the DB2 metadata, and each class contains only a subset of the information available for that particular database object. For further details see the source code that can be downloaded from the IBM Redbooks Web site. Refer to Appendix B, “Additional material” on page 267 for the download instruction 5.5.4 Alternatives: DB2 tools An alternative is to use a migration tool to migrate one database to another. These tools are usually comprehensive and require some manual steps and user interactions. One of these tools are the DB2 Migration Toolkit. The primary purpose of this tool is to migrate a non-IBM database such as Oracle or MSSQL into an IBM database — either DB2 or Informix. However, it is also a possibility to use the DB2 Migration Toolkit for the purpose described in this chapter. You can read more about the DB2 Migration Toolkit at: http://www-306.ibm.com/software/data/db2/migration/mtk/?S_TACT=105AGX42&S_CMP=M GST 5.6 Samples overview In this section we list all the scripts, command files, and Java programs we present in this chapter. We refer to “a script” as a text file containing DDL and SQL statements; “a shell script” as a command file at the operating system level.
- 266. 252 DB2 Deployment Guide 5.6.1 Scripts Table 5-6 lists the scripts used in the examples in this chapter. Table 5-6 Scripts containing DDL and SQL statements 5.6.2 Shell scripts We divide the scripts into supportive shell scripts and plain shell scripts. Supportive scripts are used to execute the plain scripts when we want to act on the return code from the executed plain script. Table 5-7 lists the supportive shell scripts. The plain scripts are listed in Table 5-8. When we refer to the execution environment, we mean the command shell from where we invoke the shell script. Script name Description itsodb.ddl Contain DDL and SQL statements to create the database layout and database object for our sample database ITSODB. itsodb2.ddl Contain DDL and SQL statements to create the database layout and database objects for the modified sample database ITSODB2. export.sql Contain statements to export data from either the DB2 sample database or the ITSODB sample database. Data are exported using the IXF file format. The tables exported are STAFF, EMPLOYEE and DEPARTMENT. import.sql Contain statements to populate data to tables STAFF, EMPLOYEE, and DEPARTMENT using the DB2 import utility. load.sql Contain statements to populate data to tables STAFF, EMPLOYEE. and DEPARTMENT using the DB2 load utility. alteritso.sql Contain statements to migrate the database objects from ITSODB to ITSODB2. department.sql Contain SQL INSERT statements to populate the DEPARTMENT table. employee.sql Contain SQL INSERT statements to populate the EMPLOYEE table. staff.sql Contain SQL INSERT statements to populate the STAFF table. populate.sql Contain SQL INSERT statements to populate all three tables.
- 267. Chapter 5. Deploying pre-configured databases 253 Table 5-7 Supportive shell scripts None of the shell scripts take any arguments. All the scripts set the DB2 environment and can be executed directly from a standard command shell. Table 5-8 Shell scripts Script name Description exe.cmd Execute another shell script and terminate the execution environment with the return code returned by the invoked shell script. The shell script to be executed must be given as the argument. Example: c:>exe createdb.cmd exe_shell.cmd Execute another shell script and print out the return code from the invoked shell script to the console. The shell script to be executed must be given as the argument. Example: c:>exe_shell createdb.cmd Script name Description createdb.cmd Create the ITSODB sample database. if ITSODB already exist, it will be deleted. Only the database is created, no layouts or objects are created. Example: c:>createdb.cmd Log file: createdb.log createdb2.cmd Create the ITSODB2 sample database. If ITSODB2 already exist, it will be deleted. Only the database is created, no layouts or objects are created. Example: c:>createdb2.cmd Log file: createdb.log itsodb.cmd Create the ITSODB sample database along with the database layout and the database objects. The database is created with a call to createdb.cmd, then the layout and objects are created by executing the script itso.ddl. Example: c:>itsodb.cmd Log file: createdb.log itsodb2.cmd Create the ITSODB2 sample database along with the database layout and the database objects. The database is created with a call to createdb2.cmd, then the layout and objects are created by executing the script itso2.ddl. Example: c:>itsod2b.cmd Log file: createdb.log
- 268. 254 DB2 Deployment Guide exportdb.cmd Export data from the ITSODB database to IXF files. It connects to the ITSODB database and then execute the script export.sql. Example: c:>exportdb.cmd Log file: export.log importdb.cmd Import data into the ITSODB database from a set of IXF files using the DB2 import utility. It connects to the ITSODB database and execute the script import.sql. Example: c:>importdb.cmd Log file: importdb.log loaddb.cmd Load data into the ITSODB database from a set of IXF files using the DB2 load utility. It connects to the ITSODB database and execute the script load.sql. Example: c:>loaddb.cmd Log file: loaddb.log populatedb.cmd Populate the tables in the ITSODB database from a set of SQL INSERT statements. It connects to the ITSODB database and execute the three scripts staff.sql, department.sql and employee.sql. Example: c:> populatedb.cmd Log file:populatedb.log alterdb.cmd Alter the ITSODB database to match the database objects of the ITSODB2 database. It connects to the ITSODB database. Remove the shadow table (temporary table) if it exist, then execute the script alterdb.sql. c:>alterdb.cmd Log file: alterdb.log Script name Description
- 269. Chapter 5. Deploying pre-configured databases 255 5.6.3 Java applications Table 5-9 lists the Java applications. All Java applications are packaged into the Java archive itso.jar. When starting a Java application, we have to make sure that all used classes are available to the runtime. This is done by setting up the classpath. We must therefore add itso.jar to the classpath. The DDLExecuter and the MigrateExecuter connect to DB2 from Java, so for these applications we add also add db2jcc.jar and db2jcc_license_cu.jar to the classpath. The Java applications will exit with one of the following codes: 0: If execution was successful. 1: If wrong number of arguments were passed to the application. 2: If any error occurred during execution. Table 5-9 Java applications Application name Description ScriptExecuter Execute a script file. The name of the script file must be passed as argument to the application. DDLExecuter Execute a file containing DDL and/or SQL statements. It connects to the database given as argument and executes all the statements in the file in one transaction. That is, if one statement fail, all the statements are rolled back. The application require 3 or 5 arguments: server:port or server. Server name and optional port number for the DB2 server. alias. The name of the database to be conncted to. filename. The name of the file containing the statements. userid. The name of the user used to connect to DB2. password. The password for the user used to connect to DB2. user ID and password are optional, but must either both be omitted or both supplied. Example: localhost itsodb populate.sql db2inst1 db2inst1
- 270. 256 DB2 Deployment Guide Each Java application has a corresponding shell script used to set up the environment and start the execution of the application. These shell scripts are listed in Table 5-10. The classpath used in the scripts assume that the DB2 jar files are located in the directory c:Program FilesIBMSQLLIBjava. The scripts must be modified to reflect the actual location of the DB2 jar files. MigrateExecuter Based on two database configurations this application can perform a set of migration related actions. It compares the source database configuration, which is the configuration of the ITSO2 database, with the target database configuration which is retrieved dynamically from the database given as an argument to the application. Possible actions are these: Print Print out both database configurations to stdout. Compare Compare two database configurations and list new tables, tables to be removed and tables to be changed. Generate Print out the statements required to migrate the existing database (given as argument) to meet the configuration of the ITSO2 database. Execute Migrate the existing database (given as argument) to reflect the configuration of the ITSO2 database. The application require 3 or 5 arguments : – server:port or server. Server name and optional port number for the db2 server – alias. The name of the database to be connected to. – Action. One the above specified actions. – userid. The name of the user used to connect to DB2. – password. The password for the user used to connect to DB2. user ID and password are optional, but must either both be omitted or both supplied. This set of arguments will migrate the ITSO database: localhost itsodb execute db2inst1 db2inst1 Application name Description
- 271. Chapter 5. Deploying pre-configured databases 257 Table 5-10 Shell scripts to start Java applications Shell script Description jscript.cmd Starts the Java application ScriptExecuter. The script to be executed must be given as an argument. The script given as the argument will be executed through the exe.cmd support script to ensure correct handling of the return code. Example: c:>jscript populatedb.cmd jstmt.cmd Starts the Java application DDLExecuter. The name of the file containing SQL and /or DDL statements must be given as a parameter. Server information, database name, and user ID /password in this script must be modified to reflect the target environment. Example: c:>jstmt populatedb.sql jmigrate.cmd Starts the Java application MigrateExecuter. The migrate action must be given as an argument. Server information, database name, and user ID/password in this script must be modified to reflect the target environment. Example: c:>jmigrate print
- 272. 258 DB2 Deployment Guide
- 273. © Copyright IBM Corp. 2008. All rights reserved. 259 Appendix A. Sample applications This appendix provides the application codes of various languages used in demonstrating the DB2 application deployment as well as deploying pre-configured database. A.1 C/C++ Example A-1 shows the application used to demonstrate the deployment of the DB2 C/C++ application. Example: A-1 Sample CLI application /**************************************************************************** ** ** A sample CLI application which makes DSN-less connection to database. ** Database connectivity informations are read from command line arguments. ** ***************************************************************************** ** Build the application: ** ** There are two approaches to build this applicaiton: ** 1. use bldapp script that is included in DB2 installation ** 2. use recommended compile and link options according to DB2 information center: A
- 274. 260 DB2 Deployment Guide ** http://publib.boulder.ibm.com/infocenter/db2luw/v9r5/topic/com.ibm.db2.luw.apdv .cli.doc/doc/t0007141.html ** ** For example, on Linux x86_64 env: ** gcc -o itso_cliapp -m64 -I/home/db2inst1/sqllib/include ** -L/home/db2inst1/sqllib/lib64 -ldb2 itso_cliapp.c ** ****************************************************************************/ #include <stdio.h> #include <string.h> #include <stdlib.h> #include <string.h> #include <sqlenv.h> #include <sqlcli1.h> #include <sqlutil.h> #define MAX_UID_LENGTH 18 #define MAX_PWD_LENGTH 30 int main(int argc, char *argv[]) { SQLRETURN cliRC = SQL_SUCCESS; struct sqlca sqlca; SQLHANDLE henv; /* environment handle */ SQLHANDLE hdbc; /* connection handle */ char ip[255]; char port[8]; char dbname[SQL_MAX_DSN_LENGTH + 1]; char user[MAX_UID_LENGTH + 1]; char passwd[MAX_PWD_LENGTH + 1]; SQLCHAR message[SQL_MAX_MESSAGE_LENGTH + 1]; SQLCHAR sqlstate[SQL_SQLSTATE_SIZE + 1]; SQLINTEGER sqlcode; SQLSMALLINT length; SQLCHAR connStr[255]; /* connection string */ /* verify the number of arguments */ if( argc != 6 ) { printf(" ERROR: incorrect command line.nt%s hostname port database_name user passwordn", argv[0]); return 1; }
- 275. Appendix A. Sample applications 261 /* get connection information from command line arguments */ strcpy(ip, argv[1]); strcpy(port, argv[2]); strcpy(dbname, argv[3]); strcpy(user, argv[4]); strcpy(passwd, argv[5]); /* populate the connection string */ sprintf((char *)connStr, "Database=%s; Protocol=tcpip; Hostname=%s; Servicename=%s; Uid=%s; Pwd=%s", dbname, ip, port, user, passwd); /* allocate an environment handle */ cliRC = SQLAllocHandle(SQL_HANDLE_ENV, SQL_NULL_HANDLE, &henv); if (cliRC != SQL_SUCCESS) { printf("n ERROR while allocating the environment handle.n"); return 1; } /* allocate a connection handle */ cliRC = SQLAllocHandle(SQL_HANDLE_DBC, henv, &hdbc); if (cliRC != SQL_SUCCESS) { printf("n ERROR while allocating the connection handle.n"); return 1; } printf("n Connecting to the database %s ...n", dbname); /* connect to database using dsn-less connection */ cliRC = SQLDriverConnect(hdbc, (SQLHWND)NULL, connStr, SQL_NTS, NULL, 0, NULL, SQL_DRIVER_NOPROMPT); if (cliRC != SQL_SUCCESS ) { printf ("n Failed to connect to the database %s.n", dbname); /* get the first field settings of diagnostic record */ cliRC = SQLGetDiagRec(SQL_HANDLE_DBC, hdbc, 1, sqlstate, &sqlcode, message, SQL_MAX_MESSAGE_LENGTH + 1, &length); printf("n SQLSTATE = %s", sqlstate); printf("n SQLCODE = %d", sqlcode); printf("n Message: %s", message); }else { printf("n Connected to the database %s.n", dbname);
- 276. 262 DB2 Deployment Guide /* disconnect from the database */ printf("n Disconnecting from the database %s...n", dbname); cliRC = SQLDisconnect(hdbc); } /* free connection handle & environment handle */ cliRC = SQLFreeHandle(SQL_HANDLE_DBC, hdbc); cliRC = SQLFreeHandle(SQL_HANDLE_ENV, henv); } A.2 PHP Example A-2 shows the application used to demonstrate the deployment of the DB2 PHP application. Example: A-2 Sample PHP application <?php /* A sample php application. Use this program to test connection to a database. Database connectivity information is read as command line arguments. Give arguments in the following order: hostname port_number database_name user password Run the application as following: php itso_phpapp.php hostname port_number database_name user password */ # Varifying the number of command line arguments. if($argc != 6) { printf(" ERROR: incorrect command line arguments.n Use hostname port_number database_name user_name passwordn", $argv[0]); exit(1); } # Creating dsn from command line arguments. $dsn = "HOSTNAME=" . $argv[1] . ";PORT=" . $argv[2] . ";DATABASE=" . $argv[3] . ";PROTOCOL=TCPIP" . ";UID=" . $argv[4] . ";PWD=" . $argv[5]; print "Trying to establish connection...n";
- 277. Appendix A. Sample applications 263 $conn = db2_connect($dsn, '', ''); if ($conn) { echo "Connection succeeded.n"; echo "Closing connection...n"; db2_close($conn); echo "Connection closed.n"; } else { echo db2_conn_errormsg(), "n"; echo "Connection failed.n"; } ?> A.3 Ruby Example A-3 shows the application used to demonstrate the deployment of the DB2 PHP application. Example: A-3 Sample Ruby application # A sample Ruby application. # Use this program to test connection to a database. # Database connectivity information is read as command line arguments. # Give arguments in the following order: # hostname port_number database_name user password # # Run the application as following: # ruby itso_rubyapp.rb hostname port_number database_name user password # require 'ibm_db' if ARGV.length != 5 puts " ERROR: incorrect command line arguments.n Use hostname port_number database_name user_name passwordn" else # Creating dsn from command line arguments. dsn = "" dsn << "HOSTNAME=" << ARGV[0] << ";PORT=" << ARGV[1] << ";DATABASE=" << ARGV[2] <<
- 278. 264 DB2 Deployment Guide ";PROTOCOL=TCPIP" << ";UID=" << ARGV[3] << ";PWD=" << ARGV[4] puts "Trying to establish connection..." conn = IBM_DB::connect( dsn, "", "" ) if conn puts "Is connection active? : #{IBM_DB::active(conn)}" puts "Closing connection..." IBM_DB::close(conn) puts "Connection closed." else puts IBM_DB::conn_errormsg() end end A.4 Python Example A-4 shows the application used to demonstrate the deployment of the DB2 Python application. Example: A-4 Sample Python application """ A sample python application. Use this program to test connection to a database. Database connectivity information is read as command line arguments. Give arguments in the following order: hostname port_number database_name user password Run the application as following: python itso_pyapp.py hostname port_number database_name user password """ import sys import ibm_db def main(argv): # Varifying the number of command line arguments. if len(argv) != 5: print " ERROR: incorrect command line arguments.n Use hostname port_number database_name user_name passwordn" sys.exit()
- 279. Appendix A. Sample applications 265 # Creating dsn from command line arguments. dsn = "HOSTNAME=" + argv[0] + ";PORT=" + argv[1] + ";DATABASE=" + argv[2] + ";PROTOCOL=TCPIP" + ";UID=" + argv[3] + ";PWD=" + argv[4] print "Trying to establish connection..." conn = ibm_db.connect( dsn, "", "" ) print "Is connection active? : ", ibm_db.active(conn) print "Closing connection..." ibm_db.close(conn) print "Connection closed." if __name__ == "__main__": main(sys.argv[1:]) A.5 Perl Example A-5 shows the application used to demonstrate the deployment of the DB2 Perl application. Example: A-5 Sample Perl application # A sample perl application. # Use this program to test connection to a database. # Database connectivity information is read as command line arguments. # Give arguments in the following order: # hostname port_number database_name user password # # Run the application as following: # perl itso_perlapp.pl hostname port_number database_name user password # use DBI; # Varifying the number of command line arguments. if ($#ARGV != 4){ print " ERROR: incorrect command line arguments.n Use hostname port_number database_name user_name passwordn"; exit 1; }
- 280. 266 DB2 Deployment Guide # Creating dsn from command line arguments. $dsn = "HOSTNAME=" . $ARGV[0] . ";PORT=" . $ARGV[1] . ";DATABASE=" . $ARGV[2] . ";PROTOCOL=TCPIP" . ";UID=" . $ARGV[3] . ";PWD=" . $ARGV[4]; print "Trying to establish connection...n"; $dbh = DBI->connect("dbi:DB2:$dsn", "", "", {PrintError => 0} ) || die "Database connection not made: $DBI::errstr"; print "Connection successful.n"; print "Closing connection...n"; $dbh->disconnect(); print "Connection closed.n";
- 281. © Copyright IBM Corp. 2008. All rights reserved. 267 Appendix B. Additional material This book refers to additional material that can be downloaded from the Internet as described below. Locating the Web material The Web material associated with this book is available in softcopy on the Internet from the IBM Redbooks Web server. Point your Web browser at: ftp://www.redbooks.ibm.com/redbooks/SG247653 Alternatively, you can go to the IBM Redbooks Web site at: ibm.com/redbooks Select the Additional materials and open the directory that corresponds with the IBM Redbooks form number, SG247653. B
- 282. 268 DB2 Deployment Guide Using the Web material The additional Web material that accompanies this book includes the following files: File name Description DeplyDB2Server.zip Zipped Scripts for deploying DB2 Server Java.zip Zipped Java sample code C_Sample.zip Zipped C sample code dotNet.zip Zipped .Net sample code Pre-configuredDB.zipZipped sample database setup DDLs System requirements for downloading the Web material The following system configuration is recommended: Hard disk space: 50MB minimum Operating System: Windows/UNIX/Linux Processor: 486 or higher Memory: 256MB How to use the Web material Create a subdirectory (folder) on your workstation, and unzip the contents of the Web material zip file into this folder.
- 283. © Copyright IBM Corp. 2008. All rights reserved. 269 Related publications The publications listed in this section are considered particularly suitable for a more detailed discussion of the topics covered in this book. IBM Redbooks For information about ordering these publications, see “How to get Redbooks” on page 273. Other publications These publications are also relevant as further information sources: IBM - DB2 9.5 What's New, SC23-5869 Administrative API Reference, SC23-5842 Administrative Routines and Views, SC23-5843 Call Level Interface Guide and Reference, Volume 1, SC23-5844 Call Level Interface Guide and Reference, Volume 2, SC23-5845 Command Reference, SC23-5846 Data Movement Utilities Guide and Reference, SC23-5847 Data Recovery and High Availability Guide and Reference, SC23-5848 Data Servers, Databases, and Database Objects Guide, SC23-5849 Database Security Guide, SC23-5850 Developing ADO.NET and OLE DB Applications, SC23-5851 Developing Embedded SQL Applications, SC23-5852 Developing Java Applications, SC23-5853 Developing Perl and PHP Applications, SC23-5854 Developing User-Defined Routines (SQL and External), SC23-5855 Getting Started with Database Application Development, GC23-5856
- 284. 270 DB2 Deployment Guide Getting Started with DB2 Installation and Administration on Linux and Windows, GC23-5857 Internationalization Guide, SC23-5858 Message Reference, Volume 1, GI11-7855 Message Reference, Volume 2, GI11-7856 Migration Guide, GC23-5859 Net Search Extender Administration and User's Guide, SC23-8509 Partitioning and Clustering Guide, SC23-5860 Query Patroller Administration and User's Guide, SC23-8507 Quick Beginnings for IBM Data Server Clients, GC23-5863 Quick Beginnings for DB2 Servers, GC23-5864 Spatial Extender and Geodetic Data Management Feature User's Guide and Reference, SC23-8508 SQL Reference, Volume 1, SC23-5861 SQL Reference, Volume 2, SC23-5862 System Monitor Guide and Reference, SC23-5865 Troubleshooting Guide, GI11-7857 Tuning Database Performance, SC23-5867 Visual Explain Tutorial, SC23-5868 Workload Manager Guide and Reference, SC23-5870 pureXML Guide, SC23-5871 XQuery Reference, SC23-5872 DB2 Performance Expert for Mulitplatforms Installation and Configuration Guide, SC19-1174 IBM - DB2 9 What's New, SC10-4253 Administration Guide: Implementation, SC10-4221 Administration Guide: Planning, SC10-4223 Administrative API Reference, SC10-4231 Administrative SQL Routines and Views, SC10-4293 Administration Guide for Federated Systems, SC19-1020 Call Level Interface Guide and Reference, Volume 1, SC10-4224
- 285. Related publications 271 Call Level Interface Guide and Reference, Volume 2, SC10-4225 Command Reference, SC10-4226 Data Movement Utilities Guide and Reference, SC10-4227 Data Recovery and High Availability Guide and Reference, SC10-4228 Developing ADO.NET and OLE DB Applications, SC10-4230 Developing Embedded SQL Applications, SC10-4232 Developing Java Applications, SC10-4233 Developing Perl and PHP Applications, SC10-4234 Developing SQL and External Routines, SC10-4373 Getting Started with Database Application Development, SC10-4252 Getting Started with DB2 Installation and Administration on Linux and Windows, GC10-4247 Message Reference Volume 1, SC10-4238 Message Reference Volume 2, SC10-4239 Migration Guide, GC10-4237 Performance Guide, SC10-4222 Query Patroller Administration and User's Guide, GC10-4241 Quick Beginnings for DB2 Clients, GC10-4242 Quick Beginnings for DB2 Servers, GC10-4246 Spatial Extender and Geodetic Data Management Feature User's Guide and Reference, SC18-9749 SQL Guide, SC10-4248 SQL Reference, Volume 1, SC10-4249 SQL Reference, Volume 2, SC10-4250 System Monitor Guide and Reference, SC10-4251 Troubleshooting Guide, GC10-4240 Visual Explain Tutorial, SC10-4319 XML Extender Administration and Programming, SC18-9750 XML Guide, SC10-4254 XQuery Reference, SC18-9796 DB2 Connect User's Guide, SC10-4229 DB2 9 PureXML Guide, SG24-7315
- 286. 272 DB2 Deployment Guide Quick Beginnings for DB2 Connect Personal Edition, GC10-4244 Quick Beginnings for DB2 Connect Servers, GC10-4243 Online resources These Web sites are also relevant as further information sources: DB2 DB2 Information Center http://publib.boulder.ibm.com/infocenter/db2luw/v9r5/ Database and Information Management home page http://www.ibm.com/software/data/ DB2 Technical Support http://www.ibm.com/software/data/db2/support/db2_9/ DB2 Product Family Library http://www.ibm.com/software/data/db2/library/ DB2 developerWorks http://www.ibm.com/developerworks/db2/ DB2 for Linux http://www.ibm.com/software/data/db2/linux/ http://www.ibm.com/software/data/db2/linux/validate/ DB2 Universal Database V9 Application Development http://www.ibm.com/software/data/db2/ad/ Planet DB2 http://www.planetdb2.com/ Linux IBM Software for Linux http://www.ibm.com/software/os/linux/software/ Other SAP Standard Application Benchmarks http://www.sap.com/solutions/benchmark/index.epx DBI.perl.org http://dbi.perl.org
- 287. Related publications 273 DB2 Perl Database Interface http://www.ibm.com/software/data/db2/perl Comprehensive Perl Archive Network http://www.cpan.org http://www.cpan.org/modules/by-category/07_Database_Interfaces/DBI Apache HTTP Server Project http://httpd.apache.org Perl.apache.org http://perl.apache.org/docs/1.0/guide/ PHP scripting language http://www.php.net/ IBM Tivoli System Automation for Multiplatforms http://publib.boulder.ibm.com/tividd/td/ITSAFL/SC33-8272-01/en_US/PDF/HALBA U01.pdf How to get Redbooks You can search for, view, or download Redbooks, Redpapers, Technotes, draft publications and Additional materials, as well as order hardcopy Redbooks, at this Web site: ibm.com/redbooks Help from IBM IBM Support and downloads ibm.com/support IBM Global Services ibm.com/services
- 288. 274 DB2 Deployment Guide
- 289. © Copyright IBM Corp. 2008. All rights reserved. 275 Index Symbols .pdf file 103 .prn extension 98 Numerics 32-bit 214 64-bit 214 A abstract class 170 address space 31 administration server 32 administration server user 30 administrative APIs 154 administrative credential 34 administrative task 154 administrator install 31 advertisement name 110 advertising program 122 agent priority 24, 33 alias 215, 220 ALTHOSTNAME 148 ALTPORT 148 API 217 application architect 2 application connection 141 application deployment 138 application deployment package 138 application development 12 application executable file 159 application installation image 162 application programming interface 143 application request 32 application server 32 authentication 31, 33, 148 authentication parameter 33 authorization consideration 10 authorized user license 10 automated service 100 automatic commit 222 automatic storage managed table space 219 B backup image 214, 232 BIDI 148 bin directory 149 bind files 93 buffer pool 214, 217 buffer stream 229 business information 219 business logic 219 bytecode 150 C cabinet file 98 cache 217 catalog 2 catalog directory 169 central point 130 check constraint 215 class file 140 CLI 4 client 92 client deployment planning 90 client/server relationship 10 client-to-server connection 12 CLP 4, 217 command line interface 4 command line processor 4, 217, 224 COMP keyword 98 compact installation 99 compatibility 11, 93, 214 compile 150 complexity 91 component 6, 99 configuration 3, 91 configuration option 90 configuration process 144 configuration profile 35, 92, 96 connection 4 connection option 147 connection string 158 connectivity 5, 92, 139 connectivity configuration 159 container 217
- 290. 276 DB2 Deployment Guide CREATE DATABASE command 217 create package 102 cursor stability 156 custom installation 99 D DAS 23 dascrt 23, 33 dasdrop 23, 33 daslist 23, 33 dasmigr 23, 33 dasupdt 23, 33 data definition language 214 data partitioning feature 9 data server client 94 database administration 12 database configuration process 26 database directory 92 database layout 214, 218 database manager configuration 26, 34 database manager configurations parameter 2 database object 214, 220 database partition 40 database partition node 40 db2_diagpath 148 db2_enable_ldap 148 db2_force_nls_cache 147 db2_install 96 db2_install script 95 DB2_NO_FORK_CHECK 147 DB2ACCOUNT 147 DB2BIDI 147 db2cfexp 2, 26, 37, 92, 96 db2cfimp 37, 92 db2chgpath 57 db2cli.ini 167 db2client.pdf 103 db2cliinipath 148 db2codepage 147 db2country 147 db2domainlist 147 db2governor 24 db2graphicunicodeserver 147 db2icrt 24 db2idrop 24 db2imigr 24 db2iprune 92, 97 db2iupdt 24 db2ldap_basedn 148 db2ldap_client_provider 148 db2ldap_keep_connection 148 db2ldap_search_scope 148 db2ldaphost 148 db2locale 147 db2log directory 134 db2look 38, 220 db2noexitlist 148 db2rfe 33 db2rspgn 50, 96 db2setup 43 db2sorcvbuf 147 db2sosndbuf 147 db2tcp_client_rcvtimeout 147 db2territory 147 default directory 94 default system language 96 definition wizard 102, 105 deployment 2, 111 deployment directory 179, 187, 196, 206 deployment method 30, 135 deployment methodology 2 deployment package 159 deployment planning 10 deployment process 34, 138 deployment script 167, 179, 187, 196, 206 deployment software 100 deployment solution 5 deployment target 130 deployment task 30 desktop product 7 diagnostic support 144 diagnostic utility 144 distributed transaction 93 distribution point 108, 121 dmake 201 DPF 9 drive list 134 driver 90 driver file 160 driver manager 156 driver registration 91 DSN-less connection 156 dynamic SQL 151 dynamic SQL statements 154
- 291. Index 277 E elevated privileges installation 33 embedded SQL application 169 embedded SQL statement 154 embedding client 5 encoding scheme 6 encryption 62 end of support 16 enhancements 16 enterprise edition 9 enterprise environment 10 environment setting 25 environment variable 142, 225 environment variable db2clp 225 error handling 223 errorlevel environment variable 226 executable file 97 exit code 226, 229–230 external program 229 external transaction manager 93 F feature addition 16 federation 35 fenced user 30 fetch statement 223 file permission 61 firewall 31, 43 fix pack 99 fix term license 3 flexibility 215 footprint 4, 91, 98 for loop 130 Foreign key 215 full deployment 12 Function 215 function argument 154 G gateway 7, 141 gcc 163 global profile registry 53 graphical installer 2 graphical user interface 4 H hkey_current_user 25 home directory 31 home directory path 23 host connection 7 host database 7 host language 154 host name 163 hybrid 3 hybrid data server 30 I import utility 219 index 215 input file 98 INS file 51 install image 91, 96 installation 117 installation image 97, 103–104, 117 installation method 2, 94, 100 installation package 106 installation paths 24 installation user account 30 installer 5 instance 148 instance configuration profile 51 instance home directory 40 instance level 38 instance owner user 30 instance profile 2 instance profile registry 53 internal parallelism 40 interprocess communication 12 inventory 11 IPC 12 isolation level 156 ISP 11 ISVs 22 J Java database connectivity 4 Java technology 43 Java virtual machine 138 JDBC 4, 138 JDBC standard 151 JDK_PATH 142 JRE 150 JVM 5, 138
- 292. 278 DB2 Deployment Guide K key type 61 keyword 26, 98 KRBPLUGIN 148 L LAN connection 131 LANG keyword 98 language code 96 language compiler 154 language option 91 large object 170 large scale deployment 91 large volume transaction 4 ld_library_path 149 LDAP cache 144 libpath 149 license 3 license consideration 10 license scheme 7 life cycle 16 lightweight 5 lightweight deployment solution 143 local clients 7 local database 7 local drive 104, 117 local use 7 log file 134 logical storage unit 217 M mass deployment 2, 91 memory 3 Microsoft Distributed Transaction Coordinator 93 migration 94 MSDTC 93 multi-partitioned database system 30 multiple instance 2 multiple-partition 46 multi-tier application 7 N NAT 43 native executable 150 native storage 30 native threads support 5 network address translation 43 network drive 134–135 network file system 40 network path 104, 117 network traffic 131 NFS 40 nmake 201 Node information 37 non-administrator 22 non-Administrator installation 33 non-administrator installation 22, 94 non-administrator installs 25 non-interactive deployment 48 non-interactive installation method 42 non-root installation 23, 32–33 non-root user 23 O object dependency 220 object oriented programming 150 ODBC 4 ODBC isolation level 156 OLE DB 4 open standard 151 operating system 2 P package definition 115 package definition file 102, 114 PDO_IBM 170 performance options 147 permission 160 persistent connections 170 personal computer 7 personal edition 7 PHP PDO specification 170 php.ini 172 physical storage 217 pipe 61 Populate table 214 port number 163 post deployment task 34 post-deployment configuration 30 power users group 25 priced feature 8 primary key 215, 220 private file 61 process object 229 processor core 21
- 293. Index 279 processor rating 21 processor technology 21 processor value unit 3, 10, 21 PROD keyword 98 product bundle 8 product consideration 10 product image 98 production workload 34 profile registry variable 2 program temporary fix 139 programming language 150 protocol 26, 148 protocol information 37 prototype 8 pruned image 98 PTF 139 public key 31 public key files 61 pull deployment 100 pureXML 3 push deployment 100, 130 PVU 3, 10, 21 PWDPLUGIN 148 Q quality assurance 34 R read stability 156 Redbooks Web site 273 Contact us xi redirected restore 232 redistributable driver file 159 registry setting 26 registry variable 143, 147 remote client access 141 remote clients 7 remote connection 3 remote procedure call 40 remote shell 41 remote shell utility 41 reorg 154 repeatable read 156 reserved word 23 response file 2, 48, 92, 95–96, 101, 134 response file generator 50, 96 response file installation 99 return code 224–225 rollback 22 root authority 22 root directory 98 Root installed instance 24 root privilege 32 root privileges 22 RPC 40 RSA authentication key 59 rsh 41 rshd 100, 130 runstats 154 runtime 144 runtime environment 150, 229 runtime library 25 runtime linker 139 runtime path 57 S SCCM 2, 100 SCCM client 128 SCCM network 119 schema 221 script file 229 security 22 security feature 32 security management 31 security plug-in 31 Security shell 41 security technology 31 server deployment 32 service name 142 services 16 services class 24 services file 142 setup 43 setup –i fr command 96 setup installation wizard 31 setup wizard 95 setup.exe 98 shared libraries 139 shell script 159, 222 silent install 2 silent installation 48 single-partition database 24 SMS 2, 100 Software Vendor 11 solutions 2 source directory 104, 117
- 294. 280 DB2 Deployment Guide source file 116 SQL statement 4, 223 SQLCODE 156 SQLSTATE 156 ssh 41 sshd 100, 130 standalone database 7 standard output 64 static SQL 151 storage device 217 storage layouts 219 Stored procedure 215 stored procedure 5, 31, 139, 170 subcollection 110 subscription 3 summary table 215, 221 syntax 150 system administer 25 system environment variable 149 system error 226 system reboot 24 system registry 22 system variables 165 system-based authentication 24 T table 215 table space 214–215, 217 tar archive 146 target database 169 Target directory 232 target environment 214 target system 167 target workstation 130 territory code 143 thin client 131 thin client topology 131 thnsetup 131, 134 transaction API 144 transaction processing 4 trigger 215 type 2 5, 138 type 4 5, 138 typical installation 99 U ulimit 24 unattended install 2, 48 uncommitted read 156 unicode 6, 139 unit of work 222 user defined functions 5, 31 UTF-8 6, 139 V version consideration 10 View 215 W warehouse edition 9 Windows services 22 work load manager 24 write access 98 Write-Once-Run-Anywhere 150 X XML storage 16 XQuery 4
- 298. ® SG24-7653-00 ISBN 0738431745 INTERNATIONAL TECHNICAL SUPPORT ORGANIZATION BUILDING TECHNICAL INFORMATION BASED ON PRACTICAL EXPERIENCE IBM Redbooks are developed by the IBM International Technical Support Organization. Experts from IBM, Customers and Partners from around the world create timely technical information based on realistic scenarios. Specific recommendations are provided to help you implement IT solutions more effectively in your environment. For more information: ibm.com/redbooks ® DB2 Deployment Guide Learn to deploy DB2 Data Servers and Clients Automate DB2 mass deployment with scripts Deploy DB2 with applications DB2 provides various installation methods as well as features and tools to deploy a large number of clients and servers. Database administrators, application developers, and application architects have a number of available options when deploying DB2 9.5 for Linux, UNIX, and Windows (DB2 for LUW). Focusing on the DB2 V9.5 deployment methodology, this IBM Redbooks publication provides general guidance and serves as a reference resource for DB2 based solution deployment. These techniques and considerations are also applicable to other recent versions of DB2 for LUW. Deployment begins at planning. We introduce various DB2 for LUW products to help you choose the right DB2 product for your enterprise. DB2 9.5 can be installed interactively using a graphical installer, or in a silent install where input is passed to the installer through a response file. We show details on how to deploy DB2 servers and clients to both single and multiple systems using the DB2 provided functions and features as well as a customized script. We also describe how to deploy DB2 through Microsoft System Management Server (SMS). In addition, we cover how to deploy DB2 with various applications, including Java, C/C++, PHP, Python, Ruby, Perl, and .Net. Finally, we explain how to deploy a pre-configured database. Back cover