SlideShare a Scribd company logo
Introduction toIntroduction to
Scratch!Scratch!
What is Scratch?
• Scratch is a free programmable
toolkit that enables kids to create
their own games, animated stories,
and interactive art and share their
creations with one another over the
Internet.
What is Scratch?
• Scratch is being developed by the
Lifelong Kindergarten research group
at the MIT Media Lab, in
collaboration with
KIDS research group at the UCLA
Graduate School of Education &
Information Studies.
Let’s Get Started!
• To Open Scratch, visit the following
website: http://scratch.mit.edu/
• Click on “Try it Out”
Getting Started With
Scratch
Once you’ve opened Scratch, you
should see this default screen:
Let’s Look At Some
Scratch Examples
• Go to “View Projects”, and click on
“Animation” on the left-hand side of the
screen
• Look through them and see what you will
be able to do in Scratch!
Choose Your Sprite!
• You will notice that the default sprite is an
orange cat.
(A sprite is a small graphic that can be
moved independently around the screen,
producing animated effects.)
• You can choose a different sprite to
program from a library in Scratch, or you
can draw your own! You can create your
own sprite later; for now, choose one
already created.
Choose Your Sprite!
• To choose a sprite
from the Scratch
library, click on the
Folder with a Sprite
icon.
• If you want to
remove the old
sprite, right-click on
the cat and click
“delete”. You can
have more than one
sprite in your
animation!
Resize Your Sprite!
• You can make your sprite larger or
smaller by using the “grow sprite” or
“shrink sprite” icons.
• You click on one of these icons, then
click on your sprite until it is the size
you’d like.
Choose Your Background!
• Right now, you have a plain, white
background – boring!
• You can change your background by
choosing one from the Scratch
library or creating your own.
Choose Your Background!
• Click on the button
called “New
Backdrop”:
• Now select “Choose
Backdrop from
Library”
Now, We’re Ready to
Program!
Now, you should have a sprite and a
background that you’d like to work
with!
Programming In Scratch!
• The first thing you need to do is to
double-click on the sprite you want to
program, and select the “Scripts” tab.
• Since your sprite is the only thing that can
be animated, make sure you have it
selected.
• The Scripts area is where you “build” your
program by using the programming blocks.
Programming In Scratch!
• In the upper, left-hand corner of your
Scratch window, you will see 10 buttons .
• Each of these buttons have programming
blocks in those particular areas.
• We will first experiment with the Motion
blocks.
Motion!
• When you click on the motion button,
you will see the programming blocks
that can be used with your sprite.
• Let’s all program our sprites with the
same code first, and then you’ll be
allowed to experiment on your own!
Motion!
• Drag out the “move 10 steps” block.
• Change the “10” to “50” by clicking in the
block and typing in 50.
• To see your sprite move 50 pixels to the
right, double click on the block in the
Script area. Cool, isn’t it?!
Motion
• You can also set the motion block to
move a negative number of pixels by
typing a negative number in the block.
• This will move your sprite that
number of pixels in the opposite
direction – like your sprite is moving
backwards!
What Is A Pixel?
• We’ve been talking about pixels – what is a
pixel?
• A pixel is one of the small units that make
up an image on a computer or television
screen.
• It is derived from the words picture and
element to make pixel!
The Scratch Stage
• The Scratch stage is 480 pixels wide and
360 pixels high.
-240 240
180
-180
More Motion!
• Now, add the “turn 15 degrees” block
to the other block of code.
• When you see the white bar between
the 2 blocks of code, you can release
your mouse. That white bar means
that the 2 blocks will “snap” onto the
other block.
More Motion!
• Again, you can change the number of
degrees by double clicking in that
area and typing in the number of
degrees you’d like your sprite to
rotate.
• Double click on the blocks to see your
sprite move and rotate!
Experiment With Motion!
• We’ve only used 2 of the blocks in the Motion
category.
• For the next few minutes, I want you to
experiment with all of the other blocks in the
Motion category.
• You can delete code easily by just dragging it
from the Script area back to the list.
• Have fun!
Try “Events”
• The first block I’d like us to use is the
“when flag clicked” block:
• Drag this block out, and snap it on top of
the blocks you already have in your script.
Events
• Now, instead of
having to double
click on your block
of code, you can
just click on the
flag icon to play
your animation!
Click here to start
Looks
• The next category of programming
buttons we will experiment with is
the Control category.
• With this tool, you can make your
Sprite speak, think, or even switch
costumes.
Looks
• Try making your
Sprite speak or
think. Choose a
piece of code that
would allow your
Sprite to think or
speak.
Adventures in Animation
Looks
• Now, try
changing your
Sprite’s
costume. Under
the “Costume”
tab, click
“Choose
costume from
library”.
Looks
• Then add
“Switch
costume to” to
your block of
code.
Sound!
• Now, let’s add some sound to our animation!
• There are many different ways to get
sound in your animation.
• The first way we’re going to experiment
with is by choosing a Sound from the
Scratch library.
Choose Sound from Library
• Click on the sprite
you want to have
sound.
• Click on the
Sounds tab; and
under “New
Sound”, click
“choose sound
from library”.
Scratch Sound Library
• You will see different categories of
sounds that you can use in your
animation that are available for you
in the Scratch library.
Inserting Sound
• Once you find a sound that you like,
select it and click on OK.
• You will see the sound you just
selected show up under “New Sound”.
Play Your Sound
• If you click on the “Play” button, you
can preview your sound.
Adding The Sound To
Your Animation
• Now, you’re ready to add the sound
to your animation!
• Click on the Script tab.
• Select the sprite you want to have
sound.
• Now select the Sound button.
Adding Sound
• Now, select one of the blocks that says,
“play sound…”
• Select your sound from the drop-down
menu by clicking on the name of your
sound.
Recording a Sound
• Click on the record
button to record a
sound
• Click on the red
button to start
recording
• Click on the square to
stop
• You can rename the
sound by typing over
the name
Incorporate Sound Into
Your Animation!
When I click the flag, the boy will move and a
drum will play.
Presentation Mode
• When you click on the rectangle button in the
left-hand side of your screen, your animation will
fill the whole screen!
• To exit presentation mode, just click the
rectangle button again in the top left of the
screen.
Using The Pen!
• When using the Pen
tools, your sprite
actually becomes
your writing
instrument!
• You can change the
Pen’s color, its
shade, and its size.
Using the Pen!
• Your sprite becomes your pen when
using this tool. Attach the “Pen
Down” to your block of code.
• It may sound easy, but, you have to
remember to choose “Pen Up” when
necessary so that your sprite stops
writing when you want it to!
Using The Pen!
• Try changing the color of the pen by
typing in different numbers.
• For example, number 0 is the color
white, number 70 is red, number 130
is green, and number 170 is blue.
Time To Have Fun!
• Now it’s time for you to create your
own original animations or games!
• When you create something cool, let
me see it!

More Related Content

What's hot (20)

PPTX
Scratch: Programming for everyone
Akshar Desai
 
PDF
Coding Basics with Scratch
Nicole Baratta
 
PPTX
Computer Coding with Scratch: Lesson 2_primaryschoollessons
SeniorInfants
 
PPTX
Programming in scratch
Hussam Mostafa
 
PPTX
What is Coding
RoboGarden
 
PPTX
Scratch Basics
St. Petersburg College
 
PPTX
1.1 introduction to small basic
allenbailey
 
PPTX
Basic Computer Programming
Allen de Castro
 
PDF
Scratch Lesson Plan
Erika Hayashi
 
PPSX
Computer basic for kids
Paul Gonzales
 
PDF
Computer Programming
Syed Zaid Irshad
 
PPTX
Computer Keyboard
FathimaLidiya
 
PPTX
Basic of computer
Mŕ ƛwešome
 
PPTX
Computer Viruses
Annies Minu
 
PPT
Lect 1. introduction to programming languages
Varun Garg
 
PPT
PowerPoint Tutorial
Ashford University
 
PPT
computer software
Ahsan Khan
 
PPT
Presentation on Programming Languages.
Mohammad Shakirul islam
 
PPT
Introduction to Basic Computer Concepts Presentation
Ana Tan
 
PPTX
Basic programming concepts
salmankhan570
 
Scratch: Programming for everyone
Akshar Desai
 
Coding Basics with Scratch
Nicole Baratta
 
Computer Coding with Scratch: Lesson 2_primaryschoollessons
SeniorInfants
 
Programming in scratch
Hussam Mostafa
 
What is Coding
RoboGarden
 
Scratch Basics
St. Petersburg College
 
1.1 introduction to small basic
allenbailey
 
Basic Computer Programming
Allen de Castro
 
Scratch Lesson Plan
Erika Hayashi
 
Computer basic for kids
Paul Gonzales
 
Computer Programming
Syed Zaid Irshad
 
Computer Keyboard
FathimaLidiya
 
Basic of computer
Mŕ ƛwešome
 
Computer Viruses
Annies Minu
 
Lect 1. introduction to programming languages
Varun Garg
 
PowerPoint Tutorial
Ashford University
 
computer software
Ahsan Khan
 
Presentation on Programming Languages.
Mohammad Shakirul islam
 
Introduction to Basic Computer Concepts Presentation
Ana Tan
 
Basic programming concepts
salmankhan570
 

Viewers also liked (11)

PPT
Scratch for Data Logging and Graphing
Brian Huang
 
PPTX
NYSCATE HV 2015 Scratch Hour of Code
Karen VItek
 
PPT
Scratch for intermediates course
Matthew Parry
 
PPTX
Introduction to scratch programming
Patrick John McGee
 
PPT
Scratch and pair programming
jtelss10
 
PPTX
TKPJava - Teaching Kids Programming - Core Java Langauge Concepts
Lynn Langit
 
ODP
Introduction to Python - Training for Kids
Aimee Maree
 
PPTX
Programming with Scratch
Cort1026
 
PDF
Intro to Python
Daniel Greenfeld
 
PPTX
What is 'Teaching Kids Programming'
Lynn Langit
 
PPT
An Intro to Scratch Programming for Parents
mewren
 
Scratch for Data Logging and Graphing
Brian Huang
 
NYSCATE HV 2015 Scratch Hour of Code
Karen VItek
 
Scratch for intermediates course
Matthew Parry
 
Introduction to scratch programming
Patrick John McGee
 
Scratch and pair programming
jtelss10
 
TKPJava - Teaching Kids Programming - Core Java Langauge Concepts
Lynn Langit
 
Introduction to Python - Training for Kids
Aimee Maree
 
Programming with Scratch
Cort1026
 
Intro to Python
Daniel Greenfeld
 
What is 'Teaching Kids Programming'
Lynn Langit
 
An Intro to Scratch Programming for Parents
mewren
 
Ad

Similar to Introduction to Scratch Programming (20)

PPT
Scratch Introduction
GirijaSuthoju
 
PPT
Introduction to Scratch.ppt
SMARTCLASS4
 
PPT
Introduction to scratch
emreyz
 
PPTX
Scratch an Editing App
CHARANJEET SIDHU
 
PPTX
Lecture 1.pptx
afsheenfaiq2
 
PDF
How do I learn to code with Scratch in AEP
socalternativeeducat
 
PDF
Scratch handout
Samantha TerBeest
 
PDF
Scratch_Reference_Guide.pdf
Muhammad Waqas, MBA-Finance, MEF
 
PDF
Getting-Started-With-Scratch-3.0 for kids programming
BrahimRabbani
 
PPTX
Scratch introduction
WayneJones104
 
PPTX
Scratch for kids language in Program.pptx
nandhinicse147
 
PPTX
How to create an animated infographic
Dave LaFontaine
 
PPTX
Toon doo ppt
Cristiano Alves de Oliveira
 
PDF
Getting started-guide-scratch2
Solange Zambrano
 
PDF
Guide scratch2
Laura Gomensoro
 
PDF
Getting started-guide-scratch2
Botol Budu
 
PDF
Robot flash tutorial
Foredi Surabaya
 
DOC
Blog - Samples / tutorials
Carla_podworny
 
PDF
How_to_make_ your_ quiz_interactive
Bridget Fingleton-Brown
 
Scratch Introduction
GirijaSuthoju
 
Introduction to Scratch.ppt
SMARTCLASS4
 
Introduction to scratch
emreyz
 
Scratch an Editing App
CHARANJEET SIDHU
 
Lecture 1.pptx
afsheenfaiq2
 
How do I learn to code with Scratch in AEP
socalternativeeducat
 
Scratch handout
Samantha TerBeest
 
Scratch_Reference_Guide.pdf
Muhammad Waqas, MBA-Finance, MEF
 
Getting-Started-With-Scratch-3.0 for kids programming
BrahimRabbani
 
Scratch introduction
WayneJones104
 
Scratch for kids language in Program.pptx
nandhinicse147
 
How to create an animated infographic
Dave LaFontaine
 
Getting started-guide-scratch2
Solange Zambrano
 
Guide scratch2
Laura Gomensoro
 
Getting started-guide-scratch2
Botol Budu
 
Robot flash tutorial
Foredi Surabaya
 
Blog - Samples / tutorials
Carla_podworny
 
How_to_make_ your_ quiz_interactive
Bridget Fingleton-Brown
 
Ad

Recently uploaded (20)

PPTX
Light Reflection and Refraction- Activities - Class X Science
SONU ACADEMY
 
PPTX
Ward Management: Patient Care, Personnel, Equipment, and Environment.pptx
PRADEEP ABOTHU
 
PPTX
Introduction to Biochemistry & Cellular Foundations.pptx
marvinnbustamante1
 
PDF
Lesson 1 - Nature of Inquiry and Research.pdf
marvinnbustamante1
 
PPTX
EDUCATIONAL MEDIA/ TEACHING AUDIO VISUAL AIDS
Sonali Gupta
 
PPTX
care of patient with elimination needs.pptx
Rekhanjali Gupta
 
PPTX
Introduction to Indian Writing in English
Trushali Dodiya
 
PPTX
Controller Request and Response in Odoo18
Celine George
 
PPTX
PLANNING FOR EMERGENCY AND DISASTER MANAGEMENT ppt.pptx
PRADEEP ABOTHU
 
PDF
STATEMENT-BY-THE-HON.-MINISTER-FOR-HEALTH-ON-THE-COVID-19-OUTBREAK-AT-UG_revi...
nservice241
 
PDF
Is Assignment Help Legal in Australia_.pdf
thomas19williams83
 
PPTX
How to Manage Expiry Date in Odoo 18 Inventory
Celine George
 
DOCX
Lesson 1 - Nature and Inquiry of Research
marvinnbustamante1
 
PPTX
Building Powerful Agentic AI with Google ADK, MCP, RAG, and Ollama.pptx
Tamanna36
 
PPTX
DAY 1_QUARTER1 ENGLISH 5 WEEK- PRESENTATION.pptx
BanyMacalintal
 
PDF
Vani - The Voice of Excellence - Jul 2025 issue
Savipriya Raghavendra
 
PDF
IMPORTANT GUIDELINES FOR M.Sc.ZOOLOGY DISSERTATION
raviralanaresh2
 
PDF
Vietnam Street Food & QSR Market 2025-1.pdf
ssuserec8cd0
 
PDF
Android Programming - Basics of Mobile App, App tools and Android Basics
Kavitha P.V
 
PPTX
Difference between write and update in odoo 18
Celine George
 
Light Reflection and Refraction- Activities - Class X Science
SONU ACADEMY
 
Ward Management: Patient Care, Personnel, Equipment, and Environment.pptx
PRADEEP ABOTHU
 
Introduction to Biochemistry & Cellular Foundations.pptx
marvinnbustamante1
 
Lesson 1 - Nature of Inquiry and Research.pdf
marvinnbustamante1
 
EDUCATIONAL MEDIA/ TEACHING AUDIO VISUAL AIDS
Sonali Gupta
 
care of patient with elimination needs.pptx
Rekhanjali Gupta
 
Introduction to Indian Writing in English
Trushali Dodiya
 
Controller Request and Response in Odoo18
Celine George
 
PLANNING FOR EMERGENCY AND DISASTER MANAGEMENT ppt.pptx
PRADEEP ABOTHU
 
STATEMENT-BY-THE-HON.-MINISTER-FOR-HEALTH-ON-THE-COVID-19-OUTBREAK-AT-UG_revi...
nservice241
 
Is Assignment Help Legal in Australia_.pdf
thomas19williams83
 
How to Manage Expiry Date in Odoo 18 Inventory
Celine George
 
Lesson 1 - Nature and Inquiry of Research
marvinnbustamante1
 
Building Powerful Agentic AI with Google ADK, MCP, RAG, and Ollama.pptx
Tamanna36
 
DAY 1_QUARTER1 ENGLISH 5 WEEK- PRESENTATION.pptx
BanyMacalintal
 
Vani - The Voice of Excellence - Jul 2025 issue
Savipriya Raghavendra
 
IMPORTANT GUIDELINES FOR M.Sc.ZOOLOGY DISSERTATION
raviralanaresh2
 
Vietnam Street Food & QSR Market 2025-1.pdf
ssuserec8cd0
 
Android Programming - Basics of Mobile App, App tools and Android Basics
Kavitha P.V
 
Difference between write and update in odoo 18
Celine George
 

Introduction to Scratch Programming

  • 2. What is Scratch? • Scratch is a free programmable toolkit that enables kids to create their own games, animated stories, and interactive art and share their creations with one another over the Internet.
  • 3. What is Scratch? • Scratch is being developed by the Lifelong Kindergarten research group at the MIT Media Lab, in collaboration with KIDS research group at the UCLA Graduate School of Education & Information Studies.
  • 4. Let’s Get Started! • To Open Scratch, visit the following website: http://scratch.mit.edu/ • Click on “Try it Out”
  • 5. Getting Started With Scratch Once you’ve opened Scratch, you should see this default screen:
  • 6. Let’s Look At Some Scratch Examples • Go to “View Projects”, and click on “Animation” on the left-hand side of the screen • Look through them and see what you will be able to do in Scratch!
  • 7. Choose Your Sprite! • You will notice that the default sprite is an orange cat. (A sprite is a small graphic that can be moved independently around the screen, producing animated effects.) • You can choose a different sprite to program from a library in Scratch, or you can draw your own! You can create your own sprite later; for now, choose one already created.
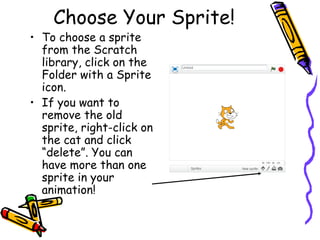
  • 8. Choose Your Sprite! • To choose a sprite from the Scratch library, click on the Folder with a Sprite icon. • If you want to remove the old sprite, right-click on the cat and click “delete”. You can have more than one sprite in your animation!
  • 9. Resize Your Sprite! • You can make your sprite larger or smaller by using the “grow sprite” or “shrink sprite” icons. • You click on one of these icons, then click on your sprite until it is the size you’d like.
  • 10. Choose Your Background! • Right now, you have a plain, white background – boring! • You can change your background by choosing one from the Scratch library or creating your own.
  • 11. Choose Your Background! • Click on the button called “New Backdrop”: • Now select “Choose Backdrop from Library”
  • 12. Now, We’re Ready to Program! Now, you should have a sprite and a background that you’d like to work with!
  • 13. Programming In Scratch! • The first thing you need to do is to double-click on the sprite you want to program, and select the “Scripts” tab. • Since your sprite is the only thing that can be animated, make sure you have it selected. • The Scripts area is where you “build” your program by using the programming blocks.
  • 14. Programming In Scratch! • In the upper, left-hand corner of your Scratch window, you will see 10 buttons . • Each of these buttons have programming blocks in those particular areas. • We will first experiment with the Motion blocks.
  • 15. Motion! • When you click on the motion button, you will see the programming blocks that can be used with your sprite. • Let’s all program our sprites with the same code first, and then you’ll be allowed to experiment on your own!
  • 16. Motion! • Drag out the “move 10 steps” block. • Change the “10” to “50” by clicking in the block and typing in 50. • To see your sprite move 50 pixels to the right, double click on the block in the Script area. Cool, isn’t it?!
  • 17. Motion • You can also set the motion block to move a negative number of pixels by typing a negative number in the block. • This will move your sprite that number of pixels in the opposite direction – like your sprite is moving backwards!
  • 18. What Is A Pixel? • We’ve been talking about pixels – what is a pixel? • A pixel is one of the small units that make up an image on a computer or television screen. • It is derived from the words picture and element to make pixel!
  • 19. The Scratch Stage • The Scratch stage is 480 pixels wide and 360 pixels high. -240 240 180 -180
  • 20. More Motion! • Now, add the “turn 15 degrees” block to the other block of code. • When you see the white bar between the 2 blocks of code, you can release your mouse. That white bar means that the 2 blocks will “snap” onto the other block.
  • 21. More Motion! • Again, you can change the number of degrees by double clicking in that area and typing in the number of degrees you’d like your sprite to rotate. • Double click on the blocks to see your sprite move and rotate!
  • 22. Experiment With Motion! • We’ve only used 2 of the blocks in the Motion category. • For the next few minutes, I want you to experiment with all of the other blocks in the Motion category. • You can delete code easily by just dragging it from the Script area back to the list. • Have fun!
  • 23. Try “Events” • The first block I’d like us to use is the “when flag clicked” block: • Drag this block out, and snap it on top of the blocks you already have in your script.
  • 24. Events • Now, instead of having to double click on your block of code, you can just click on the flag icon to play your animation! Click here to start
  • 25. Looks • The next category of programming buttons we will experiment with is the Control category. • With this tool, you can make your Sprite speak, think, or even switch costumes.
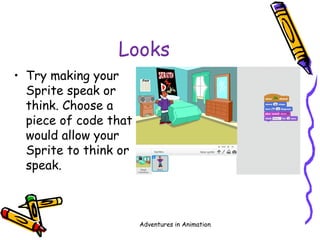
  • 26. Looks • Try making your Sprite speak or think. Choose a piece of code that would allow your Sprite to think or speak. Adventures in Animation
  • 27. Looks • Now, try changing your Sprite’s costume. Under the “Costume” tab, click “Choose costume from library”.
  • 28. Looks • Then add “Switch costume to” to your block of code.
  • 29. Sound! • Now, let’s add some sound to our animation! • There are many different ways to get sound in your animation. • The first way we’re going to experiment with is by choosing a Sound from the Scratch library.
  • 30. Choose Sound from Library • Click on the sprite you want to have sound. • Click on the Sounds tab; and under “New Sound”, click “choose sound from library”.
  • 31. Scratch Sound Library • You will see different categories of sounds that you can use in your animation that are available for you in the Scratch library.
  • 32. Inserting Sound • Once you find a sound that you like, select it and click on OK. • You will see the sound you just selected show up under “New Sound”.
  • 33. Play Your Sound • If you click on the “Play” button, you can preview your sound.
  • 34. Adding The Sound To Your Animation • Now, you’re ready to add the sound to your animation! • Click on the Script tab. • Select the sprite you want to have sound. • Now select the Sound button.
  • 35. Adding Sound • Now, select one of the blocks that says, “play sound…” • Select your sound from the drop-down menu by clicking on the name of your sound.
  • 36. Recording a Sound • Click on the record button to record a sound • Click on the red button to start recording • Click on the square to stop • You can rename the sound by typing over the name
  • 37. Incorporate Sound Into Your Animation! When I click the flag, the boy will move and a drum will play.
  • 38. Presentation Mode • When you click on the rectangle button in the left-hand side of your screen, your animation will fill the whole screen! • To exit presentation mode, just click the rectangle button again in the top left of the screen.
  • 39. Using The Pen! • When using the Pen tools, your sprite actually becomes your writing instrument! • You can change the Pen’s color, its shade, and its size.
  • 40. Using the Pen! • Your sprite becomes your pen when using this tool. Attach the “Pen Down” to your block of code. • It may sound easy, but, you have to remember to choose “Pen Up” when necessary so that your sprite stops writing when you want it to!
  • 41. Using The Pen! • Try changing the color of the pen by typing in different numbers. • For example, number 0 is the color white, number 70 is red, number 130 is green, and number 170 is blue.
  • 42. Time To Have Fun! • Now it’s time for you to create your own original animations or games! • When you create something cool, let me see it!

Editor's Notes

  • #17: You can execute any block by double clicking on it. This is a good way to try out blocks and see what they do.
  • #23: Depending on the level of the group you’re working with, this can be a 5 minute or a 15 minute activity. Make sure that they are only working within the Motion category for now, so you will limit the number of questions they have at one time!
  • #33: You can import any wav and mp3 sound files.