SlideShare a Scribd company logo
Installing and Using Oracle Database 10g

To install Oracle Database 10g:

1. Insert the Oracle Database 10g Release 1 (10.1.0.2) CD in your CD-ROM drive. The Oracle
   Database10g – Autorun dialog box opens.

HELP: If the program does not automatically start, start Windows Explorer, navigate to your CD-ROM drive and run
setup.exe on the CD.

HELP: If at anytime during the installation process, a Windows Security Alert dialog box appears,
like the one below, click the Unblock button.


2. Click Install/Deinstall Products. Before the Welcome to the Oracle Universal Installer dialog
   box opens, Oracle will check your system for the necessary requirements and you will see the
   following screen.
3. When the Welcome to the Oracle Database 10g Installation page appears, accept the default Basic
   Installation option and the Oracle Home Location: C:oracleproduct10.1.0Db_1 path.
4. Select the Installation Type Personal Edition, Standard Edition, or Enterprise Edition as
   directed by your instructor.
5. Accept the default Create Starter Database option and the default Global Database Name: orcl
6. Choose a password for your database. This password is used to login to the database as the SYS,
   SYSTEM, SYSMAN, or DBSNMP user. Type the password you chose in the Database Password
   and Confirm Password text boxes. Please be sure to write this password down as you’ll need it to
   login to the database.

NOTE: The following restrictions apply to passwords:
   •   Passwords must be between 4 and 30 characters long.
   •   Passwords cannot be the same as the user name.
   •   Passwords must be from the database character set and can include the underscore (_), dollar ($), and pound sign
       (#) characters.
   •   Passwords cannot be Oracle reserved words.
7. Click Next.

NOTE: The Product Registration page appears. On this page, you are prompted to enter a product
registration key. Click the Register button to register your Oracle software with the Oracle
Technology Network (OTN) before beginning the installation process. You will be prompted for
information about the book that your Oracle CD came with. You will need to know the book title,
ISBN, and publisher.

HELP: If you have not already obtained an OTN user_id and password you will need to do that to
continue the software registration process. There is no charge to become a member of OTN.

TIP: If an Error dialog box appears that says: Thrown when the IP address of a host cannot be
determined, click the Continue button to use the default value and go on. This may happen several
times.

8. The Preparing to Install window appears for a few moments.
9. On the Summary page, click Install. The Install page appears. The installation process will take
    several minutes.
10. When the Database Configuration Assistant page appears, click the Password Management button
    to unlock the Scott user. Scroll to the Scott user and uncheck the Lock Account? box. The
    default password for Scott is tiger, click OK, and then click OK close the Database
    Configuration Assistant.
11. When the End of Installation page displays and confirms that the installation was successful, click
    Exit, and then click Yes to confirm exiting.


                            You're now done with basic installation!


Using SQL*Plus to Create a New User

Please Note: In this example we create a user account with DBA privileges, having user name as
user123 and password as abc123.


1. Start SQL*Plus and log in to your system account:

   •   Click Start on the Windows taskbar, point to Programs or All Programs, point to Oracle –
       OraDb10g_home1, point to Application Development, and then click SQL Plus. The Log
       On dialog box opens and requests your user name, password, and host string.

   •   Type system in the User Name field, type the password you specified during installation (in
       step 6 of the installation process described above), leave the Host String field blank, then click
       OK. The SQL*Plus program window opens, and the SQL prompt appears.
2. Type the following script in Notepad and copy, paste, and execute it in SQL*Plus:
create user user123 identified by abc123
default tablespace users
temporary tablespace temp
quota unlimited on users;

grant connect , resource to user123;
grant dba to user123;

3. Exit SQL*Plus using File > Exit from the menu or by typing quit


                                              ********************

Using Enterprise Manager to Create a New User

Please Note: In this example we create a user account with DBA privileges, having user name as
user123 and password as abc123.

To use the database for user data and for day-to-day tasks such as doing your homework, you should
create one or two user accounts and then login as one of these users to do the work. A user account is
identified by a user name and password and is associated with an area in the database.

1. Login to the Enterprise Manager as a DBA.

     Start Oracle Enterprise Manager in a web browser (FireFox or IE): http://localhost:1158/em
     (Before starting EM, be sure that the following services have been started: OracleService, OracleDBConsole, and
     OracleTNSListener. You can check for the services that are started/running by going to Start> Control Panel>
     Administrative Tools> Services)

2.        On the Oracle Enterprise Manager Database Control Login page, type SYSMAN as the User
          Name, enter the password you specified in step 6 during installation, select Normal from
          "Connect As" drop-down list and then click Login.

          (Alternatively, you may login by typing SYS, your password, and selecting SYSDBA.)

TIP: If you are not on the Oracle Enterprise Manager Database Control Login page, then open a Web
Browser and type the following URL: http://localhost:1158/em

3.        If the Oracle Database Licensing Information 10g page appears, read the page and scroll to
          the bottom and then click I Agree. This page appears the first time a new user logs in to the
          Oracle Enterprise Manager Database Control application.
4.        The Oracle Enterprise Manager Database Control Home page will appear. To create a new
          user for the Oracle database: orcl, click the Administration link.
5.        Under the Security heading click the Users link.
6.        On the Oracle Enterprise Manager Database Control Users page, click the Create button
          located on the right hand side of the page.
7.        Type user123 in the Name field, abc123 in the Enter Password field, and abc123 once again
          in the Confirm Password field.
8.        Type USERS in the Default Tablespace field and Temp in the Temporary Tablespace field.
9.        Click the Roles link, click the Modify button, select DBA in the Available Roles list, and
          then click the move arrow so that DBA appears in the Selected Roles list.
10.       Click OK on the Modify Roles page, and then click OK on the Create User page. A message
          confirms that the object was successfully created.
11.       Click the Logout link at the bottom of the page.
12.       Close the Oracle Enterprise Manager 10g Database Control web page by clicking the X icon
          in the upper right corner of the web page.


                                        ********************

To Login as the User that You Created in the Above Examples

Please Note: In this example you’ll login as user123 with the password abc123

      •   Click Start on the Windows taskbar, point to Programs or All Programs, point to Oracle –
          OraDb10g_home1, point to Application Development, and then click SQL Plus. The Log
          On dialog box opens and requests your user name, password, and host string.

      •   Type user123 in the User Name field, type abc123 in the Password field, leave the Host
          String field blank, click OK. The SQL*Plus program window opens, and the SQL prompt
          appears.


                                        ********************

Starting and Stopping Database Services

After you install Oracle 10g (or 11g) on your computer, you’ll see four Oracle services running.
These services automatically start when you start your computer, and consume a good amount of the
computer’s memory and slow it down. It’s a good idea to have these services set to manual mode,
stop them when you’re not using Oracle, and restart them before using Oracle. Here’s what you
should do:

      •   Start > Control Panel > Administrative Tools > Services
      •   The services are listed alphabetically in the Services window. For each Oracle service, open
          the Properties window by right-clicking, change the Startup Type to Manual and stop the
          service. You can restart a service when needed by right-clicking and selecting Start.
      •   The following services are needed for various client tools:
              o For SQL*Plus: OracleService… (… = database name, such as ORCL)
              o For Oracle SQL Developer: OracleService + Oracle…TNSListener
              o For Enterprise Manager: OracleService + Oracle…TNSListener + OracleDBConsole...

More Related Content

What's hot (9)

PDF
12 simple steps to prepare your i os app for development and distribution (1)...
Katy Slemon
 
PPT
Ext js user login panel
Arun Prasad
 
PPT
Introduction to ExtJS
Arun Prasad
 
DOCX
Many Problems in SharePoint
no NO No
 
PPT
Designing an ExtJS user login panel
Arun Prasad
 
PDF
Dw cs3-introduction
koinoniamedia
 
DOC
Ernst & Young eDocs add a Subfolder cancel and exit the process
Mohammed Golam
 
PPS
Introduction to ExtJS lesson 01 Part two
Arun Prasad
 
PPTX
Share point 2010_overview-day4-code
Narayana Reddy
 
12 simple steps to prepare your i os app for development and distribution (1)...
Katy Slemon
 
Ext js user login panel
Arun Prasad
 
Introduction to ExtJS
Arun Prasad
 
Many Problems in SharePoint
no NO No
 
Designing an ExtJS user login panel
Arun Prasad
 
Dw cs3-introduction
koinoniamedia
 
Ernst & Young eDocs add a Subfolder cancel and exit the process
Mohammed Golam
 
Introduction to ExtJS lesson 01 Part two
Arun Prasad
 
Share point 2010_overview-day4-code
Narayana Reddy
 

Similar to Oracle install (20)

DOCX
Installing Process Oracle 10g Database Software on Windows 10
Azharul Islam
 
PDF
Oracle 10g installation_guide
Daila Carmona
 
PPTX
First To Oracle 11g release 2
Chhom Karath
 
PDF
Oracle 10g Installation
sasidharreddilingala
 
PDF
The Ultimate Guide to Upgrade ocp java 6, 7 & 8 to java se 11 developer ...
ParshantiniRoy
 
PPT
Toc d17090 gc30
Imran Ali
 
DOCX
Peoplesoft installation steps
Rogério Pereira Falcone
 
PDF
2008 Collaborate IOUG Presentation
Biju Thomas
 
PPTX
Oracle DBA
shivankuniversity
 
PPT
Less04 instance
Imran Ali
 
PDF
Oracle Database 10g The Complete Reference 1st Edition Kevin Loney
pandimshalim
 
DOCX
Data Warehousing Practical for T.Y.I.T.
Niraj Bharambe
 
PPT
Creating database
Hitesh Kumar Markam
 
PPT
Less08 users
Amit Bhalla
 
PDF
Oracle 11g step by step installation on windows
Ravi Kumar Lanke
 
PDF
Installing oracle database 11g on windows 7
Ravi Kumar Lanke
 
DOC
Create manula and automaticly database
Anar Godjaev
 
PPTX
Oracle administration classes in mumbai
Vibrant Technologies & Computers
 
PDF
E56576 01
Wilfred Mbithi Luvai
 
PPT
ora_sothea
thysothea
 
Installing Process Oracle 10g Database Software on Windows 10
Azharul Islam
 
Oracle 10g installation_guide
Daila Carmona
 
First To Oracle 11g release 2
Chhom Karath
 
Oracle 10g Installation
sasidharreddilingala
 
The Ultimate Guide to Upgrade ocp java 6, 7 & 8 to java se 11 developer ...
ParshantiniRoy
 
Toc d17090 gc30
Imran Ali
 
Peoplesoft installation steps
Rogério Pereira Falcone
 
2008 Collaborate IOUG Presentation
Biju Thomas
 
Oracle DBA
shivankuniversity
 
Less04 instance
Imran Ali
 
Oracle Database 10g The Complete Reference 1st Edition Kevin Loney
pandimshalim
 
Data Warehousing Practical for T.Y.I.T.
Niraj Bharambe
 
Creating database
Hitesh Kumar Markam
 
Less08 users
Amit Bhalla
 
Oracle 11g step by step installation on windows
Ravi Kumar Lanke
 
Installing oracle database 11g on windows 7
Ravi Kumar Lanke
 
Create manula and automaticly database
Anar Godjaev
 
Oracle administration classes in mumbai
Vibrant Technologies & Computers
 
ora_sothea
thysothea
 
Ad

Oracle install

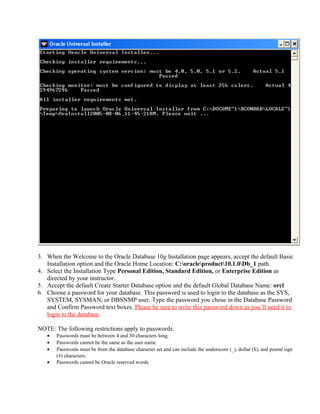
  • 1. Installing and Using Oracle Database 10g To install Oracle Database 10g: 1. Insert the Oracle Database 10g Release 1 (10.1.0.2) CD in your CD-ROM drive. The Oracle Database10g – Autorun dialog box opens. HELP: If the program does not automatically start, start Windows Explorer, navigate to your CD-ROM drive and run setup.exe on the CD. HELP: If at anytime during the installation process, a Windows Security Alert dialog box appears, like the one below, click the Unblock button. 2. Click Install/Deinstall Products. Before the Welcome to the Oracle Universal Installer dialog box opens, Oracle will check your system for the necessary requirements and you will see the following screen.
  • 2. 3. When the Welcome to the Oracle Database 10g Installation page appears, accept the default Basic Installation option and the Oracle Home Location: C:oracleproduct10.1.0Db_1 path. 4. Select the Installation Type Personal Edition, Standard Edition, or Enterprise Edition as directed by your instructor. 5. Accept the default Create Starter Database option and the default Global Database Name: orcl 6. Choose a password for your database. This password is used to login to the database as the SYS, SYSTEM, SYSMAN, or DBSNMP user. Type the password you chose in the Database Password and Confirm Password text boxes. Please be sure to write this password down as you’ll need it to login to the database. NOTE: The following restrictions apply to passwords: • Passwords must be between 4 and 30 characters long. • Passwords cannot be the same as the user name. • Passwords must be from the database character set and can include the underscore (_), dollar ($), and pound sign (#) characters. • Passwords cannot be Oracle reserved words.
  • 3. 7. Click Next. NOTE: The Product Registration page appears. On this page, you are prompted to enter a product registration key. Click the Register button to register your Oracle software with the Oracle Technology Network (OTN) before beginning the installation process. You will be prompted for information about the book that your Oracle CD came with. You will need to know the book title, ISBN, and publisher. HELP: If you have not already obtained an OTN user_id and password you will need to do that to continue the software registration process. There is no charge to become a member of OTN. TIP: If an Error dialog box appears that says: Thrown when the IP address of a host cannot be determined, click the Continue button to use the default value and go on. This may happen several times. 8. The Preparing to Install window appears for a few moments. 9. On the Summary page, click Install. The Install page appears. The installation process will take several minutes. 10. When the Database Configuration Assistant page appears, click the Password Management button to unlock the Scott user. Scroll to the Scott user and uncheck the Lock Account? box. The default password for Scott is tiger, click OK, and then click OK close the Database Configuration Assistant. 11. When the End of Installation page displays and confirms that the installation was successful, click Exit, and then click Yes to confirm exiting. You're now done with basic installation! Using SQL*Plus to Create a New User Please Note: In this example we create a user account with DBA privileges, having user name as user123 and password as abc123. 1. Start SQL*Plus and log in to your system account: • Click Start on the Windows taskbar, point to Programs or All Programs, point to Oracle – OraDb10g_home1, point to Application Development, and then click SQL Plus. The Log On dialog box opens and requests your user name, password, and host string. • Type system in the User Name field, type the password you specified during installation (in step 6 of the installation process described above), leave the Host String field blank, then click OK. The SQL*Plus program window opens, and the SQL prompt appears.
  • 4. 2. Type the following script in Notepad and copy, paste, and execute it in SQL*Plus: create user user123 identified by abc123 default tablespace users temporary tablespace temp quota unlimited on users; grant connect , resource to user123; grant dba to user123; 3. Exit SQL*Plus using File > Exit from the menu or by typing quit ******************** Using Enterprise Manager to Create a New User Please Note: In this example we create a user account with DBA privileges, having user name as user123 and password as abc123. To use the database for user data and for day-to-day tasks such as doing your homework, you should create one or two user accounts and then login as one of these users to do the work. A user account is identified by a user name and password and is associated with an area in the database. 1. Login to the Enterprise Manager as a DBA. Start Oracle Enterprise Manager in a web browser (FireFox or IE): http://localhost:1158/em (Before starting EM, be sure that the following services have been started: OracleService, OracleDBConsole, and OracleTNSListener. You can check for the services that are started/running by going to Start> Control Panel> Administrative Tools> Services) 2. On the Oracle Enterprise Manager Database Control Login page, type SYSMAN as the User Name, enter the password you specified in step 6 during installation, select Normal from "Connect As" drop-down list and then click Login. (Alternatively, you may login by typing SYS, your password, and selecting SYSDBA.) TIP: If you are not on the Oracle Enterprise Manager Database Control Login page, then open a Web Browser and type the following URL: http://localhost:1158/em 3. If the Oracle Database Licensing Information 10g page appears, read the page and scroll to the bottom and then click I Agree. This page appears the first time a new user logs in to the Oracle Enterprise Manager Database Control application. 4. The Oracle Enterprise Manager Database Control Home page will appear. To create a new user for the Oracle database: orcl, click the Administration link. 5. Under the Security heading click the Users link. 6. On the Oracle Enterprise Manager Database Control Users page, click the Create button located on the right hand side of the page.
  • 5. 7. Type user123 in the Name field, abc123 in the Enter Password field, and abc123 once again in the Confirm Password field. 8. Type USERS in the Default Tablespace field and Temp in the Temporary Tablespace field. 9. Click the Roles link, click the Modify button, select DBA in the Available Roles list, and then click the move arrow so that DBA appears in the Selected Roles list. 10. Click OK on the Modify Roles page, and then click OK on the Create User page. A message confirms that the object was successfully created. 11. Click the Logout link at the bottom of the page. 12. Close the Oracle Enterprise Manager 10g Database Control web page by clicking the X icon in the upper right corner of the web page. ******************** To Login as the User that You Created in the Above Examples Please Note: In this example you’ll login as user123 with the password abc123 • Click Start on the Windows taskbar, point to Programs or All Programs, point to Oracle – OraDb10g_home1, point to Application Development, and then click SQL Plus. The Log On dialog box opens and requests your user name, password, and host string. • Type user123 in the User Name field, type abc123 in the Password field, leave the Host String field blank, click OK. The SQL*Plus program window opens, and the SQL prompt appears. ******************** Starting and Stopping Database Services After you install Oracle 10g (or 11g) on your computer, you’ll see four Oracle services running. These services automatically start when you start your computer, and consume a good amount of the computer’s memory and slow it down. It’s a good idea to have these services set to manual mode, stop them when you’re not using Oracle, and restart them before using Oracle. Here’s what you should do: • Start > Control Panel > Administrative Tools > Services • The services are listed alphabetically in the Services window. For each Oracle service, open the Properties window by right-clicking, change the Startup Type to Manual and stop the service. You can restart a service when needed by right-clicking and selecting Start. • The following services are needed for various client tools: o For SQL*Plus: OracleService… (… = database name, such as ORCL) o For Oracle SQL Developer: OracleService + Oracle…TNSListener o For Enterprise Manager: OracleService + Oracle…TNSListener + OracleDBConsole...