Rit 8.5.0 integration testing training student's guide
16 likes8,805 views

provides help and documentation for Rational Integration Tester. Recent Projects: lists recently opened projects for quick access. Exit: closes Rational Integration Tester. For this training, we will be creating a new project from scratch. So let's select New Project. 2.2 The initial screen Once configuration of our system is complete, we are ready to launch Rational Integration Tester and create a


![IBM RATIONAL INTEGRATION TESTER TESTING TRAINING GUIDE
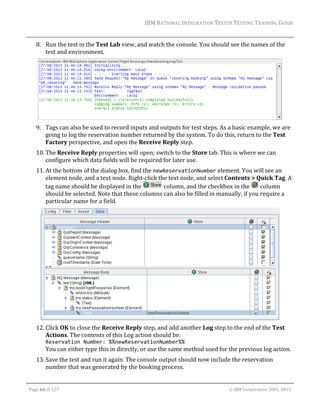
7.3 Regular expressions
This module makes use of regular expressions during the use of the Tests using MEP wizard. This
course assumes some familiarity with regular expressions, but in case you do not use regular
expressions often, a table has been provided to explain the tokens that will be used in this module,
and future modules.
Token
Matches
^
The start of the string. No characters can occur before this point.
$
The end of the string. No characters can occur after this point
.
Any single character.
[ ]
Any single character contained within the brackets.
w
A single word character (a letter or number).
d
A single digit.
*
The preceding character 0 or more times. For example, d* means 0 or more digits.
+
The preceding character 1 or more times. For example, d+ means 1 or more digits.
{n}
The preceding character repeated n times. For example, d{3} means 3 digits.
{m,n}
The preceding character repeated, between m and n times. d{4,6} means a set of 4, 5,
or 6 digits.
There are more tokens available to use within the regular expressions used in Rational Integration
Tester, but this table will cover the majority of tokens used within this training course.
7.4 Exercise: Creating tests with the MEP wizard
1. In the Test Factory perspective, right‐click the Tests virtual folder under the MakeBooking
operation and select New > Tests using MEP. A wizard is launched that will help you create
multiple tests to validate all possibilities from the operation’s message exchange pattern
(MEP).
2. The first page of the wizard lets you control the structure of the request messages that will
be generated for each test. You can alter that structure by selecting how many occurrences
of each element should be included. As the message schema we are using does not allow for
any optional or repeating elements, every element should occur exactly once. This means
that we can leave all settings at their defaults for this example.
Page 42 of 127 © IBM Corporation 2001, 2013](https://image.slidesharecdn.com/rit8-140221044403-phpapp01/85/Rit-8-5-0-integration-testing-training-student-s-guide-44-320.jpg)


![IBM RATIONAL INTEGRATION TESTER TESTING TRAINING GUIDE
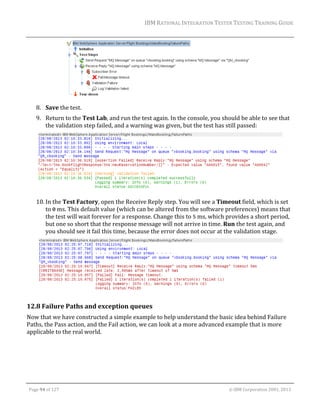
10.3 Using tags
As seen above, tags can be given values when they are created. Test tags can also be given new
values during the execution of a test or stub. This will usually be done on the Store tab of a test
action; in that case, the tag is referenced simply by its name.
To retrieve the value of a tag, you will need to surround the tag name with two percentage signs at
each end. This means that you can store a value in a tag called myTag simply by referring to its
name, myTag, but to retrieve the value of that tag, you will need to refer to it as %%myTag%%.
Some features of Rational Integration Tester use ECMA Script. In most cases, a tag can be
referenced within a script through its name, which would give you myTag, if you kept using the
previous example. However, there are exceptions to this. If your tag name clashes with a reserved
word or variable, then you will not be able to use the tag name without causing confusion. Similarly,
if you have a hierarchy of tags (with an example tag of MYTAGS/tag1), the slash character would
cause confusion within a script. In these cases, you can refer to the tag using, for example,
tags["myTag"] or tags["MYTAGS/tag1"].
10.4 Exercise: Testing with tags
1. Go to the Test Factory and create a new test based on the basicTemplate we created
earlier. Call it tagTest.
2. We are going to add another step to the test, to log the name of the test, and the environment
being used. Right‐click Test Steps, and select New > Flow > Log.
3. A new Log step should be added to your test. Drag this step so that it appears as the first
item in the Test Steps section of the test.
4. Double‐click the Log action to edit it.
5. In the Output Message field, right‐click and select Insert Tag > TEST > NAME. You should
see the text %%TEST/NAME%% appear in the Output message.
6. Press Enter to add a new line. Right‐click again, and select Insert Tag > ENVIRONMENT >
NAME. Similarly, you should see %%ENVIRONMENT/NAME%% appear.
7. The double percentage signs (%%)designate a tag, and this part of the text will be replaced
when we run the Log action. However, we can also add some extra text. Add some context so
that you know what is being logged later on. For example:
Page 65 of 127 © IBM Corporation 2001, 2013](https://image.slidesharecdn.com/rit8-140221044403-phpapp01/85/Rit-8-5-0-integration-testing-training-student-s-guide-67-320.jpg)


![IBM RATIONAL INTEGRATION TESTER TESTING TRAINING GUIDE
6. Click OK to close the dialog box.
7. In Test Factory, create a new test based on the basicTemplate and call it MonitorTest.
8. Switch to the Monitoring tab of the test, and choose Add; it should automatically find the
log file location we selected in Architecture School. At the moment, this will simply copy
any items that appear in the log file during the test into the Rational Integration Tester
console.
9. In the test steps, add a Sleep action after the Receive Reply action.
10. Configure the Sleep action so that it uses a Fixed delay of 2000ms. This will pause the test for
2 seconds after we have received a reply. As the log file is polled periodically, and the logging
in the application might take a short amount of time to write to disk, we are allowing some
extra time to pick up any messages that might be relevant to our test.
11. Run your test. In the console, you should see a line of information, such as:
[INFO] Booking made for Neil Myers reservation: A00020
You might also see some warnings. The information item is always written to the log file for
each new booking, while the warnings will only come up under certain conditions.
12. Return to the Test Factory. We are going to configure the Send Request action to send
some data to the system that will generate some warnings, so open that action.
Page 108 of 127 © IBM Corporation 2001, 2013](https://image.slidesharecdn.com/rit8-140221044403-phpapp01/85/Rit-8-5-0-integration-testing-training-student-s-guide-110-320.jpg)
![IBM RATIONAL INTEGRATION TESTER TESTING TRAINING GUIDE
13. The system will log a warning if any of the fields in the message do not contain any data, so
clear any data in the postcode field.
14. It will also log a warning if the cardholder name does not match the passenger name. Make
sure that these two names are different, and then close the Send Request action.
15. Save the test and Run it. This time you should see a pair of warnings in the console, telling
you that the postcode is missing, and that the cardholder name does not match the
passenger name. However, these are logged to the Rational Integration Tester console at the
information level.
16. Switch back to the Test Factory, and return to the Monitoring tab of the test. Within that
section, there is also an Actions tab that tells Rational Integration Tester how to handle
anything it sees inside the log file. The default behavior is to write it to the console as
information.
17. Click the Add
button to add an item to watch for in the log file.
18. Double‐click in the Match field. It should bring up an Edit Regex window, with a copy of the
log file as it currently stands.
19. First, we will look out for the warning for the mismatched passenger and cardholder names,
so select the text [WARNING 012]. Several regular expressions that match this will be
suggested in a popup menu; choose the expression [WARNING 012]. This will only match
the exact same string. Any matches for that string in the file will then be highlighted.
20. Click OK to close the dialog box.
21. In the Action column, set this to Treat as error, so that any warnings about cardholder
names will fail the test. Select the box in the Enabled column as well, to make sure it is
applied to the test.
Page 109 of 127 © IBM Corporation 2001, 2013](https://image.slidesharecdn.com/rit8-140221044403-phpapp01/85/Rit-8-5-0-integration-testing-training-student-s-guide-111-320.jpg)
![IBM RATIONAL INTEGRATION TESTER TESTING TRAINING GUIDE
22. Add a second action, following the same process. This time, choose the regular expression
[WARNING d{3}] and the action Treat as warning. Any other warnings that are logged to
the log file will now also be shown as warnings inside the Rational Integration Tester
console.
23. Save, then Run your test again. You should now see it fail, due to the difference detected
between the cardholder name and passenger name. You will also see a warning recorded for
the missing postcode.
Page 110 of 127 © IBM Corporation 2001, 2013](https://image.slidesharecdn.com/rit8-140221044403-phpapp01/85/Rit-8-5-0-integration-testing-training-student-s-guide-112-320.jpg)


Ad
More Related Content
What's hot (20)
Viewers also liked (15)


Ad
Similar to Rit 8.5.0 integration testing training student's guide (20)


Ad
More from Darrel Rader (6)


Rit 8.5.0 integration testing training student's guide
- 3. IBM RATIONAL INTEGRATION TESTER TESTING TRAINING GUIDE OVERVIEW .................................................................................................................................... 4 1 PREPARATION ......................................................................................................................... 5 1.1 1.2 CONFIGURING THE LIBRARY MANAGER FOR WEBSPHERE APPLICATION SERVER AND MQ ...... 5 1.3 2 INTRODUCTION ................................................................................................................. 5 INTERCEPT FOR WEBSPHERE MQ ...................................................................................... 7 PROJECT SETUP ...................................................................................................................... 8 2.1 2.2 CREATING A NEW PROJECT ................................................................................................ 9 2.3 3 THE INITIAL SCREEN .......................................................................................................... 8 EXERCISE: CREATING A NEW PROJECT ............................................................................. 10 COMPLEX ENVIRONMENTS ...................................................................................................... 13 3.1 3.2 MANAGING FLIGHT BOOKINGS .......................................................................................... 13 3.3 FINDING AND BOOKING HOTELS ........................................................................................ 14 3.4 4 INTRODUCTION ............................................................................................................... 13 FLIGHT ADMINISTRATION .................................................................................................. 15 SYNCHRONIZATION ................................................................................................................ 17 4.1 4.2 5 INTRODUCTION ............................................................................................................... 17 EXERCISE: SYNCHRONIZING WITH A WEBSPHERE APPLICATION SERVER ............................. 18 BUILDING A SYSTEM MODEL FROM RECORDED EVENTS ............................................................. 21 5.1 5.2 RECORDING MQ MESSAGES ............................................................................................ 21 5.3 EXERCISE: SETTING UP THE TRANSPORTS ......................................................................... 22 5.4 EXERCISE: ADDING THE FLIGHT BOOKING MESSAGE SCHEMAS ............................................ 23 5.5 EXERCISE: RECORDING EVENTS FROM A TRANSPORT ......................................................... 24 5.6 EXERCISE: BUILDING OPERATIONS FROM RECORDED EVENTS ............................................. 26 5.7 6 INTRODUCTION ............................................................................................................... 21 EXERCISE: COMPLETING THE SYSTEM MODEL .................................................................... 33 MANAGING RECORDED MESSAGES .......................................................................................... 36 6.1 6.2 EXERCISE: RECORDING EVENTS FROM AN OPERATION ....................................................... 36 6.3 7 INTRODUCTION ............................................................................................................... 36 ADVANCED EXERCISE: CREATING AND RUNNING TRIGGERS ................................................. 39 CREATING TESTS FOR VACATION BOOKING ............................................................................. 41 7.1 INTRODUCTION ............................................................................................................... 41 7.2 THE TESTS USING MEP WIZARD....................................................................................... 41 7.3 REGULAR EXPRESSIONS .................................................................................................. 42 7.4 EXERCISE: CREATING TESTS WITH THE MEP WIZARD ......................................................... 42 Page 1 of 127 © IBM Corporation 2001, 2013
- 4. IBM RATIONAL INTEGRATION TESTER TESTING TRAINING GUIDE 7.5 COPYING AND LINKING REQUIREMENTS ............................................................................. 47 7.6 TEST TEMPLATES ............................................................................................................ 48 7.7 EXERCISE: CREATING A TEST FROM A TEMPLATE ............................................................... 48 8 REPAIRING TESTS .................................................................................................................. 50 8.1 INTRODUCTION ............................................................................................................... 50 8.2 EXERCISE: REVIEWING TEST RESULTS .............................................................................. 50 8.3 EXERCISE: REPAIRING TESTS ........................................................................................... 51 8.4 THE RULE CACHE ........................................................................................................... 55 8.5 EXERCISE: CREATING VALIDATION RULES .......................................................................... 55 9 CREATING AND RUNNING A STUB ............................................................................................ 57 9.1 EXERCISE: CREATING A STUB FROM RECORDED EVENTS .................................................... 57 9.2 EXERCISE: EXECUTING A STUB FROM RATIONAL INTEGRATION TESTER ............................... 59 10 STORING AND MANIPULATING DATA ..................................................................................... 62 10.1 TAGS AND THE TAG DATA STORE .................................................................................. 62 10.2 CREATING TAGS .......................................................................................................... 63 10.3 USING TAGS ................................................................................................................ 65 10.4 EXERCISE: TESTING WITH TAGS .................................................................................... 65 11 DATA DRIVEN TESTS ........................................................................................................... 68 11.1 DATA SOURCES ........................................................................................................... 68 11.2 EXERCISE: DATA DRIVEN TESTING ................................................................................. 68 11.3 OPTIONAL AND REPEATING ELEMENTS ........................................................................... 73 11.4 AN EXAMPLE OF REPEATING ELEMENTS.......................................................................... 73 11.5 EXERCISE: ADDING THE NEW OPERATION AND SCHEMA ................................................... 76 11.6 EXERCISE: CREATING THE REPEATING ELEMENTS TEST ................................................... 77 12 TEST ACTIONS ................................................................................................................... 81 12.1 TEST ACTION SUMMARY................................................................................................ 81 12.2 EXERCISE: RUN COMMAND .......................................................................................... 84 12.3 EXERCISE: LOG ........................................................................................................... 86 12.4 EXERCISE: LOOKUP TEST DATA .................................................................................... 88 12.5 FAILURE PATHS AND PASS PATHS................................................................................. 92 12.6 THE PASS AND FAIL ACTIONS ........................................................................................ 92 12.7 EXERCISE: USING FAILURE PATHS ................................................................................ 92 12.8 FAILURE PATHS AND EXCEPTION QUEUES ...................................................................... 94 13 INTERACTING WITH DATABASES........................................................................................... 96 Page 2 of 127 © IBM Corporation 2001, 2013
- 5. IBM RATIONAL INTEGRATION TESTER TESTING TRAINING GUIDE 13.1 INTRODUCTION ............................................................................................................ 96 13.2 EXERCISE: CREATING A DATABASE COMPONENT MANUALLY ............................................ 96 13.3 EXERCISE: SQL COMMAND .......................................................................................... 98 13.4 EXERCISE: COLUMN AND CELL VALIDATIONS ................................................................ 100 14 RUN TEST ....................................................................................................................... 102 14.1 INTRODUCTION .......................................................................................................... 102 14.2 EXERCISE: CREATING THE CHILD TEST......................................................................... 102 14.3 EXERCISE: CREATING THE PARENT TEST...................................................................... 103 14.4 EXERCISE: PASSING DATA BETWEEN THE TESTS ........................................................... 105 14.5 CONCLUSION............................................................................................................. 106 15 MONITORING LOG FILES .................................................................................................... 107 15.1 OVERVIEW ................................................................................................................ 107 15.2 EXERCISE: LOOKING FOR ERROR MESSAGES ................................................................ 107 16 ADVANCED STUBS............................................................................................................ 111 16.1 17 EXERCISE: PARAMETERIZED STUBS ............................................................................. 111 FURTHER TEST AUTOMATION............................................................................................. 117 17.1 INTRODUCTION .......................................................................................................... 117 17.2 EXERCISE: PASSING TAGS BETWEEN TESTS ................................................................. 117 17.3 MANAGING TEST RESULTS .......................................................................................... 119 17.4 EXERCISE: MANAGING TEST RESULTS.......................................................................... 120 18 RUNNING TESTS EXTERNALLY ........................................................................................... 123 18.1 INTRODUCTION .......................................................................................................... 123 18.2 EXERCISE: SCHEDULING TESTS .................................................................................. 123 19 LEGAL NOTICES ............................................................................................................... 126 Page 3 of 127 © IBM Corporation 2001, 2013
- 6. IBM RATIONAL INTEGRATION TESTER TESTING TRAINING GUIDE Overview This document serves as a training manual to help familiarize the user with the functionality present in IBM® Rational® Integration Tester. Most of the training exercises make use of a variety of technologies, including IBM WebSphere® Application Server, IBM WebSphere MQ, IBM DB2®, and web services. It is assumed that the reader has a fair understanding of these systems. The main objectives of this training course are to present the various functionalities of Rational Integration Tester and how best to use them in testing Message Oriented Middleware applications. In this course we will: Deal with complex, multi‐component architectures, looking at how to model and test those within Rational Integration Tester Examine advanced functions of Recording Studio Work with several advanced features of tests: o Create tests using templates o Update tests based on their results o Use data files to determine how tests will be run o Work with the various test actions available inside tests o Test against databases o Monitor log files Build test suites Run tests and test suites outside Rational Integration Tester. Before we dive into this training course, please make sure you have all the correct files in place. If you are using a cloud instance, the training files should be located on the desktop Otherwise, your instructor will let you know where to find any required files. Page 4 of 127 © IBM Corporation 2001, 2013
- 7. IBM RATIONAL INTEGRATION TESTER TESTING TRAINING GUIDE 1 Preparation 1.1 Introduction When working with proprietary middleware technologies, there will often be a certain amount of configuration that needs to be carried out before you can begin to work with that technology from Rational Integration Tester. In most cases, you will need to set up the various Java libraries that allow connectivity to that technology. In a few cases, you might also need to perform other setup to enable recording and virtualization on that particular platform. In the example system used in this course, you will be using a number of IBM technologies. Some of these require more setup than others. The simplest one of these is IBM DB2. Rational Integration Tester includes drivers for a number of databases, including DB2, so no further setup needs to be done for these in order to run tests against them. Note that you might need to do further setup for recording or virtualization of JDBC connections, but that is outside the scope of this course. The second item you will need to work with is the WebSphere Application Server. While there is some setup to be performed here, it is still quite simple. You will need to tell the Library Manager where certain Java libraries provided with the WebSphere Application Server can be found. Provided you have installed the application server into the default location, you can expect Library Manager to find these quickly. WebSphere MQ also requires setup within the Library Manager. In addition to this, for certain recording and virtualization methods, an extra piece of software needs to be installed on the queue manager that you want to work with. As you will be recording traffic from WebSphere MQ in this course, we will need to set this up as well. 1.2 Configuring the Library Manager for WebSphere Application Server and MQ Depending on the version of WebSphere Application Server and MQ, specific product libraries are required. Please make sure that you have configured Library Manager with the right libraries. This has already been set up for any cloud instances. 1. In the Library Manager, click the IBM WebSphere Application Server item on the left side. You will now see a list of providers, for each supported version of the WebSphere Application Server. Page 5 of 127 © IBM Corporation 2001, 2013
- 8. IBM RATIONAL INTEGRATION TESTER TESTING TRAINING GUIDE 2. In the Providers section on the right, select version 8.5 of WebSphere Application Server. 3. Go down to the Settings section, and make sure that each of the necessary .jar files has been found. If not, select each one in turn, clicking the Edit button to locate the .jar files. If necessary, your instructor will be able to provide you with a copy of each file. 4. Next, you will need to do the same for IBM WebSphere MQ 7.1. Page 6 of 127 © IBM Corporation 2001, 2013
- 10. IBM RATIONAL INTEGRATION TESTER TESTING TRAINING GUIDE 2 Project setup 2.1 The initial screen Once configuration of our system is complete, we are ready to launch Rational Integration Tester and create a new project. Launching Rational Integration Tester will bring up the following screen: If you are running Rational Integration Tester on your local computer, you will need to make sure you have a license at this stage; cloud instances should already have a license installed for you. Once licensing is sorted out, you have several options. From top to bottom: New Project: allows you to create a project. Clone Project: creates a copy of any Rational Integration Tester project. Fetch Project from Source Control: Check out a project from a source control system, and open it. Note that you will need to configure Rational Integration Tester to communicate with your source control system before doing this. Open Link: follows a link taken from the Test Lab to navigate to the results of a test or test suite. Page 8 of 127 © IBM Corporation 2001, 2013
- 11. IBM RATIONAL INTEGRATION TESTER TESTING TRAINING GUIDE Open an existing project: opens an existing project, either from the list of recent projects shown by Rational Integration Tester, or by browsing to a .ghp file. 2.2 Creating a new project Creating a new project involves the following four stages: 1. Setting the project name and location 2. Connecting to external servers 3. Setting up user‐based permissions 4. Setting up change management integration Only the first step is compulsory; the others are optional, with the settings available to edit later from within the project. If you need to edit any of these settings after the project has been created, you can do it through the Project Settings window (found in the Project menu of Rational Integration Tester). That said, filling out the server settings listed in the second stage of the project creation process will normally be very useful, and we will be supplying that information for the examples used in this course. The first of these settings is for a results database, which we will be using during this training course. The results database provides the ability to record and view historical test results. Without this, you will only be able to view results from the current session. It also provides the ability to record logging data from any stubs that you use. Scripts are provided with Rational Integration Tester to help you set up and configure a results database, which can be an IBM DB2, MySQL, MS SQL, or Oracle database. Once it is set up, the database can be shared across multiple users and multiple projects. The other server settings available are for Rational Test Control Panel and the Results Server (legacy users only). Rational Test Control Panel provides the ability to manage any proxies and agents used by the software; these capabilities can be used while recording and stubbing. The Results Server setting is used to create links to the reports held on the server, which should also be connected to your results database; this functionality is now provided by Rational Test Control Panel, so the Results Server is no longer required, and will not be used in this project. As we only have a single user for our example project, we will not configure user‐based permissions for our project. It will be useful in other projects where it is necessary to restrict access to a project to certain individuals, or to allow different access levels to the project for different users. In particular, it will be helpful for projects that implement data masking. Permissions will allow one user to set up masks over certain message fields, so that other users cannot view the contents of those fields. Finally, we can configure a connection to change management tools such as JIRA, HP Quality Center, or any Open Services for Lifecycle Collaboration (OSLC) compliant change management system, such as IBM Rational Team Concert™. This allows us to link directly into these tools, and to raise defects directly from a test or test suite. Page 9 of 127 © IBM Corporation 2001, 2013
- 13. IBM RATIONAL INTEGRATION TESTER TESTING TRAINING GUIDE 3. Click Next. 4. The wizard will now display the Server Settings dialog box. At the top of this dialog box, in the Results Database section, you should see details that have already been filled in for the Database URL, User Name, and Password fields. If you need to re‐enter them, the settings for the databases on the cloud instances are shown below. For other environments, ask your trainer. Settings Value Database URL jdbc:db2://localhost:50000/resultdb User Name db2inst1 Password Gr33nhat 5. Click Test Connection. A window should open stating that the connection was successful. 6. Below the database settings, we can connect to the Results Server and Rational Test Control Panel. We will not be using the Results Server, but Rational Test Control Panel will be needed later on. Use the following settings to connect: Settings Value URL http://localhost:7819/RTCP Domain Booking System Page 11 of 127 © IBM Corporation 2001, 2013
- 14. IBM RATIONAL INTEGRATION TESTER TESTING TRAINING GUIDE 7. When you are satisfied with the details entered on this screen, click Finish. 8. The new project will be opened in Rational Integration Tester. 9. Add a new environment using Project > Create New Environment. Give the environment the name Local, and click OK. 10. The Environments editor will open; click OK again to close it. You should then see that the Local environment is selected in the title bar. Page 12 of 127 © IBM Corporation 2001, 2013
- 15. IBM RATIONAL INTEGRATION TESTER TESTING TRAINING GUIDE 3 Complex environments 3.1 Introduction The Platform training modules used a simple web service to introduce you to the toolset. This set of modules will use a more complex example, the Vacation Booking system, which has several different subsystems. Your instructor may choose to use some or all of these sections during your training course. So before we can go any further, we need to know how this example system under test fits together. There are three main sections to the system that we will be dealing with: a flight booking system, a hotel booking system, and a flight administration system. All three parts of the system are presented to the user through their web browser; the interface is generated by a Tomcat web server, which connects to the relevant parts of the system as required. In the background, the following software has been deployed: Tomcat IBM WebSphere Application Server IBM WebSphere MQ IBM DB2 In this module, you will see how the different parts of this system fit together. In the following modules, you will see two different methods that can be used to build the model of the system under test: using synchronization and recorded messages. 3.2 Managing flight bookings The Vacation Booking system has three separate subsystems. The first of these lets users book a flight on a fictional airline. Bookings can also be managed through the interface, allowing users to find, update, and delete existing bookings. The implementation for this is split into two parts: the set of services for making bookings, and the set of services for managing bookings. Page 13 of 127 © IBM Corporation 2001, 2013
- 18. IBM RATIONAL INTEGRATION TESTER TESTING TRAINING GUIDE Page 16 of 127 © IBM Corporation 2001, 2013
- 19. IBM RATIONAL INTEGRATION TESTER TESTING TRAINING GUIDE 4 Synchronization 4.1 Introduction The simplest option when building a model of the system under test is synchronisation. This process analyzes the services and infrastructure provided by the system and replicates that within the Architecture School. This will set up the logical and physical views, an environment, and any message schemas used by the various services in the system. In order to do this, Rational Integration Tester requires a valid synchronisation source to exist within the system under test, so that it can request information on the system. Supported synchronization sources include: WSDL UDDI (including WebSphere Service Registry and Repository) WebSphere Message Broker WebSphere Application Server webMethods Integration Server TIBCO BusinessWorks Project/Design Time Library SAP System Oracle SCA Domain Adding any of these to your project will give you the option to synchronise with the data held by that external resource. To start the synchronisation process, you can add any one of these infrastructure components to the Logical View of Architecture School, or by switching to Synchronisation view and adding it there. Either way, the process of adding a synchronization source will provide the option of synchronising. Multiple synchronisation sources can be added to the project if required. After synchronisation, the system under test might change; as this will be recorded within the synchronisation source, it is possible for Rational Integration Tester to update the project to reflect these changes. To do this within the Synchronisation view, first click Check Synchronisation . This will compare the system model within the Rational Integration Tester project against any synchronisation sources and display any differences between these. Following on from that, you can click the Synchronise button, which will then update the Rational Integration Tester project to resolve these differences. Page 17 of 127 © IBM Corporation 2001, 2013
- 20. IBM RATIONAL INTEGRATION TESTER TESTING TRAINING GUIDE 4.2 Exercise: Synchronizing with a WebSphere Application Server 1. You can start synchronization from either the Logical View or Synchronization View of the Architecture School. The process is largely the same either way, but in this example, you will use the Logical View, so switch to that view now. 2. Make sure that nothing is selected, so that the next item you create will go at the top level. 3. From the toolbar, add a new IBM WebSphere Application Server. 4. A dialog box will open to start the synchronization process. The first thing you will need to do is to set up the connection details of the application server. To do this, click the New button. 5. A second dialog box will open. Configure the server with the host localhost and the SOAP Connector Port 8880. The security settings can be left blank. When you are done, click OK. 6. You will then return to the first dialog box. Now that you have entered details for an application server, click Next. 7. On the next screen, select Create a New Component and click Next again. Page 18 of 127 © IBM Corporation 2001, 2013
- 21. IBM RATIONAL INTEGRATION TESTER TESTING TRAINING GUIDE 8. When asked which environment to use, choose the Local environment you created previously, and click Next again. 9. On the final screen of the wizard, select Open Synchronisation View and perform the synchronisation. 10. Click Finish. The view will switch to Synchronisation view, and it will take a moment to read in details from the system under test and update your project. Once it is done, you should see the following in Synchronisation View: Page 19 of 127 © IBM Corporation 2001, 2013
- 23. IBM RATIONAL INTEGRATION TESTER TESTING TRAINING GUIDE 5 Building a system model from recorded events 5.1 Introduction As you might have noticed, while Rational Integration Tester supports a number of synchronization sources, not all of these will exist in every system. If a system does not have any of the synchronization sources mentioned above, then there is nothing to refer to when building a model of a system under test. For example, a WebSphere MQ‐based system might be able to provide information on the available queues and topics, while being unable to provide any information on the operations that access those resources, the dependencies between operations, or the message schemas being used. In this case, we might be able to build a model of the system from recorded data. This is similar to the situation we see with the WebSphere Application Server and WebSphere MQ. The application server can tell us of the existence of the queue manager, but it does not give us enough information to be able to build up the operations that use that queue manager, or the dependencies between those operations. We could build these by hand to fill in the missing gaps, but instead we will use recorded messages to help us build the operations, leaving us with only a few dependencies to add manually. 5.2 Recording MQ messages Before you start doing this, we will take a quick look at how you will be recording messages on the MQ transport. There are several different ways to record messages over this transport; each has their own advantages and disadvantages. The choices are as follows: Queue browsing Proxy queues Mirror queues Dynamic mirror queues Queue aliasing Your choice will depend on several factors. Some methods, such as the use of proxy queues, require changes to the system under test. Others are invisible to the system under test, but require access to the MQ server in order to make modifications. Other factors will include determining if the system under test can be stopped temporarily, to ensure that no messages are missed, and connections can be set up appropriately; and finally, the amount of effort required on the part of the user, and the impact on the performance of the MQ server. For more information on the pros and cons of each method, refer to the Rational Integration Tester Information Center. In our example, we will be using dynamic mirror queues, as this requires no modification to the system under test, and requires a very small amount of setup on the part of the user. Regardless of the method that you have chosen, the recording setup should look similar to the following diagram: Page 21 of 127 © IBM Corporation 2001, 2013
- 24. IBM RATIONAL INTEGRATION TESTER TESTING TRAINING GUIDE The client application will communicate by way of request and reply queues with a given service. Rational Integration Tester will read the request and response messages being posted to the queues within the queue manager. While the queue manager might act slightly differently to its usual behavior (for example, by copying each message to a mirror queue), the messages themselves will be untouched, and the actions of the system under test should also be unchanged. Note that we can choose to record just a given service if we have an operation definition (and so know which queues to monitor), or we can record all queues within the queue manager by recording the MQ transport. 5.3 Exercise: Setting up the transports In the Vacation Booking system, you should now have a lot of information about the web services included in the system. However, the WebSphere Application Server does not provide information on the operations that run over MQ. This is because the applications installed on the application server do not provide enough information themselves. As you will not be able to synchronize with the server to get information about these, you will record the WebSphere MQ transport, and build up the operations that way. 1. Before you can record the transport, you will need to select your recording method. Go to the Physical View of Architecture School. 2. Find the MQ Queue Manager called QM_vbooking, and double‐click it to edit it. 3. A dialog box will open showing the physical settings for your queue manager. Switch to the Recording tab. 4. Under Queue Recording, set the Recording Mode to Dynamic Mirror Queues. All other settings here can be left at their defaults. Page 22 of 127 © IBM Corporation 2001, 2013
- 25. IBM RATIONAL INTEGRATION TESTER TESTING TRAINING GUIDE 5. Click OK to close the properties for the MQ Queue Manager. 5.4 Exercise: Adding the flight booking message schemas In order to make working with recorded messages easier, you will also need to add the message schemas that will be used in those messages. 1. Return to the Schema Library. Here, we need to add three new XML schemas, so click the XSDs button on the left of the screen to show any available XML schema definition (XSD) files; none should be shown at the moment. 2. We could use the XSD button in the Schema Library toolbar to add new XSD files to the project, as we did with the addNumbers WSDL. However, as we have a group of files, we will just drag them into the schema library. Find the XSD Schemas folder on your desktop and drag it into the center panel of the Schema Library. 3. Rational Integration Tester should now show three new XSD files: BookFlightRequest, BookFlightResponse, and Payment. Page 23 of 127 © IBM Corporation 2001, 2013
- 26. IBM RATIONAL INTEGRATION TESTER TESTING TRAINING GUIDE 4. You can select each of these, and view the associated message schemas on the right side of the screen. 5.5 Exercise: Recording events from a transport We will now capture events for the MQ Queue Manager transport. 1. Before we get started, we will need to initialize a few components of the system, such as the GUI layer, to make sure that they are running. To do this, use the Start Tomcat shortcut on your desktop. 2. Return to Rational Integration Tester, and go to the Logical View of Architecture School. 3. Make sure you are in the Local environment (as shown in the Rational Integration Tester title bar). 4. Select the QM_vbooking infrastructure component. Note that there will be two: one representing the transport as a simple JMS system, the other as a WebSphere MQ queue manager. Choose the WebSphere MQ queue manager 5. Right‐click the QM_vbooking component, and select Record. The perspective will change to the Recording Studio, and the QM_vbooking transport should be listed in the Event Monitors panel. 6. Click the Start Recording button in the Events View toolbar to start recording events. 7. In a browser window, open the Vacation Booking home page. For a cloud image, this will be listed in the favorites menu of your web browser; otherwise, ask your trainer. Page 24 of 127 © IBM Corporation 2001, 2013
- 28. IBM RATIONAL INTEGRATION TESTER TESTING TRAINING GUIDE 10. Return to Rational Integration Tester and you should see that four events have been recorded in the Events View. 11. Click the first message in the Events View. You should then see the message details displayed in the panel below, showing the message that was initially sent by Tomcat. 12. We still need information on how the system deals with requests for other credit card types, as these will be posted to different queues, so return to your web browser, and make bookings for Global and Worldwide credit cards. These should also be recorded in Rational Integration Tester, giving you a total of 12 recorded events. 5.6 Exercise: Building operations from recorded events Now that we have recorded some events, we can use these for a number of different purposes. The first thing we will do is to complete the model of the system. 1. Take a look at your set of recorded messages, in particular the description fields. There should be 12 messages, and the descriptions will list the queues that were used while recording. This should include vbooking.booking, vbooking.payment.multinational, vbooking.payment.global, vbooking.payment.worldwide, along with their respective reply queues. If you are missing any of the different credit card queues, go back and record a booking using that particular type of card. 2. Pause the recording by clicking the Pause button. 3. Select all 12 messages before clicking the Save button. 4. The Recorded Events wizard will open, allowing us to choose what we will do with the selected events. To build a model of the system under test, we need to create some operations, so select that option, and then click Next. Page 26 of 127 © IBM Corporation 2001, 2013
- 30. IBM RATIONAL INTEGRATION TESTER TESTING TRAINING GUIDE 6. Because the operation names are generated from the queue names used, we might like to change them to something more useful. Select the first message belonging to the operation that is currently named vbooking.booking – vbooking.booking.reply. 7. You will now be able to enter a new name below, so enter MakeBooking, and click Rename. You will be asked if you want to apply this change to all other messages that were associated with the same operation; click Yes. You should then see the Operation column update accordingly. 8. Next, we will add the message schemas for MakeBooking. To do this, select one of the request messages for MakeBooking on the left side of the window (it will contain all of the data you entered into the web form earlier). On the right side, select the second line of the message, beginning text (String). Page 28 of 127 © IBM Corporation 2001, 2013
- 32. IBM RATIONAL INTEGRATION TESTER TESTING TRAINING GUIDE 10. Now select a response message for MakeBooking, and follow the same procedure, using the BookFlightResponse XSD. 11. We will need to go through the same process for the other operations in our system. Select the two messages that are associated with the vbooking.payment.multinational queue, give them an operation name of ProcessMultinational, and click Rename. 12. We also need to set up message schemas for ProcessMultinational, but this will be a little bit simpler than for MakeBooking. If you take a look at the response message, you will see that it only includes a single text field, so we will not need to apply a schema there. Select the request message for the ProcessMultinational operation, and apply the Payment XSD as the schema. 13. You can set up the last two operations for Global and Worldwide cards in exactly the same way. Call them ProcessGlobal and ProcessWorldwide; you can use the same message schemas as for ProcessMultinational. Once you are done, the window should look like the following screen capture: Page 30 of 127 © IBM Corporation 2001, 2013
- 33. IBM RATIONAL INTEGRATION TESTER TESTING TRAINING GUIDE 14. Click Next. You will then be able to select where in the model of the system these operations should be created. The wizard will suggest putting them under the IBM WebSphere Application Server component; we will create a separate service component inside that instead. Click the Select button. 15. A Select dialog box will open. Click the Create New Service Component button and give the new service component a name of Flight Bookings. Make sure the new service component is selected, and then click OK to return to the wizard. Page 31 of 127 © IBM Corporation 2001, 2013
- 35. IBM RATIONAL INTEGRATION TESTER TESTING TRAINING GUIDE 17. In the Logical View, you can now double‐click each operation to view its properties. Do this for one of the operations you created, and view the Message Exchange Pattern tab. This should show you the message schemas you set earlier for request and reply messages; it should also show you the transport information used by that operation, including the names of the queues that it uses. 5.7 Exercise: Completing the system model You have now added a new group of operations to your model of the system under test. Each of these should have their message exchange pattern configured, based on the schema information you supplied while creating them. Each operation will also have a dependency on the WebSphere MQ transport, as that is the transport used within their message exchange pattern. However, the operations also have other dependencies. For example, the MakeBooking operation needs to use a payment processor to complete a booking. Remember that adding a dependency does not indicate an input/output relationship. In this example, when MakeBooking receives a booking that contains information for a Global card, it will use the ProcessGlobal operation to check that the booking is acceptable, and after it has received that response, it will then send back its own response. 1. Within the Logical View of Architecture School, we now need to add some extra dependency information to give ourselves a complete system model. First, the MakeBooking operation should have a dependency on each of the credit card processing operations. For example, to add a dependency from MakeBooking to ProcessMultinational, select the Add Dependency button from the toolbar, click the MakeBooking operation, and then click the ProcessMultinational operation. Page 33 of 127 © IBM Corporation 2001, 2013
- 36. IBM RATIONAL INTEGRATION TESTER TESTING TRAINING GUIDE 2. Follow the same process to create dependencies from MakeBooking to ProcessWorldwide and ProcessGlobal. 3. Next, each of the credit card processing operations should have a dependency on the Vacation Booking database. Add a dependency from ProcessMultinational to the VBooking XA Datasource component in the same way, and then do the same for ProcessGlobal and ProcessWorldwide. 4. Note that dependencies are only shown for items you have selected. However, the entire dependency tree will be seen using the default preferences. To see this, select MakeBooking; you will then notice that a lot of dependencies will be displayed, making the diagram difficult to read. 5. This is difficult to read, and will only get more difficult if we make the model of the system more complex, so we will change the preference settings to show a single level of dependencies. Go to Project > Preferences, and in the General panel, set Max dependencies shown to 1, then click OK. The diagram should then become easier to read. Page 34 of 127 © IBM Corporation 2001, 2013
- 37. IBM RATIONAL INTEGRATION TESTER TESTING TRAINING GUIDE Page 35 of 127 © IBM Corporation 2001, 2013
- 38. IBM RATIONAL INTEGRATION TESTER TESTING TRAINING GUIDE 6 Managing recorded messages 6.1 Introduction You have already used the Recording Studio to record messages from the system under test, and turn those into both tests and operations. In this module, you will see a few other things that you can do with recorded messages. You will start off by looking at how you can manage and filter the messages that you have recorded. You will also see a couple of other things that you can do with recorded messages: creating requirements and triggers. 6.2 Exercise: Recording events from an operation Now that we have a model of the Vacation Booking system, we can choose to record events for particular operations, rather than recording everything in the system. As we now have multiple sources of events, we can also choose to filter events by source. We will capture booking events again, but this time we will be recording events based on operations rather than transports. We will see how we can filter these events. Later, we will see how we can reuse these events to build other resources within Rational Integration Tester. 1. Return to the Recording Studio perspective and find the Event Monitors panel. This should currently show that we are monitoring the QM_vbooking transport. We will stop monitoring this for the moment, so select it and click the Delete Event Monitor button to remove the event monitor. 2. We will also clear the events we recorded in the previous exercise. To do this, click the Clear All Events button in the Events View toolbar. 3. Click the Add Event Monitor button; this will allow us to select an operation to record. Choose the MakeBooking operation we created in the previous module. Page 36 of 127 © IBM Corporation 2001, 2013
- 39. IBM RATIONAL INTEGRATION TESTER TESTING TRAINING GUIDE 4. You will now be given the option to choose to record any of the dependencies of the MakeBooking operation at the same time. You should see that the QM_vbooking transport is available, as are the other three operations. This is because the default behaviour is to show only items that MakeBooking has a direct dependency on. Switch the radio button at the top of the dialog box from Direct Only to Indirect Only, and you should see the VBooking XA DataSource component become available, while the other dependencies are hidden; MakeBooking only has a dependency on VBooking XA DataSource through the other operations in the project, rather than having a direct connection to it. Finally, switch to Both, and you should see all recordable components that MakeBooking has a dependency upon. 5. Select the ProcessMultinational, ProcessGlobal, and ProcessWorldwide operations. Note that if other operations had dependencies on the MakeBooking operation, we could select those on the Parent References tab; as nothing depends on MakeBooking in our system, this will not be necessary. Click OK to continue. 6. All four operations created in the previous exercise should now be listed in the Event Monitors panel. If any of them are not listed, return to step 2 and add any missing operations. 7. Click the Start Recording button. 8. Switch to your web browser and submit another booking request, using a Multinational credit card. Page 37 of 127 © IBM Corporation 2001, 2013
- 40. IBM RATIONAL INTEGRATION TESTER TESTING TRAINING GUIDE 9. Return to Rational Integration Tester, where you should see four events recorded in the Events View: 2 each for MakeBooking and ProcessMultinational. 10. You can filter recorded events to show only those events that were recorded for a given event monitor by selecting the event monitor in the Event Monitors panel. For example, click the MakeBooking event monitor. You should now see just the MakeBooking events, with the events recorded for ProcessMultinational filtered out. 11. Click in the empty space below the list of event monitors to clear the filter. You should see all four events again. 12. Record two new bookings, again using the Global and Worldwide options. You should now have 12 messages in total. 13. Again, you will be able to filter by source. Note that you can select multiple event monitors at the same time when filtering, to show messages from multiple operations. 14. We will save two of these example messages as requirements. With the first message for MakeBooking selected, click the Save icon on the Events View toolbar to open the Recorded Events Wizard. 15. Select the requirements option on the first screen, and click Next. 16. On the second screen, you will be asked how the data within the message should be stored. You choose either hardcoded values, or to use a data source. We will look at using data sources later in the course, so for now, choose Store data as hard coded values, and click Next. 17. Following this, Rational Integration Tester will confirm that the requirement is associated with the correct operation. As we have recorded from an operation, this should state MakeBooking as the operation. This is correct, so click Next again. 18. You will then see a Header Transformation screen. Click Next through this screen. 19. On the Summary screen, you will be asked to give the requirement a name. Call it exampleRequest. Clear the box labeled Open Resource After Finish, and click Finish to create the new requirement. 20. Do the same for the corresponding reply message, calling it exampleReply. Page 38 of 127 © IBM Corporation 2001, 2013
- 41. IBM RATIONAL INTEGRATION TESTER TESTING TRAINING GUIDE 21. You can now switch to the Requirements Library to view the saved messages. 6.3 Advanced exercise: Creating and running triggers A trigger is used to send an event to the system under test. It can be used to explore how the system responds to an input; it does not perform any validation on the corresponding response. Triggers can be created manually, or from a previously recorded event. In our example, we will use an existing event. 1. In the Recording Studio perspective, select the Triggers tab, below the Event Monitors panel: 2. In the Events View panel select the first recorded event (the request) and then click the Save triggers from selected events toolbar button. 3. Give the new trigger the name MakeBookingTrigger ; it will be created under the Components tree in the Triggers view. 4. If necessary, expand the tree to show the new trigger (expand each node, or click to expand all nodes). 5. Double‐click the TriggerMakeBooking trigger to edit it. 6. The Edit Trigger dialog box is displayed. Select the Value tab and update one of the fields (for example, change the flightNumber field) in the message body. Page 39 of 127 © IBM Corporation 2001, 2013
- 42. IBM RATIONAL INTEGRATION TESTER TESTING TRAINING GUIDE 7. Click OK to save the change and close the dialog box. 8. Click Record in the Monitor View if it has been stopped. 9. Run the trigger by right‐clicking it in the Triggers view, and selecting Run Trigger from the context menu. A new series of events will be recorded in the Monitor View. 10. To verify that the request contains the updated field, select the event and view the updated field in the message view below. 11. Stop the recording using the button. Do not clear the recorded messages as they will be used in the following exercises. Page 40 of 127 © IBM Corporation 2001, 2013
- 43. IBM RATIONAL INTEGRATION TESTER TESTING TRAINING GUIDE 7 Creating tests for Vacation Booking 7.1 Introduction In the Platform modules, you created two simple tests for the addNumbers service. In this module, you will create tests for the Vacation Booking system. You will see some new methods of creating tests: The first uses the Message Exchange Pattern (MEP), while the second makes use of templates. 7.2 The Tests using MEP wizard Previously, you used the Test using MEP wizard. This helped you build one of your first tests by providing the information required to send messages to the service, as well as providing the appropriate message structures. All of this information was taken from the MEP that you had created in the Logical View of Architecture School. There is a second wizard that also uses the MEP, which can be used to help with creating tests containing randomly‐generated data. In the previous example you saw, after the message structures had been generated, the actual contents of each field were left blank. The Tests using MEP wizard (note that it is labeled for a group of tests, rather than a single test) can be used to generate such tests. After the wizard has analyzed the message structure being used for the input message, you are given the option to state how many times any optional or repeating elements should occur within the input message. Previously, all elements only occurred once, or not at all if they were optional and you had chosen to leave out all optional elements. Here, you have much more control over each part of the message. Following that, you will be given the option of stating how the content of each element should be generated. You can choose to leave it completely random, supply a constant value, or have a value generated based on a regular expression that you supply. Note that any random values will be fixed to those values after the generation of the test; they will not be randomly generated with each execution of the test. Depending on the type of data in the field, you might also be provided with other options. In the training example, the most important of those options deals with fields that contain enumerated values. You will see an example of this in the credit card type, which can hold the value of Worldwide, Multinational, or Global. By default, the generation of data for this type is set to Iterate Enum, which means that a test will be generated for each value of this field, giving you three separate tests, each with their own data. If there were multiple enumerated fields, you would have the option to determine the coverage of the generated tests over the enumerated fields. You could either try to generate tests that covered each and every combination of any enumerated fields, or just to generate tests that covered all values of each enumerated field at least once, without taking combinations into account. As with the example you saw earlier, where you saw the wizard create a single test, Rational Integration Tester does not know what the values contained by the response message should be. As with that example, the Tests using MEP wizard will also leave any fields in the response message blank, to be edited by the user. Previously, you edited these fields. In this example, you will leave the response message for now, and later overwrite the message with data taken from the live system. Page 41 of 127 © IBM Corporation 2001, 2013
- 44. IBM RATIONAL INTEGRATION TESTER TESTING TRAINING GUIDE 7.3 Regular expressions This module makes use of regular expressions during the use of the Tests using MEP wizard. This course assumes some familiarity with regular expressions, but in case you do not use regular expressions often, a table has been provided to explain the tokens that will be used in this module, and future modules. Token Matches ^ The start of the string. No characters can occur before this point. $ The end of the string. No characters can occur after this point . Any single character. [ ] Any single character contained within the brackets. w A single word character (a letter or number). d A single digit. * The preceding character 0 or more times. For example, d* means 0 or more digits. + The preceding character 1 or more times. For example, d+ means 1 or more digits. {n} The preceding character repeated n times. For example, d{3} means 3 digits. {m,n} The preceding character repeated, between m and n times. d{4,6} means a set of 4, 5, or 6 digits. There are more tokens available to use within the regular expressions used in Rational Integration Tester, but this table will cover the majority of tokens used within this training course. 7.4 Exercise: Creating tests with the MEP wizard 1. In the Test Factory perspective, right‐click the Tests virtual folder under the MakeBooking operation and select New > Tests using MEP. A wizard is launched that will help you create multiple tests to validate all possibilities from the operation’s message exchange pattern (MEP). 2. The first page of the wizard lets you control the structure of the request messages that will be generated for each test. You can alter that structure by selecting how many occurrences of each element should be included. As the message schema we are using does not allow for any optional or repeating elements, every element should occur exactly once. This means that we can leave all settings at their defaults for this example. Page 42 of 127 © IBM Corporation 2001, 2013
- 46. IBM RATIONAL INTEGRATION TESTER TESTING TRAINING GUIDE 5. Instead of allowing completely random strings for all fields, we are going to edit some of them. Set the flightNumber field to a constant, with a value of VB100. 6. For the price and weekNumber fields, we will allow random values, but we will set some constraints. In both cases, we would like to have a two digit number. Set the Type for the field to Random Regex, and the Value to dd 7. In the final screen of the wizard, go to the With Tests section, and select Do Nothing. Click Finish to close the wizard and generate the tests. Page 44 of 127 © IBM Corporation 2001, 2013
- 47. IBM RATIONAL INTEGRATION TESTER TESTING TRAINING GUIDE 8. Take a look at what this wizard did. In the Test Factory perspective, look at the Tests virtual folder under the MakeBooking operation. The wizard created three new tests. 9. Double‐click to open one of these: paymentcardType = multinational 10. Double‐click to look inside the Send Request action. 11. Here you see the request message that will be sent for this test of the MakeBooking operation. The wizard has created the message with the expected structure and populated most fields automatically with randomized values. The flightNumber field should be set to VB100, while the weekNumber and price fields should be set to random two digit numbers. Similarly, the cardType field should be populated with one of the three possible card types (a different one in each of the three generated tests) Page 45 of 127 © IBM Corporation 2001, 2013
- 50. IBM RATIONAL INTEGRATION TESTER TESTING TRAINING GUIDE means that the message will then hold a copy of whatever was in the requirement at the time; future updates will not flow through to the test action automatically. If desired, you can relink to the requirement later on. 7.6 Test templates When creating new tests, similar sequences of actions can be used. Rather than recreating these every time, Rational Integration Tester provides the option of test templates, which can be used to store those common sequences for fast reuse when creating new tests. These new tests will then have copies of the actions used within the template, which can be altered as required. Test templates can be created in similar ways to tests. They can be created without any test actions, in the same way an empty test can be created. It is also possible to create a template based on the MEP of an operation. This will be similar to creating a single test from the MEP; the template will contain messages based on the schemas used in the MEP, with each field left blank for the user to fill in. After creating the template, it can then be edited in exactly the same way as a test, using the same settings and test actions. Once the template has been saved, tests can then be created based on the template. This will copy all of the properties of the template into a brand new test. Note that this is simply a copy, and any further updates to the template after that time will not automatically flow through to the tests created from the template. However, if the template uses linked requirements, changes to the requirements will still flow through to each test, as long as the requirements are not unlinked in those individual tests. 7.7 Exercise: Creating a test from a template 1. Test templates, like tests, are created for operations. Return to the MakeBooking operation in the Test Factory Tree. 2. Right‐click the operation and select New > Templates > Test Template using MEP. Call the template basicTemplate. 3. Your test template will look much like the other tests you have created, though if you look at the messages contained in the Send Request and Receive Reply steps, you will notice that they are empty. Again, you will use requirements to fill in the message contents here. Drag the exampleRequest requirement onto the Send Request step. 4. When asked, choose to Update this action with a copy of the requirement. 5. Carry out the same procedure again, dragging the exampleReply onto the Receive Reply step. 6. The messages in the template should now be populated with data. Save and close the template. 7. Let’s use the template to create a new test. Right‐click the MakeBooking operation, then select New > Tests > Test From Template. 8. Within the dialog box that opens, select the basicTemplate, and give your new test a name, such as exampleFromTemplate. Page 48 of 127 © IBM Corporation 2001, 2013
- 52. IBM RATIONAL INTEGRATION TESTER TESTING TRAINING GUIDE 8 Repairing tests 8.1 Introduction The first tests that you created for the addNumbers web service were very simple. They passed if the system was giving us the correct responses, which it was doing. However, this might not always be the case. Obviously, some tests will fail due to the system not responding, or responding incorrectly. In these cases, you might like to know some more detail; for example, which field or fields were incorrect? At other times, you might have generated tests that you would like to use as regression tests. In these cases, you might just generate the request message, and use the reply message from the system as the correct response. If you already have a reply message in your test, as you have in the example tests that you generated from the MEP, then you might need to replace or update this message. You might have come across this process in other tools. In some tools, you might know it by the term “healing”; in others, including Rational Integration Tester, this process is called repairing the test. In this module, you will first see how to examine the output of your tests, and then go into more detail by comparing the expected and received messages. You will then see how to repair a test step containing an incorrect message. Finally, you will see how you can apply these changes to multiple tests using a rule. 8.2 Exercise: Reviewing test results You will now run your tests and review the results. These tests will not pass at first, so you will also use the Message Differencing Window to get more information. 1. Switch to the Test Lab perspective. 2. Run the exampleFromTemplate test by right‐clicking on it and selecting Run from the context menu, or select the test and click Run in Rational Integration Tester’s main toolbar. In this case, the test should fail because the reservation number does not match what is expected. 3. Click the Receive Reply error in red on the Console. The View Message Differences window pops up to reveal the difference in the Expected and Received messages. In this case the newReservationNumber elements are different. Page 50 of 127 © IBM Corporation 2001, 2013
- 53. IBM RATIONAL INTEGRATION TESTER TESTING TRAINING GUIDE 8.3 Exercise: Repairing tests The exampleFromTemplate test failed because it did not take into account the fact that the system will allocate a new reservation number for each new reservation. You will now see how you can fix the test from the Test Lab perspective. Note: Before starting this exercise, make sure that you have saved all changes in your tests in the Test Factory perspective. You will be updating and saving tests through the Test Lab in this exercise. Different sets of changes in each perspective will only cause confusion, and are best avoided. 1. The View Message Differences window gives us the opportunity to correct any discrepancies between the expected and received messages. In this case, we will try to update the message by clicking the Overwrite expected field button. 2. Select the test and click Run in the Task Monitor to run the test again. 3. The test should fail again due to a reservation number mismatch. The reservation numbers increment with each reservation, so attempting to use a hard coded value will not work. 4. Bring up the View Message Differences window for this new run of the test. We will try to repair the test again, but this time, we will use the Replace with regex match button to use a regex that will allow any reservation number. Page 51 of 127 © IBM Corporation 2001, 2013
- 54. IBM RATIONAL INTEGRATION TESTER TESTING TRAINING GUIDE 5. Close the Message Differencing window, choosing to Apply your changes. 6. Open up the test in the Test Factory perspective. 7. Double‐click the Receive Reply step and note that the value of the message field element newReservationNumber has been replaced by a regular expression. Page 52 of 127 © IBM Corporation 2001, 2013
- 55. IBM RATIONAL INTEGRATION TESTER TESTING TRAINING GUIDE 8. Re‐run the test in the Test Lab. 9. This time the test passes. 10. Bring up the Message Differences window for this latest run of the exampleFromTemplate test. Note that the regex is now displayed as part of the expected message, allowing the received message to pass the test. Page 53 of 127 © IBM Corporation 2001, 2013
- 56. IBM RATIONAL INTEGRATION TESTER TESTING TRAINING GUIDE 11. The tests generated using the MEP wizard will need to be handled differently, as they have no data describing what the expected message is to look like. To start, run the paymentcardType = global test. This will fail. 12. Bring up the Message Differences window. You will see that the expected message is missing some of the fields found in the received message. 13. Therefore, instead of overwriting just a single field, choose Overwrite expected message. 14. If we run the test again, it will still fail. This time, it will be due to the reservation number not matching, as in the exampleFromTemplate test. We could repair the field in the same way Page 54 of 127 © IBM Corporation 2001, 2013
- 57. IBM RATIONAL INTEGRATION TESTER TESTING TRAINING GUIDE that we did previously, but we would need to do the same thing for each of the other tests as well. Instead, we will use the Rule Cache to apply repairs to multiple tests. 8.4 The Rule Cache Every time that you have validated any part of a message so far, that validation has only applied to that single message. Rational Integration Tester can also set up rules to apply validation settings across multiple messages. For example, you might realize that you will not always get back the same response for a particular field, no matter what message it appears in. In our system, an example of this is the reservation number returned after a booking. In each test, it should always appear in the form of A followed by 5 digits, as specified by the regular expression we used in the previous exercise. Because it does not matter what test this is in (we want the same regular expression used in all of our tests), it would be easier to set this validation setting so that it is applied to all tests that use the same message schema. This is exactly what a rule does for us. The easiest way to create a rule is by choosing to add your repairs to the rule cache as you repair your tests. This is what you will be doing in the following exercise. You can also choose to create rules from the Config tab of a messaging action (right‐click and choose Rule Cache > Add to Cache…). You can also create rules from the Rule Cache view of Architecture School, which provides an overview of all rules within your current project. If you explore the Rule Cache, you will also notice that rules can be set up for more than just validation; you can also specify rules for providing values, filtering values, or storing values into variables. Once a rule is being applied to a particular field within a schema, it should show up in both the test action within the Test Factory, and within the Message Differencing Window. A rule will be indicated by the star icon: . You might also want to disable a rule for a particular messaging action by right‐clicking on the appropriate line of the message in the Config tab, and selecting Rule Cache > Disable. If you do this, the rule icon will be modified to add a red line through it ( ) to show that a rule is available, but that it has been switched off in this particular case to allow the user to set their own method of dealing with that particular field. 8.5 Exercise: Creating validation rules 1. Run the paymentcardType = global test again. As predicted, it should fail due to the reservation number. 2. Bring up the Message Differences window, and select the check box Add to Rule Cache. 3. Make sure that the reservation number field is selected, and click the Replace with Regex button 4. You will be asked to confirm that you want to apply this change as a rule. 5. After this, check that you are satisfied with the proposed regex, and carry out the changes as normal. Before leaving the Message Differences window, you will notice that a star has been placed next to both the expected and received fields. 6. Close the Message Differences window, and run the test again. It should now pass. Page 55 of 127 © IBM Corporation 2001, 2013
- 58. IBM RATIONAL INTEGRATION TESTER TESTING TRAINING GUIDE 7. Switch to the Test Factory perspective, and open the paymentcardType = global test. 8. View the Receive Reply step of the test, making sure that you are looking at the Config tab of the dialog box. Here, we can see that the regular expression has been applied, as in the previous exercise; but in this case, there is a star next to the regular expression, letting us know that a rule exists. 9. Return to the Test Lab and run the other two tests that we have not yet repaired. You will find that they both fail at first, as the expected message is incorrect. This can be fixed as in the previous exercise. Once you have done this, there will be no need to worry about the reservation numbers any more. The regular expression specified within the rule will be applied for you automatically. Page 56 of 127 © IBM Corporation 2001, 2013
- 59. IBM RATIONAL INTEGRATION TESTER TESTING TRAINING GUIDE 9 Creating and running a stub A stub can be used to simulate a system or process that is unavailable. In the example below, we will create a stub from the request/reply events that were recorded earlier. This stub can then be used to simulate the business process that is unavailable. 9.1 Exercise: Creating a stub from recorded events 1. Open the Recording Studio perspective and clear any previously recorded events from the Events View. 2. In the list of Event Monitors, choose to record the MakeBooking operation. 3. Make sure that recording is currently switched on. 4. Go to the Test Lab perspective to run the paymentcardType = worldwide test, then return to the Recording Studio. 5. Click MakeBooking in the Event Monitors to filter out any messages from other sources. 6. Select a request message and the corresponding reply message in the Events View. 7. Click the Save button. Select stubs on the first page of the wizard, and click Next. 8. On the second page of the wizard, we have the option of creating several different types of stub. As this stub will be pretty simple, we will choose to use the Store data as hard coded values option. Click Next once you have done this. 9. The next page of the wizard simply asks for verification that all events have been sorted by the correct operation. As we have already filtered messages by the MakeBooking operation, this should show two messages from that operation. If so, click Next. 10. On the following page, the messages have been grouped into transactions. As there is only a single pair of messages for the moment, these should both be listed as a single transaction. Click Next again. 11. Following this, you will see the Header Transformation page. This will remove information from the message headers that normally will not be relevant to your stub, such as the timestamp of the recorded messages. Leave all checkboxes ticked here, and click Next. 12. On the final page, you will be able to specify a name for the stub. Set this to SimpleBookingStub, and make sure that Open resource after finish is checked. 13. Click Finish to create the stub. Rational Integration Tester should then switch to the Test Factory perspective. 14. We can now take a look at the stub we have created. In the Events section, we have a list of the events that the stub will respond to. The stub we have created only knows how to respond to events for MakeBooking. Page 57 of 127 © IBM Corporation 2001, 2013
- 60. IBM RATIONAL INTEGRATION TESTER TESTING TRAINING GUIDE 15. Below this, we can see the messages we recorded previously, in the Input and Output tabs. 16. By default, the stub will attempt to filter out anything that does not exactly match the default message that we received. In those cases, it will not send a response message; instead it will discard the request message. In this example, we would like to be less strict, and respond to anything. To get started, switch to the Input tab, and take a look at the message body. You will see that each text field has a small filter icon next to it: 17. We want to switch off any filtering that is checking for an exact field match. To switch off filtering for the exact matches, select all of the fields within the message (you might need to scroll down to do this). With everything selected, right‐click to bring up the context menu, and then click Contents > Field Actions > Filter > Equality. This will toggle the equality checks off, and the message body should then be shown without the filter icons, like the following screen capture: Page 58 of 127 © IBM Corporation 2001, 2013
- 61. IBM RATIONAL INTEGRATION TESTER TESTING TRAINING GUIDE 18. Switch to the Output tab, and take note of the reservation number that will be sent by the stub. You should see this again in the following exercise. 19. Save your stub; it is now ready to run. 9.2 Exercise: Executing a stub from Rational Integration Tester Now that you have created a simple stub and edited it, you can run that stub inside Rational Integration Tester. 1. Before we start using our stub, we will switch off the service in WebSphere Application Server, so we are certain that it is not processing any messages, but instead leaving them for the stub. To do this, open up your web browser, and follow the link in your bookmarks to the Websphere Integrated Solutions Console. When asked for login details, leave them blank, and click the Log In button. 2. In the left pane select Applications>Application Types>WebSphere Enterprise Applications. 3. The list of applications that we are using within WebSphere Application Server will then be shown on the right side. Check the box for vbooking.booking.app ; this handles booking requests for us. 4. Above the list of applications, there is a Stop button. You can now click this to stop the booking application; note that this will take a moment. You should then see that the application has stopped successfully. Page 59 of 127 © IBM Corporation 2001, 2013
- 62. IBM RATIONAL INTEGRATION TESTER TESTING TRAINING GUIDE 5. Return to Rational Integration Tester, and switch to the Test Lab perspective. 6. You will still see your stub in the tree on the left of the screen. Run the stub, either by double‐clicking on it, or by selecting it and clicking the Run button. 7. The stub will then be displayed in the Task Monitor. Some initial details will be shown below in the Console. This will be updated later on, as the stub receives incoming messages, and responds to them. 8. As it stands, the stub will now wait until it receives some input, so we will provide something for it to work with. Return to your web browser, and make a new booking. 9. In the Test Lab of Rational Integration Tester, take a look at the console output for your stub. You should now see that the stub has received a message, and sent a reply. 10. If you make another booking in your web browser, you should see that you are receiving the same booking number every time. As we turned off the filtering of messages within the stub, it should not make any difference what booking request we send to the stub; all messages will receive the same response. It would be possible to create a more complex stub which generated new reservation numbers for each booking. This would require use of more complex actions within the stub. Note that this might or might not be necessary, depending on what you intend to do with the stub. If all you require to Page 60 of 127 © IBM Corporation 2001, 2013
- 64. IBM RATIONAL INTEGRATION TESTER TESTING TRAINING GUIDE 10 Storing and manipulating data 10.1 Tags and the Tag Data Store The first resources that you have created have all dealt with hard coded data. While this is useful in some situations, there will be many situations where you will want to have more flexibility with the data used in your project. For example, you might want to take a piece of data received from one system; you might then want to use that data in another message, or use it to query a database. Any time that you want to read data from one source and use it in another place, you will need some way of storing that data in a variable. Within Rational Integration Tester, variables are called tags. Tags can be used any time you need to store or retrieve data within your tests or stubs. Additionally, some types of tags can be used outside of tests and stubs; for example, if you want to specify a path relative to the root folder of your project, you can refer to that root folder using a tag, so that if the project is moved, the path is updated automatically. There are three main types of tags that you might see within Rational Integration Tester: System tags: contain values that are provided by Rational Integration Tester, and cannot be changed by the user. These include things like the time, the project name, and the host name of the computer running Rational Integration Tester. Environment tags: contain user‐supplied data that can change from environment to environment. Test tags: contain user‐supplied data that is local to a given test or stub. In addition to these main types, you might see other types of tags. These are mainly treated as varieties of Test tags. Some examples of these that you might encounter are: Global tags: a test tag that has had its scope set to cover all tests in a test suite. Global tags can be used to pass values between multiple tests in a test suite, as long as the tag is defined in both tests, and marked as global in both tests. Outside a test suite, the scope of the tag is limited to the current test. Global tags are not relevant for stubs. Overridden Environment tags: it is possible to override an environment tag with a test tag. These are marked to differentiate them from other tags; note that this is discouraged, but might occasionally happen when creating environment tags for a project that already contains a set of tests/stubs. Java Properties: by creating a test tag with the same name as a Java property, it is possible to access that Java property within a test or stub (for example, the Java property file.separator). For the purposes of this module, we will focus on the three main types of tag: System tags, Environment tags, and Test tags. Page 62 of 127 © IBM Corporation 2001, 2013
- 67. IBM RATIONAL INTEGRATION TESTER TESTING TRAINING GUIDE 10.3 Using tags As seen above, tags can be given values when they are created. Test tags can also be given new values during the execution of a test or stub. This will usually be done on the Store tab of a test action; in that case, the tag is referenced simply by its name. To retrieve the value of a tag, you will need to surround the tag name with two percentage signs at each end. This means that you can store a value in a tag called myTag simply by referring to its name, myTag, but to retrieve the value of that tag, you will need to refer to it as %%myTag%%. Some features of Rational Integration Tester use ECMA Script. In most cases, a tag can be referenced within a script through its name, which would give you myTag, if you kept using the previous example. However, there are exceptions to this. If your tag name clashes with a reserved word or variable, then you will not be able to use the tag name without causing confusion. Similarly, if you have a hierarchy of tags (with an example tag of MYTAGS/tag1), the slash character would cause confusion within a script. In these cases, you can refer to the tag using, for example, tags["myTag"] or tags["MYTAGS/tag1"]. 10.4 Exercise: Testing with tags 1. Go to the Test Factory and create a new test based on the basicTemplate we created earlier. Call it tagTest. 2. We are going to add another step to the test, to log the name of the test, and the environment being used. Right‐click Test Steps, and select New > Flow > Log. 3. A new Log step should be added to your test. Drag this step so that it appears as the first item in the Test Steps section of the test. 4. Double‐click the Log action to edit it. 5. In the Output Message field, right‐click and select Insert Tag > TEST > NAME. You should see the text %%TEST/NAME%% appear in the Output message. 6. Press Enter to add a new line. Right‐click again, and select Insert Tag > ENVIRONMENT > NAME. Similarly, you should see %%ENVIRONMENT/NAME%% appear. 7. The double percentage signs (%%)designate a tag, and this part of the text will be replaced when we run the Log action. However, we can also add some extra text. Add some context so that you know what is being logged later on. For example: Page 65 of 127 © IBM Corporation 2001, 2013
- 68. IBM RATIONAL INTEGRATION TESTER TESTING TRAINING GUIDE 8. Run the test in the Test Lab view, and watch the console. You should see the names of the test and environment. 9. Tags can also be used to record inputs and outputs for test steps. As a basic example, we are going to log the reservation number returned by the system. To do this, return to the Test Factory perspective, and open the Receive Reply step. 10. The Receive Reply properties will open; switch to the Store tab. This is where we can configure which data fields will be required for later use. 11. At the bottom of the dialog box, find the newReservationNumber element. You will see an element node, and a text node. Right‐click the text node, and select Contents > Quick Tag. A tag name should be displayed in the column, and the checkbox in the column should be selected. Note that these columns can also be filled in manually, if you require a particular name for a field. 12. Click OK to close the Receive Reply step, and add another Log step to the end of the Test Actions. The contents of this Log action should be: Reservation Number: %%newReservationNumber%% You can either type this in directly, or use the same method used for the previous log action. 13. Save the test and run it again. The console output should now include the reservation number that was generated by the booking process. Page 66 of 127 © IBM Corporation 2001, 2013
- 69. IBM RATIONAL INTEGRATION TESTER TESTING TRAINING GUIDE Page 67 of 127 © IBM Corporation 2001, 2013
- 70. IBM RATIONAL INTEGRATION TESTER TESTING TRAINING GUIDE 11 Data driven tests 11.1 Data sources Previously, all of the data that you have used within your tests has either been hardcoded, or has been taken from interacting with messages or predefined tags. However, it is standard practice when testing to use external data to provide inputs or to help validate outputs. In order to access this data, you will need to add a data source to our project. The data source can then be used to access this external data for the purpose of data driving any test or stub. Four types of data source are supported by Rational Integration Tester. Each one is handled separately within a project, to account for configuration settings that will vary from data source to data source. The following data sources are supported: File Data Source: reads data from an individual file. This can be something like a CSV file, fixed width, or other delimited file. Excel Data Source: reads data from a sheet in an Excel spreadsheet. Database Data Source: reads data from a table in a database, or the results of a query on a database. The database must be set up in Architecture School before this data source can be created. Directory Data Source: reads in a set of files (for example, a set of XML documents). 11.2 Exercise: Data driven testing In this section, you will generate a spreadsheet from an existing test, and use that to drive multiple iterations of the test with different data. 1. Return to the Test Factory view, and create a new test using the basicTemplate test template. Call it dataDrivenTest. 2. Open the dataDrivenTest, and bring up the properties for the Send Request step of the test. 3. Go to the Config tab of the test action. 4. Click the tns:flightNumber (Text) field, and then use Ctrl+click to select each of the following (Text) fields, down to tns:passengerGender. Do not select the (Element) fields, or later stages of the exercise will fail. 5. Right‐click and select Contents > Quick Tag. The message structure should now appear as below, with tags created for each of the selected fields: Page 68 of 127 © IBM Corporation 2001, 2013
- 71. IBM RATIONAL INTEGRATION TESTER TESTING TRAINING GUIDE 6. Close the test action and Save the test. 7. From the test action toolbar, click the Edit or create test data button. 8. In the Edit or create test data dialog box that opens, there are settings for the location of the Excel File on the file system, and the Test Data Set within the project. The Test Data Set should be under MakeBooking, so that it is with the test, but the Excel File settings will be blank. Click the Browse button for that field to choose a location. 9. A file navigation window will open, pointing to a folder within your Rational Integration Tester project. We will use this location, because it means that we can easily move the entire project, and any links to this file can stay the same. Enter a file name of PassengerData.xls, and click Select. The name and location of the Excel file will then be shown within the Create or edit test data dialog box, using a system tag to refer to the location of the file. 10. In the Action section of the dialog box, click Use this test data in a new action. The New action type should be Iterate Test Data, and Insert after should be set to Test Steps. Page 69 of 127 © IBM Corporation 2001, 2013
- 72. IBM RATIONAL INTEGRATION TESTER TESTING TRAINING GUIDE 11. Click Next to go to the second screen of the wizard. 12. Here, you will need to select the tags for the wizard to use. By default, all tags are selected, meaning that they will be mapped to columns in the spreadsheet. This is exactly what we want, so click Next again. 13. In the final page of the wizard, you are presented with options for dealing with null values in the spreadsheet; this is normally used for messages that contain repeating elements. As this example does not contain any repeating elements, you can leave the options for null values alone. However, there is also a box labeled Edit Excel data on finish; make sure this is selected. Page 70 of 127 © IBM Corporation 2001, 2013
- 73. IBM RATIONAL INTEGRATION TESTER TESTING TRAINING GUIDE 14. Click Finish. Your spreadsheet editor will launch, displaying the spreadsheet that has been created. The first row of the spreadsheet will contains headings that match the tag names from the data source. The second row of the spreadsheet should contain the values that were in the original message before we tagged the fields. This is due to two things: firstly, when we created the tags, the default value of each one was set as the values given inside the message we quick tagged. Secondly, the spreadsheet generated used those default values of each tag as the first row of data. 15. In addition to this row of data, add 3 more rows of passenger information, then save the document. If your spreadsheet editor suggests changing the format of your file, choose to keep it in Excel format. 16. Close the spreadsheet editor. 17. Return to Rational Integration Tester. In the Test Factory Tree, there should now be a Test Data set called PassengerData. Open this, so we can validate that everything has been set up correctly. 18. The File Name field should point toward the same location that we saw in the wizard. The Sheet name field will be blank; this is fine, as the default setting is to use the first sheet in the workbook. Under the Format Configuration section, A row of the file contains column names should be selected, with 0 rows before and after the column names. Check that this is correct, and then click the Refresh button at the bottom of the screen. You should now see the data that you entered into the spreadsheet. Page 71 of 127 © IBM Corporation 2001, 2013
- 74. IBM RATIONAL INTEGRATION TESTER TESTING TRAINING GUIDE 19. Close the PassengerData data source, and return to the dataDrivenTest. 20. This test should now have three test actions: an Iterate Test Data, a Send Request, and a Receive Reply. To make sure that we send a request and receive a reply for each line of data, drag the Send Request and Receive Reply actions onto the Iterate Test Data action. Your test should now look like the following image: 21. Save the DataDrivenTest. Return to the Test Lab perspective, and run the test. You should see a Send Request and a Receive Reply line in the console for each row of data in your spreadsheet. Note: Whenever changes are made to the test data source from within Rational Integration Tester (for example, the file name), the test data source will need to be saved. Until you save the data source, other parts of Rational Integration Tester will not know about those changes. In this exercise, for example, the Iterate Test Data action will not be aware of changes to the chosen sheet name if you do not save the data source first. Note that this only applies to configuration settings controlled inside Rational Integration Tester. You do not need to save the data source again if an extra column is added to the data source, for example. Page 72 of 127 © IBM Corporation 2001, 2013
- 76. IBM RATIONAL INTEGRATION TESTER TESTING TRAINING GUIDE Page 74 of 127 © IBM Corporation 2001, 2013
- 78. IBM RATIONAL INTEGRATION TESTER TESTING TRAINING GUIDE 11.5 Exercise: Adding the new operation and schema 1. In Architecture School, create a Service Component object called Orders and include an operation in it called PublishOrders 2. Double‐click the PublishOrders operation to bring up its properties and go to the Message Exchange Pattern tab. 3. In the Binding section, click Browse to select a transport and choose QM_vbooking. 4. In the Queue section, enter queue.orders , and then click OK to close the dialog box. 5. Now navigate to the Schema Library and import a new XSD file . Select the supplied XML schema, order.xsd, which can be found in the Data FilesRepeating Elements folder on your desktop. 6. After importing, select XSDs on the left side of the Schema Library; you should now be able to view the order schema. Page 76 of 127 © IBM Corporation 2001, 2013
- 79. IBM RATIONAL INTEGRATION TESTER TESTING TRAINING GUIDE 7. Optionally, you can return to the PublishOrders operation to set the Message Exchange Pattern field to Publish, and to use the schema you have just imported; we will not be making use of the MEP in this exercise, but if you want to create other tests using MEP, this will be useful. 11.6 Exercise: Creating the repeating elements test Now that you have set up an operation and imported a schema that includes repeating elements, you can create a test that makes use of that schema. In this example, you will simply publish a message, and subscribe to it yourself, printing the message to the console so that you can see whether or not the message contains the correct data formatted in the appropriate manner. 1. Switch to the Test Factory. We will now create a data source to import our data. Right‐click the PublishOrders operation and select New>Test Data>Excel Data Source. Call the data source OrderData. 2. In the configuration pane, click Browse and find the OrderTestData.xls file found in the Repeating Elements folder. Following that, select the box labeled Treat empty strings as null. This will allow the tool to group nested data correctly. After clicking the Refresh button, you should see the following data in the Preview pane: 3. Save the data source, and then close it. Page 77 of 127 © IBM Corporation 2001, 2013
- 80. IBM RATIONAL INTEGRATION TESTER TESTING TRAINING GUIDE 4. We will now create a test to process this data. Right‐click the PublishOrders operation and select New>Tests>Test. Call it TestOrders. 5. Add an Iterate Test Data action to the Test Steps section. Create, and then drag a Publish action, followed by a Subscribe action and a Log action onto the Iterate Test Data action. Your test should look like the following: 6. Double‐click the Publish action and configure it: o On the Config tab, select QM_vbooking as the Transport o In the Queue setting, enter queue.orders o Look under the MQ Message (Message) node; there should be a text (String) underneath it. If there is not, right‐click the node, and select Add Child > Choice > text (String) to add the text node. Click OK in the dialog box that opens to confirm your choice. o Right‐click the text(String) node and select Schema. Choose the order schema, and click Next. o Select the box labeled Include optional fields, and then click Finish. o You should now see the message schema applied to your message. Use Ctrl+Click to select all the text nodes within the message, along with the orderid attribute. Make sure that you have not selected any of the elements in the message, and then Quick Tag everything that you have selected. o Right‐click the item(Element) node and select Mark as Repeating. o Do the same for the discountCode(Element) node and the address (Element) node. o Check that the test action now appears as below, then click OK to save your changes: Page 78 of 127 © IBM Corporation 2001, 2013
- 81. IBM RATIONAL INTEGRATION TESTER TESTING TRAINING GUIDE 7. Next, we will configure the Subscribe action to retrieve the message that we have just sent, and hold the entire XML message in a single tag. Open up the Subscribe action and configure it as follows, starting from the Config tab: o Use the same transport settings as the publish action (receiving a message from QM_vbooking, using queue.orders) o Disable validation on the text(String) part of the message. o Switch to the Store tab, and save the value of the incoming message by quick tagging the text(String) field. o Click OK to close the test action. 8. Open the Log action, add %%text%% as the text message, then close the test action. 9. We now have to map the test data to the tags defined in the Publish action. Double‐click the Iterate Test Data action to configure it: o In the Config tab, Browse to the OrderData data source for the Test data set. o In the Group data by column field select id. Page 79 of 127 © IBM Corporation 2001, 2013
- 82. IBM RATIONAL INTEGRATION TESTER TESTING TRAINING GUIDE o Switch to the Store tab and check that each field in the Tag name column has been mapped appropriately to the data source columns listed in the Data column. This should have been done for you automatically, but if you did not have the tags in the test prior to setting the data source for this test action, it would not be done for you; similarly, if you did not save the data source earlier, this mapping will not have taken place. o Close the Iterate Test Data action. 10. Save the test, and run it in the Test Lab. 11. You should see the test pass and in the console you should see five order messages, corresponding to the messages described previously. As an example, the final message is shown below: Page 80 of 127 © IBM Corporation 2001, 2013
- 83. IBM RATIONAL INTEGRATION TESTER TESTING TRAINING GUIDE 12 Test actions Test actions are the main building blocks of our tests. So far, we have seen just a couple of the actions that are available to us. Over the course of the next couple of chapters, we will look at a number of the other actions available in Rational Integration Tester. 12.1 Test action summary The following tables describe the majority of the test actions used within Rational Integration Tester. The test actions in Rational Integration Tester are categorized into 5 groups, as seen in the toolbar along the top of the test factory. These groups are Messaging, Flow, General, BPM, and Performance. As this manual does not deal with BPM or Performance actions, the summary has been limited to the first three categories. Messaging actions Send Request: Send a message and wait for a response. Receive Reply: Receive and validate a response to a request. Receive Request: Choose a transport and format to receive a message. Send Reply: Respond to a previously received request message. Publish: Publish a message on a transport. Subscribe: Start listening for messages on a transport. Unsubscribe: Stop listening for messages on a transport. Message Switch: Configure a subscriber to pick up a message that can be passed to the child Message Case actions. Message Case: Filter the message received by the parent Message Switch. Page 81 of 127 © IBM Corporation 2001, 2013
- 86. IBM RATIONAL INTEGRATION TESTER TESTING TRAINING GUIDE 12.2 Exercise: Run Command The Run Command action allows you to run commands from the local command prompt. You can also use it to connect to another computer through the SSH protocol, and run commands on that computer. This means that you can run any external batch files or executables as needed within your tests. You can choose to set up this test action so that it waits for the command to complete, or to continue immediately. If you choose to wait for the command to complete, you can then validate the output of the command, or store that output as you would for a message. If you do not want to wait, you can choose to later terminate that command, at a specified point in time; for example, at the end of the test, or at the end of the test suite that contains the current test. To illustrate this functionality we will create a test that runs the hostname command. 1. Go to the Test Factory perspective and create a new blank test. Call it RunCommand. 2. In the Test Steps, right‐click and select New > General > Run. 3. Double‐click to configure the Run command. 4. Check the Connection settings. The Location field should be set to Local, and the Working Directory field can be left blank. 5. Enter the command: hostname 6. Make sure that the option Wait for command execution to finish is selected. 7. Click the Test button to run the command. You should see a set of results here, with the hostname of your computer appearing in the Standard Output section. Page 84 of 127 © IBM Corporation 2001, 2013
- 87. IBM RATIONAL INTEGRATION TESTER TESTING TRAINING GUIDE 8. In some circumstances, you might want to validate the output of the command, and make sure that it is still the same when you run the test. While the results of this command will not change during this course, we will give that a go anyway. Click the Overwrite Expected Results button, and then click Close. 9. Staying in the Run Command action, switch to the Assert tab. You should now see that your hostname is appearing as part of the standard output, and that the standard error and exit codes have been set to empty and 0, respectively. 10. Switch to the Store tab; here you can save the output to be used later on. Quick tag the stdout node here to save the standard output stream into a tag called stdout. 11. Click OK to close the dialog box. 12. In order to see the output of your action, add a new Log action. Make sure that this is after the Run Command action. 13. Fill in the Log action with the tag you created earlier, %%stdout%% . Click OK to close the action. Page 85 of 127 © IBM Corporation 2001, 2013
- 88. IBM RATIONAL INTEGRATION TESTER TESTING TRAINING GUIDE 14. Switch to the Test Lab, and run your test. 15. The test should pass, and your hostname should appear in the console. 12.3 Exercise: Log You have already used the Log action in a previous exercise, to write a string to the console. As it is fairly useful, we will take a look at what else it can do in this next exercise. First, the Log action can write to a file, not just the console. We will be using that capability over this exercise and the next. The Log action can also be used to do more than just add information to the console or a file; it can also be used to provide custom warnings or error messages for the user. If a test is being run as part of a test suite, these warnings and errors will be included in the statistics generated for that test suite. In this exercise and the next, you will build a more complex test. First, you will set up a test that can log the details of a flight booking to a file. In the following exercise, you will modify this so that it looks up the data in that file, comparing it with any data that has just been received. 1. In your operating system’s file explorer, create a new blank file called reservationData.csv. Open the file for editing with your text editor and add one line at the beginning, which should simply give column names for our data: ReservationNo,FirstName,LastName 2. Save the file and close it. 3. In Rational Integration Tester’s Test Factory, create a new test based on basicTemplate. Call it checkForDuplicates. Page 86 of 127 © IBM Corporation 2001, 2013
- 89. IBM RATIONAL INTEGRATION TESTER TESTING TRAINING GUIDE 4. So that we have something interesting to log, we will tag some of the data in the request and reply messages. Open the Send Request action, and go to the Store tab. 5. Find the passenger first and last name fields, and Quick Tag both of them. 6. Close the Send Request action. 7. Similarly, tag the newReservationNumber field within the Receive Reply action. 8. After the Send Request and Receive Reply actions, add a new Log action, and open it. 9. Within the Output Message field, add each of the tags we have created, separated by commas. Make sure they are in the same order as the headings you created earlier: reservation number, first name, and then last name. 10. Add a new line after the tags, so that the Log action will add a new line to the file before each row of data. The Log action will do exactly what you tell it to do, so if you leave out the new line, you will end up with one long row of data that cannot be processed in Rational Integration Tester. 11. Set the output file to the reservationData.csv file created at the beginning of this exercise. Page 87 of 127 © IBM Corporation 2001, 2013
- 90. IBM RATIONAL INTEGRATION TESTER TESTING TRAINING GUIDE 12. Make sure that the Append checkbox is selected. This will ensure that we add new log information to the end of the file, rather than overwriting any previous contents. 13. The Role field should be set to Info by default; check that this is the case. 14. Close the Log action and run the test in the Test Lab. 15. Open the reservationData.csv file to verify that it has the details of the customer from the test we have just run, and then close the file without making any changes. 16. Go back to the Log action in the Test Factory, and change the Role to Error. Observe what happens when you run the test. 17. Change the Log action again, setting the Role to Warning, and observe what happens to the test when you run it this time. 18. Go back to the Log action one last time, and change the Role back to Info. 12.4 Exercise: Lookup Test Data The Lookup Test Data action will look up information from a data source, based on a key field. Here, you will use it to make sure that that your system is not creating duplicate reservation numbers. You will do this by making a booking, saving the reservation number into a tag, and looking for that reservation number in the CSV file that you created in the previous exercise. Note that in a live system, it would be better to simply look at the data held in the database, rather than logging everything to a file, so treat this as an example of using the Lookup Test Data action, rather than best practice for testing. 1. In order to lookup any information, we will require a data source. While in the Test Factory, right‐click the MakeBooking operation, and select New > Test Data > File Data Source. Call it ReservationLog. 2. As the file source, choose the reservationData.csv file we created in the previous exercise. The file type should be set as Delimited. 3. In the Format Options section, Delimiter Options should be set to Comma. 4. Click the Refresh button at the bottom of the screen to check that the file has been loaded correctly. You should see the same data you logged in the previous exercise. 5. Save the ReservationLog test data source and close it. 6. Switch back to the checkForDuplicates test. Add a Lookup Test Data test and open it. action to the 7. On the Config tab, click Browse to choose a data set, and select the ReservationLog data. 8. You will need to add a lookup, by setting the values for Column Key to ReservationNo, and Lookup Value to %%newReservationNumber%% . Close the test action. Page 88 of 127 © IBM Corporation 2001, 2013
- 91. IBM RATIONAL INTEGRATION TESTER TESTING TRAINING GUIDE 9. When we perform this lookup, we expect that we will not find any duplicates; the reservation numbers should be unique for each reservation. If we do find a duplicate, then we want to report this. You should see that the Lookup action comes with two paths below it: Found and Not Found. Right‐click the Found option, and add a new Log action to this path. 10. The new Log action should report that the reservation number is a duplicate. It should not be added to any file, but the Role should be set to Error. Once you have set the role and entered an error message, close the Log action. 11. If we do not find the reservation number in the previous log, then the test has succeeded, and we will want to log the current data. This can be done simply by dragging the Log action created in the previous exercise onto the Not Found path. 12. Save the test and run it against the Vacation Booking system. It should succeed, telling you that no match was found for the specified reservation number. New data will then be added to the log file. As the system always produces a new reservation number, this test should pass every time. Page 89 of 127 © IBM Corporation 2001, 2013
- 92. IBM RATIONAL INTEGRATION TESTER TESTING TRAINING GUIDE 13. However, we can anticipate what the next reservation number will be, and we can insert that number into the log file that we have created. This would fool the test into thinking it had found a duplicate reservation number. Open the log file, and edit it so that there is an entry for the next reservation number. Save the file, then run the test again; you should now see it fail. 14. The Lookup Test Data action can also be used to retrieve information from the data source. If we find a duplicate, we will report the first and last names of the customer recorded in the file. To do this, return to the Test Factory, right‐click in the Test Steps section, and open the Tag Data Store. 15. Click the button in the Tag Data Store to add a new tag to the test. Call it logFirstName. Do this one more time, and create a second tag called logLastName. Close the Tag Data Store. 16. Open the Lookup Test Data action, and switch to the Store tab. 17. In the Output format, select Store one matching row only. As we are attempting to prevent any duplicates, we will not expect to find more than one row of data inside the log file for each reservation number. 18. In the Mappings section, you will see the FirstName and LastName fields from the data source. Click the FirstName row; a pencil button will be displayed to the right. Click this button to bring up the Select Tags dialog box. 19. Choose the logFirstName tag and click Select. 20. Go through the same process to match the LastName field and the logLastName tag. Once you are done, the test action should now appear as follows: Page 90 of 127 © IBM Corporation 2001, 2013
- 93. IBM RATIONAL INTEGRATION TESTER TESTING TRAINING GUIDE 21. Close the test action and amend the Log action used for reporting errors, so that it looks like the following screen capture: 22. Save the test. 23. Take note of the most recent reservation number, and again make sure that there is an entry for the following reservation number in your log file. So that we can verify that data is being extracted from our data source, choose new first and last names for this new entry. Remember to save the log file after making any changes. 24. Run the test again. You should now see a duplicate, and the name shown in the console should be the one that you entered in the previous step. Page 91 of 127 © IBM Corporation 2001, 2013
- 94. IBM RATIONAL INTEGRATION TESTER TESTING TRAINING GUIDE 12.5 Failure Paths and Pass Paths There will be times when you do not want a particular test action to pass; in fact, you might only consider the test to be successful if that test action passes. To illustrate, let’s consider a simple example: you might have a system where you publish a message to a queue, and when that message is processed normally, you receive no response message. In this example, the system might just be updating a database table in response to the message you have published. However, if it has a problem doing its work – maybe you have supplied data that would cause a problem with the constraints put on the database – the service is designed to post a message onto a message queue for error and exception messages. In this case, you might wish to design a test that publishes a message as normal, then subscribes to the exception queue. Unlike the tests you have seen so far, if the subscribe action fails, then the test should pass; if the subscribe action passes, then the test should fail. Failure Paths and Pass Paths allow you to specify what occurs in a test if a particular test action passes or fails. These can be added to any test action by right‐clicking on it, and selecting Add Pass Path or Add Failure Path. We will be focusing mainly on failure paths; these allow us to create tests that fail gracefully. Note that when you add a failure path to a test action, it might include multiple branches; most test actions will only have one way in which they fail, but messaging actions (for example) can have two ways to fail: either a message is not received within the specified timeout period, or a message is received, but does not satisfy the validation criteria. 12.6 The Pass and Fail actions The Pass and Fail actions cause a test to pass and fail respectively; test execution will skip straight to the Tear Down phase of the test, ignoring any further actions within the Test Steps phase. As the any actions in the Tear Down phase will still be executed, these can still be used to clean up files, clear database tables, or perform other tasks that may still need to be done once it has been determined that the test should pass or fail. This assumes that no further analysis needs to be carried out on those resources – if analysis is needed in the case of a test failure, you may want to leave the Tear Down phase of the test empty. 12.7 Exercise: Using Failure Paths We will now create a simple test to illustrate how to implement failure paths; it will also make use of the Fail action. 1. Create a new test based on basicTemplate . Call it failurePaths. 2. Go into the Receive Reply action, and then to the Config tab. Find the newReservationNumber field. It should currently have a star next to it, indicating that it is governed by a rule in the Rule Cache. Right‐click this line, and select Rule Cache > Disable. Once you have done this, the star will still appear, but with a line through it: Page 92 of 127 © IBM Corporation 2001, 2013
- 95. IBM RATIONAL INTEGRATION TESTER TESTING TRAINING GUIDE 3. Go to the Test Lab, and run the test again. It should now fail, as it is no longer receiving the expected reservation number. 4. We are going to modify the test so that it will pass with a warning if there an issue validating the reply message. Anything else should still cause the test to fail (transport failure, timeout, and so on). Return to the Test Factory, right‐click the Receive Reply step, and choose Add Failure Path. Two new nodes will appear underneath the Receive Reply action: Subscriber Error and Validation Failure. 5. Right‐click Subscriber Error and select New > Flow > Fail. Double‐click the Fail test step and add some text into the Output Message box, e.g. Message timeout. Click OK. 6. Right‐click Validation Failure and select New > Flow > Log. Double‐click the Log test step and some text into the Output Message box, such as Validation failed. Set the Role of the action to Warning. Click OK. 7. Your test should now look like this: Page 93 of 127 © IBM Corporation 2001, 2013
- 96. IBM RATIONAL INTEGRATION TESTER TESTING TRAINING GUIDE 8. Save the test. 9. Return to the Test Lab, and run the test again. In the console, you should be able to see that the validation step failed, and a warning was given, but the test has still passed: 10. In the Test Factory, open the Receive Reply step. You will see a Timeout field, which is set to 0 ms. This default value (which can be altered from the software preferences) means that the test will wait forever for a response. Change this to 5 ms, which provides a short period, but one so short that the response message will not arrive in time. Run the test again, and you should see it fail this time, because the error does not occur at the validation stage. 12.8 Failure Paths and exception queues Now that we have constructed a simple example to help understand the basic idea behind Failure Paths, the Pass action, and the Fail action, we can look at a more advanced example that is more applicable to the real world. Page 94 of 127 © IBM Corporation 2001, 2013
- 98. IBM RATIONAL INTEGRATION TESTER TESTING TRAINING GUIDE 13 Interacting with databases 13.1 Introduction Working with messages will be a large component of the tests you create with Rational Integration Tester. However, in most systems, you will also need to interact with databases. For example, you might wish to check that data has been added or removed from a database correctly. Alternatively, you might wish to insert data yourself, or run a stored procedure on a database as part of a larger test. Rational Integration Tester can interact with any JDBC‐compliant database, as long as you have the appropriate JDBC drivers, and can tell the Library Manager where these are. Once you have set up the JDBC drivers, you can then create a database within the Architecture School as you would for any other infrastructure component. Finally, you can then add actions to your tests that work with the database. There are three actions you can use: the SQL Query, which allows you to select data from the database, and optionally validate the contents of the database; the SQL Command, which can run an Insert, Update, or Delete; and finally, the Stored Procedure action, which executes a stored procedure on the database. In this chapter, you will see how to use an SQL Query to validate that the contents of a database query are as expected, and then how to use the SQL Command action to update a database. 13.2 Exercise: Creating a database component manually This section details the steps necessary to create a database component in your project. We will use the Logical and Physical views to manually add a database that can then be accessed from any test in the project. This chapter will assume you are using the sample database provided, however the same process can be used for any database. 1. Ensure you have SQLite listed as one of the Database (JDBC) providers in your Library Manager, using the driver sqlite‐jdbc‐3.7.2.jar. If necessary, you can do this by adding a new provider and pointing to the file, which can be found in /opt/sqlite . 2. If you have made changes in the Library Manager, close and restart Rational Integration Tester so that it will load those changes when it restarts. 3. Go to the Logical View. Select the VBooking service component, and then create a new database component by right‐clicking and selecting New > General > Database Server. Name it Test Database. 4. We now need to create a physical database for our logical database to point to. Switch to the Physical View, right‐click the Physical Components root folder and select New > General > Database. 5. Open the new database and input the following values: Max Num of Connections: 1 Driver: org.sqlite.JDBC (Note that there are two SQLite drivers; the other one will not work) Page 96 of 127 © IBM Corporation 2001, 2013
- 99. IBM RATIONAL INTEGRATION TESTER TESTING TRAINING GUIDE Database URL: jdbc:sqlite:/home/<username>/Desktop/Data Files/Database/reservations.db (Modify depending upon where your database is stored) 6. Click Test Connection to ensure your database connection is setup correctly. If this does not work, then you should go back and check steps 1 and 2 again. 7. Go back to the Logical View and reopen the Test Database you created before. 8. Go to the Bindings tab. For the current environment, select the UNBOUND field and pick the SQLite database you just created (jdbc:sqlite:/home/<username>/Desktop/Data Files/Database/reservations.db). 9. To check that the database is now available to use in tests, we will create a test to query the database. Switch to the Test Factory perspective 10. Previously, we have created all of our tests under operations. This does not need to be the case; you can create tests under service components or even database components. Create a new blank test called queryTest, under the Test Database component. 11. Add an SQL Query action to the test. 12. Edit the action, and hit the Browse button to select the Test Database from the list of resources. If you do not see it listed, set Obey References to No. This will ignore any dependencies set in Architecture School, and show all databases within the project. 13. Enter the following SQL Query: SELECT * FROM reservation ORDER BY reservation_number Page 97 of 127 © IBM Corporation 2001, 2013
- 100. IBM RATIONAL INTEGRATION TESTER TESTING TRAINING GUIDE 14. Click Test. If Rational Integration Tester shows an error message, check that you have entered the query correctly and that the Test Database has been selected as the Database Server at the top of the window. Otherwise, you will see the contents of the Reservation table. 15. Click Overwrite Expected Results and click OK to close the SQL Query window. 16. Run the test; it should pass. We have not altered the database, so the expected and actual results of the query will match. 13.3 Exercise: SQL Command The SQL Command action allows you to run INSERT, UPDATE or DELETE queries in Rational Integration Tester. We will now create a simple test that performs an SQL INSERT command to insert a single record into a database. This section assumes you are using the database created in Page 98 of 127 © IBM Corporation 2001, 2013
- 101. IBM RATIONAL INTEGRATION TESTER TESTING TRAINING GUIDE the previous section. You are free to use your own however you will need to make appropriate changes to the SQL query. 1. Create a new test called InsertTest under the Test Database component. 2. Add an SQL Command action and double‐click to open it. 3. On the Settings tab, set the Database Server field to the Test Database. 4. Enter the following SQL command: INSERT into reservation VALUES ("Male","Lyon","Thomas","Jack","21","VB007","A05006") 5. Close the SQL Command action and Save the test. 6. Run the test in the Test Lab. Assuming there were no syntax errors in your SQL, it should pass. If not, return to the test and check that the syntax is correct, and then try again. Note that the test will not succeed if you run it again, as it would be trying to insert a row of data that duplicates a value of the primary key used in the table: the reservation number. 7. Now run the queryTest again. You should observe that it now fails, as the data returned by the query no longer matches the expected data for that test. Page 99 of 127 © IBM Corporation 2001, 2013
- 102. IBM RATIONAL INTEGRATION TESTER TESTING TRAINING GUIDE 8. Open the message differencing window for the query results, and you should now see the difference between the expected and actual results. Close the window without making any changes. 13.4 Exercise: Column and cell validations The queryTest is currently failing, due to the extra row that was not in the expected results. However, in some cases, we will want to validate a set of query results given more general criteria, rather than specifying exact values to match. 1. Return to the Test Factory, and make a copy of the queryTest. Call it columnValidations. 2. Open the SQL Query action in your new test, and go to the Assert tab to view the expected results. 3. Select any cell, and click the Edit Cell button. Alternatively, right‐click the cell, and choose Edit Cell. 4. Note that you can edit the validation for this particular cell. By default, the validation should have an Action Type of Equality, and the value should be set to whatever value is currently in the database within that field. Close this validation window without making any changes. 5. Similarly, to edit validation rules for a column, we can select any cell within the column, and click the Edit Column button, or we can right‐click the column heading, and choose Edit Column. Open the validation rules for the gender column. 6. You will see that there is an action here already, with the Action Type list set to Equality. You can also see that it is currently disabled, as the box next to Equality at the top of the window is not checked. Select Regex from the Action Type list, and mark the box to enable the assert action. 7. For the regular expression, enter ^(Male|Female)$ 8. This should let us accept either Male or Female as valid entries; anything other than these exact strings will fail. Check this by typing into the Document field and verifying that these values pass, and others fail, when you click the Test button. Page 100 of 127 © IBM Corporation 2001, 2013
- 103. IBM RATIONAL INTEGRATION TESTER TESTING TRAINING GUIDE 9. Once you are satisfied that the regular expression is working here, click OK to close the dialog box. Add more validation rules for other columns, using regular expressions as follows: week_number ^d{1,2}$ flight_number ^VBd{3}$ reservation_number ^Ad{5}$ 10. These rules can be used to generalize how query results will be evaluated. However, we still have the original cell assertions, which state that each cell must be equal to the values we can see in the table in this window. In order to make things more general, check the box labeled Disable Cell Assertions. This will mean that only the column assertions are used. 11. Click OK to close the window and run the test. You should see that the test passes. 12. Return to the Test Factory, and modify the InsertTest so that it uses an invalid reservation number (for example, change the A at the beginning to B). 13. Run the modified InsertTest, and then run the columnValidations test one more time. The columnValidations test should fail, pointing out the invalid reservation number. 14. In the next exercise, we will reset the database to its original state, allowing both query tests to pass again. Page 101 of 127 © IBM Corporation 2001, 2013
- 104. IBM RATIONAL INTEGRATION TESTER TESTING TRAINING GUIDE 14 Run Test 14.1 Introduction At times, you will find that there are tasks that you need to carry out in multiple tests. As a simple example, you might need to retrieve a login token before you can continue with your test. When creating your tests, you could add the actions for doing this to each test that requires it. However, you would be doing the same thing over and over. Instead, you can put a set of repeatable actions inside a test, and then run that test as part of a larger test whenever you want to use those actions. This can be any set of actions, so it might be a set of actions that reset a database table, start up one or more external applications, or anything else you can do within a test. Once you have created a test containing this set of actions, you can then use the Run Test action. It allows you to run one test from inside another, so once you have defined your repeatable actions, you can then use them in any other test inside your project. In this section you will create a modified “Insert Record” test that inserts a given record into a database, using tags rather than hardcoding the values to be inserted into the database. You will then use this as part of a separate test to reset the database. As part of this process, you will also see how you can pass data between the two tests that are interacting through the Run Test action. 14.2 Exercise: Creating the child test In the first exercise for this module, we will create a test that can insert a row of data into our database, given a list of tags. On its own, this test won’t be very useful, but it will be used later on with the Run Test action to provide reusable functionality. 1. Go to the Test Factory perspective, and find the InsertTest in the Test Factory Tree. Make a copy of this test, and call it InsertWithTags. 2. Open the tag data store, and create the following tags: ChildTestGender ChildTestLastName ChildTestMiddleName ChildTestFirstName ChildTestWeekNumber ChildTestFlightNumber ChildTestReservationNumber 3. Close the Tag Data Store when you are finished. 4. Open the SQL Command action. 5. Replace the SQL command with the following: INSERT into reservation VALUES ("%%ChildTestGender%%", "%%ChildTestLastName%%", "%%ChildTestMiddleName%%", "%%ChildTestFirstName%%", "%%ChildTestWeekNumber%%", "%%ChildTestFlightNumber%%", "%%ChildTestReservationNumber%%") Page 102 of 127 © IBM Corporation 2001, 2013
- 105. IBM RATIONAL INTEGRATION TESTER TESTING TRAINING GUIDE 6. Click OK to close the SQL Command action. 7. Do not run this test. As the default value for a new tag is null, you would only be inserting null values into the database. Instead, simply Save the test. You might be wondering why every tag starts with ChildTest. This is to help us identify which tags belong to which test, and will be very useful when we come to pass data between the parent and child tests. We will now create a test that will reset a database by removing all current records, and then entering a selection of supplied records. We will do this by way of the Run Test action calling the InsertWithTags test. 14.3 Exercise: Creating the parent test 1. Create a new File Data Source, and name it DBResetData. 2. Click the Browse button and select the inputData.csv file located in the Data Files/Database folder on your desktop 3. Click the Refresh button and check that five records are displayed. Save and close the DBResetData data source. 4. Create a new test and call it ResetDatabase. This test will remove all records from the database and populate it with sample data stored in a CSV file. 5. Add an SQL Command action to the test. 6. Open this action and configure it: set the Database Server field to the Test Database and enter the following SQL command to remove all records from the database: DELETE FROM reservation 7. Save and close the SQL Command action, then right‐click Test Steps and select Tag Data Store. 8. Create the following tags: ParentTestGender, ParentTestLastName, ParentTestMiddleName, ParentTestFirstName, ParentTestWeekNumber, ParentTestFlightNumber, ParentTestReservationNumber. Page 103 of 127 © IBM Corporation 2001, 2013
- 106. IBM RATIONAL INTEGRATION TESTER TESTING TRAINING GUIDE 9. These tags will store the values of each attribute read in from the CSV file. Because the CSV file contains multiple records, we are going to make use of the Iterate Test Data action to apply an action to each record in the CSV file. 10. Add an Iterate Test Data action below the SQL Command action. 11. Open the new action, click the Browse button and then select the DBResetData data source. 12. Go to the Store tab. You should see a list of the tags you created. Select the drop down menu to the right of each tag and select the appropriate attribute. Click OK. This sets the value of the tags in the test to the values of each column in the data source. 13. Right‐click the Iterate Test Data action and select New > Flow > Run Test. 14. Open up the Run Test action, click the Browse button and select the InsertWithTags test you created earlier. Make sure that Run process in parallel is not selected. The test should now appear as follows: Page 104 of 127 © IBM Corporation 2001, 2013
- 107. IBM RATIONAL INTEGRATION TESTER TESTING TRAINING GUIDE 14.4 Exercise: Passing data between the tests We now have a child test and a parent test, and the parent test can run the child test through the Run Test action. However, we still need to specify how data will be passed between the two tests. First, we will go to the child test, and set up tags that will hold any input values. Then, we will return to the parent test, and fill in those tags appropriately. 1. Return to the InsertWithTags test, and go to the Properties tab of the test. 2. This tab presents input and output tags for the test, in Input and Output sections. Under the Input section, make sure All Tags is selected. All tags in the insert test have now been enabled as inputs, but we still need to say what data will go into them. 3. Save the InsertWithTags test and Close it. 4. Next, we need to go back to the ResetDatabase test, and reopen the Run Test step. 5. Go to the Value tab. 6. You should see all the tags you created in the InsertWithTags test in the Unmapped list. Click the << button to move them all into the Mapped list. 7. For each tag, select it, and in the Value field below insert the corresponding tag from the ResetDatabase test. 8. Go to the Test Lab, and run the ResetDatabase test. The ResetDatabase test should call the InsertWithTags test five times, each time adding a new row of data to the database. If these insert commands are failing, return to the InsertWithTags test and check the syntax in your SQL statement. It is very easy to make a mistake with the quotes, commas, and percentage signs in this exercise, so this should be the first thing that you check if things are not working. Page 105 of 127 © IBM Corporation 2001, 2013
- 109. IBM RATIONAL INTEGRATION TESTER TESTING TRAINING GUIDE 15 Monitoring log files 15.1 Overview You have now used a lot of tests that handle interactions with the system under test, and check that the system responds appropriately to those interactions. However, it is possible that the system might appear to be working correctly, when in fact an error has occurred. In many cases, the log files used by the applications within your system under test can help out with this. While you could check these log files manually, that would require you to check the log file before starting your test, look for anything new when you get to the end of the test, and then determine how to interpret anything that might have appeared in the log file, including whether or not it even had anything to do with your actions. Instead, you will see how to automatically monitor a log file in this module. Rational Integration Tester will check for any new entries added at the end of the log file during your test, and even check whether or not the system has moved onto a new log file, or shrunk the log file due to it growing too large. If it does find any new entries, it can then filter for anything that applies to your test, and determine how to treat those entries: if they should be ignored, treated as warnings, treated as errors, or simply reported to the console. To set this up, you will first need to tell Rational Integration Tester how to find and connect to each log file that you might be using, through the Architecture School. You can then determine which log entries you are interested in, and how to react to any new entries. 15.2 Exercise: Looking for error messages To illustrate log file monitoring, we will now look at a log file produced by the Vacation Booking system. Each time a booking is made, an entry is added to a log file. Additional entries may be added to the log file to provide warnings if there is some concern with the input data. We will see how to add this information to the console, and also how to treat warnings logged in the log file as warnings or errors within Rational Integration Tester. 1. Go to Architecture School, and locate the IBM WebSphere Application Server service component. 2. Double‐click the resource to edit it, and go to the Monitoring tab. 3. Click Add to add a Log File. For this example, we will be using a log file that records entries each time you make a booking. 4. Set the Path field to /opt/IBM/WebSphere/AppServer/profiles/AppSrv01/logs/. Set the File field to vbooking.log . 5. As we are only looking at a single log file, you can clear the two options at the bottom of the window, for Wildcard match File and With multiple matches choose last modified. Page 107 of 127 © IBM Corporation 2001, 2013
- 110. IBM RATIONAL INTEGRATION TESTER TESTING TRAINING GUIDE 6. Click OK to close the dialog box. 7. In Test Factory, create a new test based on the basicTemplate and call it MonitorTest. 8. Switch to the Monitoring tab of the test, and choose Add; it should automatically find the log file location we selected in Architecture School. At the moment, this will simply copy any items that appear in the log file during the test into the Rational Integration Tester console. 9. In the test steps, add a Sleep action after the Receive Reply action. 10. Configure the Sleep action so that it uses a Fixed delay of 2000ms. This will pause the test for 2 seconds after we have received a reply. As the log file is polled periodically, and the logging in the application might take a short amount of time to write to disk, we are allowing some extra time to pick up any messages that might be relevant to our test. 11. Run your test. In the console, you should see a line of information, such as: [INFO] Booking made for Neil Myers reservation: A00020 You might also see some warnings. The information item is always written to the log file for each new booking, while the warnings will only come up under certain conditions. 12. Return to the Test Factory. We are going to configure the Send Request action to send some data to the system that will generate some warnings, so open that action. Page 108 of 127 © IBM Corporation 2001, 2013
- 111. IBM RATIONAL INTEGRATION TESTER TESTING TRAINING GUIDE 13. The system will log a warning if any of the fields in the message do not contain any data, so clear any data in the postcode field. 14. It will also log a warning if the cardholder name does not match the passenger name. Make sure that these two names are different, and then close the Send Request action. 15. Save the test and Run it. This time you should see a pair of warnings in the console, telling you that the postcode is missing, and that the cardholder name does not match the passenger name. However, these are logged to the Rational Integration Tester console at the information level. 16. Switch back to the Test Factory, and return to the Monitoring tab of the test. Within that section, there is also an Actions tab that tells Rational Integration Tester how to handle anything it sees inside the log file. The default behavior is to write it to the console as information. 17. Click the Add button to add an item to watch for in the log file. 18. Double‐click in the Match field. It should bring up an Edit Regex window, with a copy of the log file as it currently stands. 19. First, we will look out for the warning for the mismatched passenger and cardholder names, so select the text [WARNING 012]. Several regular expressions that match this will be suggested in a popup menu; choose the expression [WARNING 012]. This will only match the exact same string. Any matches for that string in the file will then be highlighted. 20. Click OK to close the dialog box. 21. In the Action column, set this to Treat as error, so that any warnings about cardholder names will fail the test. Select the box in the Enabled column as well, to make sure it is applied to the test. Page 109 of 127 © IBM Corporation 2001, 2013
- 113. IBM RATIONAL INTEGRATION TESTER TESTING TRAINING GUIDE 16 Advanced stubs 16.1 Exercise: parameterized stubs In this exercise, you will create a parameterized stub. This is more complex than the basic stub we created earlier, in that it will produce different reply messages when given different request messages. 1. To start collecting data to generate the stub, go to the Recording Studio. Clear any messages recorded previously. 2. Check that the MakeBooking operation is being monitored, and start recording. 3. Switch to the Test Lab, and run the test suite created earlier. Return to the Recording Studio, and you should see the messages produced for that set of tests. 4. Select MakeBooking within the Event Monitors panel. This should filter out any other events, leaving you with just the six MakeBooking requests and responses that were recorded. Check these to make sure that you have a request message for each of the three card types allowed by the booking system. If not, you will need to record more interactions with the system. If you have got too many, then delete any extras from the Events View. 5. Select all six events, and click the Save button. 6. Again, we will choose to save them as a stub in the first page of the wizard. Click Next once you have done this. 7. On the second page of the wizard, choose to Store data in a simple data set. Click Next. 8. The third page checks that everything has been allocated to the correct operation. You should see six events, all labeled as being related to the MakeBooking operation. If so, click Next. If not, you will need to go back and make sure you have selected the right events. 9. The fourth page checks that the requests and replies have been grouped correctly. Again, this should already be the case, but you can choose to change groupings here or restart if necessary. Click Next once you are satisfied that this is correct. Page 111 of 127 © IBM Corporation 2001, 2013
- 114. IBM RATIONAL INTEGRATION TESTER TESTING TRAINING GUIDE 10. You will then get a preview of how the request messages will be mapped into our data set. Rational Integration Tester will analyze the messages used in the recorded messages, and look for differences between the messages. By default, it will record data that changes into columns within the data set; data that appears to be static will not be included. Take a look at the request message: fields that are going to be included in the data set have a status of New , while those that are not going to be included are listed as Ignored . 11. Within the request message, we only care about the card type, so select each of the other fields, and click the Ignore button. This should leave only the card type listed as New, and everything else Ignored. 12. Click Next to go to the response message for MakeBooking. 13. Here, we can see that the reservation number is also marked as New. In this case, we might also decide that we are interested in the status field as well, even though it had the same value in each of the recorded messages. Find the status row, which should be marked as Ignored. Select it, and click the Column button. 14. A popup dialog box opens, allowing you to name the column that will be created for the status within our data source; by default, it will be called status. This will be fine for our Page 112 of 127 © IBM Corporation 2001, 2013
- 115. IBM RATIONAL INTEGRATION TESTER TESTING TRAINING GUIDE purposes, so click OK. Both the reservation number and the status should now be marked as New. 15. Click Next. You will see the Header Transformation Screen, which we can ignore for this example. 16. Click Next one last time to go to the summary screen. This should inform you that a stub will be created, along with a data source containing information about the card type, reservation number, and status. If different fields are listed, you will want to click Back to return to the previous steps, and make sure that each field is being added to the data set or ignored, as required. 17. Call the stub BookingsWithData, and click Finish. 18. The software should switch to the Test Factory to show what we have produced, but if not, switch to that perspective. 19. Under the MakeBooking operation, you should see two things with the name BookingsWithData. We have a stub, but we also have a data source. Double‐click this within the Test Factory Tree to open it. Page 113 of 127 © IBM Corporation 2001, 2013
- 116. IBM RATIONAL INTEGRATION TESTER TESTING TRAINING GUIDE 20. The first thing you might notice is that the file name contains a reference to the root directory of a project, written in gold and surrounded by percentage signs. This is a system tag: a variable internal to Rational Integration Tester, which we cannot edit directly. This allows us to refer to the project folder, no matter where that might be located. If the project is moved to another folder or another computer, the link to the CSV file that we are using will still function. 21. Click the Refresh button at the bottom of the screen to view the data within the data source. This should contain the three card types and reservation numbers we recorded previously, along with a status column that states SUCCESS for each. There is also a grouping column provided for us, in case we had recorded data with repeating elements (which would require multiple lines of data). As our data is fairly simple, we do not need to worry about this for now. 22. Close the data source. 23. Open the stub itself, and look at the Input tab. You should notice that the card type is being stored into a tag. 24. Switch to the Output tab, and you will notice that no response is being sent here; in fact, no response message appears to be present at all. This is because the stub that we have Page 114 of 127 © IBM Corporation 2001, 2013
- 118. IBM RATIONAL INTEGRATION TESTER TESTING TRAINING GUIDE 27. Switching to the Store tab, you will be able to see that we are going to save the data from the columns in the data source into corresponding tags within the stub (with the exception of the grouping tag). This will only happen if we find a match; otherwise, any values that might exist within those tags will be left alone. Close the Lookup Test Data Action. 28. Open the Send Reply action. This will be used to send a reply if and only if we found a match within the Lookup Test Data action. 29. Observe the message that is being sent back: this uses the values that were saved into the status and newReservationNumber tags within the Lookup Test Data action, so these values will be coming directly from our data source. Close the Send Reply action. 30. Run the stub, and send some requests to it (either by running tests, or by creating requests using the web interface). You should notice that each card type gets its own reply, based on the data source. Page 116 of 127 © IBM Corporation 2001, 2013
- 119. IBM RATIONAL INTEGRATION TESTER TESTING TRAINING GUIDE 17 Further test automation 17.1 Introduction As you have now created a number of tests, we will now take another look at test automation. Previously, you only took a very short, brief look at viewing test suites and their results. In this module, you will see a few more ways to use test automation and manage your test results. 17.2 Exercise: Passing tags between tests In an earlier module, you were introduced to the concept of tags; global tags were mentioned as a method of passing data between tests. Creating such a tag is quite simple: you just need to create the tag in at least two tests, and mark it as a global tag as you do so. Data can then be shared across the tests using that tag, as long as both tests are run within the same test suite. In this exercise, you will save a reservation number in one test, then check that it exists within the database inside a second test. As with the example using the Run Test action earlier, there is no reason why this goal could not be achieved in a single test, but here you will be using two tests, to understand how tags can be passed between two different tests. 1. Create a new test based on the basicTemplate and call it globalTestOne. 2. Open the Receive Reply step of the test, and go to the Store tab. 3. Quick tag the newReservationNumber field to save it to a tag of the same name, and then close the Receive Reply step. 4. Open the Tag Data Store and locate the newReservationNumber tag that you have just created. 5. Double‐click the tag to open its properties. An Edit Tag dialog box will open. 6. Uncheck the box marked Confine scope to this test, and click OK. 7. In the Tag Data Store, the icon for the newReservationNumber tag should have updated to show that it is a global tag: . Close the Tag Data Store and Save the test. 8. Create an empty test using New > Test, and call it globalTestTwo. 9. Open the Tag Data Store for globalTestTwo, and add a new test tag called newReservationNumber. Make sure you have the spelling and capitalization exactly the same as the tag you used in the previous test. Page 117 of 127 © IBM Corporation 2001, 2013
- 120. IBM RATIONAL INTEGRATION TESTER TESTING TRAINING GUIDE 10. Again, while editing the properties of this test, uncheck the box marked Confine scope to this test. Make sure that the icon for the tag is updated appropriately. 11. Close the Tag Data Store when you are done. 12. Add a new SQL Query action to the test, and open it to the Config tab. 13. For the Database Server, choose the VBooking XA DataSource database. 14. For the query, enter: SELECT COUNT (*) FROM reservation WHERE reservation_number=’%%newReservationNumber%%’ 15. Click the Test button. 16. As you have used a tag in the query, you are now given the opportunity to give it a value when testing the query. Enter A00001 for the newReservationNumber tag, and then click Execute Query. Page 118 of 127 © IBM Corporation 2001, 2013
- 121. IBM RATIONAL INTEGRATION TESTER TESTING TRAINING GUIDE 17. A new window should open, showing that there is one row with that reservation number, which is exactly what you would expect to see when confirming that a particular reservation has been entered into the database. Click Overwrite Expected Result to save this. 18. Click OK to close the test action, and then Save this test. 19. Create a new Test Suite under the MakeBooking operation and call it globalSuite. 20. Add the globalTestOne and globalTestTwo tests to the test suite. Make sure that globalTestOne is run before globalTestTwo. 21. Save the test suite. 22. Run the test suite in the Test Lab. It should pass. Advanced: 23. You might like to add a log action to globalTestTwo to make sure that the tag is actually getting passed along as you would expect, by writing it to the console. 24. What happens if you switch the order of the two tests? Why do you think this happens? 25. What happens if you switch the order of the two tests, and then clear the Continue on Fail boxes in the test suite? 26. If you have switched the order of the tests, put them back in the correct order before going on to the next exercise. 17.3 Managing test results When considering test automation, you might also want to consider which results will be kept, and for how long. Keeping details of every execution of a test suite might start to take up too much space, and there will likely be results of test suites that are irrelevant. For example, you might not want to keep results that are created when initially setting up test suites. You might also decide that you do not want to keep results of suites that failed due to smoke test failures, or that you only need to keep a single set of results from a particular week for long term records. In all of these cases, you need to manage your results. There are two approaches to this: to set expiry dates for test suite results before running the test suite, or to delete old results from the results database after the test suite has been run. Page 119 of 127 © IBM Corporation 2001, 2013
- 122. IBM RATIONAL INTEGRATION TESTER TESTING TRAINING GUIDE The first approach requires you to set up a Test Suite Run Archive Policy. This allows you to say that, for example, the results of any test suites that are run in the next hour will be set to expire after one week, or at any another point in the future. The second approach allows you to go into the Results Gallery, and set an expiry date there, or to simply delete sets of results that are no longer needed. You will observe both approaches in the following exercise. 17.4 Exercise: Managing test results In this exercise, we will use a Test Suite Run Archive Policy to determine how long test suite results should be stored in the results database. Following that, we will then see how we can change expiry dates within the Results Gallery, and finally, how to delete old test suite results. 1. You will take a look at the Test Suite Run Archive Policy first. Before using it, you will need to enable the use of these policies. Go to the Project menu, and choose Preferences. 2. In the General section, you will find an option labeled Prompt for Suite Run Archive Policy. Make sure this is selected, and then click OK to close the dialog box. 3. Run the globalSuite in the Test Lab. 4. A new dialog box will open, allowing you to choose how long you would like to keep your results. For the duration, choose Keep one week, and then select Use this policy for all Suites I run This Session. 5. Click Run with Policy. The test suite will run as it usually does. 6. Run the test suite a second time. While you will not see a prompt this time, the policy that you created in the previous step will be applied. 7. Switch to the Results Gallery to view the results of your test suite. 8. Click the Modify Suite Run Archive Policies button. Page 120 of 127 © IBM Corporation 2001, 2013
- 123. IBM RATIONAL INTEGRATION TESTER TESTING TRAINING GUIDE 9. A Suite Run History window will open, showing all previous executions of this test suite. You should see that the two most recent are set to expire in one week. You can change this expiry date. First, select the row corresponding to the results you would like to alter. 10. Next, set the policy by clicking Keep one month, and then click Apply to Selected. You should see that the expiry date is updated. 11. Finally, you can delete a set of old results. Again, choose a row corresponding to a set of results that you would like to delete. 12. Click the Delete button to delete the results. Be careful not to click the Delete All button, which will remove all of your results. 13. Close the Suite Run History window. 14. On the main toolbar of Rational Integration Tester, there is another Delete button. Click this. A Delete Results window will open. Page 121 of 127 © IBM Corporation 2001, 2013
- 125. IBM RATIONAL INTEGRATION TESTER TESTING TRAINING GUIDE 18 Running tests externally 18.1 Introduction Once you have created a selection of tests, you will not always want to run them from inside Rational Integration Tester. There might be a number of reasons why you want to do this. You might want to run tests from a quality management tool, so that you can link together and report on all of your tests as a group, not just your integration tests. You might want to schedule tests to run at a particular interval; or you might want to look at practices such as continuous integration, and have your build server run a set of tests to check each new build. There are a few different ways you can run tests or test suites outside of Rational Integration Tester: Using the command line Using an Ant script Connecting to a quality management tool Scheduling a test using Rational Test Control Panel Using the command line is fairly simple: use the RunTests command, providing it with parameters for the project, the environment to use, and the test or test suite to run. For example: RunTests –environment Local –project /home/rational/Vacation Booking/Vacation Booking.ghp –run "IBM WebSphere Application Server/MakeBooking/paymentcardType = global" An Ant script can be used by a build server to run tests. To create an Ant script that runs a particular test or test suite, choose Generate Ant Script on the Tools menu. You will then be given the option to choose the resource you would like to run within the Ant script. Tests can be run from linked quality management tools, including IBM Rational Quality Manager and HP Quality Center. As the configuration and execution will vary depending on the software you are using, and the version of that software, refer to the appropriate section of the Rational Integration Tester documentation for more information. After execution, the quality management tools can then link to test results, through links to the Rational Test Control Panel. Finally, tests or test suites can be scheduled from within Rational Integration Tester, to be run at another time. This method uses the Rational Test Control Panel to track the schedules for each test or test suite, and an instance of Rational Test Virtualization Server or Rational Performance Test Server to run the test resource. In this module, you will run a test suite outside Rational Integration Tester by scheduling it. You will then be able to review the results of that test in the Results Gallery or the Rational Test Control Panel. 18.2 Exercise: Scheduling tests In this exercise, you will see an example of running a test suite outside Rational Integration Tester. You will be running the test suite by scheduling it. Once it has been scheduled, you will be able to Page 123 of 127 © IBM Corporation 2001, 2013
- 126. IBM RATIONAL INTEGRATION TESTER TESTING TRAINING GUIDE see that schedule in Rational Test Control Panel. After it runs, you will then be able to observe the results in the Results Gallery as you have done previously. 1. From the Test Factory or Test Lab, select the globalSuite you created earlier. 2. Right‐click the test suite and choose Run… 3. A new window will open. This has a number of extended options for executing test suites. In the top half of the window, you can choose which tests from the test suite should be run. In this case, we will run everything, so click All to make sure that all tests are selected. 4. In the bottom half of this window, make sure that you are looking at the Run tab. 5. Under that tab, you will see three radio buttons describing how to run the test suite; choose Run Test Later. 6. In the Attributes section, you can select which instances of Rational Test Virtualization Server or Rational Performance Test Server can be used to run this test suite. As you only have a single instance of Rational Test Virtualization Server on your computer, you can leave this blank. 7. In the Schedule section, choose Once, and then a time that is a few minutes in the future. If you are using a cloud instance or virtual machine, take note of the time on that machine when doing this step; your local time might be hours ahead or behind the clock on the cloud instance or virtual machine. Page 124 of 127 © IBM Corporation 2001, 2013
- 127. IBM RATIONAL INTEGRATION TESTER TESTING TRAINING GUIDE 8. Click Run to schedule the test suite. You should see a confirmation message. 9. Switch to Rational Test Control Panel using your web browser, and log in. 10. Go to the Scheduling tab of Rational Test Control Panel. You should see the globalSuite listed here, along with the time that it is scheduled for. 11. Once the server reaches the designated time, the test suite should run, and shortly after, you should be able to view the results within the Results Gallery. Page 125 of 127 © IBM Corporation 2001, 2013