Share point training_guide[1]
0 likes940 views

SharePoint Training Guide - created for a client so the overall design is a snapshot of the live intranet. Creating step by step training material ensures speedy user adoption and on-going support; which eases Help Desk queries.


![Replying in a HelpDesk Ticket
Once a ticket is submitted, all contact regarding the issue will be done through the original ticket. If you have
set up the alert correctly, you will receive an email notifying you of any changes to the ticket, including a
reply from a service rep. Once you have received this email, you follow the steps below to reply.
1. From the email, you will see the header
shown above. Click View [ticket name] to
open the ticket in SharePoint
2. To reply, click Edit Item and type your
reply in the Actions Taken field
NB: The email notification will show
which areas have been edited so you
and the service rep can keep track of
changes and correspondence
3. Once your reply is composed, click Save.
The service rep will then receive a
notification via email of the changes you
have made
56](https://image.slidesharecdn.com/sharepointtrainingguide1-140115085321-phpapp01/85/Share-point-training_guide-1-56-320.jpg)


![Basel Ii Share Point Presv[1].2](https://cdn.slidesharecdn.com/ss_thumbnails/baseliisharepointpresv1-2-090728190655-phpapp02-thumbnail.jpg?width=560&fit=bounds)


Ad
More Related Content
What's hot (19)
Similar to Share point training_guide[1] (20)


Ad
More from The Online Consultancy (9)


![Apple v microsoft_pid[1]](https://cdn.slidesharecdn.com/ss_thumbnails/applevmicrosoftpid1-140115084305-phpapp02-thumbnail.jpg?width=560&fit=bounds)

Ad
Recently uploaded (20)


Share point training_guide[1]
- 1. FSCintranet Permissions Every user will have assigned permissions for each area of the site, controlling what they can and can’t do or have access to. This is to make sure that data is protected and that only certain people can make big changes to the site. Permission Levels Viewer Can view pages and list items and download documents. Most users will have this level of permission for their area(s) Contributor Can view, add, update and delete list items and documents Editor Can view, add, update, delete, approve and customize. This is the highest permission level for general users which will only be granted to department managers Full control Will be limited to overall site administrators 1 Permissions can be changed by SharePoint administrators. If you are denied access to a certain site area, you will have the option to request access. You can also send a ticket to the helpdesk for other permission issues.
- 2. Launching SharePoint SharePoint is browser-based, meaning that you access the site using your internet browser. If you are logged in to the FSC network, open a new Internet Explorer page, enter http://fscintranet into the address bar and you will automatically be logged into the homepage of the FSC SharePoint site. Breadcrumb Search function Quick Launch Links RSS Feed Site Widgets Site Widgets Clicking on these images will take you to the corresponding site RSS feed These are links to BBC education news articles Search function Use keywords to search the entire site for files or items. Searching from within sites will only show results from within that site 2
- 3. Navigating the Site By clicking the home button, you will be taken back to the homepage Breadcrumbs This shows you what route you have taken to get to the site you are in. Each step is a link and these can be used to go back through the sites. NB: Some sites do not have a breadcrumb trail. You can instead use this icon at the top of the screen to navigate back. 3
- 4. Quick Launch These are quick links to different files, items and areas of the site Site Content This will show you all lists and libraries within the site you are currently working in. It also allows you to create new site content. This is situated below the Quick Launch on the left pane. You will only be able to see site content which you have permission to view. The Ribbon You can use the SharePoint Ribbon to access the common tasks used for working with lists/libraries. These include creating new items, editing existing items, and viewing items. Additional tasks include deleting items and viewing an item’s version history. If the ribbon is available, tabs will appear next to ‘Browse’ which you can click on to access these different options. You can also use the Ribbon’s List tab to make configuration changes to the list, such as changing which columns appear in the list. The menu commands you see in the Ribbon depend on the kind of list you’re viewing. Usually the Ribbon displays list commands in one of two tabs under List Tools: Items - displays all the commands you need for working with items. List - displays commands for managing and customising the entire list, such as creating views and exporting the list to Excel. 4
- 5. Search Function The search function is available on all site areas to allow you to search for documents or other content within SharePoint. The search bar is located at the top right of each page. Type in your query and then click the magnifying glass to begin the search The results displayed are also based on your permission settings; only areas and content which you are permitted to see will appear in the search results. If you use the search bar on the homepage, it will search the entire site. If you use the search bar within a department site, it will only search that site and any available sub-sites. Write Effective Search Queries - If you type in Learner Key Contacts, for example, the search will look for all results containing learner, key and contacts. To search for the phrase, put quotation marks around it. - The search automatically ignores common words such as in, the, it and by, as well as single digit numbers and capital letters. - To search for filenames only, type filename: before the search. - For more examples, click the Help question mark next to the search bar 5
- 6. SharePoint Sites A page creates a basic page that can be filled with content by editing the page A web part page creates a basic page onto which web parts can be added. A web part is a reusable piece of content or functionality that is inserted into a web part page Sites and workspaces option allows creation of a sub-site within a site that can be filled with content, e.g. the recruitment team have their own subsite within the main marketing site SharePoint Libraries A document library is a place for storing documents or other files you want to share. Document libraries allow content versioning, check in check out and content approval A forms library is a place to manage business forms like status reports or purchase orders. This requires a compatible xml reader such as Microsoft InfoPath A wiki page library is an interconnected set of easily editable web pages. These can contain text, images/ web parts A picture library is a store house of pictures that can go onto the SharePoint site or be used for other purposes such as marketing material or uploading to the company website SharePoint Lists There are various types of lists available in SharePoint (see table below) depending on the type of data that it needs to hold Custom lists can be built if the default templates to do not suit the user’s needs Attachments can be added to list items to include relevant documentation or to separate a particular document from existing libraries 6
- 7. Create Menu Type Announcements Description Benefits To display brief announcements on your You enter expiration dates for each site’s home page announcement Basic Meeting Workspace A site to plan, organize and capture the result of a meeting Agenda management, meeting attendees and relevant documents Blank Meeting Workspace No features by default Customise to suit your needs Blank Site No features by default Customise to suit your needs Blog Site A person or team area to post ideas, observations and expertise Site visitors can comment on blog posts Calendar To track calendar items Can synchronise with Outlook and can handle recurring events Circulations List Use to send information including confirmation stamps to team members Can be used send out memos instead of using Outlook Contacts To track contacts, especially if you use Outlook for data entry You can remove unnecessary columns Custom List To create a list with columns you define Allows you to create a list specific to your content and can act differently depending on content Custom List in Datasheet View A blank list displayed as a spreadsheet You can add your own columns and different views Decision Meeting Workspace Site for meetings that track status/progress or make decisions Provides lists for creating tasks, storing documents and recording decisions Discussion Board To create a forum where people can post messages and reply Can use third-party add-ons Document Library Storing documents to share with the department 7 Add folders, versioning and document check out
- 8. Document Workspace Collaborative area for documents Includes a task list with the ability specifically to assign tasks to users and links to other resources as well as hosting the original document External List To create a list based on data sources outside of SharePoint Allows you to display data from other databases or web services Form Library Manage business forms like status reports and purchase orders Requires Microsoft InfoPath Group Work Site Designed to allow teams to quickly create, organize and share information Includes group calendar, circulations list, phone call memo. Document libraries and basic lists by default HelpDesk Template used for the existing helpdesk Ticket tracking, link to email via alerts Import Spreadsheet To create a list based on an existing spreadsheet No need to recreate data if already in a spreadsheet Issue Tracking To track trouble tickets Works well with open/closed/resolved statuses Knowledgebase Template used for helpdesk knowledgebase Can add various documents and acts as a searchable database of information Links To track hyperlinks Uses hyperlink column which automatically formats text into HTML links Microsoft IME Dictionary List Create an IME dictionary Can be linked to a specific URL, used for multilingual sites Multipage Meeting Site to plan, organize and capture results Workspace of a meeting plus two blank pages to customise Managing agenda and meeting attendees plus the customisable pages Page Easily editable page which can contain text, images, wiki links, lists and web parts 8 Useful for collaborating on small projects
- 9. Picture Library Upload and share pictures Can organise into folders Project Tasks Track work items relating to a particular project Can display information as a Gantt chart Social Meeting Workspace Site to plan social events Provides lists for tracking attendees, providing directions and storing pictures from the event Survey To take a poll Allows you to create a question set for users to go through Tasks To track tasks Can synchronise with Outlook and task lists can be grouped with summary tasks Team Site Allows teams to quickly organize, author and share information Provides document libraries and lists Web Part Page Used to display a collection of information, usually from various sources Can display many types of data including lists, other web pages, search results or data retrieved from other servers Wiki Page Library Interconnected, easily-editable web pages Can contain text, images and web parts 9
- 10. Creating a List/Library 1. Navigate to the site you would like to create content in 2. From Site Actions, click More Options 3. Click on the type of content you would like to create, i.e a new document library 4. Type in a title for the list or library 5. Click More Options to fill in additional information about the list/library 6. Click Create 10
- 11. Deleting a list/library NB: all of the list/library content will be deleted once you delete the list/library. Ensure that you have saved what you need elsewhere before you delete 1. From Site Actions, click Site Settings 2. Under Site Administration, click Site libraries and lists 3. Click Customize (list/library) 4. Under Permissions and Management, click Delete this list/library 11
- 12. Adding List Content In this example, you will see how to add a task to the Task list. 1. Click on the Tasks link from Quick Launch 2. Click ‘Add new item’ 3. Fill in details about the task including title, priority, assigned to and due date (see right). These fields will change depending on the type of list 4. Click Save Some lists have the option to add different types of items. Under Items, under list tools, click the arrow underneath new item. This will show you the different options for list items 12
- 13. Deleting Content from a List/Library 1. Highlight the item you would like to delete 2. Click the arrow which will appear next to the title 3. Click ‘Delete Item’ NB: deleted items will be stored in the user recycle bin for 30 days before being permanently deleted 13
- 14. Exporting Lists to Excel This feature is especially useful if the contents of a list need to be emailed to someone who does not have access to the list on the SharePoint site. This feature does not link the information to an Excel spread sheet, but creates a copy of the current information held. 1. Navigate to the list you would like to export 2. Under List Tools on the ribbon, click ‘List’ 3. Click ‘Export to Excel’ 4. Click OK 5. Click Open when the prompt appears at the bottom of your screen 6. Click Enable 14
- 15. Filtering and Sorting Lists As in Excel, you can sort and filter list items to easily view only certain types of item. This is useful for larger lists or if you only know a certain attribute of an item you are looking for. 1. Hover over the heading of the column you would like to sort or filter 2. An arrow will appear to the right of the column heading. Click the arrow 3. Choose from the sort and filtering options 15
- 16. Views You can change the view of a list/library to only display certain columns/information about the list or library item. This can be done to suit the needs of users who will use the information for different tasks. Creating a view 1. When in a list or library, select Library/List under Library/List Tools on the ribbon 2. Click Create View 3. Select a format for the view. If you would just like to change the columns that are shown, select Standard View 4. You can then set a name for the view, choose a view audience (public or personal), which columns to show and in which order, sort order, set a filter and other options 5. Click OK To change to an existing view, use the breadcrumb trail. The view drop down will appear in lilac, and you can use the drop down menu to switch views, modify the current view or create a new view 16
- 17. Datasheet View You can view the data in a list in a spreadsheet from within SharePoint for a simplified view of data. This is also beneficial to users who feel more comfortable working with data in Excel or similar software. From List Tools on the ribbon, select List and then Datasheet View. The list will then appear like the screenshot below: Add information to cells just as you would in Excel. Depending on the column and type of data the column holds, you may type it in or have a drop down box available. NB: Datasheet view is only available when using Internet Explorer 17
- 18. Edit List Item Properties Item properties can be edited or viewed by selecting either of these options from the drop-down menu made available when the item is selected. ‘View Item’ will bring up a summary of information about the item. ‘Edit Item’ will open a window with the same options which appear when creating an item. View Item In libraries, follow the same process but instead of Edit Item, click the Edit Properties option 18
- 19. Setting Alerts You can set alerts to lists, list items and libraries which means that you will be notified when anything is changed or added. You can set this up for your own email address or for someone else’s. For example, you may want to ensure that your colleagues are kept up-to-date on certain items. 1. When the list, list item or library is open, click Alert Me 2. Click Set alert on this list 3. You can then give the alert a title, choose who receives the alert, what sort of change to alert you of and how often to alert you 4. Click OK 19
- 20. List/Library Settings In any site, open a list or library by clicking its link from the Quick Launch. To access list/library settings, click List/Library under List/Library tools and then List Settings. This will allow you to customize the list/library in various ways. The image below shows these various options. Below these settings are the column and view settings for each list/library. Title, description and navigation From here, you can change the title and description of the list/library and if it should be displayed on the Quick Launch Versioning From here, you can enable content approval requirements, version history and draft item functionality Advanced Settings From here, you can manage content types, item-level permissions, attachment functionality, ability to create new folders, offline client availability, datasheet functionality and dialog launches Columns You can add or delete columns from here. Click on individual columns will allow you to change the content of that column. You also have the option to reorder the columns Views You can create new views or edit existing ones 20
- 21. Save List Template Saving a list as a template can be useful if you need to use lists with similar content, as these can be tweaked after the template is applied instead of building another list from scratch. 1. Open the list from the Quick Launch and then click List Settings on the ribbon (Under List Tools, then List) 2. Under Permissions and Management, click Save list as template 3. Choose a file name, template name and description. You can also choose to include content, which saves items in the list as part of the template, by ticking the box next to Include Content 4. Click Okay once the fields have been filled in and you will see the Operation Completed Successfully screen. 5. Now, if you click More Options from Site Actions, the template you have saved will be available to use on different sites 21
- 22. List Content Types Management Enable content management from the advanced settings within list settings for each individual list. This allows you to create custom lists or customise existing ones so that a list can collect all of the necessary information. Any columns used across the site collection will be available as well as the built-in default column types, once this feature is enabled. Enable Content Management 1. When in the list, click List Settings from under List under List Tolls from the Ribbon 2. Click Advanced Settings 3. Under Allow management of content types? select Yes 4. Click OK Add a Custom Content Column 1. On the List Settings page, there is now a content types section. Click Add from existing site content types 2. From the drop down menu, select All Groups to see all available column types, or select a specific group 3. Select a type you would like to add, then click the Add button 4. Add as many as needed and then click OK 22
- 23. List Content Types Management The example below shows what happens when we add some content types to an announcements list As you can see from the screenshot on the left, in addition to adding an announcement, you can now add a What’s New notification, Official Notice and Event, all of which were added from the content type settings Each item has different fields set by default, but these can be changed from List Settings (see List/Library Settings to find out how) As you can see, this feature allows you do differentiate between types of information within a list or library by putting them into different categories and letting each content type collect different data 23
- 24. Wiki Libraries A wiki library is a place for gathering and storing generic information. It is very quick and easy to edit meaning it can be a dynamic directory resource. An example of a wiki library is the FSC Wiki in our Resource Centre which can be used as an internal Wikipedia page for the business. Links can be embedded in the pages to make navigation intuitive, making it a great place to share information. Wiki pages can be edited as other areas of the site. Editors can choose from various template layouts, default font formats, add images, insert links and add web parts (or link to existing web parts or lists) using the ribbon. From the homepage, click Resource Centre and then click FSC Wiki from the Quick Launch 24 Please contact the HelpDesk for more information, if you would like to add a Wiki library to your site, or you would like to edit an existing Wiki library.
- 25. Creating Surveys Surveys can be created on your site for any purpose. It may be to get feedback from your department or it may be to keep a record of surveys done by external contacts. 1. Under Site Actions, click More Options… 2. Scroll down and click Survey 3. Click More Options 4. Fill in the survey name and description. You can also choose whether to display a link to the survey on the Quick Launch pane, to show user names with results and whether to allow multiple responses 5. Click Create 6. You will now be able to add questions to your survey by filling in the relevant information. The options will change depending on what type of answer you are asking the user for 7. Click Next Question to add more questions to the survey. 8. Click Finish when you have added the questions you need NB: you can edit a survey at any time by going to Survey Settings. Open the survey, click settings and then survey settings 25
- 26. Editing Surveys From Settings on the toolbar, click Survey Settings to edit the survey. From here you can edit the title, individual questions, view permissions and branching logic (see next section). Survey Settings - By default, all users can view all other users’ responses. Change this by going into advanced settings - You can also allow users to submit anonymous responses. Go to title, description and navigation to edit this - You can specify if users can submit multiple responses in title, description and navigation settings Branching Logic You can use branching logic in surveys to change the sequence of questions which appear to users depending on their answer to the previous question. This improves the user experience by skipping irrelevant questions and reduces distortion of results when looking at a summary of the responses given. 1. Create all of the questions for the survey and organize them into a logical order 2. In Survey Settings, open the individual question 4. Select a question for each response 3. Next to branching logic, you will see the possible responses to the question with some drop down boxes which show the possible questions you could branch to 5. Check that the questions you have branched to then go on to or branch to the correct questions 26
- 27. Responding to Surveys 1. Click the survey name from the Quick Launch 2. Click Respond to this survey from the options shown above the survey information 3. A dialog box will appear showing the survey questions. Fill in the questions (red asterisks indicate questions which require an answer) 4. When you have filled in the survey, click Finish To the right is an example of a survey, taken from the HelpDesk. As you can see, there are questions which require different types of answers including rating, tick boxes and written answers 27
- 28. Discussion Boards Discussion boards are a great way to gather feedback and information from staff about any topic. They can be set up on department site pages to encourage collaboration and feedback. To see an example of a discussion board, go to the HelpDesk homepage or the Reviews page in the FSC Wiki situated in the Resource Centre. Each discussion board can have multiple topics set up inside of it relating to an overarching theme so as to not clutter the site’s Quick Launch with lots of topics Create a Discussion Board 1. From Site Actions, select More Options… 2. Select Discussion Board from the available options 3. Click More Options. Type in a name and description for the board and specify if you want it to appear on the Quick Launch 4. Click Create Add a New Discussion 1. Open the Discussion Board from the Quick Launch 2. Click Add new discussion 3. Type in a title and a description. The description will appear as the first post in the discussion 4. Click Save 28
- 29. Add to a Discussion 1. Open the Discussion Board from the Quick Launch 2. Click on the discussion you would like to contribute to 3. To add to the discussion, you must reply to a post. You can just reply to the last post added or back track and reply to a specific earlier post. Click Reply on the right of the post 4. Add your text in the Body field above the quoted post (shown in grey) 5. Click Save Notice that you can also add attachments to posts NB: remember that you can add alerts to lists, including discussions, meaning that you are notified if anything is added 29
- 30. Adding Web Parts Web parts are an easy way to add functionality to your sites. There are default web parts such as announcements and calendars, or you can create one from an existing item on the site. Adding web parts to the home page of your site can give easy access to frequently used items to users. 1. Navigate to the site of your choice and click the ‘Edit’ button on the ribbon 2. Under ‘Editing Tools’, click ‘Insert’ to see more options 3. Click ‘Web Part’ 4. You can then select the web part you would like to add from the selection given and click ‘Add’ NB: This will allow you to link an existing list or library to the page. Create the item before trying to add the web part. 30
- 31. Calendars Syncing to Your Outlook Calendar 1. When the calendar is open, the Calendar Tools tab will appear. Underneath this, click Calendar and then Connect to Outlook 2. Click Allow on the next 2 prompts 3. Click Yes NB: To cancel a sync, delete the SharePoint calendar in Outlook from the left hand pane showing all available calendars by right-clicking the calendar and then Delete Calendar 31
- 32. Calendars Adding Calendar Events 1. Find the date you would like to add an event to. Use the month calendar in the top left and the arrows next to the current month to move around the calendar 2. Hover over the date you would like to add the event to and an + Add link will appear 3. Click Add and then fill in the details 4. Checking the Recurrence box will bring up more options 5. Click Save when all of the details have been added To edit an event once it has been created, doubleclick the event and then click Edit Item 32
- 33. Creating a New Library Folder 1. Go to the library where you would like to create the folder and navigate to the area in which you would like the folder to go 2. Under Library Tools, click Documents 3. Click New Folder 4. Type in a name for the folder 5. Click Save 33
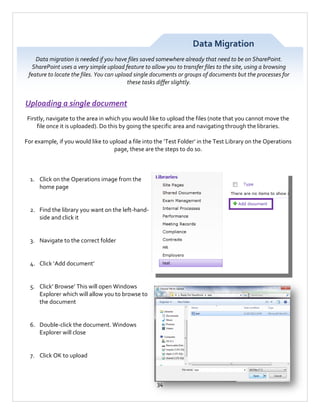
- 34. Data Migration Data migration is needed if you have files saved somewhere already that need to be on SharePoint. SharePoint uses a very simple upload feature to allow you to transfer files to the site, using a browsing feature to locate the files. You can upload single documents or groups of documents but the processes for these tasks differ slightly. Uploading a single document Firstly, navigate to the area in which you would like to upload the files (note that you cannot move the file once it is uploaded). Do this by going the specific area and navigating through the libraries. For example, if you would like to upload a file into the ‘Test Folder’ in the Test Library on the Operations page, these are the steps to do so. 1. Click on the Operations image from the home page 2. Find the library you want on the left-handside and click it 3. Navigate to the correct folder 4. Click ‘Add document’ 5. Click’ Browse’ This will open Windows Explorer which will allow you to browse to the document 6. Double-click the document. Windows Explorer will close 7. Click OK to upload 34
- 35. Data Migration Uploading multiple documents As for a single document, navigate to the folder where you want to upload the files to (note that you cannot move the file once it is uploaded). For example, if you want to upload the 4 test files into the ‘Test Folder’ in the Test Library on the Operations page, these are the steps to do so. 1. Click on the Operations image from the home page 2. Find the library you want on the lefthand side and click it 3. Navigate to the correct folder 4. Click ‘Add document’ 5. Click ‘Upload multiple files’ 6. The window which appears looks similar to Windows Explorer and can be used in much the same way 7. Once you have found the files, tick the boxes next the files you would like to upload and click OK 35
- 36. Data Migration Drag and Drop Uploads There is also a drag-and-drop method of uploading files. Some users may find this easier than browsing to the file. Again, navigate to the folder in which you would like to upload the data and follow these steps. 1. Go into Windows Explorer and find the files you would like to upload 2. After entering a library, the library tools will appear on the ribbon at the top of the page. Click Library on the ribbon. 3. Click ‘Open with Explorer’. A window will appear containing the contents of that folder in Windows Explorer. 4. Select the files and drag them across to the SharePoint folder in the other window. 5. Refresh the SharePoint page and you will see that your files have been uploaded 36
- 37. Saving to SharePoint In Office applications, you have the option to save directly to SharePoint. All new documents should be saved in this way. 1. After creating your document, click File 2. Click Save & Send 3. Click Save to SharePoint 4. Double-click Browse for a location 5. The usual save window will open with your usual browsing functions and areas. Click in the bar at the top so the text is highlighted 6. Type http://fscintranet and press enter 7. The different areas of the SharePoint site will appear in this window. Double-click areas to browse through the site until you find a location for your file 8. Enter a name for the file in the file name box and click Save NB: You can still convert files to PDF when saving by changing the save as type to PDF in the drop down box 37
- 38. Save and Send If you are working on a document which is intended for someone else, you can send the document directly via email if they do not have access to where you would usually save documents. If they do have access, save directly to SharePoint and email them a link, but this is a workaround if this is not the case. 1. Create the document in any of the Office suite applications 2. Click File 3. Click Save and Send 4. Click Send Using Email 5. Then click one of the 5 options for sending (most commonly send as an attachment) 6. A new email window will open in Outlook with the document already attached. Compose you email, add the recipient email address(es) and send as normal 38
- 39. Document Check Out You can check out documents if you need to edit a document but do not want anyone else to access the document while this is in progress. 1. Click the arrow next to the file name and click Check Out 2. Click OK when the prompt appears 3. This icon will appear next to the document type on SharePoint to signify that the document has been checked out 4. Open the document as usual and edit as needed 5. Click Save when done 6. You will be prompted to check the document back in. Click Yes 7. You will then be asked to add comments to the version of the document you are saving. This can be used to let other users what you have changed and why 8. Click OK 39
- 40. Uploading Images Uploading a single image 1. Navigate to the picture library and then the folder within that in which you would like to put the photo in 2. From the four options at the top of the library, click Upload and then Upload Picture 3. Click Browse. 4. Double-click the photo you would like to upload. 5. Click OK 40
- 41. Uploading Images Uploading multiple images 1. Navigate to the picture library and then the folder within that in which you would like to put the photo in 2. From the four options at the top of the library, click Upload and then Upload Multiple Pictures 3. By default, the Picture Manager will show you your picture library. Navigate to the files you would like to upload 4. If the image is not in the picture library, go to file and click locate file. You will then be able to scan drives for images (right-hand pane) 5. Tick the items you would like to upload and click upload and close 41
- 42. Creating a Sub-Site A sub-site can be created in any existing site. It may be useful to use sub-sites when teams are very closely linked but still need separate areas to work within. The process is very similar to that of creating top level sites. 1. Navigate to the site in which you would like to create a sub-site 2. Click ‘Site Actions’ and then ‘New Site’ 3. From here, you can select what kind of site you would like to create, or choose a blank site 4. Type in a title for the site and a URL 5. Going into ‘More Options’ shows options for permissions and site navigation 6. When you have filled in all of the relevant information, click Create The new site will now appear from which you can edit and customize its look and features. The Getting Started links appear on the right of the page and you can use the editing ribbon to make any changes. For more options, go to ‘Site Settings’ from the Site Actions menu 42
- 43. Recycle Bin Deleted items are stored in the recycle bin for a limited amount of time. You can go into the recycle bin to restore documents that may have been accidently deleted. It can be accessed by clicking in the Recycle Bin link at the bottom of the Quick Launch for any page. When a document is restored, it returns to the place it was deleted from, shown next to each item in the recycle bin. Level 1 – User Bin Items are stored here for 30 days before being automatically deleted. Anyone can restore content from here as long as they have the permissions for the file (you will not be able to see files which you do not have permissions to restore). To restore a document, check the box next to the file and then click Restore document at the top of the recycle bin page. Level 2 – Admin Bin Items are stored here for 50 days before being automatically deleted. Only site collection administrators can restore content from here. It is accessed from Site Settings from the Site Actions menu. 43
- 44. SharePoint Glossary Word Sub-site Meaning A site created within another site, useful for departments which are closely linked or department areas which differ significantly List A collection of related information made up of list items Library A collection of related files or data made up of folders and files Check out Taking a document out of a library temporarily so other users cannot edit it while changes are being made Web part A quick way of adding functionality of a site and sometimes linking data from other site areas Quick Launch The left side of each site which shows links to different lists, libraries, sub-sites and surveys which have been configured to be shown on the Quick Launch Breadcrumb A way of navigating back through SharePoint by clicking on each ‘breadcrumb’ link. It will show each area visited as separate links, allowing you to Knowledgebase A large store of information collected over a period of time by the helpdesk plus step-bystep guides FAQs Frequently Asked Questions from our helpdesk tickets HelpDesk ticket A record of an issue with SharePoint which is then sent to the helpdesk Branching Logic Allowing questions to be skipped in surveys depending on the user’s answer The Ribbon An area which shows editing/formatting options for the current site area along the top of the window RSS Feed Really Simple Syndicated Feed – a stream of external data which is automatically updated Wiki Library A collection of wiki pages which are easily editable, designed for generic information which will grow over time Hyperlink A link to an internal or external site which saves data replication Data migration Moving data from one area to another Direct Upload Saving a new document directly to SharePoint 44
- 45. Permissions Rules which dictate which areas of a site a user can access and at what level 45
- 46. Inserting Images 1. Click the edit button in the top left on the toolbar 2. Click on the page where you would like to place the image, making sure that you can see the cursor blinking in the right place 3. Under editing tools and then insert, click Picture 4. Browse to the picture you want and then click OK 46
- 47. Inserting Links You can add links to pages without creating a link list when editing a page. You can have a text link or an image link, and it can link to an internal or external site. 1. Click the edit button in the top left on the toolbar 2. Click on the page where you would like to place the link, making sure that you can see the cursor blinking in the right place 3. Under editing tools and then insert, click Links 4. Type in how you want the link to appear in the first box, and then the web address in the second box. Click OK 5. You can use the format text options on the ribbon to change how the link looks Adding a Link to an Image 1. While in editing mode, select the image you would like to add an image to 2. Under editing tools and then insert, click Link 3. Leave the text to display box blank and type the web address to link to in the second box 47 4. Click OK
- 48. Sending Documents Instead of sending copies of files in SharePoint, it is better to send a link to the document via email. This avoids multiple copies being circulated and changes being lost in shared documents. 1. Navigate to the document you would like to send 2. Tick the check box next to the document you would like to send 3. On the ribbon, under library tools and then Documents, click Email a Link 4. A prompt will then appear to ask if you want to do this through Outlook. Click Allow 5. Outlook will then open with the link to the document already pasted into the message. Send the message as you would normally in Outlook 48
- 49. HelpDesk Click this logo from the intranet homepage to be taken to the helpdesk site. From here, you can access all support documentation and create a helpdesk ticket. You will also find announcements about the network i.e. in case there is any downtime, or known issues which the helpdesk is working on. The process for support is self-serve followed by assisted-serve. This means that users will search the FAQs and knowledge base for issues first before contacting the helpdesk. If the material there does not help you, or you need assistance quickly, you can create a helpdesk ticket. Use these links to navigate through the HelpDesk. Our FAQs are taken from questions most commonly asked through HelpDesk tickets. Our knowledgebase library is filled with articles about the SharePoint site, site features, step-bysteps and advice on using the site, including the HelpDesk. Use the search function to find specific articles or browse through to learn more about the site. Create a Ticket Now immediately opens a blank helpdesk ticket for you to fill out. A HelpDesk representative will be notified of your request and will get back to you as soon as possible. 49
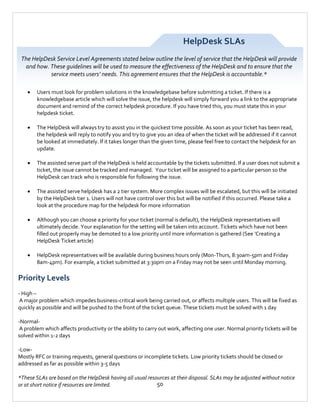
- 50. HelpDesk SLAs The HelpDesk Service Level Agreements stated below outline the level of service that the HelpDesk will provide and how. These guidelines will be used to measure the effectiveness of the HelpDesk and to ensure that the service meets users’ needs. This agreement ensures that the HelpDesk is accountable.* Users must look for problem solutions in the knowledgebase before submitting a ticket. If there is a knowledgebase article which will solve the issue, the helpdesk will simply forward you a link to the appropriate document and remind of the correct helpdesk procedure. If you have tried this, you must state this in your helpdesk ticket. The HelpDesk will always try to assist you in the quickest time possible. As soon as your ticket has been read, the helpdesk will reply to notify you and try to give you an idea of when the ticket will be addressed if it cannot be looked at immediately. If it takes longer than the given time, please feel free to contact the helpdesk for an update. The assisted serve part of the HelpDesk is held accountable by the tickets submitted. If a user does not submit a ticket, the issue cannot be tracked and managed. Your ticket will be assigned to a particular person so the HelpDesk can track who is responsible for following the issue. The assisted serve helpdesk has a 2 tier system. More complex issues will be escalated, but this will be initiated by the HelpDesk tier 1. Users will not have control over this but will be notified if this occurred. Please take a look at the procedure map for the helpdesk for more information Although you can choose a priority for your ticket (normal is default), the HelpDesk representatives will ultimately decide. Your explanation for the setting will be taken into account. Tickets which have not been filled out properly may be demoted to a low priority until more information is gathered (See ‘Creating a HelpDesk Ticket article) HelpDesk representatives will be available during business hours only (Mon-Thurs, 8:30am-5pm and Friday 8am-4pm). For example, a ticket submitted at 3:30pm on a Friday may not be seen until Monday morning. Priority Levels - High – A major problem which impedes business-critical work being carried out, or affects multiple users. This will be fixed as quickly as possible and will be pushed to the front of the ticket queue. These tickets must be solved with 1 day -NormalA problem which affects productivity or the ability to carry out work, affecting one user. Normal priority tickets will be solved within 1-2 days -LowMostly RFC or training requests, general questions or incomplete tickets. Low priority tickets should be closed or addressed as far as possible within 3-5 days *These SLAs are based on the HelpDesk having all usual resources at their disposal. SLAs may be adjusted without notice 50 or at short notice if resources are limited.
- 51. FAQs and the knowledgebase can be access from the HelpDesk quick launch or the respective icons on the HelpDesk homepage Frequently Asked Questions (FAQs) The FAQs should be the first place you visit seeking solutions from the helpdesk. You will find help and step-by-step guides for the most common issues here. Click the cross to the left of each question to see its contents. This will show the question, the answer and if there is an attached file. An attachment is signified by a paperclip in the last column on the right. To view an attachment, open the question by clicking on the purple link (the question) once its contents have been shown The FAQs will updated as more information is gathered from helpdesk tickets Knowledgebase The knowledgebase is a searchable database of all of the information and advice available through the helpdesk. This is made up of step-by-step guides and information gathered from helpdesk tickets. If the issue has been solved before or is a basic step-by-step, you will find it here. Use the search function when in the knowledgebase to quickly find information, or navigate through the library to browse the information available 51
- 52. HelpDesk Tickets If you have not found the solution to your issue in the knowledgebase, you can create a helpdesk ticket to ask for support. This will notify the helpdesk of your issue so they can try to resolve it. Click Create a Service Request from the Quick Launch in the HelpDesk or click the Create a Ticket Now icon from the helpdesk homepage When to Create a HelpDesk ticket: You have an issue which is not solved by a knowledgebase article, FAQ or step-by-step guide The issue is urgent, e.g. it affects all users, you cannot do any work until the issue is solved You would like to make a change to your department site which you cannot do, possibly because of the permissions you have (requests for new features should be approved and sent by departmental managers) You would like training on an area of SharePoint or would like more information about a certain feature Your permissions do not allow you to access a certain area or complete a task that you think you should be able to do 52
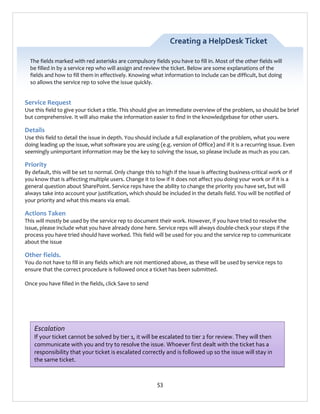
- 53. Creating a HelpDesk Ticket The fields marked with red asterisks are compulsory fields you have to fill in. Most of the other fields will be filled in by a service rep who will assign and review the ticket. Below are some explanations of the fields and how to fill them in effectively. Knowing what information to include can be difficult, but doing so allows the service rep to solve the issue quickly. Service Request Use this field to give your ticket a title. This should give an immediate overview of the problem, so should be brief but comprehensive. It will also make the information easier to find in the knowledgebase for other users. Details Use this field to detail the issue in depth. You should include a full explanation of the problem, what you were doing leading up the issue, what software you are using (e.g. version of Office) and if it is a recurring issue. Even seemingly unimportant information may be the key to solving the issue, so please include as much as you can. Priority By default, this will be set to normal. Only change this to high if the issue is affecting business-critical work or if you know that is affecting multiple users. Change it to low if it does not affect you doing your work or if it is a general question about SharePoint. Service reps have the ability to change the priority you have set, but will always take into account your justification, which should be included in the details field. You will be notified of your priority and what this means via email. Actions Taken This will mostly be used by the service rep to document their work. However, if you have tried to resolve the issue, please include what you have already done here. Service reps will always double-check your steps if the process you have tried should have worked. This field will be used for you and the service rep to communicate about the issue Other fields. You do not have to fill in any fields which are not mentioned above, as these will be used by service reps to ensure that the correct procedure is followed once a ticket has been submitted. Once you have filled in the fields, click Save to send Escalation If your ticket cannot be solved by tier 1, it will be escalated to tier 2 for review. They will then communicate with you and try to resolve the issue. Whoever first dealt with the ticket has a responsibility that your ticket is escalated correctly and is followed up so the issue will stay in the same ticket. 53
- 54. Exemplary HelpDesk Ticket Why is this a good helpdesk ticket? The title reflects the issue – calendar events are not being updated in Outlook when being added to SharePoint The user has looked at the step-by-step guides for help first and followed them The problem details clearly outline the issue The user has asked others if they have experienced the same issue first. Because others are not experiencing it, it narrows down the possible causes as it is most likely a local issue The user has added to the Actions Taken fields, emphasising that they have tried the step-bystep The user has chosen the correct priority. It does not affect important work. 54
- 55. Create a HelpDesk ticket 1. When in the helpdesk, click Create a Service Request from the Quick Launch or click the Create a Ticket Now! icon from the helpdesk homepage 2. This will open a blank ticket. Fill in the required fields and optionally, the Actions Taken field. 3. Click Save to send the ticket 4. You will then see a list of other tickets. Open the ticket you have just created by clicking on the question title 5. Click Alert Me 6. Ensure that your name is in the Sent Alerts To Users field. 7. Look through the options for when the alert is sent and change them to suit your preference. 8. Click OK. Setting up the alert is necessary so that you are notified when a service rep has replied to you. All contact regarding the issue will be done through the ticket you set up so it can be recorded. 55
- 56. Replying in a HelpDesk Ticket Once a ticket is submitted, all contact regarding the issue will be done through the original ticket. If you have set up the alert correctly, you will receive an email notifying you of any changes to the ticket, including a reply from a service rep. Once you have received this email, you follow the steps below to reply. 1. From the email, you will see the header shown above. Click View [ticket name] to open the ticket in SharePoint 2. To reply, click Edit Item and type your reply in the Actions Taken field NB: The email notification will show which areas have been edited so you and the service rep can keep track of changes and correspondence 3. Once your reply is composed, click Save. The service rep will then receive a notification via email of the changes you have made 56
- 57. CRM SharePoint has a dedicated CRM site designed specifically as a place to house contact information, company information and correspondence records. The information held in these lists can be exported to Excel, Access, Outlook or can be edited within SharePoint itself to make it easier for the user to manage in an environment they feel comfortable with. The phone call memo feature ensures that users can effectively work as a team, assigning memos as tasks to certain users while having the ability to keep this information confidential. The phone call memo is an extremely useful feature to record correspondence or to make a note of something to be followed up. You can assign someone else to the memo with the option to keep it confidential between you and any other users added. 57
- 58. Adding a Logo to a Contact 1. Open the Logo library 2. Click on the logo you would like to add to a company. Click on the image, which should be the only thing on the web page 3. Copy the web address on the page 4. Open the contact list and then the contact you would like to add the logo to 5. Click Edit item 6. Paste the web address into the logo field. You can also test the link by clicking Click here to test Once contacts are added here, they are automatically added to the CRM contacts in Outlook, where you can edit them further 58
- 59. Managing Contacts As the CRM contacts in SharePoint are synced with Outlook, contacts can be edited in either place and will be automatically updated in both places. From SharePoint 6. From the contacts list within the CRM site, click the last name of the contact you want to edit (the link will be purple) 7. Click Edit 8. Edit the fields you would like to change 9. Click Save From SharePoint Datasheet 5. Open datasheet view by selecting the All data view, or selecting datasheet view from the ribbon under List 6. Edit or create new records by clicking the cells and then typing information in NB: Datasheet view is only available when using Internet Explorer 59
- 60. Phone Call Memos Call From: Fill in the name of the person you spoke to Recipients: Who you would like to send the memo to (or you can just add your name) Confidential: Tick this if you want only the recipients of the memo to be able to see it Call Back: Tick this if you need to call the person back Call Back Number: Type in the contact number of the person you spoke to Message: Add the memo message. This can be notes about the call or tasks for other people to follow up Date/Time: Record the time and date of the call 60
- 61. CRM Connect to Outlook CRM contacts can be linked to Outlook in one of two ways: syncing the list to Outlook or exporting a specific contact to Outlook This option will sync the contact list with your Outlook address book, meaning that any changes made in SharePoint will be made in Outlook and vice versa. 1. On the ribbon in the Contacts list, click List under List Tools 2. Click Connect to Outlook 3. Click Allow on the two warning messages which appears 4. Click Yes 5. Outlook will then create a CRM group in the address book which will appear Contacts in CRM are already synced to the CRM mailbox. If you do not think they are connected, try the above steps but note that this will sync the list to your own contacts list 61
- 62. CRM Export Contact CRM contacts can be linked to Outlook in one of two ways: syncing the list to Outlook or exporting a specific contact to Outlook This option will export one contact to Outlook and allow you to edit it in Outlook. This is not a sync, and updates will not happen. 6. Click the arrow next to the last name of the contact you would like to export 7. Click Export Contact 8. Click Open on the message which appears at the bottom of the Window 9. The contact will then open in Outlook. You can then edit the contact 10. Click Save and Close Contacts will already sync with the CRM list. Try the above steps if you think that one contact is not updating but note that it will export it to your personal contacts and will not sync permanently 62
- 63. Resource Centre The Resource Centre is accessible by any member of FSC staff and is designed to hold non-sensitive information and documentation that needs to be accessed by various members of staff across multiple departments. There is also a company calendar, task list and company announcements list to share information. The Quick Launch shows libraries for various departments to share their files in. There are also links to FSC websites and important company documentation. The FSC Wiki is also in the Resource Centre, which you can visit to read about different aspects of the company, get advice on best practice or join a discussion. Submit a ticket to the HelpDesk if you would like to add to the Wiki. 63