SlideShare a Scribd company logo
1
Introduction to
HTML
Presented by Dr.Sm.Badhusha
Sr.Professor/CSE
2
Definitions
HTML : HyperText Markup Language – The Language of Web
Pages on the World Wide Web.
HTML is a text formatting language.
URL : Uniform Resource Locator.
Browser :A software program which is used to show webpages.
WWW: A collection of websites or web pages stored in web
servers.Building blocks of webpages connected by hyperlinks and
HTTP
3
 “Normal text” surrounded by
bracketed tags that tell browsers
how to display web pages
 Pages end with “.htm” or “.html”
 Hypertext Markup Language, a
standardized system for tagging
text files to achieve font, colour,
graphic, and hyperlink effects on
World Wide Web pages.
4
Tags
 Codes enclosed in brackets
 Usually paired
<TITLE>My Web Page</TITLE>
 Not case sensitive
<TITLE> = <title> = <TITLE>
But preferably upper case is used
5
Creating a Basic Starting
Document
<HTML>
<HEAD>
<TITLE>Alva’s Institute of Engineering &Technology</TITLE>
</HEAD>
<BODY>
This is what is displayed on webpage
</BODY>
</HTML>
6
Creating a Basic Starting
Document
 The HEAD of your document point to above
window part. The TITLE of your document
appears in the very top line of the user’s
browser.
 The text in your TITLE should be as
descriptive as possible because this is what
many search engines, on the internet, use for
indexing your site.
7
Setting Document Properties
 Document properties are controlled by
attributes of the BODY element. For
example, there are color settings for the
background color of the page, the
document’s text and different states of
links.
<BODY BGCOLOR=“#FFFFFF” text=#000000></BODY>
8
Color Codes
• Colors are set using “RGB” color codes,
which are, represented as hexadecimal
values. Each 2-digit section of the code
represents the amount, in sequence, of
red, green or blue that forms the color. For
example, a RGB value with 00 as the first
two digits has no red in the color.
9
Main Colours
10
RGB Colour Model
11
16 Basic Colors
12
Color Codes
1. WHITE
2. BLACK
3. RED
4. GREEN
5. BLUE
6. MAGENTA
7. CYAN
8. YELLOW
9. AQUAMARINE
10. BAKER’S CHOCOLATE
11. VIOLET
12. BRASS
13. COPPER
14. PINK
15. ORANGE
1. #FFFFFF
2. #000000
3. #FF0000
4. #00FF00
5. #0000FF
6. #FF00FF
7. #00FFFF
8. #FFFF00
9. #70DB93
10. #5C3317
11. #9F5F9F
12. #B5A642
13. #B87333
14. #FF6EC7
15. #FF7F00
13
The Body Element
• The BODY element of a web page is an
important element in regards to the page’s
appearance. Here are the attributes of the
BODY tag to control all the levels:
TEXT="#RRGGBB" to change the color of all
the text on the page (full page text color.)
 This element contains information about the
page’s background color, the background image,
as well as the text and link colors.
14
Background Color
It is very common to see web pages with
their background color set to white or some
other colors.
To set your document’s background color,
you need to edit the <BODY> element by
adding the BGCOLOR attribute. The
following example will display a document
with a white background color:
<BODY BGCOLOR=“#FFFFFF”></BODY>
15
TEXT Color
 The TEXT attribute is used to control the
color of all the normal text in the
document. The default color for text is
black. The TEXT attribute would be added
as follows:
<BODY BGCOLOR=“#FFFFFF”
TEXT=“#FF0000”></BODY>
In this example the document’s page
color is white and the text would be red.
16
Using Image Background
 The BODY element also gives you ability of
setting an image as the document’s background.
 An example of a background image’s HTML code
is as follows:
<BODY BACKGROUND=“hi.gif”
BGCOLOR=“#FFFFFF”></BODY>
17
Headings, <Hx> </Hx>
 Inside the BODY element, heading elements
H1 through H6 are generally used for major
divisions of the document. Headings are
permitted to appear in any order, but you will
obtain the best results when your documents
are displayed in a browser if you follow these
guidelines:
1. H1: should be used as the highest level of heading, H2
as the next highest, and so forth.
2. You should not skip heading levels: e.g., an H3 should
not appear after an H1, unless there is an H2 between
them.
18
Headings, <Hx> </Hx>
<HTML>
<HEAD>
<TITLE> Example Page</TITLE>
</HEAD>
<BODY>
<H1> Heading 1 </H1>
<H2> Heading 2 </H2>
<H3> Heading 3 </H3>
<H4> Heading 4 </H4>
<H5> Heading 5 </H5>
<H6> Heading 6 </H6>
</BODY>
</HTML>
Heading 1
Heading 2
Heading 3
Heading 4
Heading 5
Heading 6
19
Paragraphs, <P> </P>
 Paragraphs allow you to add text to a
document in such a way that it will
automatically adjust the end of line to suite
the window size of the browser in which it
is being displayed. Each line of text will
stretch the entire length of the window.
20
Paragraphs, <P> </P>
<HTML><HEAD>
<TITLE> Example Page</TITLE>
</HEAD>
<BODY></H1> Heading 1 </H1>
<P> Paragraph 1, ….</P>
<H2> Heading 2 </H2>
<P> Paragraph 2, ….</P>
<H3> Heading 3 </H3>
<P> Paragraph 3, ….</P>
<H4> Heading 4 </H4>
<P> Paragraph 4, ….</P>
<H5> Heading 5 </H5>
<P> Paragraph 5, ….</P>
<H6> Heading 6</H6>
<P> Paragraph 6, ….</P>
</BODY></HTML>
Heading 1
Paragraph 1,….
Heading 2
Paragraph 2,….
Heading 3
Paragraph 3,….
Heading 4
Paragraph 4,….
Heading 5
Paragraph 5,….
Heading 6
Paragraph 6,….
21
Break, <BR>
 Line breaks allow you to decide where the text
will break on a line or continue to the end of the
window.
 A <BR> is an empty Element, meaning that it
may contain attributes but it does not contain
content.
 The <BR> element does not have a closing tag.
22
Break, <BR>
<HTML>
<HEAD>
<TITLE> Example Page</TITLE>
</HEAD>
<BODY>
<H1> Heading 1 </H1>
<P>Paragraph 1, <BR>
Line 2 <BR> Line 3 <BR>….
</P>
</BODY>
</HTML>
Heading 1
Paragraph 1,….
Line 2
Line 3
….
23
Horizontal Rule, <HR>
 The <HR> element causes the
browser to display a horizontal
line (rule) in your document.
 <HR> does not use a closing tag,
</HR>.
24
Horizontal Rule, <HR>
Attribute Description Default Value
SIZE Height of the rule in
pixels 2 pixels
WIDTH Width of the rule in
pixels or percentage
of screen width 100%
NOSHADE Draw the rule with a
flat look instead of a
3D look
Not set
(3D look)
ALIGN Aligns the line (Left,
Center, Right) Center
COLOR Sets a color for the
rule (IE 3.0 or later) Not set
25
Horizontal Rule, <HR>
<HTML>
<HEAD>
<TITLE> Example Page</TITLE>
</HEAD>
<BODY>
<H1> Heading 1 </H1>
<P>Paragraph 1, <BR>
Line 2 <BR>
<HR>Line 3 <BR>
</P>
</BODY>
</HTML>
Heading 1
Paragraph 1,….
Line 2
______________________
_____
Line 3
26
Bold, Italic and other Character Formatting
Elements
 <FONT SIZE=“+2”> Two sizes bigger</FONT>
 The size attribute can be set as an absolute value from 1 to 7
or as a relative value using the “+” or “-” sign. Normal text size
is 3 (from -2 to +4).
 <B> Bold </B>
 <I> Italic </I>
 <U> Underline </U>
 Color = “#RRGGBB” The COLOR attribute of the FONT
element. E.g., <FONT COLOR=“#RRGGBB”>this text has
color</FONT>
 <PRE> Preformatted </PRE> Text enclosed by PRE tags is
displayed in a mono-spaced font. Spaces and line breaks are
supported without additional elements or special characters.
27
Bold, Italic and other Character Formatting
Elements
 <EM> Emphasis </EM> Browsers usually
display this as italics.
 <STRONG> STRONG </STRONG> Browsers
display this as bold.
 <TT> TELETYPE </TT> Text is displayed in a
mono-spaced font. A typewriter text, e.g. fixed-
width font.
 <CITE> Citation </CITE> represents a document
citation (italics). For titles of books, films, etc.
Typically displayed in italics. (A Beginner's
Guide to HTML)
28
Bold, Italic and other Character Formatting
Elements
<P> <FONT SIZE=“+1”> One
Size Larger </FONT> - Normal
–
<FONT SIZE=“-1”> One Size
Smaller </FONT> <BR>
<B> Bold</B> - <I> italics</I> -
<U> Underlined </U> -
<FONT COLOR=“#FF0000”>
Colored </FONT> <BR>
<EM> Emphasized</EM> -
<STRONG> Strong
</STRONG> - <TT> Tele Type
</TT> <BR>
One Size Larger - Normal – One
Size Smaller
Bold - italics - Underlined -
Colored
Emphasized - Strong - Tele
Type
29
Alignment
 Some elements have attributes for
alignment (ALIGN) e.g. Headings,
Paragraphs and Horizontal Rules.
 The Three alignment values are : LEFT,
RIGHT, CENTER.
 <CENTER></CENTER> Will center
elements.
30
Alignment
 <DIV ALIGN=“value”></DIV> Represents
a division in the document and can contain
most other element type. The alignment
attribute of the DIV element is well
supported.
 <TABLE></TABLE> Inside a TABLE,
alignment can be set for each individual
cell.
31
Special Characters & Symbols
 These Characters are recognized in HTML as
they begin with an ampersand and end with with
a semi-colon e.g. &value; The value will either
be an entity name or a standard ASCII character
number. They are called escape sequences.
 The next table represents some of the more
commonly used special characters. For a
comprehensive listing, visit the W3C’s section on
special characters at:
http://www.w3.org/MarkUp/HTMLPlus/htmlplus_13.html
32
Special Characters & Symbols
Special
Character Entity
Name Special
Character Entity
Name
Ampersand &amp; & Greater-than
sign &gt; >
Asterisk &lowast;
∗∗ Less-than sign &lt; <
Cent sign &cent; ¢ Non-breaking
space &nbsp;
Copyright &copy; © Quotation mark &quot; "
Fraction one
qtr &frac14;
¼ Registration
mark &reg; ®
Fraction one
half &frac12;
½ Trademark
sign &trade;
™
33
• Additional escape sequences support accented
characters, such as:
• &ouml;
– a lowercase o with an umlaut: ö
• &ntilde;
– a lowercase n with a tilde: ñ
• &Egrave;
– an uppercase E with a grave accent: È
NOTE: Unlike the rest of HTML, the escape
sequences are case sensitive. You cannot, for
instance, use &LT; instead of &lt;.
Special Characters & Symbols
34
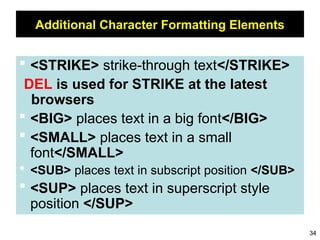
Additional Character Formatting Elements
 <STRIKE> strike-through text</STRIKE>
DEL is used for STRIKE at the latest
browsers
 <BIG> places text in a big font</BIG>
 <SMALL> places text in a small
font</SMALL>
 <SUB> places text in subscript position </SUB>
 <SUP> places text in superscript style
position </SUP>
35
Example
<P><STRIKE> strike-through text </STRIKE></BR>
<BIG>places text in a big font </BIG><BR>
<SMALL> places text in a small font</SMALL><BR>
<SUB> places text in subscript position </SUB>
Normal
<SUP> places text in superscript style position
</SUP><BR> </P>
36
List Elements
 HTML supplies several list elements. Most list elements
are composed of one or more <LI> (List Item) elements.
 UL : Unordered List. Items in this list start with a list mark
such as a bullet. Browsers will usually change the list
mark in nested lists.
<UL>
<LI> List item …</LI>
</UL>
• List item …
• List item …
37
List Elements
 You have the choice of three bullet types: disc(default),
circle, square.
 These are controlled in Netscape Navigator by the
“TYPE” attribute for the <UL> element.
<UL TYPE=“square”>
<LI> List item …</LI>
</UL>
 List item …
 List item …
 List item …
38
List Elements
 OL: Ordered List. Items in this list are numbered
automatically by the browser.
<OL>
<LI> List item …</LI>
</OL>
1. List item …
2. List item …
3. List item
 You have the choice of setting the TYPE Attribute to
one of five numbering styles.
39
List Elements
TYPE Numbering Styles
1 Arabic numbers 1,2,3, ……
a Lower alpha a, b, c, ……
A Upper alpha A, B, C, ……
i Lower roman i, ii, iii, ……
I Upper roman I, II, III, ……
40
List Elements
 You can specify a starting number for an ordered
list.
<OL TYPE =“i”>
<LI> List item …</LI>
</OL>
<P> text ….</P>
<OL TYPE=“i” START=“3”>
<LI> List item …</LI>
</OL>
41
List Elements
i. List item …
ii. List item …
Text ….
iii. List item …
42
List Elements
 DL: Definition List. This kind of list is different from the
others. Each item in a DL consists of one or more
Definition Terms (DT elements), followed by one or
more Definition Description (DD elements).
<DL>
<DT> HTML </DT>
<DD> Hyper Text Markup Language </DD>
<DT> DOG </DT>
<DD> A human’s best friend!</DD>
</DL>
HTML
Hyper Text Markup Language
DOG
A human’s best friend!
43
Nesting Lists
 You can nest lists by inserting a UL, OL, etc., inside a list
item (LI).
EXample
<UL TYPE = “square”>
<LI> List item …</LI>
<LI> List item …
<OL TYPE=“i” START=“3”>
<LI> List item …</LI>
</OL>
</LI>
<LI> List item …</LI>
</UL>
44
<H1 ALIGN="CENTER">SAFETY TIPS FOR
CANOEISTS</H1>
<OL TYPE=“a” START=“2”>
<LI>Be able to swim </LI>
<LI>Wear a life jacket at all times </LI>
<LI>Don't stand up or move around. If canoe tips,
<UL>
<LI>Hang on to the canoe </LI>
<LI>Use the canoe for support and </LI>
<LI>Swim to shore
</UL> </LI>
<LI>Don't overexert yourself </LI>
<LI>Use a bow light at night </LI>
</OL>
What will be the output?
45
The output….
46
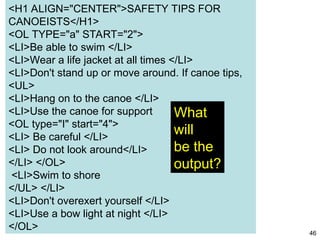
<H1 ALIGN="CENTER">SAFETY TIPS FOR
CANOEISTS</H1>
<OL TYPE="a" START="2">
<LI>Be able to swim </LI>
<LI>Wear a life jacket at all times </LI>
<LI>Don't stand up or move around. If canoe tips,
<UL>
<LI>Hang on to the canoe </LI>
<LI>Use the canoe for support
<OL type="I" start="4">
<LI> Be careful </LI>
<LI> Do not look around</LI>
</LI> </OL>
<LI>Swim to shore
</UL> </LI>
<LI>Don't overexert yourself </LI>
<LI>Use a bow light at night </LI>
</OL>
What
will
be the
output?
47
The output….
48
Images
 <IMG>This element defines a graphic image on
the page.
 Image File (SRC:source): This value will be a
URL (location of the image) E.g.
http://www.domain.com/dir/file.ext or /dir/file.txt.
 Alternate Text (ALT): This is a text field that
describes an image or acts as a label. It is
displayed when they position the cursor over a
graphic image.
 Alignment (ALIGN): This allows you to align the
image on your page.
49
Images
 Width (WIDTH): is the width of the image in pixels.
 Height (HEIGHT): is the height of the image in
pixels.
 Border (BORDER): is for a border around the
image, specified in pixels.
 HSPACE: is for Horizontal Space on both sides of
the image specified in pixels. A setting of 5 will put 5
pixels of invisible space on both sides of the image.
 VSPACE: is for Vertical Space on top and bottom of
the image specified in pixels. A setting of 5 will put 5
pixels of invisible space above and bellow the
image.
50
Some Examples on images
1) <IMG SRC=“jordan.gif“ border=4>
2) <IMG SRC=" jordan.gif" width="60"
height="60">
3) <IMG SRC=“jordan.gif" ALT="This is a
text that goes with the image">
4) <IMG SRC=" jordan.gif “ Hspace="30"
Vspace="10" border=20>
5) < IMG SRC =" jordan.gif“ align="left">
blast blast blast blast blast
51
HOW TO MAKE A LINK
1) The tags used to produce links are the <A>
and </A>. The <A> tells where the link should start and
the </A> indicates where the link ends. Everything between
these two will work as a link.
2) The example below shows how to make the word
Here work as a link to yahoo.
Click <A HREF="http://www.yahoo.com">here</A> to
go to yahoo.
52
LINK, VLINK, and ALINK
These attributes control the colors of the different link
states:
1. LINK – initial appearance – default = Blue.
2. VLINK – visited link – default = Purple.
3. ALINK –active link being clicked–default= Yellow.
The Format for setting these attributes is:
<BODY BGCOLOR=“#FFFFFF” TEXT=“#FF0000”
LINK=“#0000FF”
VLINK=“#FF00FF”
ALINK=“FFFF00”> </BODY>
53
<body LINK="#C0C0C0" VLINK="#808080"
ALINK="#FF0000">
• LINK - standard link - to a page the visitor hasn't
been to yet. (standard color is blue - #0000FF).
VLINK - visited link - to a page the visitor has been to
before. (standard color is purple - #800080).
ALINK - active link - the color of the link when the
mouse is on it. (standard color is red - #FF0000).
If the programmer what to change the color
• Click <a href="http://www.yahoo.com"><font
color="FF00CC">here</font></a> to go to yahoo.
More on LINKs
54
Internal Links
 Internal Links : Links can also be created inside large
documents to simplify navigation. Today’s world wants to be
able to get the information quickly. Internal links can help you
meet these goals.
1. Select some text at a place in the document that you would
like to create a link to, then add an anchor to link to like this:
<A NAME=“bookmark_name”></A>
The Name attribute of an anchor element specifies a location
in the document that we link to shortly. All NAME attributes in
a document must be unique.
2. Next select the text that you would like to create as a link to
the location created above.
<A HREF=“#bookmark_name”>Go To Book Mark</A>
55
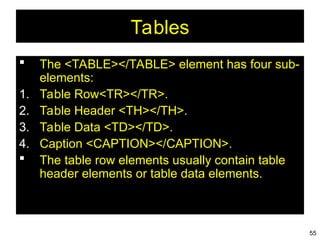
Tables
 The <TABLE></TABLE> element has four sub-
elements:
1. Table Row<TR></TR>.
2. Table Header <TH></TH>.
3. Table Data <TD></TD>.
4. Caption <CAPTION></CAPTION>.
 The table row elements usually contain table
header elements or table data elements.
56
Tables
<table border=“1”>
<tr>
<th> Column 1 header </th>
<th> Column 2 header </th>
</tr>
<tr>
<td> Row1, Col1 </td>
<td> Row1, Col2 </td>
</tr>
<tr>
<td> Row2, Col1 </td>
<td> Row2, Col2 </td>
</tr>
</table>
57
Tables
Column 1 Header Column 2 Header
Row1, Col1 Row1, Col2
Row2, Col1 Row2, Col2
58
Tables Attributes
 BGColor: Some browsers support background
colors in a table.
 Width: you can specify the table width as an
absolute number of pixels or a percentage of the
document width. You can set the width for the
table cells as well.
 Border: You can choose a numerical value for
the border width, which specifies the border in
pixels.
 CellSpacing: Cell Spacing represents the space
between cells and is specified in pixels.
59
Table Attributes
 CellPadding: Cell Padding is the space
between the cell border and the cell
contents and is specified in pixels.
 Align: tables can have left, right, or
center alignment.
 Background: Background Image, will be
titled in IE3.0 and above.
 BorderColor, BorderColorDark.
60
Table Caption
 A table caption allows you to specify a line of
text that will appear centered above or bellow
the table.
<TABLE BORDER=1 CELLPADDING=2>
<CAPTION ALIGN=“BOTTOM”> Label For My Table
</CAPTION>
 The Caption element has one attribute ALIGN
that can be either TOP (Above the table) or
BOTTOM (below the table).
61
Table Header
 Table Data cells are represented by the
TD element. Cells can also be TH (Table
Header) elements which results in the
contents of the table header cells
appearing centered and in bold text.
62
Table Data and Table Header
Attributes
 Colspan: Specifies how many cell columns of the table
this cell should span.
 Rowspan: Specifies how many cell rows of the table this
cell should span.
 Align: cell data can have left, right, or center alignment.
 Valign: cell data can have top, middle, or bottom
alignment.
 Width: you can specify the width as an absolute number
of pixels or a percentage of the document width.
 Height: You can specify the height as an absolute
number of pixels or a percentage of the document height.
63
<TABLE BORDER=1 width=50%>
<CAPTION> <h1>Spare Parts <h1> </Caption>
<TR><TH>Stock Number</TH><TH>Description</TH><TH>List
Price</TH></TR>
<TR><TD bgcolor=red>3476-AB</TD><TD>76mm
Socket</TD><TD>45.00</TD></TR>
<TR><TD >3478-AB</TD><TD><font color=blue>78mm Socket</font>
</TD><TD>47.50</TD></TR>
<TR><TD>3480-AB</TD><TD>80mm Socket</TD><TD>50.00</TD></TR>
</TABLE>
Basic Table Code
64
Table Data and Table Header Attributes
<Table border=1 cellpadding =2>
<tr> <th> Column 1 Header</th> <th>
Column 2 Header</th> </tr>
<tr> <td colspan=2> Row 1 Col 1</td> </tr>
<tr> <td rowspan=2>Row 2 Col 1</td>
<td> Row 2 Col2</td> </tr>
<tr> <td> Row 3 Col2</td> </tr>
</table>
65
Table Data and Table Header
Attributes
Column 1 Header Column 2 Header
Row 1 Col 1
Row 2 Col 1 Row 2 Col 2
Row 3 Col 2
66
Special Things to Note
• TH, TD and TR should always have end tags.
Although the end tags are formally optional, many browsers will
mess up the formatting of the table if you omit the end tags. In
particular, you should always use end tags if you have a TABLE
within a TABLE -- in this situation, the table parser gets
hopelessly confused if you don't close your TH, TD and TR
elements.
• A default TABLE has no borders
By default, tables are drawn without border lines. You need the
BORDER attribute to draw the lines.
• By default, a table is flush with the left margin
TABLEs are plopped over on the left margin. If you want
centered tables, You can either: place the table inside a DIV
element with attribute ALIGN="center".
Most current browsers also supports table alignment, using the
ALIGN attribute. Allowed values are "left", "right", or "center", for
example: <TABLE ALIGN="left">. The values "left" and "right"
float the table to the left or right of the page, with text flow
allowed around the table. This is entirely equivalent to IMG
alignment
67
<TABLE BORDER width=“750”>
<TR> <TD colspan=“4” align=“center”>Page
Banner</TD></TR>
<TR> <TD rowspan=“2” width=“25%”>Nav
Links</TD><TD colspan=“2”>Feature
Article</TD> <TD rowspan=“2”
width=“25%”>Linked Ads</TD></TR>
<TR><TD width=“25%”>News Column 1 </TD>
<TD width=“25%”><News Column 2 </TD></TR>
</TABLE>
What will be the output?
68
The Output
69
Frames
 Frames are a relatively new addition to the HTML
standard. First introduced in Netscape
Navigator 2.0.
Objectives:
Upon completing this section, you should be able to:
 Create a Frame based page.
 Work with the Frameset, Frame, and Noframes
elements.
 Use the attributes of the Frames elements to
control the display.
 Set Targets appropriately.
70
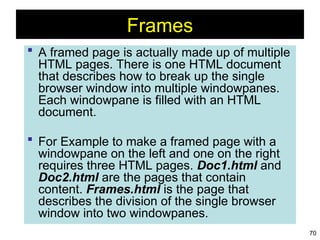
Frames
 A framed page is actually made up of multiple
HTML pages. There is one HTML document
that describes how to break up the single
browser window into multiple windowpanes.
Each windowpane is filled with an HTML
document.
 For Example to make a framed page with a
windowpane on the left and one on the right
requires three HTML pages. Doc1.html and
Doc2.html are the pages that contain
content. Frames.html is the page that
describes the division of the single browser
window into two windowpanes.
71
Frames
Doc2.html
Doc1.html
Frames.html
Doc2.html
Doc1.html
72
Frame Page Architecture
 A <FRAMESET> element is placed in the html
document before the <BODY> element. The
<FRAMESET> describes the amount of screen real
estate given to each windowpane by dividing the
screen into ROWS or COLS.
 The <FRAMESET> will then contain <FRAME>
elements, one per division of the browser window.
 Note: Because there is no BODY container,
FRAMESET pages can't have background images
and background colors associated with them.
73
Frame Page Architecture
<HTML>
<HEAD>
<TITLE> Framed Page </TITLE>
<FRAMeSET COLS=“23%,77%”>
<FRAME SRC=“Doc1.html”>
<FRAME SRC=“Doc2.html”>
</FRAMeSET >
</HEAD>
</HTML>
74
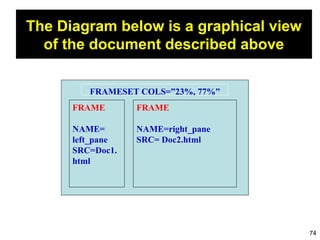
The Diagram below is a graphical view
of the document described above
FRAMESET COLS=”23%, 77%”
FRAME
NAME=right_pane
SRC= Doc2.html
FRAME
NAME=
left_pane
SRC=Doc1.
html
75
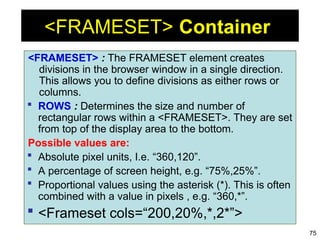
<FRAMESET> Container
<FRAMESET> : The FRAMESET element creates
divisions in the browser window in a single direction.
This allows you to define divisions as either rows or
columns.
 ROWS : Determines the size and number of
rectangular rows within a <FRAMESET>. They are set
from top of the display area to the bottom.
Possible values are:
 Absolute pixel units, I.e. “360,120”.
 A percentage of screen height, e.g. “75%,25%”.
 Proportional values using the asterisk (*). This is often
combined with a value in pixels , e.g. “360,*”.
 <Frameset cols=“200,20%,*,2*”>
76
Creating a Frames Page
 COLS: Determines the size and number of
rectangular columns within a <FRAMESET>.
They are set from left to right of the display
area.
Possible values are:
 Absolute pixel units, I.e. “480,160”.
 A percentage of screen width, e.g. “75%,25%”.
 Proportional values using the asterisk (*). This is
often combined with a value in pixels , e.g.
“480,*”.
77
Creating a Frames Page
 FRAMEBORDER : Possible values 0, 1, YES, NO. A
setting of zero will create a borderless frame.
 FRAMESPACING: This attribute is specified in
pixels. If you go to borderless frames you will need to
set this value to zero as well, or you will have a gap
between your frames where the border used to be.
 BORDER(thickness of the Frame): This attribute
specified in pixels. A setting of zero will create a
borderless frame. Default value is 5.
 BORDERCOLOR: This attribute is allows you choose
a color for your border. This attribute is rarely used.
78
79
<FRAME>
<FRAME>: This element defines a single frame within a
frameset. There will be a FRAME element for each
division created by the FRAMESET element. This tag
has the following attributes:
 SRC: Required, as it provides the URL for the page that
will be displayed in the frame.
 NAME: Required for frames that will allow targeting by
other HTML documents. Works in conjunction with the
target attribute of the <A>, <AREA>, <BASE>, and
<FORM> tags.
80
Compound FRAMESET Divisions
 In this case a second FRAMESET element will
be inserted in the place of the FRAME element
that would describe the second row.
 The second FRAMESET element will divide the
remaining screen real estate into 2 columns.
 This nested FRAMESET will then be followed by
2 FRAME elements to describe each of the
subsequent frame divisions created.
81
Compound FRAMESET Divisions
<html>
<head>
<title> Compound Frames Page</title>
</head>
<frameset rows=“120,*”>
<frame src=“banner_file.html”
name”banner”>
<frameset cols=“120,*”>
<frame src=“links_file.html”
name=“links”>
<frame src=“content_file.html”
name=“content”>
<noframes>
<p>
Default
message
</p>
</noframes>
</frameset>
</frameset>
</head>
82
Compound FRAMESET Divisions
You may want to create a frames design with a
combination of rows and columns.
Banner File
Contents File
Links
File
83
<HEAD>
<FRAMESET ROWS="25%,50%,25%”
<FRAME SRC="">
<FRAMESET COLS="25%,*">
<FRAME SRC="">
<FRAME SRC="">
</FRAMESET>
<FRAME SRC="">
</FRAMESET>
</HEAD>
Compound FRAMESET
Divisions Example
84
Output
85
86
87
88
Frame Formatting
• Example:
<frameset rows=“20%, *, 20%”>
<frame src=“header.html” noresize
scrolling=no>
<frame src=“body.html”>
<frame src=“navigationbar.html”
noresize scrolling=no>
</frameset>
89
90
91
1) <FRAMESET COLS="2*, 3*, 5*">
2) <FRAMESET COLS="150, 20%, *, 3*">
So what are the space-allocation priorities?
Absolute pixel values are always
assigned space first, in order from left to
right. These are followed by percentage
values of the total space. Finally,
proportional values are divided based
upon what space is left.
What do the following mean?
92
• The <FRAME> tag has six associated
attributes: SRC, NAME, MARGINWIDTH,
MARGINHEIGHT, SCROLLING, and
NORESIZE. Here's a complete generic
FRAME:
• <FRAME SRC="url" NAME="window_name"
SCROLLING=YES|NO|AUTO
MARGINWIDTH="value"
MARGINHEIGHT="value"
NORESIZE>
Generic Frame Formula
93
Targets
 When you use links for use in a frames environment you
will need to specify an additional attribute called TARGET.
 The TARGET attribute uses the NAME attribute of the
FRAME element.
 If we were to place a link in doc1.html that linked to
doc3.html and we wanted doc3.html to be displayed in the
right windowpane; the HTML code would appear in
doc1.html as follows:
<A HREF=“doc3.html”
TARGET=“right_pane”>Link to Document 3
</A>
Ad

More Related Content

Similar to Simple intro to HTML and its applications (20)

HTML
HTMLHTML
HTML
Shaza Abd Alwahab
 
WDD
WDDWDD
WDD
CHANDERPRABHU JAIN COLLEGE OF HIGHER STUDIES & SCHOOL OF LAW
 
HTML Introduction
HTML IntroductionHTML Introduction
HTML Introduction
Hameda Hurmat
 
html tags
 html tags html tags
html tags
YogeshDhamke2
 
HTML
HTMLHTML
HTML
CONNECTINGTO
 
902350 html jar
902350 html jar902350 html jar
902350 html jar
siva thirumal
 
902350_HTML_Jar.ppt
902350_HTML_Jar.ppt902350_HTML_Jar.ppt
902350_HTML_Jar.ppt
mevitechnologies
 
DOC-20220920-WA0012..pptx
DOC-20220920-WA0012..pptxDOC-20220920-WA0012..pptx
DOC-20220920-WA0012..pptx
AnuragKashyap413069
 
902350_HTML_Jar.ppt
902350_HTML_Jar.ppt902350_HTML_Jar.ppt
902350_HTML_Jar.ppt
ARUNVEVO1
 
web development html css javascrptt902350_HTML_Jar.ppt
web development html css javascrptt902350_HTML_Jar.pptweb development html css javascrptt902350_HTML_Jar.ppt
web development html css javascrptt902350_HTML_Jar.ppt
PuniNihithasree
 
902350_HTML_Jar.ppt
902350_HTML_Jar.ppt902350_HTML_Jar.ppt
902350_HTML_Jar.ppt
KulmiyeCaliJaxaf
 
HTML_Fundamentals_Tutorial_902350_HTML_Jar.ppt
HTML_Fundamentals_Tutorial_902350_HTML_Jar.pptHTML_Fundamentals_Tutorial_902350_HTML_Jar.ppt
HTML_Fundamentals_Tutorial_902350_HTML_Jar.ppt
hinalsomani93
 
Introduction to HTML Basic to advance full
Introduction to HTML Basic to advance fullIntroduction to HTML Basic to advance full
Introduction to HTML Basic to advance full
VinuS29
 
Basics-of-HTML.ppt
Basics-of-HTML.pptBasics-of-HTML.ppt
Basics-of-HTML.ppt
Bala Anand
 
html presentation on basis of tage .ppt
html presentation on basis of tage  .ppthtml presentation on basis of tage  .ppt
html presentation on basis of tage .ppt
ProgressiveHeights2
 
Intro to HTML
Intro to HTMLIntro to HTML
Intro to HTML
VincentAcapen
 
HTMLppt 1hagbSKJhzdvjhdjdvhjsfhjsdhfshfshsfhsf
HTMLppt 1hagbSKJhzdvjhdjdvhjsfhjsdhfshfshsfhsfHTMLppt 1hagbSKJhzdvjhdjdvhjsfhjsdhfshfshsfhsf
HTMLppt 1hagbSKJhzdvjhdjdvhjsfhjsdhfshfshsfhsf
RudraRathore6
 
HTML Tutorials
HTML TutorialsHTML Tutorials
HTML Tutorials
Arvind Kumar
 
Basics-of-HTML Basics-of-HTML Basics-of-HTML
Basics-of-HTML Basics-of-HTML Basics-of-HTMLBasics-of-HTML Basics-of-HTML Basics-of-HTML
Basics-of-HTML Basics-of-HTML Basics-of-HTML
Bala Anand
 
HTML NOTES.ppt BASIC HTML PROGRAMING NOTES
HTML NOTES.ppt BASIC HTML PROGRAMING NOTESHTML NOTES.ppt BASIC HTML PROGRAMING NOTES
HTML NOTES.ppt BASIC HTML PROGRAMING NOTES
AAFREEN SHAIKH
 

More from S.Mohideen Badhusha (7)

Introduction to Python Data Analytics.pdf
Introduction to Python Data Analytics.pdfIntroduction to Python Data Analytics.pdf
Introduction to Python Data Analytics.pdf
S.Mohideen Badhusha
 
PHP Programming and its Applications workshop
PHP Programming and its Applications workshopPHP Programming and its Applications workshop
PHP Programming and its Applications workshop
S.Mohideen Badhusha
 
‘How to develop Pythonic coding rather than Python coding – Logic Perspective’
‘How to develop Pythonic coding rather than Python coding – Logic Perspective’‘How to develop Pythonic coding rather than Python coding – Logic Perspective’
‘How to develop Pythonic coding rather than Python coding – Logic Perspective’
S.Mohideen Badhusha
 
Object oriented Programming using C++ and Java
Object oriented Programming using C++ and JavaObject oriented Programming using C++ and Java
Object oriented Programming using C++ and Java
S.Mohideen Badhusha
 
‘How to develop Pythonic coding rather than Python coding – Logic Perspective’
‘How to develop Pythonic coding rather than Python coding – Logic Perspective’‘How to develop Pythonic coding rather than Python coding – Logic Perspective’
‘How to develop Pythonic coding rather than Python coding – Logic Perspective’
S.Mohideen Badhusha
 
‘How to develop Pythonic coding rather than Python coding – Logic Perspective’
‘How to develop Pythonic coding rather than Python coding – Logic Perspective’‘How to develop Pythonic coding rather than Python coding – Logic Perspective’
‘How to develop Pythonic coding rather than Python coding – Logic Perspective’
S.Mohideen Badhusha
 
Introduction to Python Data Analytics.pdf
Introduction to Python Data Analytics.pdfIntroduction to Python Data Analytics.pdf
Introduction to Python Data Analytics.pdf
S.Mohideen Badhusha
 
PHP Programming and its Applications workshop
PHP Programming and its Applications workshopPHP Programming and its Applications workshop
PHP Programming and its Applications workshop
S.Mohideen Badhusha
 
‘How to develop Pythonic coding rather than Python coding – Logic Perspective’
‘How to develop Pythonic coding rather than Python coding – Logic Perspective’‘How to develop Pythonic coding rather than Python coding – Logic Perspective’
‘How to develop Pythonic coding rather than Python coding – Logic Perspective’
S.Mohideen Badhusha
 
Object oriented Programming using C++ and Java
Object oriented Programming using C++ and JavaObject oriented Programming using C++ and Java
Object oriented Programming using C++ and Java
S.Mohideen Badhusha
 
‘How to develop Pythonic coding rather than Python coding – Logic Perspective’
‘How to develop Pythonic coding rather than Python coding – Logic Perspective’‘How to develop Pythonic coding rather than Python coding – Logic Perspective’
‘How to develop Pythonic coding rather than Python coding – Logic Perspective’
S.Mohideen Badhusha
 
‘How to develop Pythonic coding rather than Python coding – Logic Perspective’
‘How to develop Pythonic coding rather than Python coding – Logic Perspective’‘How to develop Pythonic coding rather than Python coding – Logic Perspective’
‘How to develop Pythonic coding rather than Python coding – Logic Perspective’
S.Mohideen Badhusha
 
‘How to develop Pythonic coding rather than Python coding – Logic Perspective’
‘How to develop Pythonic coding rather than Python coding – Logic Perspective’‘How to develop Pythonic coding rather than Python coding – Logic Perspective’
‘How to develop Pythonic coding rather than Python coding – Logic Perspective’
S.Mohideen Badhusha
 
Ad

Recently uploaded (20)

15th International Conference on Computer Science, Engineering and Applicatio...
15th International Conference on Computer Science, Engineering and Applicatio...15th International Conference on Computer Science, Engineering and Applicatio...
15th International Conference on Computer Science, Engineering and Applicatio...
IJCSES Journal
 
Smart Storage Solutions.pptx for production engineering
Smart Storage Solutions.pptx for production engineeringSmart Storage Solutions.pptx for production engineering
Smart Storage Solutions.pptx for production engineering
rushikeshnavghare94
 
Value Stream Mapping Worskshops for Intelligent Continuous Security
Value Stream Mapping Worskshops for Intelligent Continuous SecurityValue Stream Mapping Worskshops for Intelligent Continuous Security
Value Stream Mapping Worskshops for Intelligent Continuous Security
Marc Hornbeek
 
Data Structures_Introduction to algorithms.pptx
Data Structures_Introduction to algorithms.pptxData Structures_Introduction to algorithms.pptx
Data Structures_Introduction to algorithms.pptx
RushaliDeshmukh2
 
MAQUINARIA MINAS CEMA 6th Edition (1).pdf
MAQUINARIA MINAS CEMA 6th Edition (1).pdfMAQUINARIA MINAS CEMA 6th Edition (1).pdf
MAQUINARIA MINAS CEMA 6th Edition (1).pdf
ssuser562df4
 
Data Structures_Searching and Sorting.pptx
Data Structures_Searching and Sorting.pptxData Structures_Searching and Sorting.pptx
Data Structures_Searching and Sorting.pptx
RushaliDeshmukh2
 
some basics electrical and electronics knowledge
some basics electrical and electronics knowledgesome basics electrical and electronics knowledge
some basics electrical and electronics knowledge
nguyentrungdo88
 
Artificial Intelligence (AI) basics.pptx
Artificial Intelligence (AI) basics.pptxArtificial Intelligence (AI) basics.pptx
Artificial Intelligence (AI) basics.pptx
aditichinar
 
Level 1-Safety.pptx Presentation of Electrical Safety
Level 1-Safety.pptx Presentation of Electrical SafetyLevel 1-Safety.pptx Presentation of Electrical Safety
Level 1-Safety.pptx Presentation of Electrical Safety
JoseAlbertoCariasDel
 
Raish Khanji GTU 8th sem Internship Report.pdf
Raish Khanji GTU 8th sem Internship Report.pdfRaish Khanji GTU 8th sem Internship Report.pdf
Raish Khanji GTU 8th sem Internship Report.pdf
RaishKhanji
 
Compiler Design Unit1 PPT Phases of Compiler.pptx
Compiler Design Unit1 PPT Phases of Compiler.pptxCompiler Design Unit1 PPT Phases of Compiler.pptx
Compiler Design Unit1 PPT Phases of Compiler.pptx
RushaliDeshmukh2
 
Development of MLR, ANN and ANFIS Models for Estimation of PCUs at Different ...
Development of MLR, ANN and ANFIS Models for Estimation of PCUs at Different ...Development of MLR, ANN and ANFIS Models for Estimation of PCUs at Different ...
Development of MLR, ANN and ANFIS Models for Estimation of PCUs at Different ...
Journal of Soft Computing in Civil Engineering
 
Metal alkyne complexes.pptx in chemistry
Metal alkyne complexes.pptx in chemistryMetal alkyne complexes.pptx in chemistry
Metal alkyne complexes.pptx in chemistry
mee23nu
 
The Gaussian Process Modeling Module in UQLab
The Gaussian Process Modeling Module in UQLabThe Gaussian Process Modeling Module in UQLab
The Gaussian Process Modeling Module in UQLab
Journal of Soft Computing in Civil Engineering
 
Degree_of_Automation.pdf for Instrumentation and industrial specialist
Degree_of_Automation.pdf for  Instrumentation  and industrial specialistDegree_of_Automation.pdf for  Instrumentation  and industrial specialist
Degree_of_Automation.pdf for Instrumentation and industrial specialist
shreyabhosale19
 
theory-slides-for react for beginners.pptx
theory-slides-for react for beginners.pptxtheory-slides-for react for beginners.pptx
theory-slides-for react for beginners.pptx
sanchezvanessa7896
 
Smart_Storage_Systems_Production_Engineering.pptx
Smart_Storage_Systems_Production_Engineering.pptxSmart_Storage_Systems_Production_Engineering.pptx
Smart_Storage_Systems_Production_Engineering.pptx
rushikeshnavghare94
 
Fort night presentation new0903 pdf.pdf.
Fort night presentation new0903 pdf.pdf.Fort night presentation new0903 pdf.pdf.
Fort night presentation new0903 pdf.pdf.
anuragmk56
 
Structural Response of Reinforced Self-Compacting Concrete Deep Beam Using Fi...
Structural Response of Reinforced Self-Compacting Concrete Deep Beam Using Fi...Structural Response of Reinforced Self-Compacting Concrete Deep Beam Using Fi...
Structural Response of Reinforced Self-Compacting Concrete Deep Beam Using Fi...
Journal of Soft Computing in Civil Engineering
 
Mathematical foundation machine learning.pdf
Mathematical foundation machine learning.pdfMathematical foundation machine learning.pdf
Mathematical foundation machine learning.pdf
TalhaShahid49
 
15th International Conference on Computer Science, Engineering and Applicatio...
15th International Conference on Computer Science, Engineering and Applicatio...15th International Conference on Computer Science, Engineering and Applicatio...
15th International Conference on Computer Science, Engineering and Applicatio...
IJCSES Journal
 
Smart Storage Solutions.pptx for production engineering
Smart Storage Solutions.pptx for production engineeringSmart Storage Solutions.pptx for production engineering
Smart Storage Solutions.pptx for production engineering
rushikeshnavghare94
 
Value Stream Mapping Worskshops for Intelligent Continuous Security
Value Stream Mapping Worskshops for Intelligent Continuous SecurityValue Stream Mapping Worskshops for Intelligent Continuous Security
Value Stream Mapping Worskshops for Intelligent Continuous Security
Marc Hornbeek
 
Data Structures_Introduction to algorithms.pptx
Data Structures_Introduction to algorithms.pptxData Structures_Introduction to algorithms.pptx
Data Structures_Introduction to algorithms.pptx
RushaliDeshmukh2
 
MAQUINARIA MINAS CEMA 6th Edition (1).pdf
MAQUINARIA MINAS CEMA 6th Edition (1).pdfMAQUINARIA MINAS CEMA 6th Edition (1).pdf
MAQUINARIA MINAS CEMA 6th Edition (1).pdf
ssuser562df4
 
Data Structures_Searching and Sorting.pptx
Data Structures_Searching and Sorting.pptxData Structures_Searching and Sorting.pptx
Data Structures_Searching and Sorting.pptx
RushaliDeshmukh2
 
some basics electrical and electronics knowledge
some basics electrical and electronics knowledgesome basics electrical and electronics knowledge
some basics electrical and electronics knowledge
nguyentrungdo88
 
Artificial Intelligence (AI) basics.pptx
Artificial Intelligence (AI) basics.pptxArtificial Intelligence (AI) basics.pptx
Artificial Intelligence (AI) basics.pptx
aditichinar
 
Level 1-Safety.pptx Presentation of Electrical Safety
Level 1-Safety.pptx Presentation of Electrical SafetyLevel 1-Safety.pptx Presentation of Electrical Safety
Level 1-Safety.pptx Presentation of Electrical Safety
JoseAlbertoCariasDel
 
Raish Khanji GTU 8th sem Internship Report.pdf
Raish Khanji GTU 8th sem Internship Report.pdfRaish Khanji GTU 8th sem Internship Report.pdf
Raish Khanji GTU 8th sem Internship Report.pdf
RaishKhanji
 
Compiler Design Unit1 PPT Phases of Compiler.pptx
Compiler Design Unit1 PPT Phases of Compiler.pptxCompiler Design Unit1 PPT Phases of Compiler.pptx
Compiler Design Unit1 PPT Phases of Compiler.pptx
RushaliDeshmukh2
 
Metal alkyne complexes.pptx in chemistry
Metal alkyne complexes.pptx in chemistryMetal alkyne complexes.pptx in chemistry
Metal alkyne complexes.pptx in chemistry
mee23nu
 
Degree_of_Automation.pdf for Instrumentation and industrial specialist
Degree_of_Automation.pdf for  Instrumentation  and industrial specialistDegree_of_Automation.pdf for  Instrumentation  and industrial specialist
Degree_of_Automation.pdf for Instrumentation and industrial specialist
shreyabhosale19
 
theory-slides-for react for beginners.pptx
theory-slides-for react for beginners.pptxtheory-slides-for react for beginners.pptx
theory-slides-for react for beginners.pptx
sanchezvanessa7896
 
Smart_Storage_Systems_Production_Engineering.pptx
Smart_Storage_Systems_Production_Engineering.pptxSmart_Storage_Systems_Production_Engineering.pptx
Smart_Storage_Systems_Production_Engineering.pptx
rushikeshnavghare94
 
Fort night presentation new0903 pdf.pdf.
Fort night presentation new0903 pdf.pdf.Fort night presentation new0903 pdf.pdf.
Fort night presentation new0903 pdf.pdf.
anuragmk56
 
Mathematical foundation machine learning.pdf
Mathematical foundation machine learning.pdfMathematical foundation machine learning.pdf
Mathematical foundation machine learning.pdf
TalhaShahid49
 
Ad

Simple intro to HTML and its applications

  • 1. 1 Introduction to HTML Presented by Dr.Sm.Badhusha Sr.Professor/CSE
  • 2. 2 Definitions HTML : HyperText Markup Language – The Language of Web Pages on the World Wide Web. HTML is a text formatting language. URL : Uniform Resource Locator. Browser :A software program which is used to show webpages. WWW: A collection of websites or web pages stored in web servers.Building blocks of webpages connected by hyperlinks and HTTP
  • 3. 3  “Normal text” surrounded by bracketed tags that tell browsers how to display web pages  Pages end with “.htm” or “.html”  Hypertext Markup Language, a standardized system for tagging text files to achieve font, colour, graphic, and hyperlink effects on World Wide Web pages.
  • 4. 4 Tags  Codes enclosed in brackets  Usually paired <TITLE>My Web Page</TITLE>  Not case sensitive <TITLE> = <title> = <TITLE> But preferably upper case is used
  • 5. 5 Creating a Basic Starting Document <HTML> <HEAD> <TITLE>Alva’s Institute of Engineering &Technology</TITLE> </HEAD> <BODY> This is what is displayed on webpage </BODY> </HTML>
  • 6. 6 Creating a Basic Starting Document  The HEAD of your document point to above window part. The TITLE of your document appears in the very top line of the user’s browser.  The text in your TITLE should be as descriptive as possible because this is what many search engines, on the internet, use for indexing your site.
  • 7. 7 Setting Document Properties  Document properties are controlled by attributes of the BODY element. For example, there are color settings for the background color of the page, the document’s text and different states of links. <BODY BGCOLOR=“#FFFFFF” text=#000000></BODY>
  • 8. 8 Color Codes • Colors are set using “RGB” color codes, which are, represented as hexadecimal values. Each 2-digit section of the code represents the amount, in sequence, of red, green or blue that forms the color. For example, a RGB value with 00 as the first two digits has no red in the color.
  • 12. 12 Color Codes 1. WHITE 2. BLACK 3. RED 4. GREEN 5. BLUE 6. MAGENTA 7. CYAN 8. YELLOW 9. AQUAMARINE 10. BAKER’S CHOCOLATE 11. VIOLET 12. BRASS 13. COPPER 14. PINK 15. ORANGE 1. #FFFFFF 2. #000000 3. #FF0000 4. #00FF00 5. #0000FF 6. #FF00FF 7. #00FFFF 8. #FFFF00 9. #70DB93 10. #5C3317 11. #9F5F9F 12. #B5A642 13. #B87333 14. #FF6EC7 15. #FF7F00
  • 13. 13 The Body Element • The BODY element of a web page is an important element in regards to the page’s appearance. Here are the attributes of the BODY tag to control all the levels: TEXT="#RRGGBB" to change the color of all the text on the page (full page text color.)  This element contains information about the page’s background color, the background image, as well as the text and link colors.
  • 14. 14 Background Color It is very common to see web pages with their background color set to white or some other colors. To set your document’s background color, you need to edit the <BODY> element by adding the BGCOLOR attribute. The following example will display a document with a white background color: <BODY BGCOLOR=“#FFFFFF”></BODY>
  • 15. 15 TEXT Color  The TEXT attribute is used to control the color of all the normal text in the document. The default color for text is black. The TEXT attribute would be added as follows: <BODY BGCOLOR=“#FFFFFF” TEXT=“#FF0000”></BODY> In this example the document’s page color is white and the text would be red.
  • 16. 16 Using Image Background  The BODY element also gives you ability of setting an image as the document’s background.  An example of a background image’s HTML code is as follows: <BODY BACKGROUND=“hi.gif” BGCOLOR=“#FFFFFF”></BODY>
  • 17. 17 Headings, <Hx> </Hx>  Inside the BODY element, heading elements H1 through H6 are generally used for major divisions of the document. Headings are permitted to appear in any order, but you will obtain the best results when your documents are displayed in a browser if you follow these guidelines: 1. H1: should be used as the highest level of heading, H2 as the next highest, and so forth. 2. You should not skip heading levels: e.g., an H3 should not appear after an H1, unless there is an H2 between them.
  • 18. 18 Headings, <Hx> </Hx> <HTML> <HEAD> <TITLE> Example Page</TITLE> </HEAD> <BODY> <H1> Heading 1 </H1> <H2> Heading 2 </H2> <H3> Heading 3 </H3> <H4> Heading 4 </H4> <H5> Heading 5 </H5> <H6> Heading 6 </H6> </BODY> </HTML> Heading 1 Heading 2 Heading 3 Heading 4 Heading 5 Heading 6
  • 19. 19 Paragraphs, <P> </P>  Paragraphs allow you to add text to a document in such a way that it will automatically adjust the end of line to suite the window size of the browser in which it is being displayed. Each line of text will stretch the entire length of the window.
  • 20. 20 Paragraphs, <P> </P> <HTML><HEAD> <TITLE> Example Page</TITLE> </HEAD> <BODY></H1> Heading 1 </H1> <P> Paragraph 1, ….</P> <H2> Heading 2 </H2> <P> Paragraph 2, ….</P> <H3> Heading 3 </H3> <P> Paragraph 3, ….</P> <H4> Heading 4 </H4> <P> Paragraph 4, ….</P> <H5> Heading 5 </H5> <P> Paragraph 5, ….</P> <H6> Heading 6</H6> <P> Paragraph 6, ….</P> </BODY></HTML> Heading 1 Paragraph 1,…. Heading 2 Paragraph 2,…. Heading 3 Paragraph 3,…. Heading 4 Paragraph 4,…. Heading 5 Paragraph 5,…. Heading 6 Paragraph 6,….
  • 21. 21 Break, <BR>  Line breaks allow you to decide where the text will break on a line or continue to the end of the window.  A <BR> is an empty Element, meaning that it may contain attributes but it does not contain content.  The <BR> element does not have a closing tag.
  • 22. 22 Break, <BR> <HTML> <HEAD> <TITLE> Example Page</TITLE> </HEAD> <BODY> <H1> Heading 1 </H1> <P>Paragraph 1, <BR> Line 2 <BR> Line 3 <BR>…. </P> </BODY> </HTML> Heading 1 Paragraph 1,…. Line 2 Line 3 ….
  • 23. 23 Horizontal Rule, <HR>  The <HR> element causes the browser to display a horizontal line (rule) in your document.  <HR> does not use a closing tag, </HR>.
  • 24. 24 Horizontal Rule, <HR> Attribute Description Default Value SIZE Height of the rule in pixels 2 pixels WIDTH Width of the rule in pixels or percentage of screen width 100% NOSHADE Draw the rule with a flat look instead of a 3D look Not set (3D look) ALIGN Aligns the line (Left, Center, Right) Center COLOR Sets a color for the rule (IE 3.0 or later) Not set
  • 25. 25 Horizontal Rule, <HR> <HTML> <HEAD> <TITLE> Example Page</TITLE> </HEAD> <BODY> <H1> Heading 1 </H1> <P>Paragraph 1, <BR> Line 2 <BR> <HR>Line 3 <BR> </P> </BODY> </HTML> Heading 1 Paragraph 1,…. Line 2 ______________________ _____ Line 3
  • 26. 26 Bold, Italic and other Character Formatting Elements  <FONT SIZE=“+2”> Two sizes bigger</FONT>  The size attribute can be set as an absolute value from 1 to 7 or as a relative value using the “+” or “-” sign. Normal text size is 3 (from -2 to +4).  <B> Bold </B>  <I> Italic </I>  <U> Underline </U>  Color = “#RRGGBB” The COLOR attribute of the FONT element. E.g., <FONT COLOR=“#RRGGBB”>this text has color</FONT>  <PRE> Preformatted </PRE> Text enclosed by PRE tags is displayed in a mono-spaced font. Spaces and line breaks are supported without additional elements or special characters.
  • 27. 27 Bold, Italic and other Character Formatting Elements  <EM> Emphasis </EM> Browsers usually display this as italics.  <STRONG> STRONG </STRONG> Browsers display this as bold.  <TT> TELETYPE </TT> Text is displayed in a mono-spaced font. A typewriter text, e.g. fixed- width font.  <CITE> Citation </CITE> represents a document citation (italics). For titles of books, films, etc. Typically displayed in italics. (A Beginner's Guide to HTML)
  • 28. 28 Bold, Italic and other Character Formatting Elements <P> <FONT SIZE=“+1”> One Size Larger </FONT> - Normal – <FONT SIZE=“-1”> One Size Smaller </FONT> <BR> <B> Bold</B> - <I> italics</I> - <U> Underlined </U> - <FONT COLOR=“#FF0000”> Colored </FONT> <BR> <EM> Emphasized</EM> - <STRONG> Strong </STRONG> - <TT> Tele Type </TT> <BR> One Size Larger - Normal – One Size Smaller Bold - italics - Underlined - Colored Emphasized - Strong - Tele Type
  • 29. 29 Alignment  Some elements have attributes for alignment (ALIGN) e.g. Headings, Paragraphs and Horizontal Rules.  The Three alignment values are : LEFT, RIGHT, CENTER.  <CENTER></CENTER> Will center elements.
  • 30. 30 Alignment  <DIV ALIGN=“value”></DIV> Represents a division in the document and can contain most other element type. The alignment attribute of the DIV element is well supported.  <TABLE></TABLE> Inside a TABLE, alignment can be set for each individual cell.
  • 31. 31 Special Characters & Symbols  These Characters are recognized in HTML as they begin with an ampersand and end with with a semi-colon e.g. &value; The value will either be an entity name or a standard ASCII character number. They are called escape sequences.  The next table represents some of the more commonly used special characters. For a comprehensive listing, visit the W3C’s section on special characters at: http://www.w3.org/MarkUp/HTMLPlus/htmlplus_13.html
  • 32. 32 Special Characters & Symbols Special Character Entity Name Special Character Entity Name Ampersand &amp; & Greater-than sign &gt; > Asterisk &lowast; ∗∗ Less-than sign &lt; < Cent sign &cent; ¢ Non-breaking space &nbsp; Copyright &copy; © Quotation mark &quot; " Fraction one qtr &frac14; ¼ Registration mark &reg; ® Fraction one half &frac12; ½ Trademark sign &trade; ™
  • 33. 33 • Additional escape sequences support accented characters, such as: • &ouml; – a lowercase o with an umlaut: ö • &ntilde; – a lowercase n with a tilde: ñ • &Egrave; – an uppercase E with a grave accent: È NOTE: Unlike the rest of HTML, the escape sequences are case sensitive. You cannot, for instance, use &LT; instead of &lt;. Special Characters & Symbols
  • 34. 34 Additional Character Formatting Elements  <STRIKE> strike-through text</STRIKE> DEL is used for STRIKE at the latest browsers  <BIG> places text in a big font</BIG>  <SMALL> places text in a small font</SMALL>  <SUB> places text in subscript position </SUB>  <SUP> places text in superscript style position </SUP>
  • 35. 35 Example <P><STRIKE> strike-through text </STRIKE></BR> <BIG>places text in a big font </BIG><BR> <SMALL> places text in a small font</SMALL><BR> <SUB> places text in subscript position </SUB> Normal <SUP> places text in superscript style position </SUP><BR> </P>
  • 36. 36 List Elements  HTML supplies several list elements. Most list elements are composed of one or more <LI> (List Item) elements.  UL : Unordered List. Items in this list start with a list mark such as a bullet. Browsers will usually change the list mark in nested lists. <UL> <LI> List item …</LI> <LI> List item …</LI> </UL> • List item … • List item …
  • 37. 37 List Elements  You have the choice of three bullet types: disc(default), circle, square.  These are controlled in Netscape Navigator by the “TYPE” attribute for the <UL> element. <UL TYPE=“square”> <LI> List item …</LI> <LI> List item …</LI> <LI> List item …</LI> </UL>  List item …  List item …  List item …
  • 38. 38 List Elements  OL: Ordered List. Items in this list are numbered automatically by the browser. <OL> <LI> List item …</LI> <LI> List item …</LI> <LI> List item …</LI> </OL> 1. List item … 2. List item … 3. List item  You have the choice of setting the TYPE Attribute to one of five numbering styles.
  • 39. 39 List Elements TYPE Numbering Styles 1 Arabic numbers 1,2,3, …… a Lower alpha a, b, c, …… A Upper alpha A, B, C, …… i Lower roman i, ii, iii, …… I Upper roman I, II, III, ……
  • 40. 40 List Elements  You can specify a starting number for an ordered list. <OL TYPE =“i”> <LI> List item …</LI> <LI> List item …</LI> </OL> <P> text ….</P> <OL TYPE=“i” START=“3”> <LI> List item …</LI> </OL>
  • 41. 41 List Elements i. List item … ii. List item … Text …. iii. List item …
  • 42. 42 List Elements  DL: Definition List. This kind of list is different from the others. Each item in a DL consists of one or more Definition Terms (DT elements), followed by one or more Definition Description (DD elements). <DL> <DT> HTML </DT> <DD> Hyper Text Markup Language </DD> <DT> DOG </DT> <DD> A human’s best friend!</DD> </DL> HTML Hyper Text Markup Language DOG A human’s best friend!
  • 43. 43 Nesting Lists  You can nest lists by inserting a UL, OL, etc., inside a list item (LI). EXample <UL TYPE = “square”> <LI> List item …</LI> <LI> List item … <OL TYPE=“i” START=“3”> <LI> List item …</LI> <LI> List item …</LI> <LI> List item …</LI> <LI> List item …</LI> <LI> List item …</LI> </OL> </LI> <LI> List item …</LI> </UL>
  • 44. 44 <H1 ALIGN="CENTER">SAFETY TIPS FOR CANOEISTS</H1> <OL TYPE=“a” START=“2”> <LI>Be able to swim </LI> <LI>Wear a life jacket at all times </LI> <LI>Don't stand up or move around. If canoe tips, <UL> <LI>Hang on to the canoe </LI> <LI>Use the canoe for support and </LI> <LI>Swim to shore </UL> </LI> <LI>Don't overexert yourself </LI> <LI>Use a bow light at night </LI> </OL> What will be the output?
  • 46. 46 <H1 ALIGN="CENTER">SAFETY TIPS FOR CANOEISTS</H1> <OL TYPE="a" START="2"> <LI>Be able to swim </LI> <LI>Wear a life jacket at all times </LI> <LI>Don't stand up or move around. If canoe tips, <UL> <LI>Hang on to the canoe </LI> <LI>Use the canoe for support <OL type="I" start="4"> <LI> Be careful </LI> <LI> Do not look around</LI> </LI> </OL> <LI>Swim to shore </UL> </LI> <LI>Don't overexert yourself </LI> <LI>Use a bow light at night </LI> </OL> What will be the output?
  • 48. 48 Images  <IMG>This element defines a graphic image on the page.  Image File (SRC:source): This value will be a URL (location of the image) E.g. http://www.domain.com/dir/file.ext or /dir/file.txt.  Alternate Text (ALT): This is a text field that describes an image or acts as a label. It is displayed when they position the cursor over a graphic image.  Alignment (ALIGN): This allows you to align the image on your page.
  • 49. 49 Images  Width (WIDTH): is the width of the image in pixels.  Height (HEIGHT): is the height of the image in pixels.  Border (BORDER): is for a border around the image, specified in pixels.  HSPACE: is for Horizontal Space on both sides of the image specified in pixels. A setting of 5 will put 5 pixels of invisible space on both sides of the image.  VSPACE: is for Vertical Space on top and bottom of the image specified in pixels. A setting of 5 will put 5 pixels of invisible space above and bellow the image.
  • 50. 50 Some Examples on images 1) <IMG SRC=“jordan.gif“ border=4> 2) <IMG SRC=" jordan.gif" width="60" height="60"> 3) <IMG SRC=“jordan.gif" ALT="This is a text that goes with the image"> 4) <IMG SRC=" jordan.gif “ Hspace="30" Vspace="10" border=20> 5) < IMG SRC =" jordan.gif“ align="left"> blast blast blast blast blast
  • 51. 51 HOW TO MAKE A LINK 1) The tags used to produce links are the <A> and </A>. The <A> tells where the link should start and the </A> indicates where the link ends. Everything between these two will work as a link. 2) The example below shows how to make the word Here work as a link to yahoo. Click <A HREF="http://www.yahoo.com">here</A> to go to yahoo.
  • 52. 52 LINK, VLINK, and ALINK These attributes control the colors of the different link states: 1. LINK – initial appearance – default = Blue. 2. VLINK – visited link – default = Purple. 3. ALINK –active link being clicked–default= Yellow. The Format for setting these attributes is: <BODY BGCOLOR=“#FFFFFF” TEXT=“#FF0000” LINK=“#0000FF” VLINK=“#FF00FF” ALINK=“FFFF00”> </BODY>
  • 53. 53 <body LINK="#C0C0C0" VLINK="#808080" ALINK="#FF0000"> • LINK - standard link - to a page the visitor hasn't been to yet. (standard color is blue - #0000FF). VLINK - visited link - to a page the visitor has been to before. (standard color is purple - #800080). ALINK - active link - the color of the link when the mouse is on it. (standard color is red - #FF0000). If the programmer what to change the color • Click <a href="http://www.yahoo.com"><font color="FF00CC">here</font></a> to go to yahoo. More on LINKs
  • 54. 54 Internal Links  Internal Links : Links can also be created inside large documents to simplify navigation. Today’s world wants to be able to get the information quickly. Internal links can help you meet these goals. 1. Select some text at a place in the document that you would like to create a link to, then add an anchor to link to like this: <A NAME=“bookmark_name”></A> The Name attribute of an anchor element specifies a location in the document that we link to shortly. All NAME attributes in a document must be unique. 2. Next select the text that you would like to create as a link to the location created above. <A HREF=“#bookmark_name”>Go To Book Mark</A>
  • 55. 55 Tables  The <TABLE></TABLE> element has four sub- elements: 1. Table Row<TR></TR>. 2. Table Header <TH></TH>. 3. Table Data <TD></TD>. 4. Caption <CAPTION></CAPTION>.  The table row elements usually contain table header elements or table data elements.
  • 56. 56 Tables <table border=“1”> <tr> <th> Column 1 header </th> <th> Column 2 header </th> </tr> <tr> <td> Row1, Col1 </td> <td> Row1, Col2 </td> </tr> <tr> <td> Row2, Col1 </td> <td> Row2, Col2 </td> </tr> </table>
  • 57. 57 Tables Column 1 Header Column 2 Header Row1, Col1 Row1, Col2 Row2, Col1 Row2, Col2
  • 58. 58 Tables Attributes  BGColor: Some browsers support background colors in a table.  Width: you can specify the table width as an absolute number of pixels or a percentage of the document width. You can set the width for the table cells as well.  Border: You can choose a numerical value for the border width, which specifies the border in pixels.  CellSpacing: Cell Spacing represents the space between cells and is specified in pixels.
  • 59. 59 Table Attributes  CellPadding: Cell Padding is the space between the cell border and the cell contents and is specified in pixels.  Align: tables can have left, right, or center alignment.  Background: Background Image, will be titled in IE3.0 and above.  BorderColor, BorderColorDark.
  • 60. 60 Table Caption  A table caption allows you to specify a line of text that will appear centered above or bellow the table. <TABLE BORDER=1 CELLPADDING=2> <CAPTION ALIGN=“BOTTOM”> Label For My Table </CAPTION>  The Caption element has one attribute ALIGN that can be either TOP (Above the table) or BOTTOM (below the table).
  • 61. 61 Table Header  Table Data cells are represented by the TD element. Cells can also be TH (Table Header) elements which results in the contents of the table header cells appearing centered and in bold text.
  • 62. 62 Table Data and Table Header Attributes  Colspan: Specifies how many cell columns of the table this cell should span.  Rowspan: Specifies how many cell rows of the table this cell should span.  Align: cell data can have left, right, or center alignment.  Valign: cell data can have top, middle, or bottom alignment.  Width: you can specify the width as an absolute number of pixels or a percentage of the document width.  Height: You can specify the height as an absolute number of pixels or a percentage of the document height.
  • 63. 63 <TABLE BORDER=1 width=50%> <CAPTION> <h1>Spare Parts <h1> </Caption> <TR><TH>Stock Number</TH><TH>Description</TH><TH>List Price</TH></TR> <TR><TD bgcolor=red>3476-AB</TD><TD>76mm Socket</TD><TD>45.00</TD></TR> <TR><TD >3478-AB</TD><TD><font color=blue>78mm Socket</font> </TD><TD>47.50</TD></TR> <TR><TD>3480-AB</TD><TD>80mm Socket</TD><TD>50.00</TD></TR> </TABLE> Basic Table Code
  • 64. 64 Table Data and Table Header Attributes <Table border=1 cellpadding =2> <tr> <th> Column 1 Header</th> <th> Column 2 Header</th> </tr> <tr> <td colspan=2> Row 1 Col 1</td> </tr> <tr> <td rowspan=2>Row 2 Col 1</td> <td> Row 2 Col2</td> </tr> <tr> <td> Row 3 Col2</td> </tr> </table>
  • 65. 65 Table Data and Table Header Attributes Column 1 Header Column 2 Header Row 1 Col 1 Row 2 Col 1 Row 2 Col 2 Row 3 Col 2
  • 66. 66 Special Things to Note • TH, TD and TR should always have end tags. Although the end tags are formally optional, many browsers will mess up the formatting of the table if you omit the end tags. In particular, you should always use end tags if you have a TABLE within a TABLE -- in this situation, the table parser gets hopelessly confused if you don't close your TH, TD and TR elements. • A default TABLE has no borders By default, tables are drawn without border lines. You need the BORDER attribute to draw the lines. • By default, a table is flush with the left margin TABLEs are plopped over on the left margin. If you want centered tables, You can either: place the table inside a DIV element with attribute ALIGN="center". Most current browsers also supports table alignment, using the ALIGN attribute. Allowed values are "left", "right", or "center", for example: <TABLE ALIGN="left">. The values "left" and "right" float the table to the left or right of the page, with text flow allowed around the table. This is entirely equivalent to IMG alignment
  • 67. 67 <TABLE BORDER width=“750”> <TR> <TD colspan=“4” align=“center”>Page Banner</TD></TR> <TR> <TD rowspan=“2” width=“25%”>Nav Links</TD><TD colspan=“2”>Feature Article</TD> <TD rowspan=“2” width=“25%”>Linked Ads</TD></TR> <TR><TD width=“25%”>News Column 1 </TD> <TD width=“25%”><News Column 2 </TD></TR> </TABLE> What will be the output?
  • 69. 69 Frames  Frames are a relatively new addition to the HTML standard. First introduced in Netscape Navigator 2.0. Objectives: Upon completing this section, you should be able to:  Create a Frame based page.  Work with the Frameset, Frame, and Noframes elements.  Use the attributes of the Frames elements to control the display.  Set Targets appropriately.
  • 70. 70 Frames  A framed page is actually made up of multiple HTML pages. There is one HTML document that describes how to break up the single browser window into multiple windowpanes. Each windowpane is filled with an HTML document.  For Example to make a framed page with a windowpane on the left and one on the right requires three HTML pages. Doc1.html and Doc2.html are the pages that contain content. Frames.html is the page that describes the division of the single browser window into two windowpanes.
  • 72. 72 Frame Page Architecture  A <FRAMESET> element is placed in the html document before the <BODY> element. The <FRAMESET> describes the amount of screen real estate given to each windowpane by dividing the screen into ROWS or COLS.  The <FRAMESET> will then contain <FRAME> elements, one per division of the browser window.  Note: Because there is no BODY container, FRAMESET pages can't have background images and background colors associated with them.
  • 73. 73 Frame Page Architecture <HTML> <HEAD> <TITLE> Framed Page </TITLE> <FRAMeSET COLS=“23%,77%”> <FRAME SRC=“Doc1.html”> <FRAME SRC=“Doc2.html”> </FRAMeSET > </HEAD> </HTML>
  • 74. 74 The Diagram below is a graphical view of the document described above FRAMESET COLS=”23%, 77%” FRAME NAME=right_pane SRC= Doc2.html FRAME NAME= left_pane SRC=Doc1. html
  • 75. 75 <FRAMESET> Container <FRAMESET> : The FRAMESET element creates divisions in the browser window in a single direction. This allows you to define divisions as either rows or columns.  ROWS : Determines the size and number of rectangular rows within a <FRAMESET>. They are set from top of the display area to the bottom. Possible values are:  Absolute pixel units, I.e. “360,120”.  A percentage of screen height, e.g. “75%,25%”.  Proportional values using the asterisk (*). This is often combined with a value in pixels , e.g. “360,*”.  <Frameset cols=“200,20%,*,2*”>
  • 76. 76 Creating a Frames Page  COLS: Determines the size and number of rectangular columns within a <FRAMESET>. They are set from left to right of the display area. Possible values are:  Absolute pixel units, I.e. “480,160”.  A percentage of screen width, e.g. “75%,25%”.  Proportional values using the asterisk (*). This is often combined with a value in pixels , e.g. “480,*”.
  • 77. 77 Creating a Frames Page  FRAMEBORDER : Possible values 0, 1, YES, NO. A setting of zero will create a borderless frame.  FRAMESPACING: This attribute is specified in pixels. If you go to borderless frames you will need to set this value to zero as well, or you will have a gap between your frames where the border used to be.  BORDER(thickness of the Frame): This attribute specified in pixels. A setting of zero will create a borderless frame. Default value is 5.  BORDERCOLOR: This attribute is allows you choose a color for your border. This attribute is rarely used.
  • 78. 78
  • 79. 79 <FRAME> <FRAME>: This element defines a single frame within a frameset. There will be a FRAME element for each division created by the FRAMESET element. This tag has the following attributes:  SRC: Required, as it provides the URL for the page that will be displayed in the frame.  NAME: Required for frames that will allow targeting by other HTML documents. Works in conjunction with the target attribute of the <A>, <AREA>, <BASE>, and <FORM> tags.
  • 80. 80 Compound FRAMESET Divisions  In this case a second FRAMESET element will be inserted in the place of the FRAME element that would describe the second row.  The second FRAMESET element will divide the remaining screen real estate into 2 columns.  This nested FRAMESET will then be followed by 2 FRAME elements to describe each of the subsequent frame divisions created.
  • 81. 81 Compound FRAMESET Divisions <html> <head> <title> Compound Frames Page</title> </head> <frameset rows=“120,*”> <frame src=“banner_file.html” name”banner”> <frameset cols=“120,*”> <frame src=“links_file.html” name=“links”> <frame src=“content_file.html” name=“content”> <noframes> <p> Default message </p> </noframes> </frameset> </frameset> </head>
  • 82. 82 Compound FRAMESET Divisions You may want to create a frames design with a combination of rows and columns. Banner File Contents File Links File
  • 83. 83 <HEAD> <FRAMESET ROWS="25%,50%,25%” <FRAME SRC=""> <FRAMESET COLS="25%,*"> <FRAME SRC=""> <FRAME SRC=""> </FRAMESET> <FRAME SRC=""> </FRAMESET> </HEAD> Compound FRAMESET Divisions Example
  • 85. 85
  • 86. 86
  • 87. 87
  • 88. 88 Frame Formatting • Example: <frameset rows=“20%, *, 20%”> <frame src=“header.html” noresize scrolling=no> <frame src=“body.html”> <frame src=“navigationbar.html” noresize scrolling=no> </frameset>
  • 89. 89
  • 90. 90
  • 91. 91 1) <FRAMESET COLS="2*, 3*, 5*"> 2) <FRAMESET COLS="150, 20%, *, 3*"> So what are the space-allocation priorities? Absolute pixel values are always assigned space first, in order from left to right. These are followed by percentage values of the total space. Finally, proportional values are divided based upon what space is left. What do the following mean?
  • 92. 92 • The <FRAME> tag has six associated attributes: SRC, NAME, MARGINWIDTH, MARGINHEIGHT, SCROLLING, and NORESIZE. Here's a complete generic FRAME: • <FRAME SRC="url" NAME="window_name" SCROLLING=YES|NO|AUTO MARGINWIDTH="value" MARGINHEIGHT="value" NORESIZE> Generic Frame Formula
  • 93. 93 Targets  When you use links for use in a frames environment you will need to specify an additional attribute called TARGET.  The TARGET attribute uses the NAME attribute of the FRAME element.  If we were to place a link in doc1.html that linked to doc3.html and we wanted doc3.html to be displayed in the right windowpane; the HTML code would appear in doc1.html as follows: <A HREF=“doc3.html” TARGET=“right_pane”>Link to Document 3 </A>