SlideShare a Scribd company logo
Unit-2
Introduction to CSS
CSS is the language we use to style a Web page.
What is CSS?
CSS stands for Cascading Style Sheets
CSS describes how HTML elements are to be displayed on screen,
paper, or in other media
CSS saves a lot of work. It can control the layout of multiple web
pages all at once
External stylesheets are stored in CSS files
Why to Use CSS?
CSS is used to define styles for your web pages, including the
design, layout and variations in display for different devices and
screen sizes.
CSS Syntax:
A CSS rule consists of a selector and a declaration block.
The selector points to the HTML element you want to style.
The declaration block contains one or more declarations separated
by semicolons.
Each declaration includes a CSS property name and a value,
separated by a colon.
Multiple CSS declarations are separated with semicolons, and
declaration blocks are surrounded by curly braces.
Using CSS
CSS can be added to HTML documents in 3 ways:
Inline - by using the style attribute inside HTML
elements
Internal - by using a <style> element in
the <head> section
External - by using a <link> element to link to an
external CSS file
Example:
<!DOCTYPE html>
<html>
<head>
<style>
p {
color: red;
text-align: center;
}
</style>
</head>
<body>
<p>Hello World!</p>
<p>These is a new CSS line.</p>
</body>
</html>
<!DOCTYPE html>
<html>
<head>
<style>
body {
background-color: lightblue;
}
h1 {
color: white;
text-align: center;
}
p {
font-family: verdana;
font-size: 20px;
}
</style>
</head>
<body>
<h1>My First CSS Example</h1>
<p>This is a paragraph.</p>
</body>
</html>
The style tag
Using CSS
CSS can be added to HTML documents in 3 ways:
•Inline - by using the style attribute inside HTML
elements
•Internal - by using a <style> element in
the <head> section
•External - by using a <link> element to link to an
external CSS file
Inline CSS :
An inline CSS is used to apply a unique style to a
single HTML element.
An inline CSS uses the style attribute of an HTML
element.
Example :
<h1 style="color:blue;">A Blue Heading</h1>
<p style="color:red;">A red paragraph.</p>
Internal CSS :
An internal CSS is used to define a style for a single HTML page.
An internal CSS is defined in the <head> section of an HTML page, within a <style> element.
Example:
<!DOCTYPE html>
<html>
<head>
<style>
body
{
background-color: powderblue;
}
h1
{
color: blue;
}
p
{
color: red;
}
</style>
</head>
<body>
<h1>This is a heading</h1>
<p>This is a paragraph.</p>
</body>
</html>
External CSS:
An external style sheet is used to define the style for many
HTML pages.
To use an external style sheet, add a link to it in
the <head> section of each HTML page:
Example:
<!DOCTYPE html>
<html>
<head>
<link rel="stylesheet" href="styles.css">
</head>
<body>
<h1>This is a heading</h1>
<p>This is a paragraph.</p>
</body>
</html>
Another page with a name a "styles.css":
body {
background-color: powderblue;
}
h1 {
color: blue;
}
p {
color: red;
}
Tag selectors
A CSS selector selects the HTML element(s) you want to style.
1. The CSS element Selector
The element selector selects HTML elements based on the element name.
<!DOCTYPE html>
<html>
<head>
<style>
p {
text-align: center;
color: red;
}
</style>
</head>
<body>
<p>Every paragraph will be affected by the style.</p>
<p>And me!</p>
</body>
</html>
2. The CSS id Selector
The id selector uses the id attribute of an HTML element to select a specific element.
The id of an element is unique within a page, so the id selector is used to select one
unique element!
To select an element with a specific id, write a hash (#) character, followed by the id of
the element.
<!DOCTYPE html>
<html>
<head>
<style>
#para1 {
text-align: center;
color: red;
}
</style>
</head>
<body>
<p id="para1">Hello World!</p>
<p>This paragraph is not affected by the style.</p>
</body>
</html>
3. The CSS class Selector
The class selector selects HTML elements with a specific class attribute.
To select elements with a specific class, write a period (.) character, followed by
the class name.
<!DOCTYPE html>
<html>
<head>
<style>
.center {
text-align: center;
color: red;
}
</style>
</head>
<body>
<h1 class="center">Red and center-aligned heading</h1>
<p class="center">Red and center-aligned paragraph.</p>
</body>
</html>
<!DOCTYPE html>
<html>
<head>
<style>
p.center {
text-align: center;
color: red;
}
</style>
</head>
<body>
<h1 class="center">This heading will not be affected</h1>
<p class="center">This paragraph will be red and center-aligned.</p>
</body>
</html>
<!DOCTYPE html>
<html>
<head>
<style>
p.center {
text-align: center;
color: red;
}
p.large {
font-size: 300%;
}
</style>
</head>
<body>
<h1 class="center">This heading will not be affected</h1>
<p class="center">This paragraph will be red and center-aligned.</p>
<p class="center large">This paragraph will be red, center-aligned, and in a large font-size.</p>
</body>
</html>
4. The CSS Universal Selector
The universal selector (*) selects all HTML elements on the page.
<!DOCTYPE html>
<html>
<head>
<style>
* {
text-align: center;
color: blue;
}
</style>
</head>
<body>
<h1>Hello world!</h1>
<p>Every element on the page will be affected by the style.</p>
<p id="para1">Me too!</p>
<p>And me!</p>
</body>
</html>
The font-size
The font-size property sets the size of the text.
We should not use font size adjustments to make paragraphs look like headings,
or headings look like paragraphs.
Always use the proper HTML tags, like <h1> - <h6> for headings and <p> for
paragraphs.
The font-size value can be an absolute, or relative size.
Absolute size:
Sets the text to a specified size
Does not allow a user to change the text size in all browsers (bad for
accessibility reasons)
Absolute size is useful when the physical size of the output is known.
Relative size:
Sets the size relative to surrounding elements
Allows a user to change the text size in browsers
1. Set Font Size With Pixels
Setting the text size with pixels gives you full control over the text size:
<!DOCTYPE html>
<html>
<head>
<style>
h1 {
font-size: 40px;
}
h2 {
font-size: 30px;
}
p {
font-size: 14px;
}
</style>
</head>
<body>
<h1>This is heading 1</h1>
<h2>This is heading 2</h2>
<p>This is a paragraph.</p>
<p>This is another paragraph.</p>
</body>
</html>
2. Set Font Size With Em
To allow users to resize the text (in the browser menu), many developers use em
instead of pixels.
1em is equal to the current font size. The default text size in browsers is 16px.
So, the default size of 1em is 16px.
The size can be calculated from pixels to em using this formula: pixels/16=em
<!DOCTYPE html>
<html>
<head>
<style>
h1 {
font-size: 2.5em; /* 40px/16=2.5em */
}
h2 {
font-size: 1.875em; /* 30px/16=1.875em */
}
p {
font-size: 0.875em; /* 14px/16=0.875em */
}
</style>
</head>
<body>
<h1>This is heading 1</h1>
<h2>This is heading 2</h2>
<p>This is a paragraph.</p>
</body>
</html
font-family
In CSS, we use the font-family property to specify the font of a text.
<!DOCTYPE html>
<html>
<head>
<style>
.p1 {
font-family: "Times New Roman", Times, serif;
}
.p2 {
font-family: Arial, Helvetica, sans-serif;
}
.p3 {
font-family: "Lucida Console", "Courier New", monospace;
}
</style>
</head>
<body>
<h1>CSS font-family</h1>
<p class="p1">This is a paragraph, shown in the Times New Roman font.</p>
<p class="p2">This is a paragraph, shown in the Arial font.</p>
<p class="p3">This is a paragraph, shown in the Lucida Console font.</p>
</body>
</html>
<!DOCTYPE html>
<html>
<head>
<style>
.p1 {
font-family: "Times New Roman";
}
.p2 {
font-family: Arial;
}
.p3 {
font-family: "Lucida Console";
}
</style>
</head>
<body>
<h1>CSS font-family</h1>
<p class="p1">This is a paragraph, shown in the Times New Roman font.</p>
<p class="p2">This is a paragraph, shown in the Arial font.</p>
<p class="p3">This is a paragraph, shown in the Lucida Console font.</p>
</body>
</html>
Best Web Safe Fonts for HTML and CSS
The following list are the best web safe fonts for HTML and CSS:
•Arial (sans-serif)
•Verdana (sans-serif)
•Tahoma (sans-serif)
•Trebuchet MS (sans-serif)
•Times New Roman (serif)
•Georgia (serif)
•Garamond (serif)
•Courier New (monospace)
•Brush Script MT (cursive
Commonly Used Font Fallbacks
Below are some commonly used font fallbacks, organized by the 5
generic font families:
Serif
Sans-serif
Monospace
Cursive
Fantasy
CSS Colors
Colors are specified using predefined color names, or RGB, HEX, HSL, RGBA,
HSLA values.
1.CSS Background Color
You can set the background color for HTML elements:
<!DOCTYPE html>
<html>
<body>
<h1 style="background-color:DodgerBlue;">Hello World</h1>
<p style="background-color:Tomato;">
Hello good morning
</p>
</body>
</html>
2.CSS Text Color
You can set the color of text:
<!DOCTYPE html>
<html>
<body>
<h3 style="color:Tomato;">Hello World</h3>
<p style="color:DodgerBlue;">Good morning</p>
<p style="color:MediumSeaGreen;">welcome to lab</p>
</body>
</html>
3.CSS Border Color
You can set the color of borders:
<!DOCTYPE html>
<html>
<body>
<h1 style="border: 2px solid Tomato;">Hello World</h1>
<h1 style="border: 2px solid DodgerBlue;">Hello World</h1>
<h1 style="border: 2px solid Violet;">Hello World</h1>
</body>
</html>
line-height properties
<!DOCTYPE html>
<html>
<head>
<style>
div.a {
line-height: 10px;
}
div.b {
line-height: 30px;
}
div.c {
line-height: 0.5cm;
}
div.d {
line-height: 1cm;
}
</style>
</head>
<body>
<h1>The line-height Property</h1>
<h2>line-height: 10px:</h2>
<div class="a">This is a paragraph with a specified line-height.<br>
The line height is here set to 10 pixels.</div>
<h2>line-height: 30px:</h2>
<div class="b">This is a paragraph with a specified line-height.<br>
The line height is here set to 30 pixels.</div>
<h2>line-height: 0.5cm:</h2>
<div class="c">This is a paragraph with a specified line-height.<br>
The line height is here set to 0.5 centimeter.</div>
<h2>line-height: 1cm:</h2>
<div class="d">This is a paragraph with a specified line-height.<br>
The line height is here set to 1 centimeter.</div>
</body>
</html>
CSS Background Cursor
 The cursor property specifies the mouse cursor to be
displayed when pointing over an element.
• CSS Syntax
cursor: value;
CSS-List Tables
1. Table Borders
 To specify table borders in CSS, use
the border property.
 The example below specifies a solid border for
<table>, <th>, and <td> elements:
CSS-List Tables
2. Full-Width Table
• The table above might seem small in some cases. If
you need a table that should span the entire screen
(full-width), add width: 100% to the <table> element:
3. Collapse Table Borders
• The border-collapse property sets whether the table
borders should be collapsed into a single border:
4.CSS Table Size:
• Table Width and Height
•
• The example below sets the width of the table to
100%, and the height of the <th> elements to 70px:
5. Table Padding
• To control the space between the border and the
content in a table, use the padding property on <td>
and <th> elements:
6.CSS Responsive Table
Responsive Table:
 A responsive table will display a horizontal scroll bar
if the screen is too small to display the full content:
 Add a container element (like <div>) with overflow-
x:auto around the <table> element to make it
responsive:
CSS Box Modeling
 In CSS, the term "box model" is used when talking about design and
layout.
 The CSS box model is essentially a box that wraps around every
HTML element. It consists of: content, padding, borders and margins.
The image below illustrates the box model:
CSS Box Modeling
Explanation of the different parts:
• Content - The content of the box, where text and
images appear
• Padding - Clears an area around the content. The
padding is transparent
• Border - A border that goes around the padding and
content
• Margin - Clears an area outside the border. The
margin is transparent
Display Positioning
 The position property in CSS tells about the method of positioning for an element or
an HTML entity and the positioning of an element can be done using the top, right,
bottom, and left properties.
 These specify the distance of an HTML element from the edge of the viewport.
 There are five different types of position properties available in CSS:
Position Property Description
Fixed
An element with position: fixed property remains in the same position relative to the viewport even
when the page is scrolled.
Static
Default positioning method. Elements with position: static are positioned according to the normal flow
of the document.
Relative
Elements with position: relative are positioned relative to their normal position in the document flow.
Other elements will not fill the gap left by this element when adjusted.
Absolute
Positioned concerning its nearest non-static ancestor. Elements with position: absolute are taken out of
the normal document flow.
Sticky
Combines features of position: relative and position: fixed. The element is treated as position:
relative until it reaches a specified threshold, then it becomes position: fixed.
The float Property or CSS Layout – float
 The CSS float property specifies how an element should float.
 The CSS clear property specifies what elements can float beside the cleared element and on
which side.
.
The float Property
 The float property is used for positioning and formatting content e.g.
let an image float left to the text in a container.
 The float property can have one of the following values:
 left - The element floats to the left of its container
 right - The element floats to the right of its container
 none - The element does not float (will be displayed just where it
occurs in the text). This is default
In its simplest use, the float property can be used to wrap text
around images.
CSS Animations
CSS allows animation of HTML elements without using
JavaScript!
• What are CSS Animations?
 An animation lets an element gradually change from one style to
another.
 You can change as many CSS properties you want, as many
times as you want.
 To use CSS animation, you must first specify some keyframes
for the animation.
 Keyframes hold what styles the element will have at certain
times.
CSS Animations
In this topic you will learn about the following properties:
 @keyframes
 animation-name
 animation-duration
 animation-delay
 animation-iteration-count
 animation-direction
 animation-timing-function
 animation-fill-mode
 animation
1. The @keyframes Rule
 When you specify CSS styles inside the @keyframes rule, the
animation will gradually change from the current style to the
new style at certain times.
 To get an animation to work, you must bind the animation to an
element.
 The following example binds the "example" animation to the
<div> element. The animation will last for 4 seconds, and it will
gradually change the background-color of the <div> element
from "red" to "yellow":
2. animation-duration
 The following example will change the background-color of the
<div> element when the animation is 25% complete, 50%
complete, and again when the animation is 100% complete:
3. background-color and the position
The following example will change both the background-color and
the position of the <div> element when the animation is 25%
complete, 50% complete, and again when the animation is
100% complete:
4. animation-delay
• The animation-delay property specifies a delay for the start of
an animation.
• The following example has a 2 seconds delay before starting the
animation:
5. animation-iteration-count
• The animation-iteration-count property specifies the number of
times an animation should run.
• The following example will run the animation 3 times before it
stops:
6. animation-direction
 The animation-direction property specifies whether an
animation should be played forwards, backwards or in alternate
cycles.
 The animation-direction property can have the following values:
 normal - The animation is played as normal (forwards). This is
default
 reverse - The animation is played in reverse direction
(backwards)
 alternate - The animation is played forwards first, then
backwards
 alternate-reverse - The animation is played backwards first, then
forwards
 The following example will run the animation in reverse
direction (backwards):
7. animation-timing-function
 The animation-timing-function property specifies the speed
curve of the animation.
 The animation-timing-function property can have the following
values:
 ease - Specifies an animation with a slow start, then fast, then
end slowly (this is default)
 linear - Specifies an animation with the same speed from start to
end
 ease-in - Specifies an animation with a slow start
 ease-out - Specifies an animation with a slow end
 ease-in-out - Specifies an animation with a slow start and end
 cubic-bezier(n,n,n,n) - Lets you define your own values in a
cubic-bezier function
<span> Tag
 The <span> tag is an inline container used to mark up a part of a text, or a
part of a document.
 The <span> tag is easily styled by CSS or manipulated with JavaScript using
the class or id attribute.
 The <span> tag is much like the <div> element, but <div> is a block-level
element and <span> is an inline element.
<!DOCTYPE html>
<html>
<body>
<h1>The span element</h1>
<p>My mother has <span style="color:blue;font-weight:bold">blue</span>
eyes and my father has <span style="color:darkolivegreen;font-
weight:bold">dark green</span> eyes.</p>
</body>
</html>
CSS Borders
The border-style property specifies what kind of border to display.
The following values are allowed:
 dotted - Defines a dotted border
 dashed - Defines a dashed border
 solid - Defines a solid border
 double - Defines a double border
 groove - Defines a 3D grooved border. The effect depends on the
border-color value
 ridge - Defines a 3D ridged border. The effect depends on the border-
color value
 inset - Defines a 3D inset border. The effect depends on the border-
color value
 outset - Defines a 3D outset border. The effect depends on the border-
color value
 none - Defines no border
 hidden - Defines a hidden border

More Related Content

PPTX
DOC
Css 1
 
PPTX
Chapter_1_Web_Technologies_Basics (CSS)_Part_2.pptx
PPTX
Cascading style sheet, CSS Box model, Table in CSS
PPT
Css siva
PPT
Css siva
PPTX
Lecture-6.pptx
PPTX
Cascading Styling Sheets(CSS) simple design language intended to transform th...
Css 1
 
Chapter_1_Web_Technologies_Basics (CSS)_Part_2.pptx
Cascading style sheet, CSS Box model, Table in CSS
Css siva
Css siva
Lecture-6.pptx
Cascading Styling Sheets(CSS) simple design language intended to transform th...

Similar to Unitegergergegegegetgegegegegegeg-2-CSS.pptx (20)

PDF
Intro to css & sass
PPTX
Web Programming-css.pptx
PPT
CSS Training in Bangalore
PPTX
What is CSS.pptx power point presentation
PPT
Unit 2-CSS & Bootstrap.ppt
PDF
Css tutorial
PPTX
WEB TECHNOLOGY Unit-2.pptx
PPTX
Web Engineering - Introduction to CSS
PPTX
CSS ppt of cascading Style sheet for beginners.pptx
PPT
Make Css easy : easy tips for css
PPTX
4_css_intro.pptx. this ppt is based on css which is the required of web deve...
PDF
Intro to HTML and CSS - Class 2 Slides
PPTX
Web Development - Lecture 5
PPTX
CSS – CASCADING STYLE SHEET - MY_PPT.pptx
PDF
Introduction to CSS3
PPTX
cascading style sheets- About cascading style sheets on the selectors
PPTX
Css types internal, external and inline (1)
PPSX
Introduction to css
Intro to css & sass
Web Programming-css.pptx
CSS Training in Bangalore
What is CSS.pptx power point presentation
Unit 2-CSS & Bootstrap.ppt
Css tutorial
WEB TECHNOLOGY Unit-2.pptx
Web Engineering - Introduction to CSS
CSS ppt of cascading Style sheet for beginners.pptx
Make Css easy : easy tips for css
4_css_intro.pptx. this ppt is based on css which is the required of web deve...
Intro to HTML and CSS - Class 2 Slides
Web Development - Lecture 5
CSS – CASCADING STYLE SHEET - MY_PPT.pptx
Introduction to CSS3
cascading style sheets- About cascading style sheets on the selectors
Css types internal, external and inline (1)
Introduction to css
Ad

More from VikasTuwar1 (20)

PPTX
CS_Departmeeeeeeeeeeeeeeeeeeeeeeeeeeeeeeeeeeeeeeeeeeeeeeeent BOS.pptx
PPT
orientation proddddddddddddddddddddgramme ppt.ppt
PPTX
jabeeeeeeeeeeeeeeeeeeeeeeeeeeeeeeeeeeeeeeeeeeeeeeeeeeeeeeeein.pptx
PPTX
kle pcjabineeeeeeeeeeeeeeeeeeeeeeeeeeeeeeeeeeee.pptx
PPT
Intwwwwwwwwwwwwwwwwwwwwwwwwwwwwwwwwwwwwwwwernet.ppt
PPTX
Introduction_to_computershfffffffffffffffffffffffffffffffffffffffffffffff_and...
PPT
introductiottttttttttttttttttttttttn_to_computers.ppt
PPTX
Unit-2_XMxvvxvxvxvLccccccccccccccccccccccccccc.pptx
PPTX
XSeyeyeyeyeyeyeyeeeeeeeeeeeeeeeeeeeeeeeeeeeeeeeeeeeeeeeeeeeeeeeeeS.pptx
PPTX
ldagwvwvbwbwvvvvvvvvvvvvvvvvvvvvvvvvvvvvvvvvvpinjection.pptx
PPTX
xpathinvevevevwvwvwvwvwvwwwwwwwwwwwwwwwjection.pptx
PPTX
Uwvwwbwbwbwbwbwbwbnit-4 - web security.pptx
PPTX
Unitwwsbdsbsdbbbbbbbbbbbbbbbbbbbbbbbbbbbbbbbbbbbbb-4.pptx
PPTX
BSC notes of _HTML_Easyto understand lease see.pptx
PPTX
Python SQLite3...
PPTX
Unit-3.pptx
PPTX
Unit-1.pptx
PPTX
Unit-1.pptx
PPT
DataMining.ppt
PPTX
PPT-4.pptx
CS_Departmeeeeeeeeeeeeeeeeeeeeeeeeeeeeeeeeeeeeeeeeeeeeeeeent BOS.pptx
orientation proddddddddddddddddddddgramme ppt.ppt
jabeeeeeeeeeeeeeeeeeeeeeeeeeeeeeeeeeeeeeeeeeeeeeeeeeeeeeeeein.pptx
kle pcjabineeeeeeeeeeeeeeeeeeeeeeeeeeeeeeeeeeee.pptx
Intwwwwwwwwwwwwwwwwwwwwwwwwwwwwwwwwwwwwwwwernet.ppt
Introduction_to_computershfffffffffffffffffffffffffffffffffffffffffffffff_and...
introductiottttttttttttttttttttttttn_to_computers.ppt
Unit-2_XMxvvxvxvxvLccccccccccccccccccccccccccc.pptx
XSeyeyeyeyeyeyeyeeeeeeeeeeeeeeeeeeeeeeeeeeeeeeeeeeeeeeeeeeeeeeeeeS.pptx
ldagwvwvbwbwvvvvvvvvvvvvvvvvvvvvvvvvvvvvvvvvvpinjection.pptx
xpathinvevevevwvwvwvwvwvwwwwwwwwwwwwwwwjection.pptx
Uwvwwbwbwbwbwbwbwbnit-4 - web security.pptx
Unitwwsbdsbsdbbbbbbbbbbbbbbbbbbbbbbbbbbbbbbbbbbbbb-4.pptx
BSC notes of _HTML_Easyto understand lease see.pptx
Python SQLite3...
Unit-3.pptx
Unit-1.pptx
Unit-1.pptx
DataMining.ppt
PPT-4.pptx
Ad

Recently uploaded (20)

PPTX
master seminar digital applications in india
PPTX
Cell Types and Its function , kingdom of life
PDF
Paper A Mock Exam 9_ Attempt review.pdf.
PPTX
UV-Visible spectroscopy..pptx UV-Visible Spectroscopy – Electronic Transition...
PDF
A systematic review of self-coping strategies used by university students to ...
PPTX
Tissue processing ( HISTOPATHOLOGICAL TECHNIQUE
PDF
GENETICS IN BIOLOGY IN SECONDARY LEVEL FORM 3
PPTX
Microbial diseases, their pathogenesis and prophylaxis
PDF
Microbial disease of the cardiovascular and lymphatic systems
PDF
Trump Administration's workforce development strategy
PPTX
Orientation - ARALprogram of Deped to the Parents.pptx
PPTX
History, Philosophy and sociology of education (1).pptx
PDF
ChatGPT for Dummies - Pam Baker Ccesa007.pdf
PPTX
UNIT III MENTAL HEALTH NURSING ASSESSMENT
PDF
Black Hat USA 2025 - Micro ICS Summit - ICS/OT Threat Landscape
PDF
Classroom Observation Tools for Teachers
PDF
Weekly quiz Compilation Jan -July 25.pdf
PDF
Complications of Minimal Access Surgery at WLH
DOC
Soft-furnishing-By-Architect-A.F.M.Mohiuddin-Akhand.doc
PPTX
202450812 BayCHI UCSC-SV 20250812 v17.pptx
master seminar digital applications in india
Cell Types and Its function , kingdom of life
Paper A Mock Exam 9_ Attempt review.pdf.
UV-Visible spectroscopy..pptx UV-Visible Spectroscopy – Electronic Transition...
A systematic review of self-coping strategies used by university students to ...
Tissue processing ( HISTOPATHOLOGICAL TECHNIQUE
GENETICS IN BIOLOGY IN SECONDARY LEVEL FORM 3
Microbial diseases, their pathogenesis and prophylaxis
Microbial disease of the cardiovascular and lymphatic systems
Trump Administration's workforce development strategy
Orientation - ARALprogram of Deped to the Parents.pptx
History, Philosophy and sociology of education (1).pptx
ChatGPT for Dummies - Pam Baker Ccesa007.pdf
UNIT III MENTAL HEALTH NURSING ASSESSMENT
Black Hat USA 2025 - Micro ICS Summit - ICS/OT Threat Landscape
Classroom Observation Tools for Teachers
Weekly quiz Compilation Jan -July 25.pdf
Complications of Minimal Access Surgery at WLH
Soft-furnishing-By-Architect-A.F.M.Mohiuddin-Akhand.doc
202450812 BayCHI UCSC-SV 20250812 v17.pptx

Unitegergergegegegetgegegegegegeg-2-CSS.pptx

  • 1. Unit-2 Introduction to CSS CSS is the language we use to style a Web page. What is CSS? CSS stands for Cascading Style Sheets CSS describes how HTML elements are to be displayed on screen, paper, or in other media CSS saves a lot of work. It can control the layout of multiple web pages all at once External stylesheets are stored in CSS files Why to Use CSS? CSS is used to define styles for your web pages, including the design, layout and variations in display for different devices and screen sizes.
  • 2. CSS Syntax: A CSS rule consists of a selector and a declaration block. The selector points to the HTML element you want to style. The declaration block contains one or more declarations separated by semicolons. Each declaration includes a CSS property name and a value, separated by a colon. Multiple CSS declarations are separated with semicolons, and declaration blocks are surrounded by curly braces.
  • 3. Using CSS CSS can be added to HTML documents in 3 ways: Inline - by using the style attribute inside HTML elements Internal - by using a <style> element in the <head> section External - by using a <link> element to link to an external CSS file
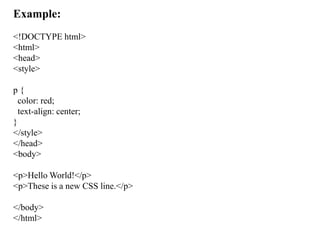
  • 4. Example: <!DOCTYPE html> <html> <head> <style> p { color: red; text-align: center; } </style> </head> <body> <p>Hello World!</p> <p>These is a new CSS line.</p> </body> </html>
  • 5. <!DOCTYPE html> <html> <head> <style> body { background-color: lightblue; } h1 { color: white; text-align: center; } p { font-family: verdana; font-size: 20px; } </style> </head> <body> <h1>My First CSS Example</h1> <p>This is a paragraph.</p> </body> </html>
  • 6. The style tag Using CSS CSS can be added to HTML documents in 3 ways: •Inline - by using the style attribute inside HTML elements •Internal - by using a <style> element in the <head> section •External - by using a <link> element to link to an external CSS file
  • 7. Inline CSS : An inline CSS is used to apply a unique style to a single HTML element. An inline CSS uses the style attribute of an HTML element. Example : <h1 style="color:blue;">A Blue Heading</h1> <p style="color:red;">A red paragraph.</p>
  • 8. Internal CSS : An internal CSS is used to define a style for a single HTML page. An internal CSS is defined in the <head> section of an HTML page, within a <style> element. Example: <!DOCTYPE html> <html> <head> <style> body { background-color: powderblue; } h1 { color: blue; } p { color: red; } </style> </head> <body> <h1>This is a heading</h1> <p>This is a paragraph.</p> </body> </html>
  • 9. External CSS: An external style sheet is used to define the style for many HTML pages. To use an external style sheet, add a link to it in the <head> section of each HTML page: Example: <!DOCTYPE html> <html> <head> <link rel="stylesheet" href="styles.css"> </head> <body> <h1>This is a heading</h1> <p>This is a paragraph.</p> </body> </html>
  • 10. Another page with a name a "styles.css": body { background-color: powderblue; } h1 { color: blue; } p { color: red; }
  • 11. Tag selectors A CSS selector selects the HTML element(s) you want to style. 1. The CSS element Selector The element selector selects HTML elements based on the element name. <!DOCTYPE html> <html> <head> <style> p { text-align: center; color: red; } </style> </head> <body> <p>Every paragraph will be affected by the style.</p> <p>And me!</p> </body> </html>
  • 12. 2. The CSS id Selector The id selector uses the id attribute of an HTML element to select a specific element. The id of an element is unique within a page, so the id selector is used to select one unique element! To select an element with a specific id, write a hash (#) character, followed by the id of the element. <!DOCTYPE html> <html> <head> <style> #para1 { text-align: center; color: red; } </style> </head> <body> <p id="para1">Hello World!</p> <p>This paragraph is not affected by the style.</p> </body> </html>
  • 13. 3. The CSS class Selector The class selector selects HTML elements with a specific class attribute. To select elements with a specific class, write a period (.) character, followed by the class name. <!DOCTYPE html> <html> <head> <style> .center { text-align: center; color: red; } </style> </head> <body> <h1 class="center">Red and center-aligned heading</h1> <p class="center">Red and center-aligned paragraph.</p> </body> </html>
  • 14. <!DOCTYPE html> <html> <head> <style> p.center { text-align: center; color: red; } </style> </head> <body> <h1 class="center">This heading will not be affected</h1> <p class="center">This paragraph will be red and center-aligned.</p> </body> </html>
  • 15. <!DOCTYPE html> <html> <head> <style> p.center { text-align: center; color: red; } p.large { font-size: 300%; } </style> </head> <body> <h1 class="center">This heading will not be affected</h1> <p class="center">This paragraph will be red and center-aligned.</p> <p class="center large">This paragraph will be red, center-aligned, and in a large font-size.</p> </body> </html>
  • 16. 4. The CSS Universal Selector The universal selector (*) selects all HTML elements on the page. <!DOCTYPE html> <html> <head> <style> * { text-align: center; color: blue; } </style> </head> <body> <h1>Hello world!</h1> <p>Every element on the page will be affected by the style.</p> <p id="para1">Me too!</p> <p>And me!</p> </body> </html>
  • 17. The font-size The font-size property sets the size of the text. We should not use font size adjustments to make paragraphs look like headings, or headings look like paragraphs. Always use the proper HTML tags, like <h1> - <h6> for headings and <p> for paragraphs. The font-size value can be an absolute, or relative size. Absolute size: Sets the text to a specified size Does not allow a user to change the text size in all browsers (bad for accessibility reasons) Absolute size is useful when the physical size of the output is known. Relative size: Sets the size relative to surrounding elements Allows a user to change the text size in browsers
  • 18. 1. Set Font Size With Pixels Setting the text size with pixels gives you full control over the text size: <!DOCTYPE html> <html> <head> <style> h1 { font-size: 40px; } h2 { font-size: 30px; } p { font-size: 14px; } </style> </head> <body> <h1>This is heading 1</h1> <h2>This is heading 2</h2> <p>This is a paragraph.</p> <p>This is another paragraph.</p> </body> </html>
  • 19. 2. Set Font Size With Em To allow users to resize the text (in the browser menu), many developers use em instead of pixels. 1em is equal to the current font size. The default text size in browsers is 16px. So, the default size of 1em is 16px. The size can be calculated from pixels to em using this formula: pixels/16=em
  • 20. <!DOCTYPE html> <html> <head> <style> h1 { font-size: 2.5em; /* 40px/16=2.5em */ } h2 { font-size: 1.875em; /* 30px/16=1.875em */ } p { font-size: 0.875em; /* 14px/16=0.875em */ } </style> </head> <body> <h1>This is heading 1</h1> <h2>This is heading 2</h2> <p>This is a paragraph.</p> </body> </html
  • 21. font-family In CSS, we use the font-family property to specify the font of a text. <!DOCTYPE html> <html> <head> <style> .p1 { font-family: "Times New Roman", Times, serif; } .p2 { font-family: Arial, Helvetica, sans-serif; } .p3 { font-family: "Lucida Console", "Courier New", monospace; } </style> </head> <body> <h1>CSS font-family</h1> <p class="p1">This is a paragraph, shown in the Times New Roman font.</p> <p class="p2">This is a paragraph, shown in the Arial font.</p> <p class="p3">This is a paragraph, shown in the Lucida Console font.</p> </body> </html>
  • 22. <!DOCTYPE html> <html> <head> <style> .p1 { font-family: "Times New Roman"; } .p2 { font-family: Arial; } .p3 { font-family: "Lucida Console"; } </style> </head> <body> <h1>CSS font-family</h1> <p class="p1">This is a paragraph, shown in the Times New Roman font.</p> <p class="p2">This is a paragraph, shown in the Arial font.</p> <p class="p3">This is a paragraph, shown in the Lucida Console font.</p> </body> </html>
  • 23. Best Web Safe Fonts for HTML and CSS The following list are the best web safe fonts for HTML and CSS: •Arial (sans-serif) •Verdana (sans-serif) •Tahoma (sans-serif) •Trebuchet MS (sans-serif) •Times New Roman (serif) •Georgia (serif) •Garamond (serif) •Courier New (monospace) •Brush Script MT (cursive
  • 24. Commonly Used Font Fallbacks Below are some commonly used font fallbacks, organized by the 5 generic font families: Serif Sans-serif Monospace Cursive Fantasy
  • 25. CSS Colors Colors are specified using predefined color names, or RGB, HEX, HSL, RGBA, HSLA values. 1.CSS Background Color You can set the background color for HTML elements: <!DOCTYPE html> <html> <body> <h1 style="background-color:DodgerBlue;">Hello World</h1> <p style="background-color:Tomato;"> Hello good morning </p> </body> </html>
  • 26. 2.CSS Text Color You can set the color of text: <!DOCTYPE html> <html> <body> <h3 style="color:Tomato;">Hello World</h3> <p style="color:DodgerBlue;">Good morning</p> <p style="color:MediumSeaGreen;">welcome to lab</p> </body> </html>
  • 27. 3.CSS Border Color You can set the color of borders: <!DOCTYPE html> <html> <body> <h1 style="border: 2px solid Tomato;">Hello World</h1> <h1 style="border: 2px solid DodgerBlue;">Hello World</h1> <h1 style="border: 2px solid Violet;">Hello World</h1> </body> </html>
  • 28. line-height properties <!DOCTYPE html> <html> <head> <style> div.a { line-height: 10px; } div.b { line-height: 30px; } div.c { line-height: 0.5cm; } div.d { line-height: 1cm; } </style> </head> <body> <h1>The line-height Property</h1> <h2>line-height: 10px:</h2> <div class="a">This is a paragraph with a specified line-height.<br> The line height is here set to 10 pixels.</div> <h2>line-height: 30px:</h2> <div class="b">This is a paragraph with a specified line-height.<br> The line height is here set to 30 pixels.</div> <h2>line-height: 0.5cm:</h2> <div class="c">This is a paragraph with a specified line-height.<br> The line height is here set to 0.5 centimeter.</div> <h2>line-height: 1cm:</h2> <div class="d">This is a paragraph with a specified line-height.<br> The line height is here set to 1 centimeter.</div> </body> </html>
  • 29. CSS Background Cursor  The cursor property specifies the mouse cursor to be displayed when pointing over an element. • CSS Syntax cursor: value; CSS-List Tables 1. Table Borders  To specify table borders in CSS, use the border property.  The example below specifies a solid border for <table>, <th>, and <td> elements:
  • 30. CSS-List Tables 2. Full-Width Table • The table above might seem small in some cases. If you need a table that should span the entire screen (full-width), add width: 100% to the <table> element: 3. Collapse Table Borders • The border-collapse property sets whether the table borders should be collapsed into a single border:
  • 31. 4.CSS Table Size: • Table Width and Height • • The example below sets the width of the table to 100%, and the height of the <th> elements to 70px: 5. Table Padding • To control the space between the border and the content in a table, use the padding property on <td> and <th> elements:
  • 32. 6.CSS Responsive Table Responsive Table:  A responsive table will display a horizontal scroll bar if the screen is too small to display the full content:  Add a container element (like <div>) with overflow- x:auto around the <table> element to make it responsive:
  • 33. CSS Box Modeling  In CSS, the term "box model" is used when talking about design and layout.  The CSS box model is essentially a box that wraps around every HTML element. It consists of: content, padding, borders and margins. The image below illustrates the box model:
  • 34. CSS Box Modeling Explanation of the different parts: • Content - The content of the box, where text and images appear • Padding - Clears an area around the content. The padding is transparent • Border - A border that goes around the padding and content • Margin - Clears an area outside the border. The margin is transparent
  • 35. Display Positioning  The position property in CSS tells about the method of positioning for an element or an HTML entity and the positioning of an element can be done using the top, right, bottom, and left properties.  These specify the distance of an HTML element from the edge of the viewport.  There are five different types of position properties available in CSS: Position Property Description Fixed An element with position: fixed property remains in the same position relative to the viewport even when the page is scrolled. Static Default positioning method. Elements with position: static are positioned according to the normal flow of the document. Relative Elements with position: relative are positioned relative to their normal position in the document flow. Other elements will not fill the gap left by this element when adjusted. Absolute Positioned concerning its nearest non-static ancestor. Elements with position: absolute are taken out of the normal document flow. Sticky Combines features of position: relative and position: fixed. The element is treated as position: relative until it reaches a specified threshold, then it becomes position: fixed.
  • 36. The float Property or CSS Layout – float  The CSS float property specifies how an element should float.  The CSS clear property specifies what elements can float beside the cleared element and on which side. . The float Property  The float property is used for positioning and formatting content e.g. let an image float left to the text in a container.  The float property can have one of the following values:  left - The element floats to the left of its container  right - The element floats to the right of its container  none - The element does not float (will be displayed just where it occurs in the text). This is default In its simplest use, the float property can be used to wrap text around images.
  • 37. CSS Animations CSS allows animation of HTML elements without using JavaScript! • What are CSS Animations?  An animation lets an element gradually change from one style to another.  You can change as many CSS properties you want, as many times as you want.  To use CSS animation, you must first specify some keyframes for the animation.  Keyframes hold what styles the element will have at certain times.
  • 38. CSS Animations In this topic you will learn about the following properties:  @keyframes  animation-name  animation-duration  animation-delay  animation-iteration-count  animation-direction  animation-timing-function  animation-fill-mode  animation
  • 39. 1. The @keyframes Rule  When you specify CSS styles inside the @keyframes rule, the animation will gradually change from the current style to the new style at certain times.  To get an animation to work, you must bind the animation to an element.  The following example binds the "example" animation to the <div> element. The animation will last for 4 seconds, and it will gradually change the background-color of the <div> element from "red" to "yellow":
  • 40. 2. animation-duration  The following example will change the background-color of the <div> element when the animation is 25% complete, 50% complete, and again when the animation is 100% complete: 3. background-color and the position The following example will change both the background-color and the position of the <div> element when the animation is 25% complete, 50% complete, and again when the animation is 100% complete:
  • 41. 4. animation-delay • The animation-delay property specifies a delay for the start of an animation. • The following example has a 2 seconds delay before starting the animation: 5. animation-iteration-count • The animation-iteration-count property specifies the number of times an animation should run. • The following example will run the animation 3 times before it stops:
  • 42. 6. animation-direction  The animation-direction property specifies whether an animation should be played forwards, backwards or in alternate cycles.  The animation-direction property can have the following values:  normal - The animation is played as normal (forwards). This is default  reverse - The animation is played in reverse direction (backwards)  alternate - The animation is played forwards first, then backwards  alternate-reverse - The animation is played backwards first, then forwards  The following example will run the animation in reverse direction (backwards):
  • 43. 7. animation-timing-function  The animation-timing-function property specifies the speed curve of the animation.  The animation-timing-function property can have the following values:  ease - Specifies an animation with a slow start, then fast, then end slowly (this is default)  linear - Specifies an animation with the same speed from start to end  ease-in - Specifies an animation with a slow start  ease-out - Specifies an animation with a slow end  ease-in-out - Specifies an animation with a slow start and end  cubic-bezier(n,n,n,n) - Lets you define your own values in a cubic-bezier function
  • 44. <span> Tag  The <span> tag is an inline container used to mark up a part of a text, or a part of a document.  The <span> tag is easily styled by CSS or manipulated with JavaScript using the class or id attribute.  The <span> tag is much like the <div> element, but <div> is a block-level element and <span> is an inline element. <!DOCTYPE html> <html> <body> <h1>The span element</h1> <p>My mother has <span style="color:blue;font-weight:bold">blue</span> eyes and my father has <span style="color:darkolivegreen;font- weight:bold">dark green</span> eyes.</p> </body> </html>
  • 45. CSS Borders The border-style property specifies what kind of border to display. The following values are allowed:  dotted - Defines a dotted border  dashed - Defines a dashed border  solid - Defines a solid border  double - Defines a double border  groove - Defines a 3D grooved border. The effect depends on the border-color value  ridge - Defines a 3D ridged border. The effect depends on the border- color value  inset - Defines a 3D inset border. The effect depends on the border- color value  outset - Defines a 3D outset border. The effect depends on the border- color value  none - Defines no border  hidden - Defines a hidden border