The document provides an overview of the Visual C# 2010 programming language and the Visual Studio integrated development environment (IDE). It describes some of the key windows and tools in Visual Studio used for writing, debugging, and organizing C# code. It then provides examples of how to use common controls like labels, buttons, textboxes, checkboxes, and progress bars in Windows Forms applications. The document is intended to help readers learn the basics of building graphical user interfaces in C# using Visual Studio.
The document discusses various topics related to the Visual Basic integrated development environment (IDE) and controls. It describes starting a new project in Visual Studio, the toolbox and common controls like command buttons, properties windows, and events. It also covers image controls, text boxes, labels, message boxes, grids, and provides examples of using properties and events for controls.
This document discusses Visual Basic and its integrated development environment. It covers starting a new project, common form properties like name, color, and scale, and controls in the toolbox like command buttons, text boxes, and images. It also discusses properties of controls, creating controls and using the name property, properties of command buttons, and the visual basic IDE interface with elements like the solution explorer and output window.
This document discusses various aspects of Visual Basic programming including built-in functions, message boxes, input boxes, controls, properties, events, and methods. It provides information on the MsgBox and InputBox functions, describing their syntax and parameters. It also describes the various controls available in the toolbox like labels, text boxes, command buttons, and lists their common properties, events, and methods.
This document discusses various controls, properties, methods and events in Visual Basic. It begins by describing the toolbox window and the various controls available like labels, textboxes, command buttons etc. It then discusses common properties of controls like name, enabled, visible. Common events like click, change and methods like move, refresh are also covered. The document also provides examples of using various properties and methods of form and pointer objects.
The document provides information on using Visual Basic to create graphical user interface (GUI) applications. It discusses the main components of a Visual Basic application, including forms, controls, properties, methods, and event procedures. It then describes various controls that can be used to build the user interface like text boxes, check boxes, option buttons, list boxes, combo boxes, and image boxes. For each control, it lists common properties, events, and methods.
Visual programming allows creating software applications graphically without writing code. Visual Studio is a development environment for building applications with languages like C#. It contains tools like the toolbox, properties window, and solution explorer. The toolbox has common controls that can be dragged onto forms to build an application's interface. Properties configure the controls and forms. Running the project generates an executable file to distribute the completed application.
The visual studio start page is shown in the figure belowTan Ps
The document provides instructions for creating a student information application in Visual Basic. It discusses setting up the project environment, building a user interface with labels and text boxes, and writing code to display data. Key steps include:
1. Creating a new Windows Forms project and setting properties like the form name and font.
2. Adding labels, text boxes, and buttons to the form and setting their name, text, and size properties.
3. Writing code handlers for the button click events to display data in the text boxes using assignment statements.
4. Saving and running the project, and using remarks to document the code. The goal is to display sample student information when buttons are clicked.
The document provides instructions for building a userform in Excel VBA to allow users to enter personal expense data. It describes how to insert a new userform, add controls like text boxes and buttons, set control properties, and write code to validate data entry and save the data to a worksheet. Specifically, it shows how to:
1) Add controls like text boxes, labels, and command buttons to the userform.
2) Write VBA code to validate that required fields are completed and check data types.
3) Write data entered into the userform controls to a worksheet using offset to position the data in cells.
The userform is designed to make data entry easier for users by providing
ITS-16163-Module 8-Graphic User Interface (GUI)oudesign
The document discusses creating graphical user interfaces (GUIs) using Tkinter in Python. It explains that Tkinter is a popular GUI toolkit that comes pre-installed with Python. It describes common Tkinter widgets like Frame, Label, Button, Text Entry, Text Box, Check Button, Radio Button, and how to create and configure them. It also covers using grids for layout, message boxes, images, list boxes, and defining functions for interaction between elements. In summary, the document provides an overview of building Python GUIs with Tkinter widgets, geometry managers and interactive functionality.
Unit IV-Checkboxes and Radio Buttons in VB.Net in VB.NET Ujwala Junghare
The document discusses forms and controls in Windows applications created using Visual Basic .NET. It covers key topics like:
1) Forms are windows that appear in applications and are represented by the Form class. Controls like buttons and text boxes are added to the form's client area.
2) Event handlers allow code to run when events occur, like a button click. The Button1_Click handler displays text in a text box when its button is clicked.
3) Message boxes and input boxes can be used to display messages and get user input using functions like MsgBox and InputBox or the MessageBox class. Results are returned indicating the user's response.
Visual Programming Lectures using Visual Studio 2015 C# Windows Form Application
Lecturer: Saman M. Almufti / Kurdistan Region, Nawroz University
facebook: https://www.facebook.com/saman.malmufti
The document discusses various features of the Visual Basic Editor in Microsoft Office, including:
1. It describes how to open the Visual Basic Editor from within Word or other Office applications using keyboard shortcuts or menu options.
2. It outlines the main windows of the Visual Basic Editor, including the Project Explorer, Code window, and Object Browser.
3. It provides details on features like Auto List Members, Quick Info, and List Constants that help provide information about code as you work.
This document provides examples of various Visual Basic applications using different controls. It includes 12 short applications demonstrating:
1. Label and text box controls to display input fields.
2. A calculator application using command buttons to perform arithmetic operations on two input numbers.
3. Radio buttons to display options and respond to user selection.
4. A form with text boxes, combo boxes and command buttons to accept user input.
5. A timer control changing the visibility of shapes to simulate traffic lights.
6. Getting user input on a form and displaying marks on another frame.
So in summary, it presents 12 mini-projects to demonstrate common Visual Basic controls and concepts like forms, buttons
The document provides an overview of various user interface controls that can be used when designing a user interface, including text boxes, group boxes, check boxes, radio buttons, picture boxes, and borders and styles. It discusses how to select and work with multiple controls, set tab order and keyboard access keys, and add tooltips.
This tutorial introduces programming in Visual Basic 6.0 through a series of activities that demonstrate the main control structures: sequence, selection (binary and multiway), and iteration (pre- and post-test). The activities guide students to implement fully tested and documented software solutions in a methodical manner, meeting the intended learning outcomes. The tutorial begins by having students set up a project template and main menu to organize their work. Subsequent activities introduce key concepts like variables, data types, functions, and event handlers through hands-on exercises creating programs like a calculator, color changer, and message/input boxes.
This document provides an overview of Visual Basic 6.0 and how to create a basic application. It outlines the objectives of learning Visual Basic and describes key concepts like the event-driven nature of VB applications. The document explains the structure of a VB project, including forms, controls, properties, methods and events. It also demonstrates how to set control properties, write code, declare variables, and use common functions and operators. Finally, it provides examples for creating a stopwatch timer application and a basic text editor application in VB.
Introduction to programming using Visual Basic 6Jeanie Arnoco
This document provides an introduction to programming using Visual Basic 6.0. It discusses why VB is a good choice for beginners, describes the basic VB integrated development environment interface and components like forms, objects, and properties. It then walks through a "Hello World" example program to demonstrate creating a form with labels, buttons, and event procedures. The document provides details on formatting text, adding images and colors, and using message boxes before concluding with a suggestion for a pizza ordering program project.
Getting started with the visual basic editorputiadetiara
berikut adalah penjelasan tentang bagaimana memulai visual basic application.
oleh :
Ade Tiara Putri
Program Studi S1 Sistem Informasi
Fakultas Sains dan Teknologi
Universitas Islam Negeri Sultan Syarif Kasim Riau
please visit
http://sif.uin-suska.ac.id/
http://fst.uin-suska.ac.id/
http://www.uin-suska.ac.id/
This document provides an overview of forms and controls in Visual Basic. It discusses:
- Forms are containers that hold controls and are used to design graphical user interfaces. Forms display information and receive user input.
- Common form properties include text, size, location, visibility, and border style.
- Controls like labels, textboxes, buttons are placed on forms. Controls have properties for appearance, location, and behavior.
- Events like clicks, text changes, and focus changes can trigger event handlers - code that executes in response to events. Common form and control events are described.
- An example program demonstrates creating a form with controls, setting control properties, and writing event handlers to
The document discusses various Windows Form controls in .NET including their properties, methods, and events. It describes common controls like forms, labels, buttons, textboxes, checkboxes, radiobuttons, comboboxes, and listboxes. For each control, it provides the core details about their intended use, relevant class hierarchies, and some of the most important properties, methods, and events for programming with the control.
This document discusses controls, properties, methods, and events in Visual Basic .NET. It defines controls as user interface elements on a form that can be customized. Controls have properties that describe them, methods that cause actions, and events that are triggered from user interactions. Common controls are described like labels, buttons, and forms. Properties and events for each are outlined, such as the Text property for a label and the Click event for a button. Forms are used to build the user interface and contain other controls.
The document provides details about 12 sample Visual Basic applications to demonstrate the use of various controls and programming concepts in Visual Basic. It includes applications to display labels and textboxes, perform arithmetic operations, use option buttons, create a student form, use timers and shapes, move items between lists, format text, use menus for calculations, print a series, and create a puzzle game. Code snippets are provided for each application example.
This document provides an overview of creating a C# Windows Forms application in Visual Studio. It discusses the two main files - Program.cs and Form1.cs - used to create the application and form. It describes using the toolbar and properties window to design the GUI. Various controls like buttons, textboxes and labels are demonstrated. Handling events like button clicks to add interactivity is covered. Finally, it provides examples of solving common programming problems using the Windows Forms environment.
The document discusses interfacing with end users in ASP.NET. It provides two programming models - Web Forms and WCF Services. Web Forms enables creating user interfaces and application logic, while WCF Services enables remote server-side functionality access. It also discusses creating a basic web form in ASP.NET that displays the current date and time when a button is clicked to demonstrate the Web Forms model. Common controls like labels, textboxes, buttons are also summarized with their properties and events.
This document summarizes a lecture on forms and controls in Visual Basic. It discusses:
- Forms are containers that display a GUI and receive user input. Common form properties include size, location, and visibility.
- Controls like labels, textboxes, and buttons are placed on forms. Controls have properties that configure appearance and behavior. Common events include click and text changed.
- Event procedures are written in code to respond to control and form events. For example, a button click event changes the text color in a textbox.
- The form, controls, properties, and event procedures are used to build a visual interface and process user interactions in an example Visual Basic program.
The Pala kings were people-protectors. In fact, Gopal was elected to the throne only to end Matsya Nyaya. Bhagalpur Abhiledh states that Dharmapala imposed only fair taxes on the people. Rampala abolished the unjust taxes imposed by Bhima. The Pala rulers were lovers of learning. Vikramshila University was established by Dharmapala. He opened 50 other learning centers. A famous Buddhist scholar named Haribhadra was to be present in his court. Devpala appointed another Buddhist scholar named Veerdeva as the vice president of Nalanda Vihar. Among other scholars of this period, Sandhyakar Nandi, Chakrapani Dutta and Vajradatta are especially famous. Sandhyakar Nandi wrote the famous poem of this period 'Ramcharit'.
Ultimate VMware 2V0-11.25 Exam Dumps for Exam SuccessMark Soia
Boost your chances of passing the 2V0-11.25 exam with CertsExpert reliable exam dumps. Prepare effectively and ace the VMware certification on your first try
Quality dumps. Trusted results. — Visit CertsExpert Now: https://www.certsexpert.com/2V0-11.25-pdf-questions.html
CBSE - Grade 8 - Science - Chemistry - Metals and Non Metals - WorksheetSritoma Majumder
Introduction
All the materials around us are made up of elements. These elements can be broadly divided into two major groups:
Metals
Non-Metals
Each group has its own unique physical and chemical properties. Let's understand them one by one.
Physical Properties
1. Appearance
Metals: Shiny (lustrous). Example: gold, silver, copper.
Non-metals: Dull appearance (except iodine, which is shiny).
2. Hardness
Metals: Generally hard. Example: iron.
Non-metals: Usually soft (except diamond, a form of carbon, which is very hard).
3. State
Metals: Mostly solids at room temperature (except mercury, which is a liquid).
Non-metals: Can be solids, liquids, or gases. Example: oxygen (gas), bromine (liquid), sulphur (solid).
4. Malleability
Metals: Can be hammered into thin sheets (malleable).
Non-metals: Not malleable. They break when hammered (brittle).
5. Ductility
Metals: Can be drawn into wires (ductile).
Non-metals: Not ductile.
6. Conductivity
Metals: Good conductors of heat and electricity.
Non-metals: Poor conductors (except graphite, which is a good conductor).
7. Sonorous Nature
Metals: Produce a ringing sound when struck.
Non-metals: Do not produce sound.
Chemical Properties
1. Reaction with Oxygen
Metals react with oxygen to form metal oxides.
These metal oxides are usually basic.
Non-metals react with oxygen to form non-metallic oxides.
These oxides are usually acidic.
2. Reaction with Water
Metals:
Some react vigorously (e.g., sodium).
Some react slowly (e.g., iron).
Some do not react at all (e.g., gold, silver).
Non-metals: Generally do not react with water.
3. Reaction with Acids
Metals react with acids to produce salt and hydrogen gas.
Non-metals: Do not react with acids.
4. Reaction with Bases
Some non-metals react with bases to form salts, but this is rare.
Metals generally do not react with bases directly (except amphoteric metals like aluminum and zinc).
Displacement Reaction
More reactive metals can displace less reactive metals from their salt solutions.
Uses of Metals
Iron: Making machines, tools, and buildings.
Aluminum: Used in aircraft, utensils.
Copper: Electrical wires.
Gold and Silver: Jewelry.
Zinc: Coating iron to prevent rusting (galvanization).
Uses of Non-Metals
Oxygen: Breathing.
Nitrogen: Fertilizers.
Chlorine: Water purification.
Carbon: Fuel (coal), steel-making (coke).
Iodine: Medicines.
Alloys
An alloy is a mixture of metals or a metal with a non-metal.
Alloys have improved properties like strength, resistance to rusting.
pulse ppt.pptx Types of pulse , characteristics of pulse , Alteration of pulsesushreesangita003
what is pulse ?
Purpose
physiology and Regulation of pulse
Characteristics of pulse
factors affecting pulse
Sites of pulse
Alteration of pulse
for BSC Nursing 1st semester
for Gnm Nursing 1st year
Students .
vitalsign
*Metamorphosis* is a biological process where an animal undergoes a dramatic transformation from a juvenile or larval stage to a adult stage, often involving significant changes in form and structure. This process is commonly seen in insects, amphibians, and some other animals.
Exploring Substances:
Acidic, Basic, and
Neutral
Welcome to the fascinating world of acids and bases! Join siblings Ashwin and
Keerthi as they explore the colorful world of substances at their school's
National Science Day fair. Their adventure begins with a mysterious white paper
that reveals hidden messages when sprayed with a special liquid.
In this presentation, we'll discover how different substances can be classified as
acidic, basic, or neutral. We'll explore natural indicators like litmus, red rose
extract, and turmeric that help us identify these substances through color
changes. We'll also learn about neutralization reactions and their applications in
our daily lives.
by sandeep swamy
Geography Sem II Unit 1C Correlation of Geography with other school subjectsProfDrShaikhImran
The correlation of school subjects refers to the interconnectedness and mutual reinforcement between different academic disciplines. This concept highlights how knowledge and skills in one subject can support, enhance, or overlap with learning in another. Recognizing these correlations helps in creating a more holistic and meaningful educational experience.
Understanding P–N Junction Semiconductors: A Beginner’s GuideGS Virdi
Dive into the fundamentals of P–N junctions, the heart of every diode and semiconductor device. In this concise presentation, Dr. G.S. Virdi (Former Chief Scientist, CSIR-CEERI Pilani) covers:
What Is a P–N Junction? Learn how P-type and N-type materials join to create a diode.
Depletion Region & Biasing: See how forward and reverse bias shape the voltage–current behavior.
V–I Characteristics: Understand the curve that defines diode operation.
Real-World Uses: Discover common applications in rectifiers, signal clipping, and more.
Ideal for electronics students, hobbyists, and engineers seeking a clear, practical introduction to P–N junction semiconductors.
How to manage Multiple Warehouses for multiple floors in odoo point of saleCeline George
The need for multiple warehouses and effective inventory management is crucial for companies aiming to optimize their operations, enhance customer satisfaction, and maintain a competitive edge.
Odoo Inventory Rules and Routes v17 - Odoo SlidesCeline George
Odoo's inventory management system is highly flexible and powerful, allowing businesses to efficiently manage their stock operations through the use of Rules and Routes.
Multi-currency in odoo accounting and Update exchange rates automatically in ...Celine George
Most business transactions use the currencies of several countries for financial operations. For global transactions, multi-currency management is essential for enabling international trade.
2. 2
Contents
Form
Buttons
Labels
TextBoxes
GroupBoxes
Panels
CheckBoxes
RadioButtons
Font Class
MessageBox
PictureBox
3. 3
Form
The form is the most important element in a
Visual C# Project, since it is the interface
(window) that the user interacts with.
When you first create your project, form1, is
always created at the beginning, meaning that
you can’t have a project without a form.
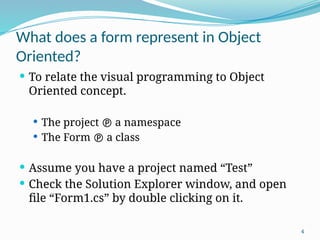
4. 4
What does a form represent in Object
Oriented?
To relate the visual programming to Object
Oriented concept.
The project a namespace
The Form a class
Assume you have a project named “Test”
Check the Solution Explorer window, and open
file “Form1.cs” by double clicking on it.
5. 5
What does a form represent in Object
Oriented?
Project Name
Form Name
Form1 Constructor
This method
is pre-
defined to set
the initial
values of all
controls’
properties in
the form.
What does a
Partial
modifier mean?
Note here, that Form1
is inherited from a
pre-defined class
“Form”
6. 6
Partial Modifier
The Partial Modifier is
used to be able to define
the same class in several
files.
This file “form1.cs”, is
used by the developer to
add his/her own code
and event handlers. And
Form1 class is defined
partially, so where is the
rest of this class?
7. 7
Partial Modifier
Return back to the Solution Explorer, and double click the file
“form1.Designer.cs”.
Check here, that
the Form1 class
is re-defined
again in this file,
which is not
possible unless
you use the
modifier Partial.
8. 8
Form1.Designer.cs
Why this file is created? And who created it?
This file is automatically created by Visual C#, to
contain all definitions of all controls added to the
form. We will discuss this shortly.
9. 9
Form: Properties
Text: The title of the form
BackColor: The background color of the form.
ForeColor: The color of the font of any control added to the form.
Font: The style of the font of any control added to the form.
Size: Determines the width and height of the form.
Maximum Size: Determines the maximum width and the
maximum height of the form the user can reach at run time.
Minimum Size: Determines the minimum width and the
minimum height of the form the user can reach at run time.
To change any of these properties, you can relate to it by using
the keyword “This”, or directly. (since you are dealing with a
class here).
10. 10
Form: Default Event
Load: This event occurs at the beginning of the
execution of the project (i.e. when the form is
loaded)
12. 12
Buttons
A Button, is a very common control that you may
find in any program works under Windows.
To add a Button, or any control we will discuss
later, go to the toolbox, then:
Either, double click on it, then it will appear to a
default location on the form.
Or, drag it from the Toolbox and drag it on the
form to the location you desire.
13. 13
A Button in Form1.Designer.cs File
When you add a button, or any control, to your
form, you actually instantiate an object of a
related class.
Meaning button1 is actually an object of a pre-
defined class named Button.
The code needed for this instantiation will be
automatically generated in Form1.Designer.cs file
by the visual C#, as soon as you add the button.
14. 14
A Button in Form1.Designer.cs File
This leads us to the reason why Form1 class is
divided into these two files. Form1.Designer.cs to
be used mainly by the visual C#, and Form1.cs is
to be used by the developer (YOU!).
And of course all controls that we will discuss
later are added in the same way.
15. 15
Button: Properties
Text: The label on the button.
Name: The name of the object (ex: button1)
This name is used in the code when referring to
the object.
Size: Width and height of the
button.
Location: the coordinates
X and Y on the form,
where the button resides.
16. 16
Button: Properties
Enabled: True a control can be accessed by the
user
False a control cannot be accessed by
the user.
Visible: True a control is displayed on the form
False a control is hidden from the
form.
Important Note: The previous properties apply on
almost all controls, and are handled in the same
way.
17. 17
LABELs
A Label is an un-editable text that is added to the
form, to display a certain message or a hint
about a control.
Usually, the label takes the size of the text written
in it and the font size, unless the “autosize”
property is set to false.
18. 18
Label: Properties
Text: The string displayed by the label.
Autosize:
True the label takes the size of the text written in it.
False you can resize the label as you like in the
design time.
TextAlign Changes the alignment of the text
within the borders of the label. It works properly
when the Autosize property is set to False.
19. 19
Show and Hide Methods
Show()
Hide()
These two methods are almost available for all controls
along with the form itself. If you need to hide a button
for example, you write:
button1.Hide();
To show it again:
button1.Show();
These two methods actually change the value of the
Visible property in the desired control.
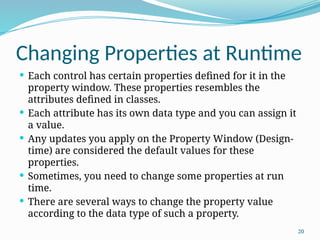
20. 20
Changing Properties at Runtime
Each control has certain properties defined for it in the
property window. These properties resembles the
attributes defined in classes.
Each attribute has its own data type and you can assign it
a value.
Any updates you apply on the Property Window (Design-
time) are considered the default values for these
properties.
Sometimes, you need to change some properties at run
time.
There are several ways to change the property value
according to the data type of such a property.
21. 21
How to determine a data type for a
property?
When you need to change a certain property for a
certain control (i.e. assign a new value to it), you
need to write an assignment statement starting with
this property.
Suppose you need to change the text property of a
label, you will start the assignment statement as:
label1.Text =
Now you need to figure out the data type of this
property, just hover the mouse over this property (in
the code), and a tooltip will be displayed to give you
a hint about it.
22. 22
How to determine a data type for a
property?
To find out the data type of property Text:
From the above picture, you can find out that the
Text data type is string.
23. 23
Changing Properties (Basic Data Types)
To change the value of a property that have a basic data type (int, float,
double, decimal, string, char, ..etc.), you can use a simple assignment
statement to provide the value you need.
Ex:
label1.Text = “Hello World”; // assign a direct value
Or
this.Text = label1.Text;
//changes the title of the form with the Text value in the label
Note: Just make sure that you are assigning the right data type to the
property, or you need to convert it if applicable.
Ex: label1.Text = 215 + “”;
//here you will add 215 to the text, but after converting it to a string.
24. 24
Changing Properties (pre-defined
enumeration)
Some properties have pre-defined data types
(enumerations) with several values, so you need
to use these values to change them.
Example, the backColor property.
Note here that BackColor is of
data type “Color”, this is not
a basic data type,
so you will have to use it to change the property
value.
26. 26
Changing Properties (Composite Properties)
Some properties consist of other several
properties, such as
Font (Name, Size, Style)
Size (width, height)
Location (X, Y)
So, to change these properties, or properties they
consist of, we have to instantiate an object of the
class related to this property.
27. 27
Changing Properties (Composite Properties)
Example: To change the property of a label font.
In this code, you can change the three composite
properties of the font. Here you change the font name
to “Arial”, the font size to 16 and the style to Bold.
Of course you can change only one of them, by
remaining the others as they are set in the Properties
Window. This will be discussed Later.
28. 28
TextBoxes
A TextBox is an editable control that is mainly
used to enable the user to enter data using
keyboard.
29. 29
TextBox: Properties
Text
Multiline: If true, you can use Enter and add several
lines to the textBox
ScrollBars: In case of Multiline Textboxes, vertical
and horizontal scrollbars can be displayed.
WordWrap:
True The lines won’t exceed the borders of the
textbox.
False you can continue writing in the line until you
press Enter.
This property only works when Multiline is activated.
30. 30
TextBox: Properties
Forecolor: The color of the text inside.
Readonly: when True, the user cannot write in
the textbox, but can access it and copy its
contents.
Enabled
PasswordChar: takes a single character as a
value, and this character will be used to mask the
entry in the textbox (password behavior)
UseSystemPasswordChar: If True it masks the
value in PasswordChar, and uses the password
character used by Windows on the current PC.
31. 31
TextBox: Properties
TabIndex: an integer used to order the
navigation between controls, starting from
smaller values to larger ones.
32. 32
TextBox: Default Even
TextChanged: This event takes place when the
user writes or deletes any character in the
textbox.
33. 33
Convert
Take into consideration that Text in a TextBox is
a string. So whenever you need to use it for
numbers, you will have to convert the string.
And whenever you need to assign a numeric
value to a textbox, you will have to convert it to
string.
34. 34
Convert from String to Numeric Value
In the statement below, a syntax error appears,
because you are trying to assign a string into an
integer.
To convert a string into a numeric value:
35. 35
Convert from a numeric value into a string
We have several ways to convert into a string:
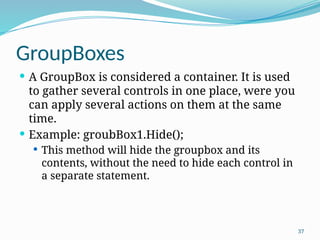
37. 37
GroupBoxes
A GroupBox is considered a container. It is used
to gather several controls in one place, were you
can apply several actions on them at the same
time.
Example: groubBox1.Hide();
This method will hide the groupbox and its
contents, without the need to hide each control in
a separate statement.
39. 39
Panels
A Panel is another type of containers, that is used
mainly as the groupbox, but it has extra
properties that don’t exist in a groupbox.
40. 40
Panel: Properties
BorderStyle: Can be (None, FixedSingle, Fixed3D)
AutoScroll: if True, the scrollbars will appear if
the controls inside the panel exceed its borders.
41. 41
CheckBoxes
CheckBoxes are used to give several options to a
user to check or uncheck. The user can select
only one or several of them, or can unselect all of
them.
43. 43
CheckBox: Default Event
CheckedChanged
This event takes place whenever the Checked
Property is changed either to True or False.
44. 44
RadioButton: Properties/Default Event
Properties:
Checked
True
False
Default Event
CheckedChanged: Takes place when the checked
property is changed to True or False.
45. 45
RadioButtons
RadioButtons are used to give several options to user, but the
user have to choose only one of each group. To separate several
radiobuttons into several groups, we can use any of the
containers in Visual C#, such as: GroupBox, Panel and the Form
itself.
46. 46
Font Classs
To change the font of a certain control, for
example a label or a textbox, we instantiate an
object from Font Class, and send the new values
of (FontName, FontSize and FontStyle).
But, in this statement, we change all the 3 values
at the same time.
47. 47
Font Class - Cont.
To change the style alone, for example, we
remain the other values as defined.
But, in the previous statement, the FontStyle is
changed into Bold, regardless of the style that
already is applied to the label.
48. 48
Font Class - Cont.
To change the FontStyle while reserving the
current style, we will use the XOR operator (^), as
in the following example:
50. 50
MessageBox
To show a message dialog to the user, we will use
MessageBox class along with the method Show().
MessageBox.Show() method is overloaded into
several methods, but we will use in this course
the following method, to display the following
message:
In this method, we send the message
text, the message title, number and
types of buttons to be displayed, and
the icon.
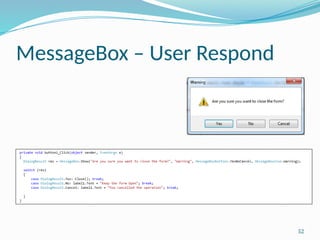
51. 51
MessageBox – User Respond
In the previous example, we only show a
message, and don’t handle the respond of the
user (i.e. whither the user clicked OK or
CANCEL).
To handle the user respond, we need to define a
variable of type DialogResult, as in the following
example
53. 53
PictureBox and Properties
A PictureBox is
used to display an
image to the user.
Properties:
Image: where the
selected image file
resides. You can
import an image
from your PC.
54. 54
PictureBox: Properties
SizeMode: Determines
how the image is
displayed in the
pictureBox.
Normal: Displays the
topleft corner of the
original image, according
to the size of the
picurebox.
StretchImage: Changes
the ratios of the original
image to fit exactly in the
pictureBox.
AutoSize: changes the size
of the PictureBox,
according to the size of
the original image.
CenterImage: crops a part
of the original image from
its center according to the
size of the PictureBox.
Zoom: Changes the size of
the original image, to fit
in the PictureBox, but
with reserving the ratios
of the image.
55. 55
PictureBox – Default Event and Method
Default Event:
Click: occurs when
the user clicks on the
image using mouse.
Method:
FromFile: This
method is used to
change the displayed
image at runtime.
Important Note: Make sure to write the path
in a correct way, so that the program can find
the actual file. Also, make sure to write the
correct extension of the image.